This post contains affiliate links. Please see our disclosure policy.

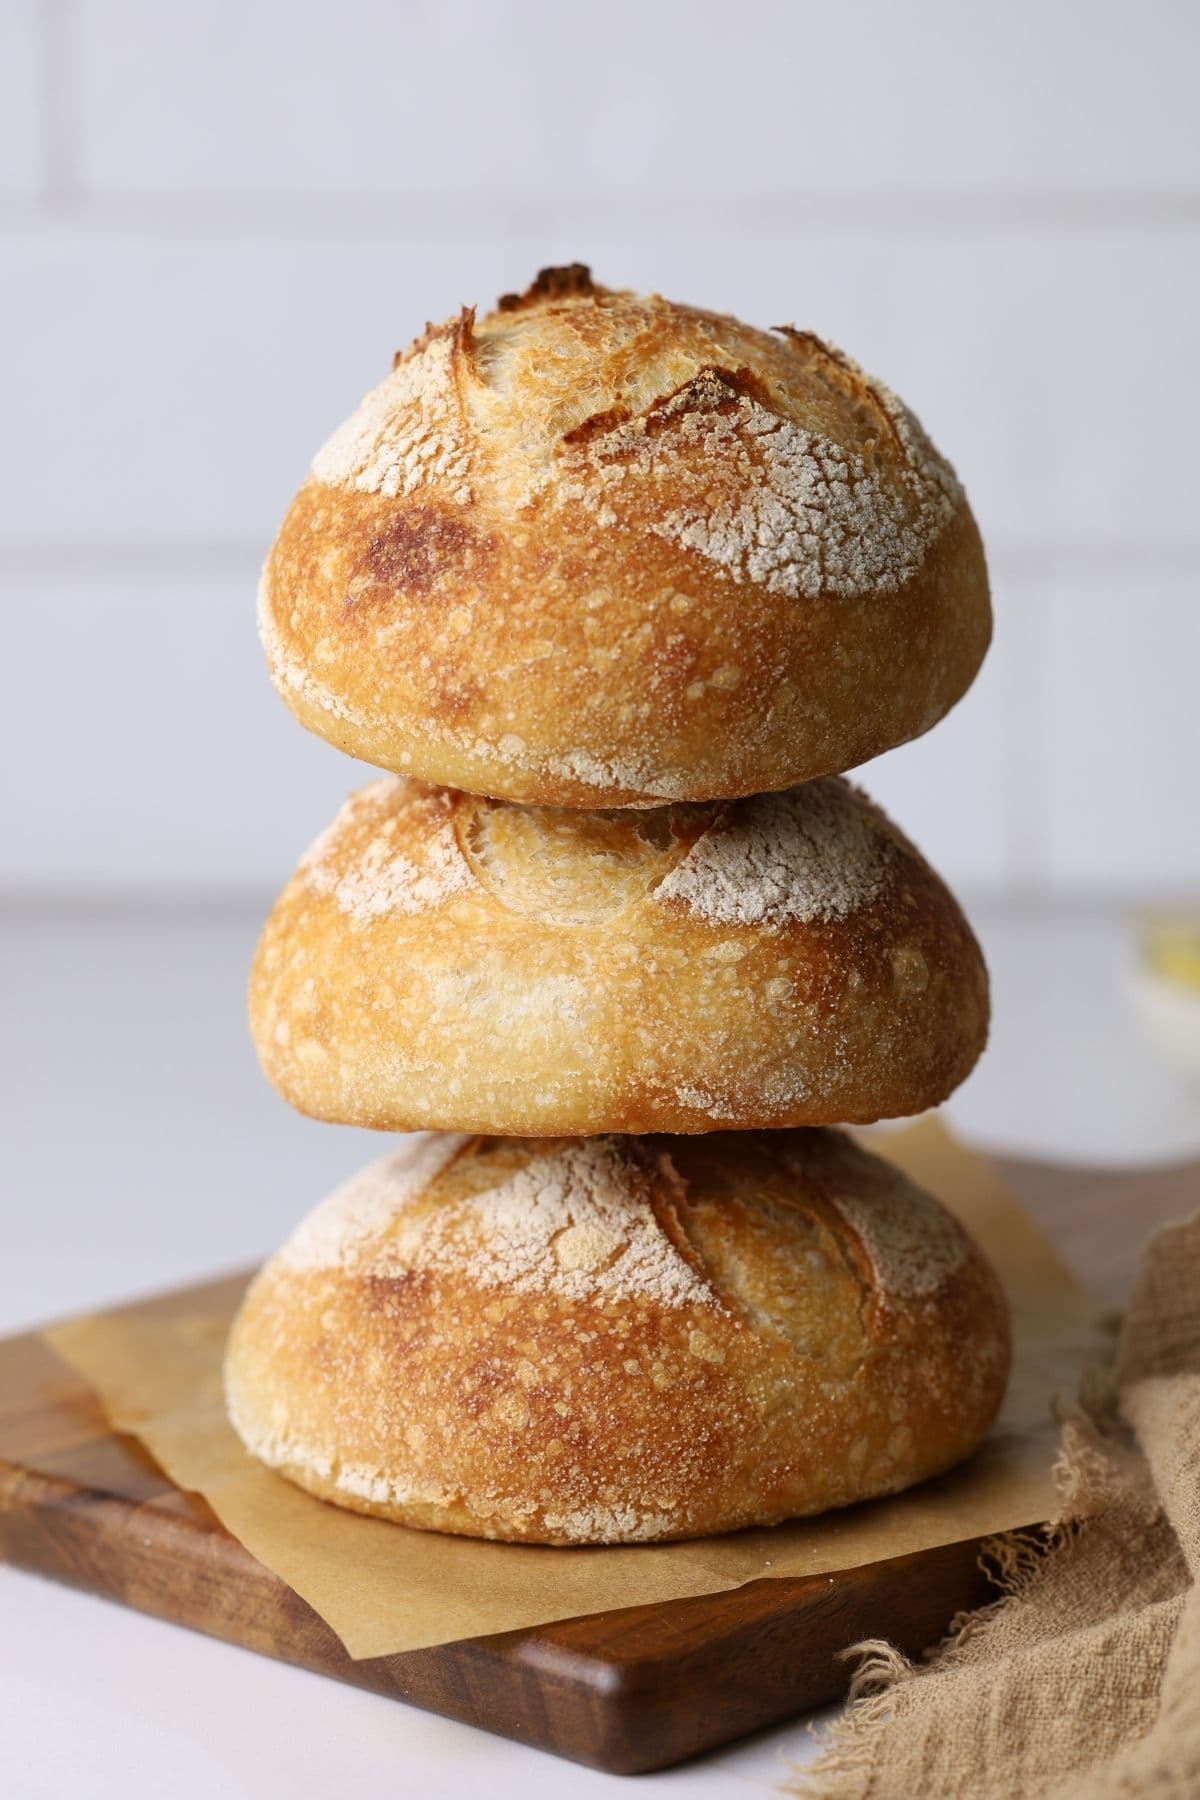
Mini sourdough loaves are one of those bakes that look extra impressive but are actually very achievable once you understand a few simple adjustments. Whether you’re baking individual loaves for entertaining, gifting, or portion-controlled baking, this guide will walk you through the entire process. I’ve included everything from dough preparation to shaping and baking beautifully risen mini boules. Just because they’re small, doesn’t mean they’re lacking in flavor! You’ll get all the flavor of a larger loaf, just in a cute, mini size!
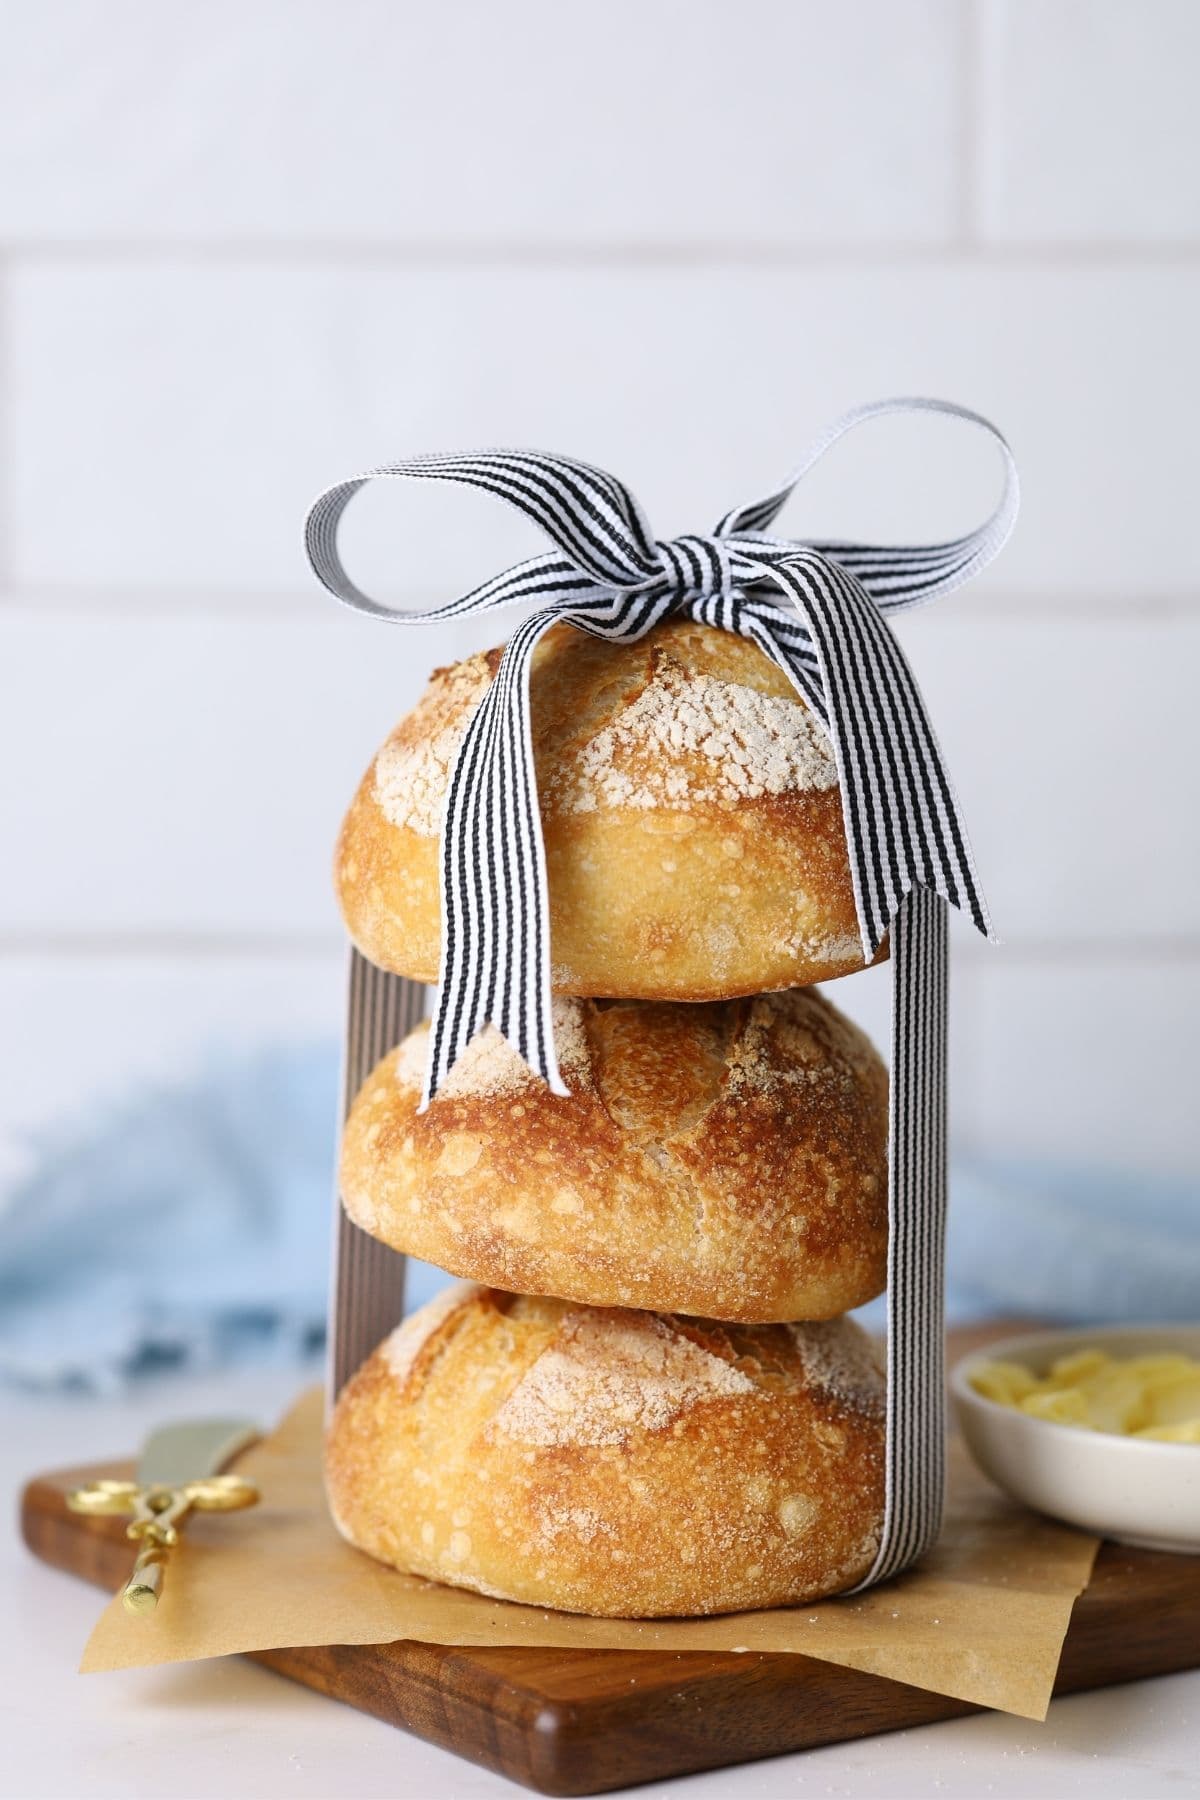
Table of Contents
Why You’ll Love These Mini Sourdough Loaves!

Perfect for entertaining – use them as individual place settings, a centrepiece for a grazing board, fill a bread basket or even hollowed out as mini sourdough bread bowls.
Great for portion control – ideal if you don’t want a full-sized loaf on the counter
Practice your sourdough skills – one batch of dough gives you multiple chances to practice and stretch your shaping skills.
Beautiful, practical gifts – impressive without being complicated and they are such a gorgeous way to share sourdough with friends and family! I love adding a couple of mini sourdough loaves to a little box with mini jars of homemade butter and small batch strawberry jam!
Ingredients
- Sourdough Starter – You’ll want to use active sourdough starter for the best results in this recipe.
- Bread Flour – I recommend using bread flour rather than all purpose flour.
- Water – you can use warm water to speed up bulk fermentation if you prefer.
- Salt
How to Make Mini Sourdough Boules
Making these mini sourdough loaves is so easy and so much fun! Prepare your dough as usual and take it through bulk fermentation at room temperature. It’s the shaping where the fun begins! Just a note here – you can make mini sourdough loaves from my simple sourdough recipe or my small batch sourdough recipe, but I have included a full recipe start to finish in the recipe card at the end of this post).
When you’re ready to shape, divide the dough into 4–6 equal portions. You can weigh them if you like, but eyeballing works just fine. Weighing can be tricky if your dough is sticky too. A metal dough scraper makes dividing easy without disturbing the dough too much.
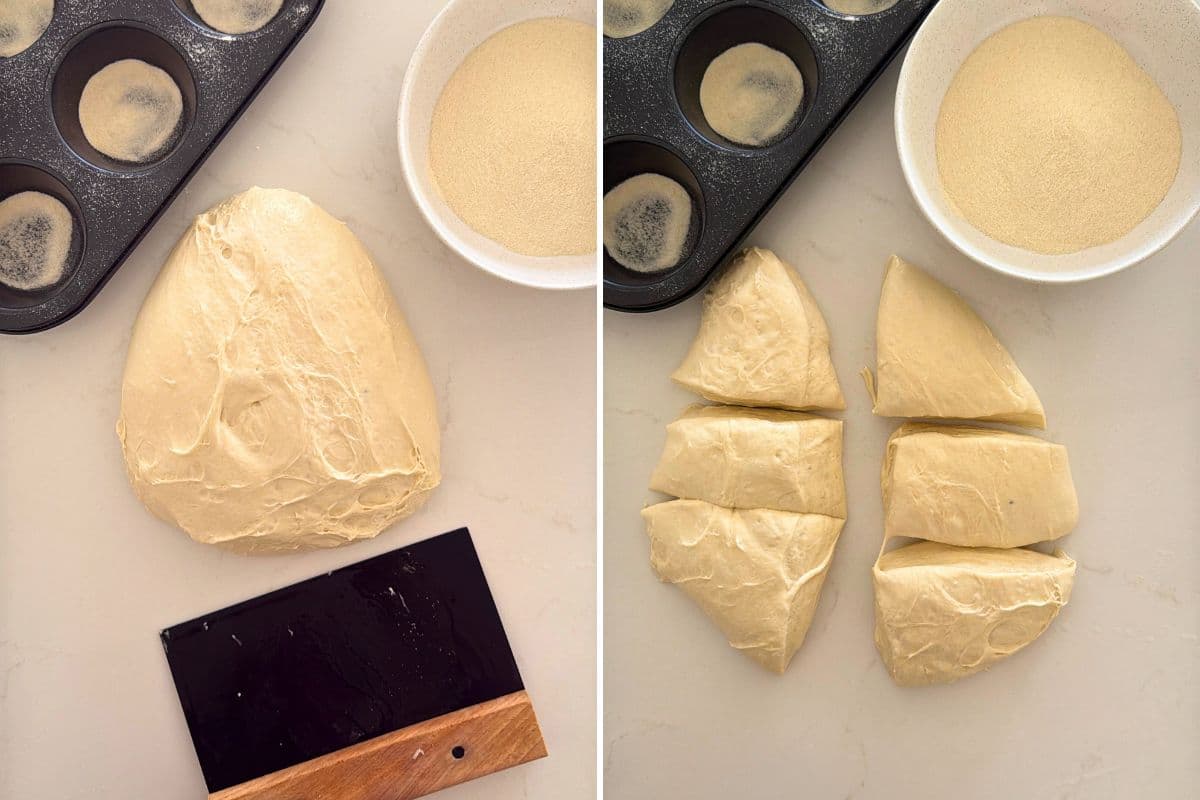
The trick to getting the cutest little mini boule is to make sure you shape each ball of dough with plenty of tension. This ensures they get great oven spring when they hit the hot Dutch oven.
Shape each mini boule tightly, using the same technique you’d use for a full-sized boule. It can feel a little fiddly at first, but it’s oddly satisfying! You want plenty of tension!
Place each shaped mini sourdough loaf into your chosen shaping container (I’ve got lots of tips for selecting the right one further down). You’ll want to make sure the seam is on top, just like when you make a regular loaf of sourdough.
Transfer the mini sourdough loaves to the fridge for a cold retard. Because they’re small, they don’t need a long cold fermentation, however you can of course leave them in the fridge for up to 24 hours if you want to.
You can open bake mini sourdough loaves on a baking stone or baking sheet, but I consistently get the best results using a Dutch oven.
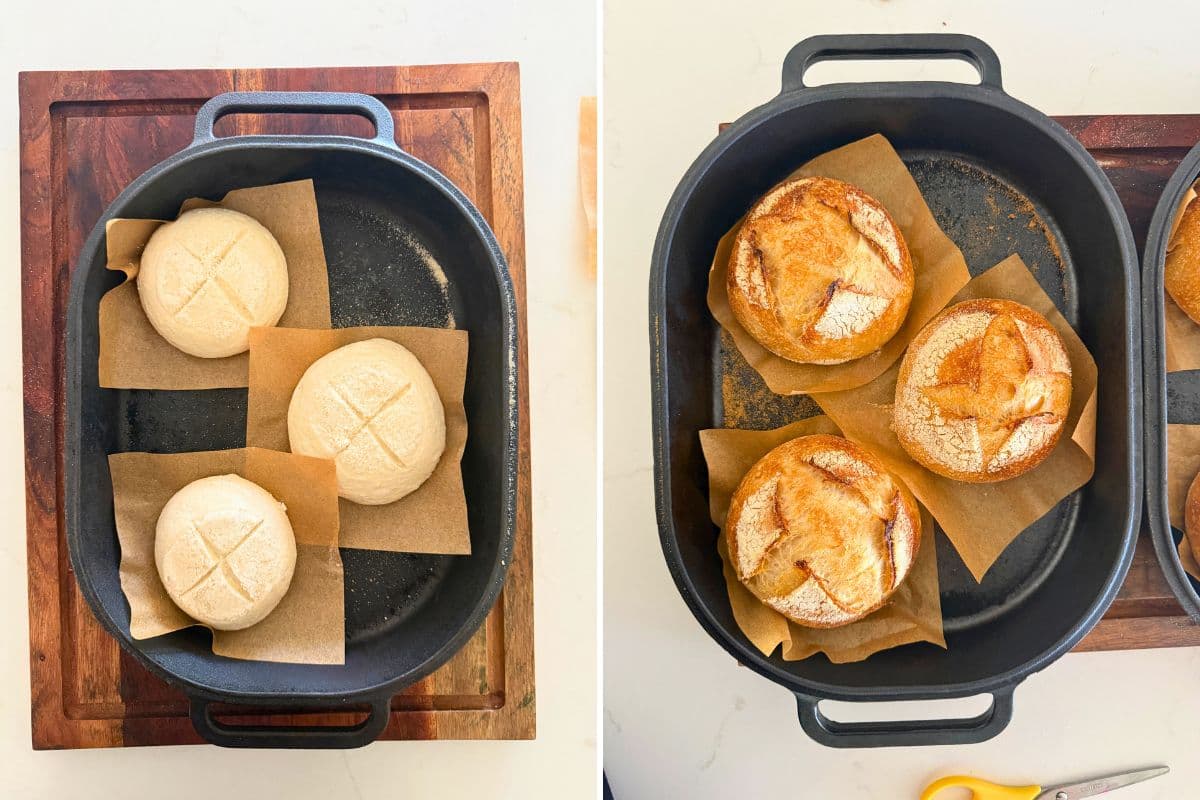
I generally bake my mini boules inside my rectangle cast iron bread pans. I can fit 2 quarter loaves in one pan or even 3 if they are smaller (like one loaf divided into 6 minis).
Kate’s MINI Tip
When You’re Ready To Bake
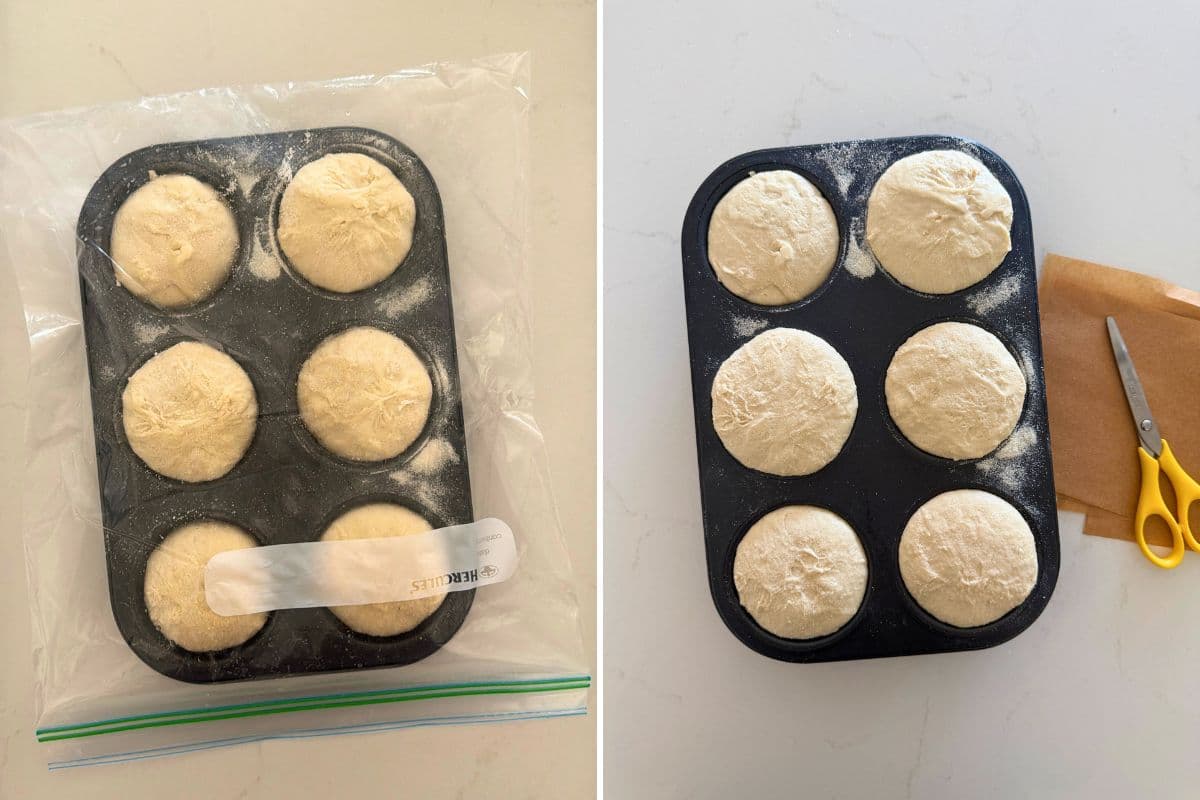
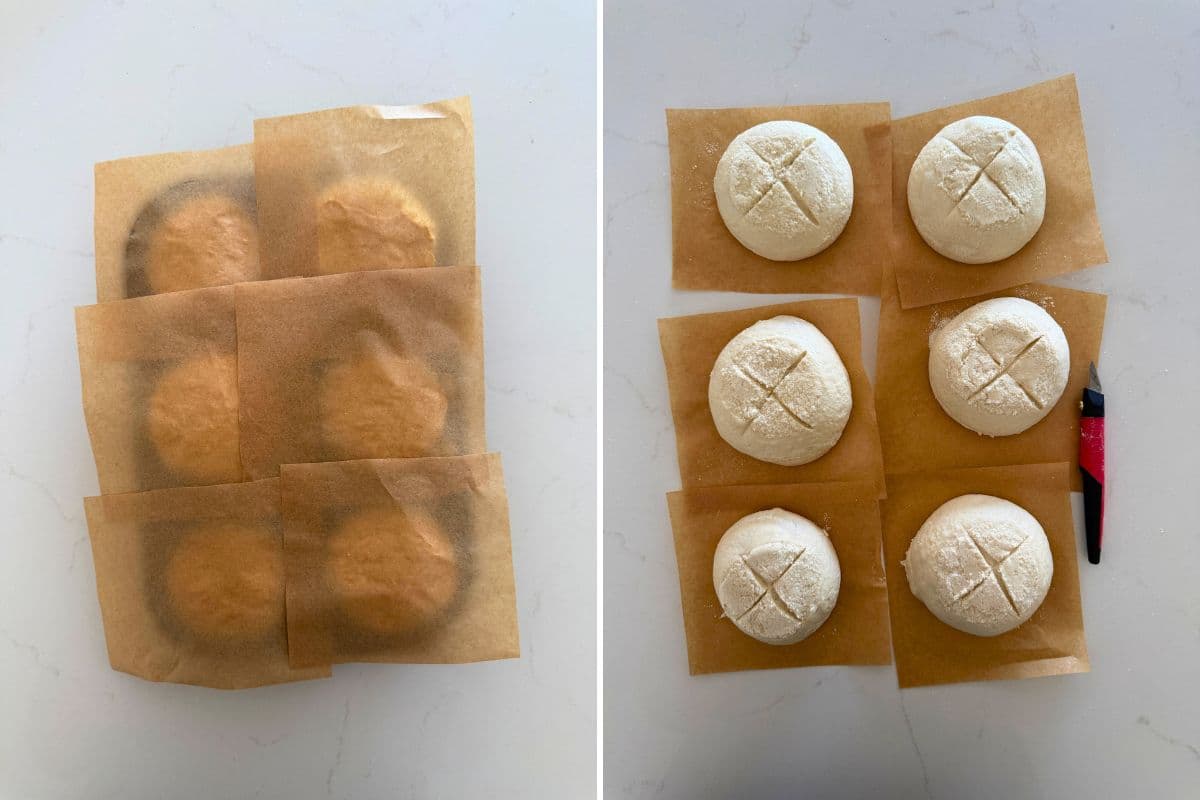
When it’s time to tip the dough out of the small bowls or muffin pans, cut out small squares of parchment paper and place them on the top of the dough, so they land on the parchment, rather than on the counter.
Bake at 230°C (lid on) for 30 minutes and then reduce to 200°C (lid off) and bake for another 10 minutes. You can reduce the lid off time if you need to (like if they are getting too dark or crunchy). If you love an extra-crunchy crust, you can extend the lid-off time slightly or increase the temperature for the final stage. Just be sure to cool them on a wire rack until they’re fully cooled before you slice them to make sure you don’t get a gummy crumb.
Best Mini Shaping Containers for Proofing
To rest and cold-proof your mini boules, you’ll need small containers to support their shape. You don’t have to purchase small bannetons or baskets if you don’t want to.
When I first started making mini sourdough loaves, I used plastic children’s bowls (similar to the ones from IKEA). When those inevitably disappeared as my kids grew, I switched to 1-cup measuring cups. I lined each one with a small square of cotton fabric dusted generously with rice flour. It worked perfectly.

More recently, I’ve been using small stoneware bowls that measure about 3.5 inches across. These are the same bowls I use in many of my ingredient photos. I bought them years ago at the grocery store, but you can find very similar options at places like Target or IKEA. You can see these bowls used in this Instagram video.
Another favourite option is a 6-cup muffin pan (you can of course use a 12 hole if you prefer). This is probably the easiest method, just dust well with semolina or rice flour and slide the entire tray into a large ziplock bag for cold proofing. I love doing this for dinner parties!
No matter what container you use, don’t skimp on flour. I always use semolina to prevent sticking. I have found this to be easier than using cloth these days.
Serving Ideas for Mini Sourdough Loaves
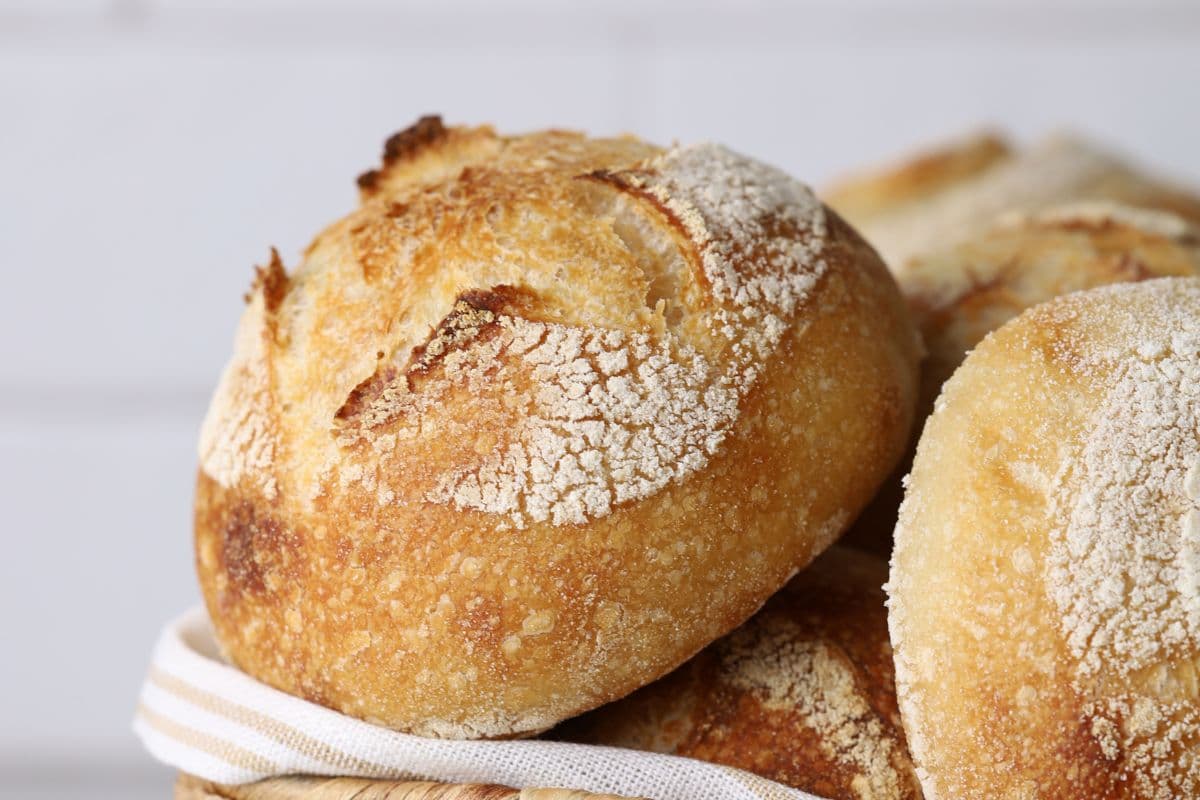
These mini boules can be baked crusty like a traditional sourdough loaf — essentially turning them into little crusty sourdough rolls. They’re incredibly adaptable, just adjust the crust to suit how you plan to serve them.
Some favourite ways to serve them:
- Sliced into mini rounds and buttered (my kids love these as a snack — there’s something magical about mini food!).
- Softened slightly and used as an alternative to sourdough burger buns or sourdough sandwich rolls.
- Served as an alternative to sourdough dinner rolls at holiday meals.
- Serve them as mini cob loaf dips for gatherings – so adorable! Check out this sourdough garlic and cheese cob loaf for inspiration!
- Scored differently and served as fancy dinner rolls
- Wrapped up as homemade gifts, paired with a jar of cultured butter and cranberry vanilla jam.
Troubleshooting Mini Sourdough Boules
There are a few things that can go wrong when making mini sourdough loaves. Here are a few common issues and how to fix them:
- Spreading instead of rising – This can be caused by under or over proofed dough, as well as lack of tension during shaping. Be sure to use a small bowl that curves upwards, rather than has a flat bottom to ensure the dough doesn’t spread too much during cold fermentation.
- Dense crumb – This can be caused by under-fermented dough and often the root cause of this is a weak sourdough starter. Be sure to use an active, bubbly sourdough starter and give your dough plenty of time to bulk ferment until double (a warm spot is best). Remember that under fermented dough will not cook through, no matter how long you cook it for so fermentation really is key! Check out these tips to strengthen your sourdough starter.
- Uneven browning – This can be caused by under fermented dough (see above). It can also just be your oven. Rotate your Dutch oven a few times during the lid off time to ensure even browning (I do this because my oven has a few hot spots.
Mini sourdough boules may look fancy, but they’re wonderfully achievable and incredibly useful. This method works with your favourite sourdough recipe and is especially well-suited to busy schedules, giving you flexibility without sacrificing that classic sourdough look and flavour.
Frequently Asked Questions
No, I bake these for the same time as my simple sourdough loaf, with the caveat that I will reduce the lid off time if they are getting to crusty or brown.
No, you can literally use anything you already have in the kitchen. When I first started making these I used the small plastic childrens bowls from Ikea. Now I use muffin pans or dipping bowls. Ikea have some great options.
You absolutely can add inclusions to the mini sourdough loaves. I add inclusions during stretch and fold if I can as it makes it easier than adding it during shaping. But if you have inclusions that might be too wet or mess with fermentation, adding them during shaping is fine too. You can pretty much divide any loaf of flavored sourdough into smaller portions!
I don’t think there is any “perfect size”, however I have the most success when I divide my dough into either 4 or 6. This division creates great portion sizes that are actually useful, rather than being too small to use them in a meaningful way.
Mini Sourdough Loaves
Equipment
- 4 Small Shaping Containers (small bowls, 6 hole muffin pan or mini bannetons)
Ingredients
- 500 g Bread Flour
- 350 g Water
- 100 g Sourdough Starter, (active and bubbly)
- 10 g Salt
Instructions
- Fermentolyse – Premixing The DoughWeigh out your sourdough starter and water into a large mixing bowl Mix the water and starter together briefly. Then add your flour and salt and mix whole lot together to form a shaggy dough.
- Cover your bowl with a damp tea towel and let it sit for around 1 hour. It's ok if it's a little bit longer, it's not going to matter too much.
- Forming Up The DoughAfter the dough has been through fermentolyse you need to bring it together into a ball. Work your way around the bowl, grabbing the dough from the outside, stretching it up and over itself, into the centre, until a smooth ball is formed. You shouldn't need more than about 20-25 stretches to form the ball.
- Once the dough has formed into a smooth ball, pop the damp tea towel back on and let it rest for 30 minutes.
- Stretch & Fold – Creating StructureOver the next few hours you need to create some structure for your dough by "stretching and folding". Aim to do around 4-6 sets of stretches and folds. For each set, stretch the dough up and over itself 4 times. Leave around 15 minutes in between each set. Again you do not have to be exact with time, but you need to do at least 4 sets over 2 hours.
- Bulk FermentOnce you've finished your stretch and folds, cover the dough with a plastic cover and allow the dough to double at room temperature.
- Shaping The DoughOnce your dough has finished its first ferment, it's time to shape it into mini sourdough loaves!Use a dough scraper to gently ease the dough out of the bowl (your hands work just fine if you don't have one). You want it to land upside down on your counter so that the smooth top of the dough is on the countertop and the sticky underside is facing up. Cut the dough into 4 or 6 even pieces (I usually just do this by eye, rather than weighing the dough). Take each piece of dough and gently form it into a mini boule (or batard if you prefer). For the smaller loaves, I find it's easier to make a boule by bringing the edges into the centre and then gently rolling it over into a ball, pulling it towards you to create plenty of surface tension.
- Placing Into A Proofing ContainerOnce the loaves are shaped, use plenty of semolina or rice flour to dust any sticky edges and place it into your proofing baskets or containers smooth side down, so your seam is on the top.
- Cold FermentNow the dough is in its "shaping container" cover it loosely with a plastic bag and place into the fridge. Try to leave it in the fridge for a minimum 5 hours up to a maximum of around 36 hours. The longer you leave it the better your bread will be! A longer cold ferment creates beautiful blisters on your crust and a deeper sourdough flavour. It will also ensure your dough forms a skin which makes it easier to score.
- BakeOnce you're ready to bake your sourdough, you'll need to preheat your oven to 230ºC/450ºF. Place your Dutch Ovens into the oven when you turn it on so they get hot. When your oven is at temperature, take your mini sourdough out of the fridge. Gently place each one onto a piece of parchment paper.Score each mini loaf with a simple cross.Carefully take your dutch ovens out of the oven. Place the sourdough into the pot using the parchment paper as a handles. I usually put 2 or 3 in each pot, leaving a little room around each one. Put the lid on and place into the hot oven. BAKE TIME:30 Minutes with the lid on at 230ºC/450ºF plus10-15 Minutes with the lid off at 210ºC/410ºF
- Finishing The BakeWhen you remove your dough from the oven, carefully remove it from the oven as soon as possible and place on a wire rack to cool.
Nutrition
Nutrition information is automatically calculated, so should only be used as an approximation.
Like this? Rate and comment below!


Your recipes are so tasty and so simple to follow. You are an amazing teacher.
Ty
When doing the cold retard…about how long are they in the fridge?
How long do you recommend the cold ferment for the rolls?
Do you put all three in Dutch oven at the same time? Don’t they stick together?
Wondering if you know the weight of each loaf before baking? I am going to try these with my normal sourdough but want to get the sizing right while I’m shaping.
Is 230C Celsius temp or is that F?
Celcius 🙂
450 Fahrenheit
Would these be a good size for soup bowls or are they too small?
Your recipes always turn out awesome, thank you!!
Do you preheat your oven
Hi Kathy, Yes, you’ll preheat the oven.
What should the internal temp be when baking is complete? Same as a normal bake? 205-210ish
Thank you,
Tamra
Hi thx for the tips and I have some questions .
1-Do you cover them bowls in the fridge?
2-can you explain how you put them in to actually bake them in a 3.1qt pan? Just on a parchment paper?
Thanks
Is the proof only for 30 minutes? Sounds too good to be true. I love making sourdough but sometimes it can be such a process!
You’ll need to watch your dough for this one, they are very small loaves, so sometimes that’s all it takes, but watch your dough and see how it looks before baking 🙂
Would these do well with par baking? Or would you just recommend cooking completely then freezing?
Hi Meghan, Cook completely and then freeze for best results.
How would you modify baking to do on a sheet pan? Trying to make a large batch for holidays and can only do 3-4 if I used my two Dutch ovens. Thank you!
These will definitely work on a sheet pan, this post will help you navigate this open bake process 🙂
Let me see through of those in a Dutch oven! I’ve done this and I can only bake one at a time. It takes forever.
I make and sell mini boules. They are very popular!
Mini sourdough loaves.
Check the temperature 4500F seems a bit hot!!
Oooh yes thank you John – all fixed, a silly typo on my behalf 🙂