This post contains affiliate links. Please see our disclosure policy.
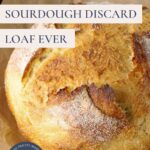
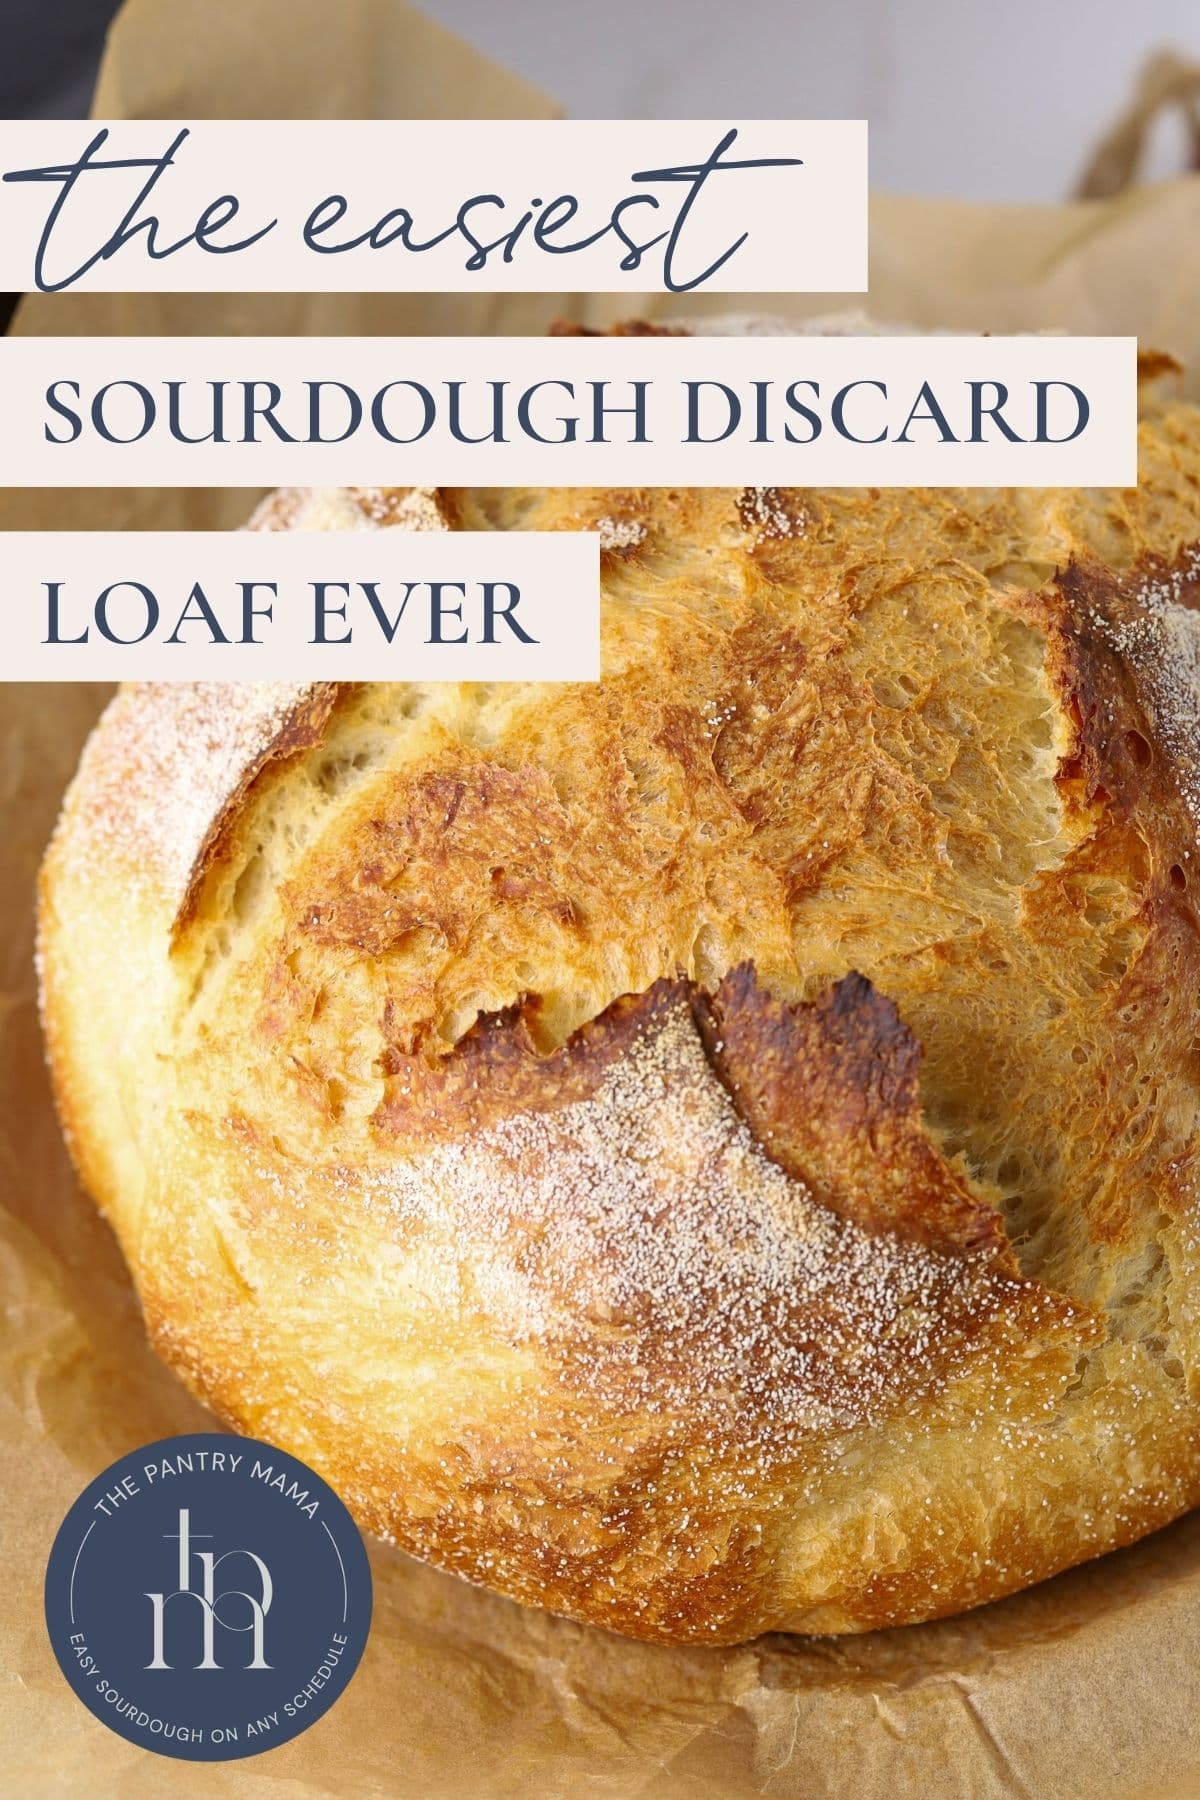
Are you ready for the easiest sourdough discard bread recipe you’ll ever make? Baking true sourdough bread is certainly rewarding, but with our busy lives, we don’t always have time for a 2 to 3 day process, right? So I’ve created the easiest sourdough discard bread you’ll ever make – seriously it’s so so simple with very minimal prep! This recipe is perfect if you’re still building your sourdough starter, but you really want to bake sourdough bread. This is why this recipe has become one of the most popular sourdough discard recipes on The Pantry Mama site!
Why You’ll Love This Recipe!
Super Quick Discard Recipe – You can make this easy sourdough discard bread in under 2 hours if your house warm enough. It does use a little commercial yeast – but you will still get some of the sourdough tang from your discard.
No Kneading, No Stretch and Folds – this recipe is completely hands off and requires no fancy equipment!
An Easy Way To Use An Immature Sourdough Starter – This easy sourdough discard bread will also work for you if your starter is not quite ready to start baking true sourdough bread, just like this sourdough discard sandwich bread. The commercial yeast will create the rise that is lacking in your sourdough starter. If you’re having trouble with your sourdough starter, check out these tips to boost your sourdough starter.
Ingredients
- Bread Flour – I recommend using bread flour for this recipe as it makes the dough less sticky. If you want to use all purpose flour, I recommend using a little less water, or you’ll end up with a big, sticky mess! You could supplement some of the 450g of flour with rye, spelt or even whole wheat flour for a more complex flavor profile.
- Water
- Salt
- Instant Yeast – I prefer to use instant yeast because it doesn’t need to be bloomed in water, but you can use active dry yeast if you prefer. Just add it when you add the water to this recipe.
- Sourdough Discard – This recipe uses sourdough discard, which is basically unfed sourdough starter. As always, you can use active sourdough starter if you prefer. You can then choose whether you add the yeast to speed things up or not.
Make This Sourdough Discard Bread In Under 2 Hours!
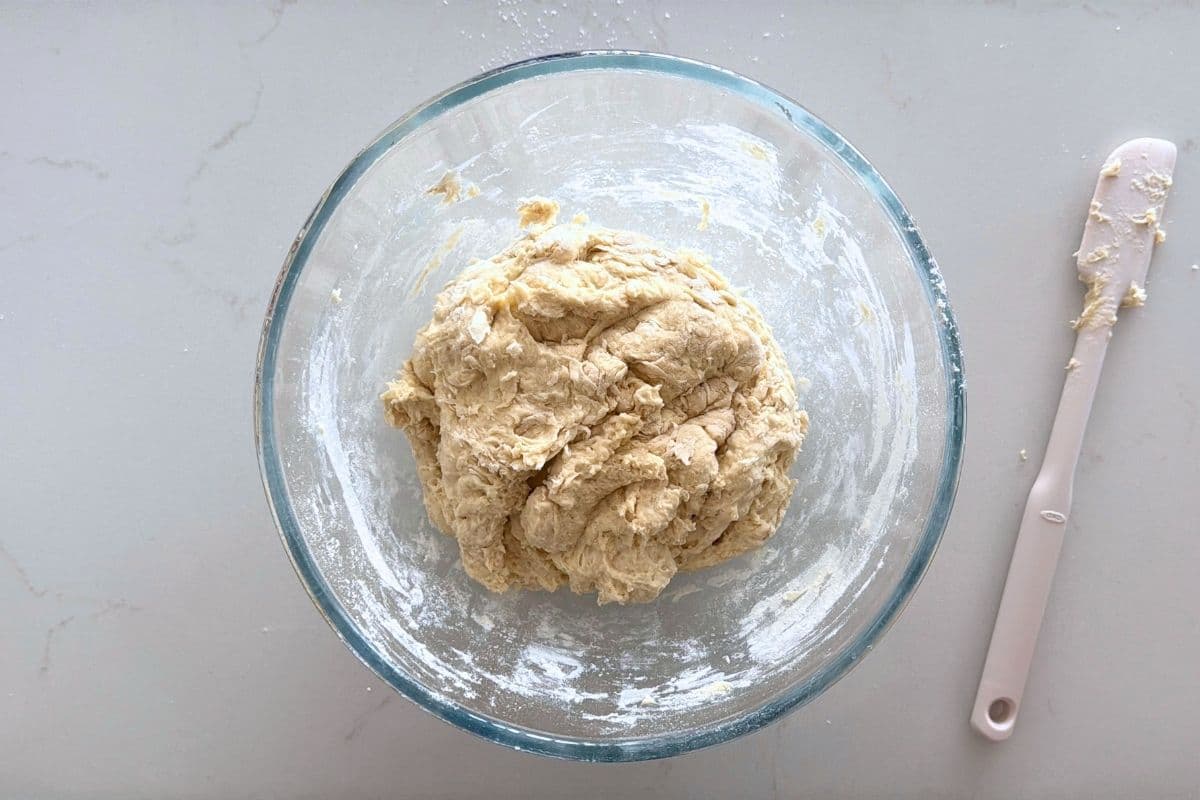
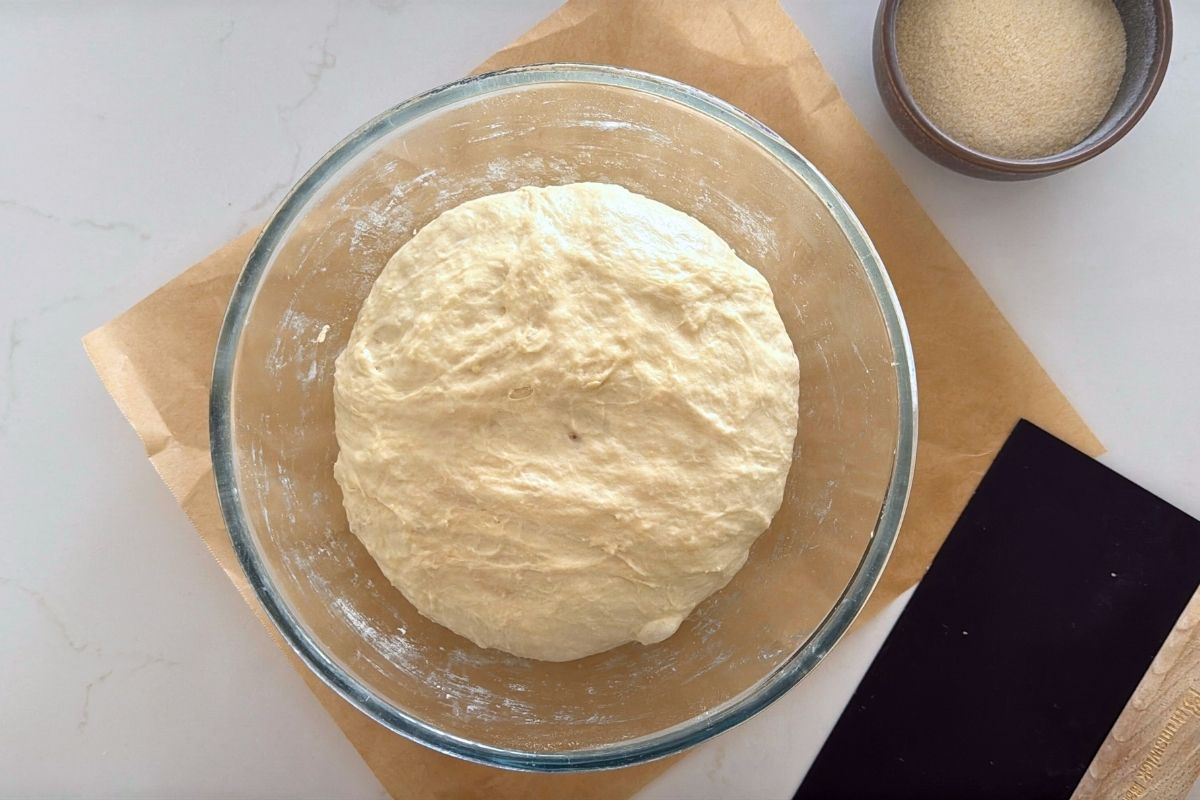
To make this easy crusty sourdough discard bread, start by adding the flour, warm water, instant yeast, salt, and sourdough discard to a large mixing bowl. Use a wooden spoon or spatula to gently mix everything together until a shaggy dough forms. You don’t need to knead it or make it perfectly smooth, just make sure all the flour is moistened.
Cover the bowl with plastic wrap and put it in a warm place for 1 to 2 hours and let the dough rise until it’s doubled. The exact time will depend on the room temperature of your kitchen. While the dough is rising, place a Dutch oven into your oven and preheat it to 220°C/430°F about 45 minutes before you plan to bake.
Kate’s RECIPE Tip
Bake It Later
If you don’t want to bake your bread immediately once it’s risen, you can pop it in the refrigerator for up to 24 hours. Just put the whole bowl in the fridge, covered with some plastic wrap to stop it drying out. This is a great idea if you want to have it freshly baked for dinner for example or when you first wake up.
When you want to bake it, let it sit out on the kitchen counter for around 30 minutes before you shape it and bake it (so preheat the oven when you take it out of the fridge).
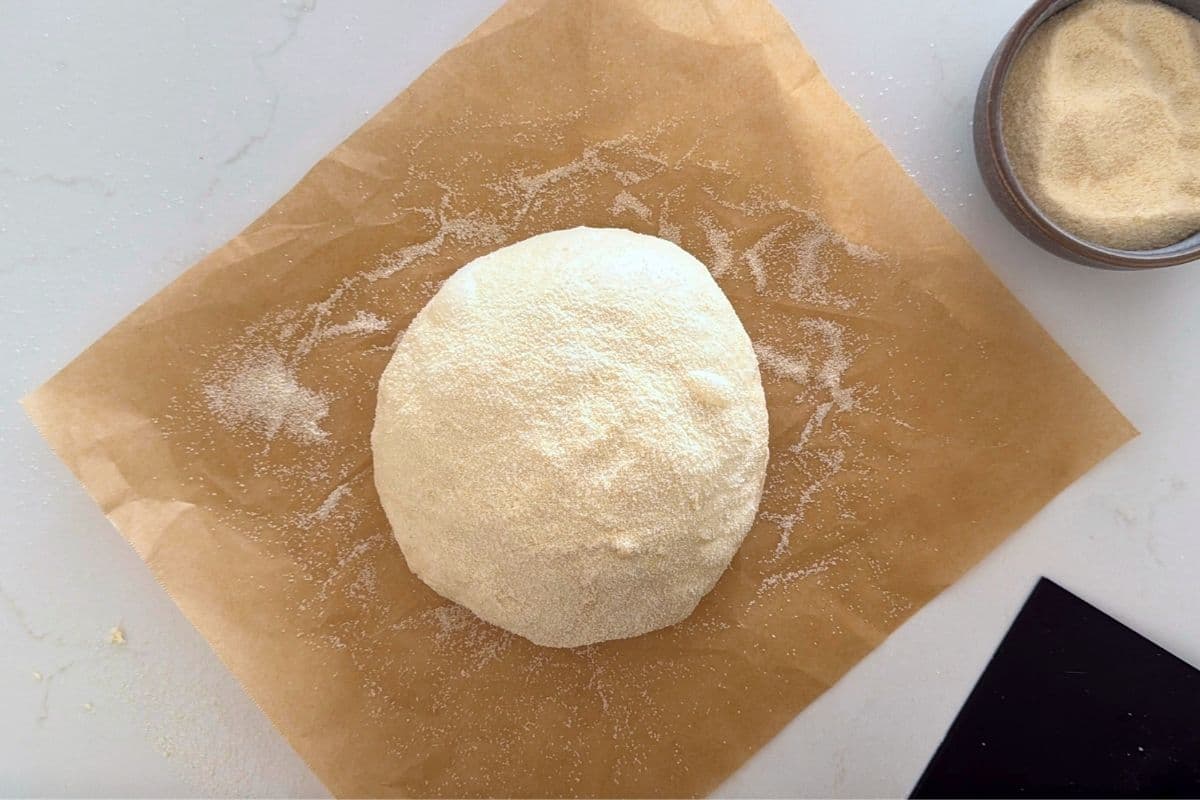
Once the dough has doubled, lay a sheet of parchment paper on your counter and sprinkle it with a little rice flour or fine semolina to prevent sticking. Gently scoop or pour the dough onto the paper. If the dough is manageable, lightly shape it into a rough round by folding the edges over themselves. If it’s very wet, simply guide it into a loose shape without worrying too much, rustic works perfectly here. Score the top if you like, or leave it to naturally split in the oven.
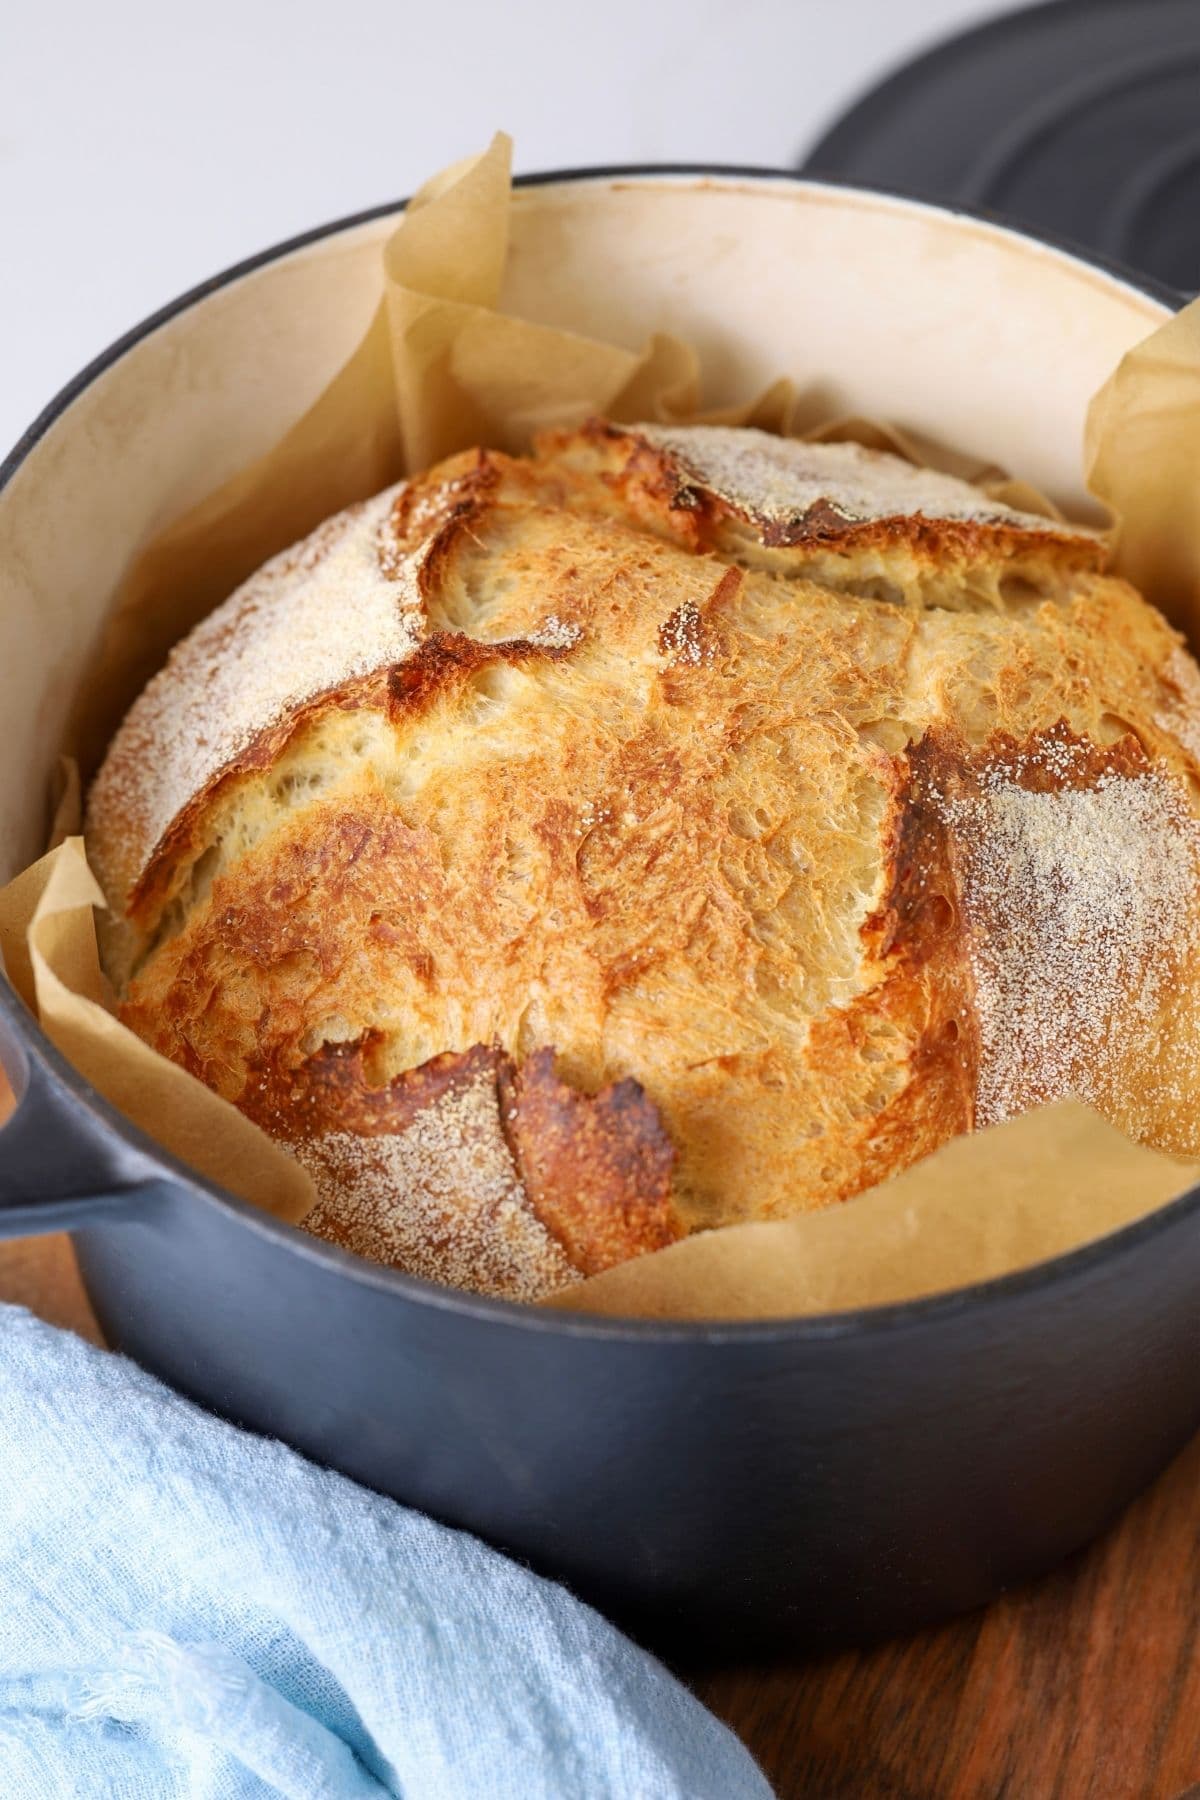
Carefully lift the dough using the parchment paper and place it into the hot Dutch oven (we don’t actually need any further proofing once the dough is shaped).
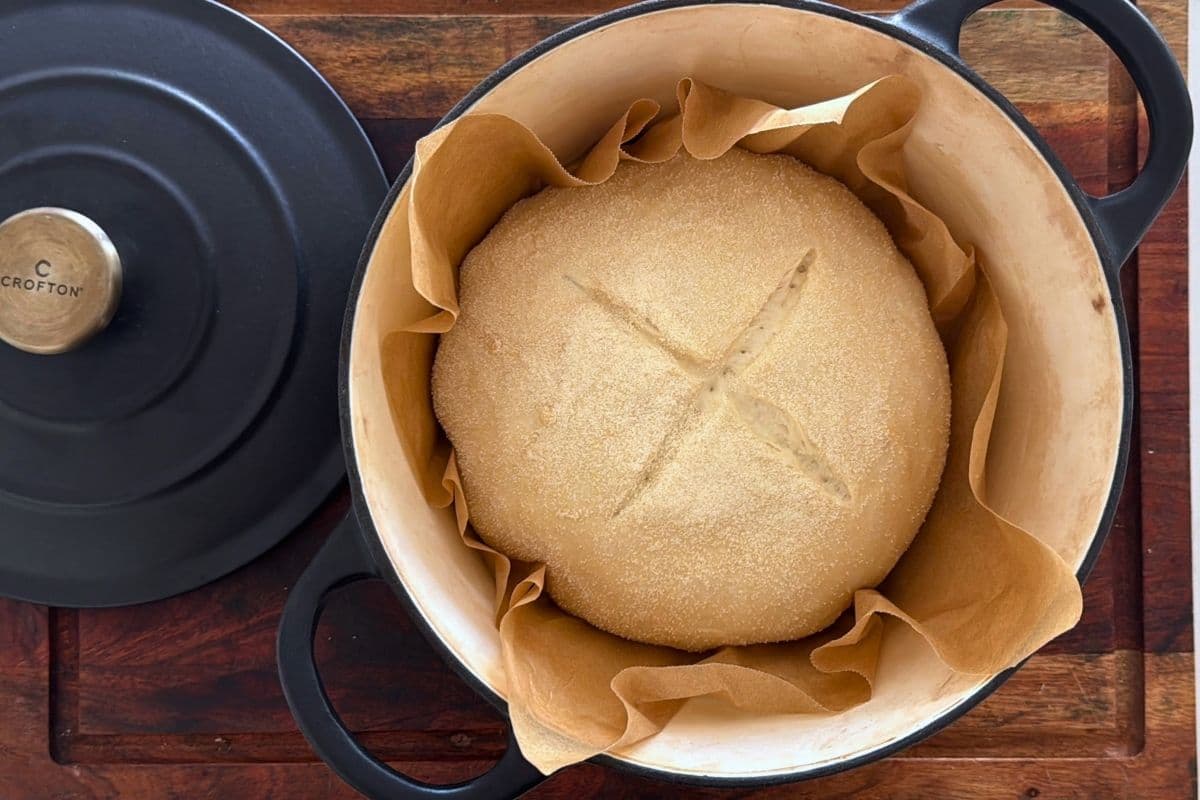
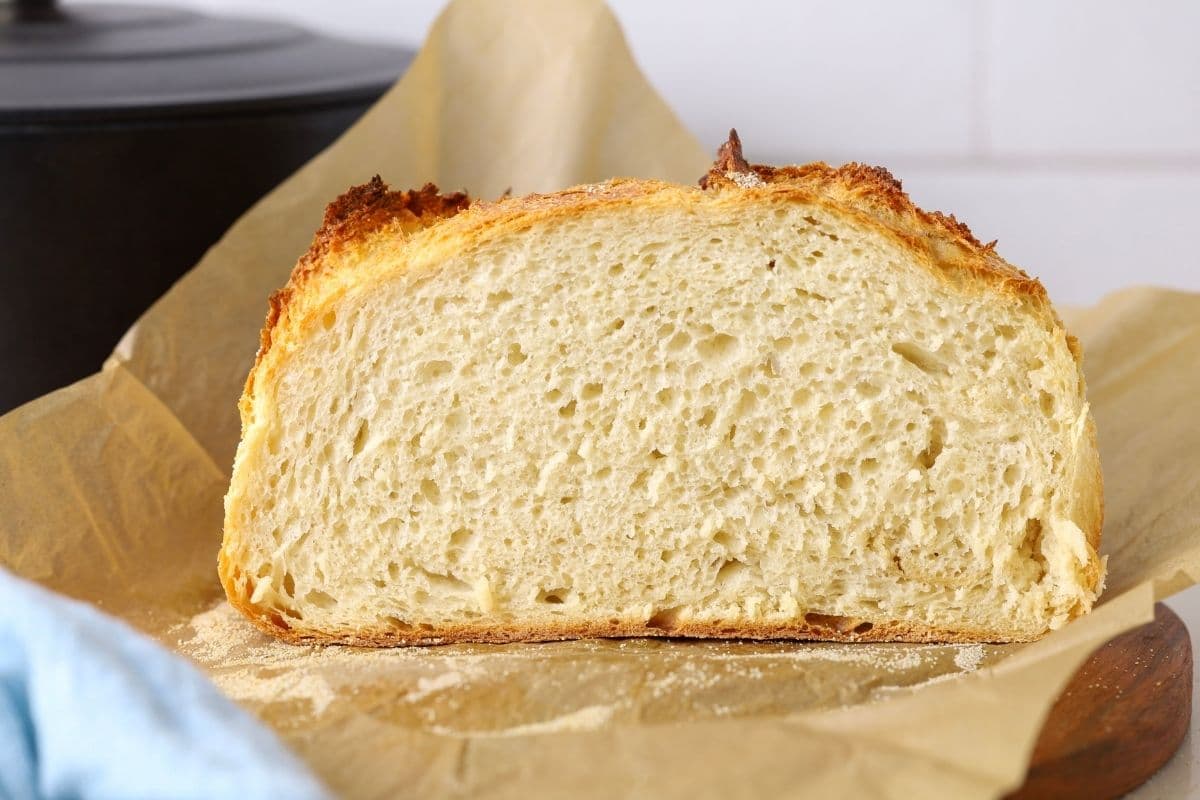
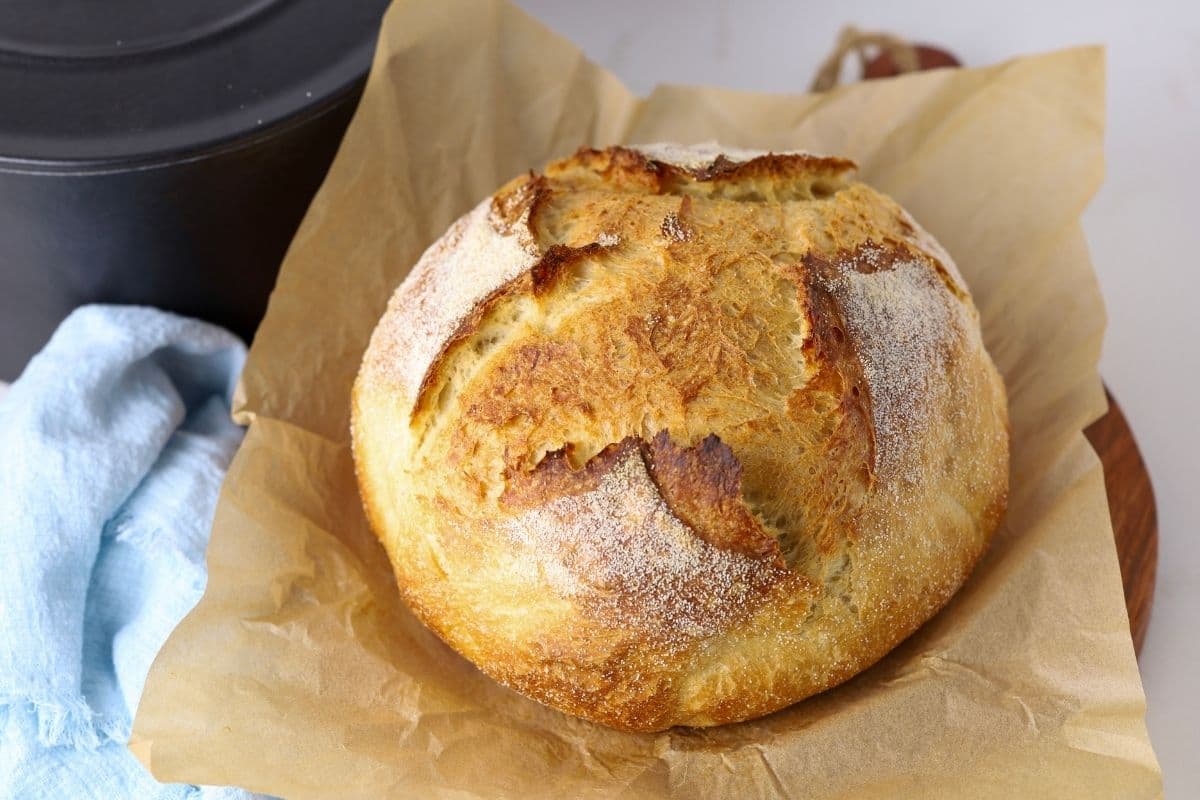
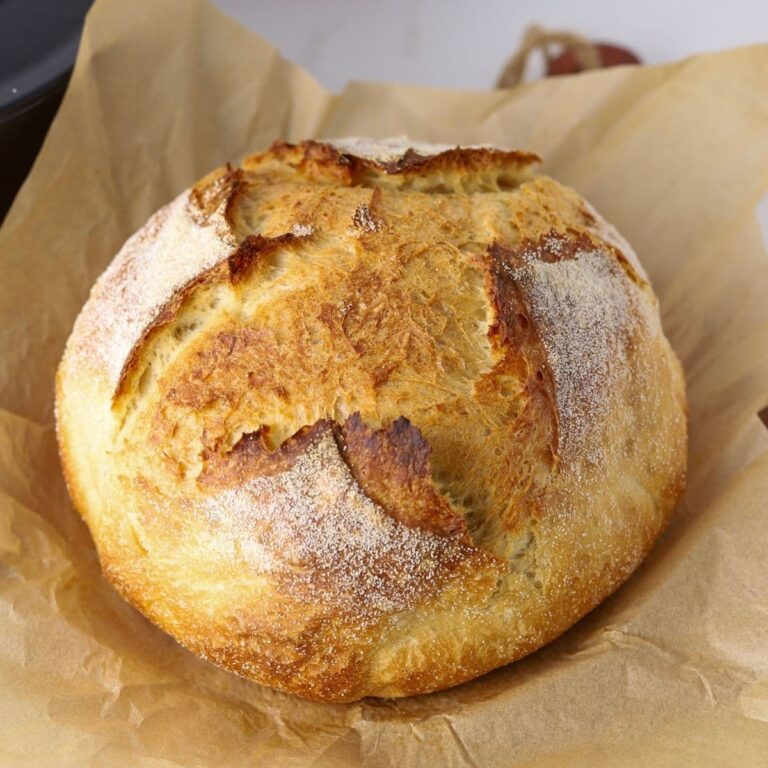
Bake with the lid on for 30 minutes at 220°C/430°F, then remove the lid and bake for another 10 minutes at 200°C/390°F until golden brown. Allow the bread to cool on a cooling rack for at least an hour before slicing for the best texture. And now, just add butter! And if you love this hands off approach, you might also enjoy these no-knead sourdough discard rolls!
I’ve included step-by-step instructions in the recipe card at the end of this post.
Kate’s Pro Tip
Bake in a Dutch Oven
To get the best results for your sourdough discard bread, bake it in a Dutch Oven. It keeps the steam inside the pot and enables your bread to get the rise before the crust starts to harden. Keep the lid on your Dutch Oven for the first 30 minutes of your bake, then take it off for the last 10 minutes to give it some crunch and colour. Just like baking true sourdough, the Dutch Oven really is a game changer.
Want To Give Your Sourdough Discard Loaf A Flavor Boost?
You can add lots of different flavor combinations to this sourdough discard loaf. It’s up to you whether you go sweet or savory. It’s best to add the inclusions to the dough when you first mix it, that way you can leave it alone to rise rather than have to disturb it to add in the flavors. Some of my favorite inclusions for this sourdough discard loaf are:
- Jalapeño Cheddar
- Bacon & Cheddar Cheese
- Olives (you can use whatever olives you love)
- Chocolate chips and orange zest
- Cranberries and walnuts
- Cinnamon and Raisins
How To Store and Freeze
This loaf is is designed to be a quick bake and made to eat the same day you bake it. It can be stored in a ziplock bag at room temperature for up to 3 days after baking, however it’s definitely better eaten the day of baking. Storing it in a ziplock bag will keep the loaf interior soft, but it will also give you a soft crust (which you can refresh in the oven). Otherwise, it’s perfect for making toast with!
This loaf can be frozen. I recommend freezing as a whole loaf in a large zipock bag for up to 3 months. When you want to use it, remove it from the freezer and allow it to thaw at room temperature.
Frequently Asked Questions
I recommend using a Dutch oven for this loaf because it traps the steam around the loaf, giving it time to bloom in the oven, giving it maximum oven spring and a gorgeous, crusty exterior – without it being rock hard. You can open bake, however, I recommend spraying the loaf with water before placing into the oven.
No you don’t need to. Because this bread has instant yeast added you can place the shaped dough straight into a hot oven. If you really can’t bake it straight away, you can place it into a well floured banneton if you want to, but I recommend keeping it in the fridge and baking it within 12 hours.
I don’t recommend making this loaf in a stand mixer. The dough is really sticky and can be really hard to clean from the dough hook attachment. Plus, there’s such minimal mixing and kneading for this recipe, it’s really not worth messing up your stand mixer for!
Easy Sourdough Discard Bread
Equipment
- Mixing Bowl
- Digital Scales
- Dutch Oven
Ingredients
- 450 g Bread Flour
- 360 g Water, (warm)
- 10 g Salt
- 7 g Instant Yeast
- 100 g Sourdough Discard, (unfed sourdough starter)
Instructions
- Take a clean ceramic or glass bowl and add your flour, warm water, instant yeast, salt and sourdough discard.
- Use a wooden chopstick or end of a wooden spoon to gently bring all the ingredients together into a shaggy dough. You don't need to it be fully smooth, just ensure that all of the flour is wet.
- Cover the bowl in cling film and set it somewhere warm for 1 – 2 hours. It really depends on the temperature of your house with this one. If your house is warm, 1 hour will be plenty. In the depths of winter or with air con, you may need more than 2 hours. You just want it to double in size, no more or it won't rise in the oven.
- Around 45 minutes before you want to put your bread into the oven, you'll need to put a dutch oven into the oven and preheat it to around 220ºC/430ºF.
- Once your dough has doubled in size, grab a piece of parchment paper and lay it out on your counter. Sprinkle on a few tablespoons of rice flour or fine semolina flour (this is just so that the dough doesn't stick to your hands).NOTE – If you are wanting to put your bread in the refrigerator to bake another time (usually within 24 hours) then just pop the cling film over the bowl of doubled dough and put in the fridge. You don't need to do anything to the dough before it goes in.
- Scoop your dough out with your hands – if it's particularly wet it's perfectly fine to pour it onto the paper.If it's not too wet, use the flour and your finger tips to gently bring it into a round shape – you will need to pull each side over each other to do this. If your dough is too wet – don't fret, just try and bring it into some kind of shape without getting too messy.
- Score your dough if you're able to – otherwise just leave it and it will open up naturally in the oven.
- Carefully take your dutch oven out of the oven and remove the lid. Use the parchment or baking paper as a handle to gently place your discard bread inside the pot and put the lid back on.
- Bake in the oven, with the lid on for 30 minutes at 220ºC/430ºF. Then remove the lid of the pot and bake for a further 10 minutes at 200ºC/390ºF. Remove the bread from the oven and allow to cool on a wire rack.
- Try to let it cool for at least an hour before cutting it. It will still taste great if you cut it hot, but it's so much easier to cut if you let it cool!
Nutrition
Nutrition information is automatically calculated, so should only be used as an approximation.
Like this? Rate and comment below!


Love your recipe Kate! It takes the worry out of baking sourdough bread for me. I’ve been baking g more often and enjoying it more! I like the dry Italian bread texture to this! I admit I cheated and added a teeny bit of olive oil. I hope that’s okay!!
Yes, Jane! We love to hear you make it your own. So glad you love this one! 🙂
I found this recipe after I forgot to start my regular sourdough in a timely fashion after feeding my starter, and I am so glad I did! I may not lower the heat next time after removing the lid, because I like the crust a bit darker, but this was a definite win.
This recipe makes the best loaf!! it comes out great consitantly every time. I did add in a couple of stretch and fold and coil fold after the first rise but that was personal prefrence.
Greetings from Minnesota! 🙂 I’ve just done my second loaf (already sliced some up for lunch) AND finally read through the entire recipe, and saw the bit about inclusions. I think my third loaf will be something cheesy. I love how easy this is – really helpful for a beginning bread baker. (bread machine doesn’t count 😉 Plus, I’m older, with some physical limitations, so having this come together without endless kneading and fussing is a bonus. I will get around to doing regular sourdough at some point. For now, I have a lot of discard to experiment with, too. I’m looking through your list of discard recipes, deciding what to try next. Thanks so much for your lovely website, and wealth of info.
I made two loaves. The plain one was perfect for sandwiches. I decided to add some inclusions and read the suggestion for chocolate chips and orange zest. I missed the word chips and added 30 grams of dutch cocoa powder. Without the sugar from the chocolate chips it was not sweet at all and didn’t have a strong chocolate flavor. The texture was perfection! I topped it with nutella and orange marmalade and OMG it was a party in my mouth!
Ohhhh! That sounds so good! Thank you so much for sharing, Anita. I love that!
Greetings from the Netherlands!
Made this and the first time it was a bit too wet, other then that it was great!
Doing another today but adding a bit of sambal ( asian chili puree) to the mix to see how it turns out!!
So fast and easy and most importantly…delicious!
This is a good recipe for me to use up my discard as I’m still working on strengthening my starter. Taking the pressure off me a bit, and the bread turned out lovely and soft, and still had a bit of a tang to it, I left it in five extra minutes to darken the crust a tad.
The hybrid method still gives you gut benefits though?? I hope so! Maybe not as much?
I did a couple of stretch and folds, because the dough was soft, and I snipped the top with scissors. I didn’t preheat the Le Creuset dutch oven as they say not to, just the oven itself. I might try adding cheese next time. I put half in the freezer, and I’m using that half now. Thank you!
I have the same question about gut health. how can I modify to avoid regular yeast?
If you’re looking for a sourdough sandwich loaf with no commercial yeast, then you should try this soft sourdough sandwich loaf 🙂
I’ve made probably 15 loaves…all not perfect…heavy gummy just not good..move made this and the crumb loaf weight…everything is perfect …yayee. thank you
My family loves this bread, and it’s really easy to make.
I want to make this but my sourdough discard is in the fridgeratoer. DO I let it warm up before I use it or uis it ok to use cold?
It won’t make too much difference for this loaf, so you can use it cold if you want to 🙂
This was such an easy recipe to follow using my sourdough discards. It turned out beautiful! Thank you 🙂
I have this recipe bookmarked in my browser, and it’s become my go-to method for making a same-day loaf; it’s that good! Very forgiving recipe–I’ve made this tens of times now, and sometimes I follow the recipe as-is, and other times I sub in some whole-wheat flour to give it a different flavor profile.
If you have the time, I would highly recommend doing a couple of stretch-and-folds with wet hands directly in the bowl during the initial rise; I do one every 30 minutes for a 90-min rise. I’ve found that building up some strength in the dough makes it much easier to shape the loaf. Because of this, I can skip the parchment paper step and transfer my loaf from the bowl to the preheated Dutch oven.
Overall, great recipe!!
This recipe was very easy to follow and was delicious!
Hi, so happy with this bread,,,the taste and texture are perfect. So easy to make and so happy to be able to put the sourdough discard to good use. Thank you for your amazing recipe.
Karen
Due to timing and needing a loaf soon I made my first attempt at making a discard SD and was pleasantly surprised. When in an emergency I’ll definitley do it again