
Yogurt Sourdough Starter Recipe
Make a strong and tangy sourdough starter using flour, water and natural yogurt. Simple instructions for a healthy sourdough starter to make delicious sourdough bread.
Servings 50 Grams of Starter
Calories 4kcal
Equipment
- Clean Jar
- Digital Scales
- Silicone Spatula
Ingredients
- 50 g Flour Bread, All Purpose, Rye, Whole Wheat - whatever you'd prefer
- 50 g Yogurt Plain, natural yogurt with no added sugar
- 25 g Water Filtered (only if you need to loosen the starter)
Instructions
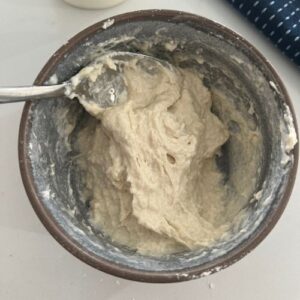
- DAY 1:All you need for today is 50g of flour and 50g of natural yogurt plus a clean jar. Mix the flour & yogurt together in the jar, pop the lid on loosely (or a piece of paper towel & elastic band). If you feel the starter is too thick or you can't mix it together properly, add just a little water to loosen it (no more than 25g).Place the starter somewhere warm for the next 24 hrs. If your house is cold, pop it near the kettle or oven to keep it warm.
- DAY 2:Once your starter is 24 hours old, you need to check on it and give it a good stir. You do not need to add anything today - just get some oxygen into your mixture and then recover and pop aside for another 24 hours.Your starter may already have some bubbles forming - this is a great sign. But it's also totally fine if it's not doing anything. Time is everything! Make sure it’s in a warm spot - you can find some ideas here.

- DAY 3:On day 3 take 50g of the starter in your jar and place it into a clean jar, adding 50g of flour and 50g of yogurt. You shouldn't need to add water to this feeding as the fermented starter should be enough to loosen the new flour and yogurt.Mix it together, being sure to get lots of oxygen into your mixture. Replace the cover and pop it away until tomorrow.Don’t worry if you keep checking it - it’s completely normal It’s good to notice how it changes in shape, size and smell over the 24 hours.At this stage it's completely normal for it to smell really bad and to have developed a layer of liquid on top (this is called hooch). It might look like the water has separated from the flour but it's just telling you that it's hungry. Stir the hooch in when you feed your starter. It's also quite normal for it to double in size. Keep going - it will be fine
- DAY 4:Step 4 is to feed your starter in the same way as you did yesterday. Remove 100g of your starter and then add 50g of flour and 50g of yogurt to the remaining 50g of starter in your jar. Mix it all together with the end of a wooden spoon. Replace the cover. You’ll need to do this twice today, around 12 hours apart. While your starter will be fairly forgiving, set a reminder on your phone if you think you’ll forget it’s just like having a pet.
- DAY 5:Step 5 is to feed your starter in the same way as you did yesterday. Remove 100g of your starter and then add 50g of flour and 50g of yogurt to the remaining 50g of starter in your jar. Mix it all together with the end of a wooden spoon. Replace the cover. You’ll need to do this twice today, around 12 hours apart. It's a good idea at this stage to pop an elastic band around the jar you are using. Put the elastic band at the level of your starter when you feed it. This helps you to be able to see how far your starter is rising when it peaks.
- DAY 6:Step 6 is to feed your starter in the same way as you did yesterday. Remove 100g of your starter and then add 50g of flour and 50g of yogurt to the remaining 50g of starter in your jar. Mix it all together with the end of a wooden spoon. Replace the cover. You’ll need to do this twice today, around 12 hours apart.
- DAY 7:YAY! Your sourdough starter is a whole week old. Keep feeding twice a day as you have been for at least 14 days - except now you are going to use water instead of yogurt!Now I know you want to get to baking bread … but just remember that the most important thing about this whole process is time. Your starter might be ready, but chances are it will need a bit longer to mature - generally 14 days. You need to keep feeding your starter the same way as you have been, twice a day (discarding before you feed) until it's consistently doubling within around 2-6 hours after you've fed it. Once it's consistently doubling after every feed you can try and bake with it. Your starter will keep maturing as you use it.For more information on how to know when your starter is ready, go here.
Notes
Method of Feeding - Clean Jar vs Same Jar:
It's up to you how you want to feed your starter - you can just pour half out and then put the flour and water directly into the same jar (you can clean the sides and rim with a silicone spatula). This will not be super accurate and may mean your starter takes longer to build - but it will still work!
You could also weigh the jar with starter in it, then remove 50g from there (keeping your starter in the same jar).
Alternatively you can place 50g of your starter into a clean jar and feed into that so you have a clean jar each time.
You'll find my guide to the best jar for sourdough starter here.
Nutrition
Calories: 4kcal | Carbohydrates: 1g | Protein: 1g | Fat: 1g | Saturated Fat: 1g | Sodium: 1mg | Potassium: 1mg | Fiber: 1g | Sugar: 1g | Calcium: 1mg | Iron: 1mg
