White Bean Dip
This post may contain affiliate links.

You can't go wrong with this white bean dip as an easy crowd pleaser for guests. Made with simple pantry staples and fresh lemon, garlic and rosemary, it comes together in minutes but tastes like you’ve put in far more effort. It’s smooth, savory, and perfect for spreading onto thick slices of sourdough, serving alongside crackers, or adding to a simple grazing board.
Why You’ll Love This Recipe!
Simple Pantry Ingredients - A couple of cans of white beans, good olive oil, fresh lemon and garlic are all you need to get started. It’s easy to customize with herbs you already have on hand, which makes it a reliable, go-to dip.
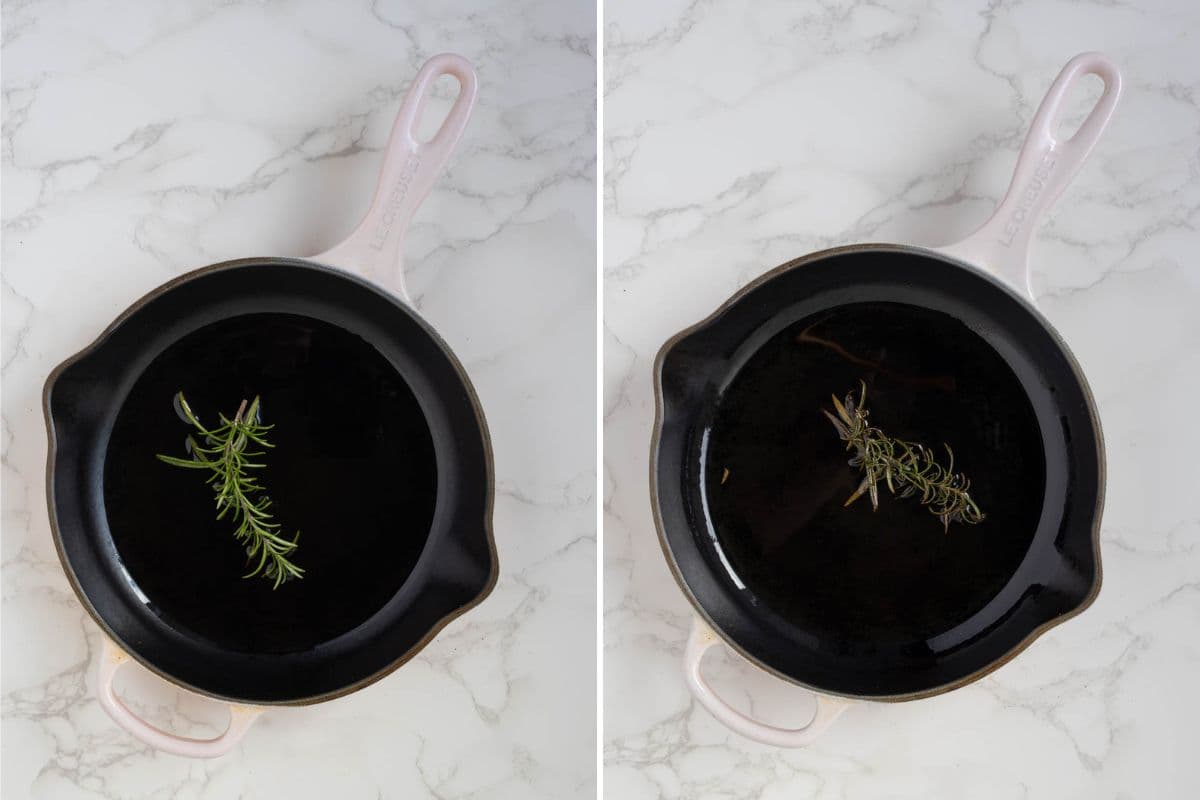
Infused Rosemary Oil - Frying a fresh sprig of rosemary in olive oil for a few minutes really boosts the flavor and it adds tons of depth to this dish. Lay the sprig on top of the finished dip for crispy little bits of fried rosemary!
Perfect for Entertaining or Everyday - This dip works just as well on a grazing board as it does spread onto sourdough for a quick meal or hearty snack.

Ingredients
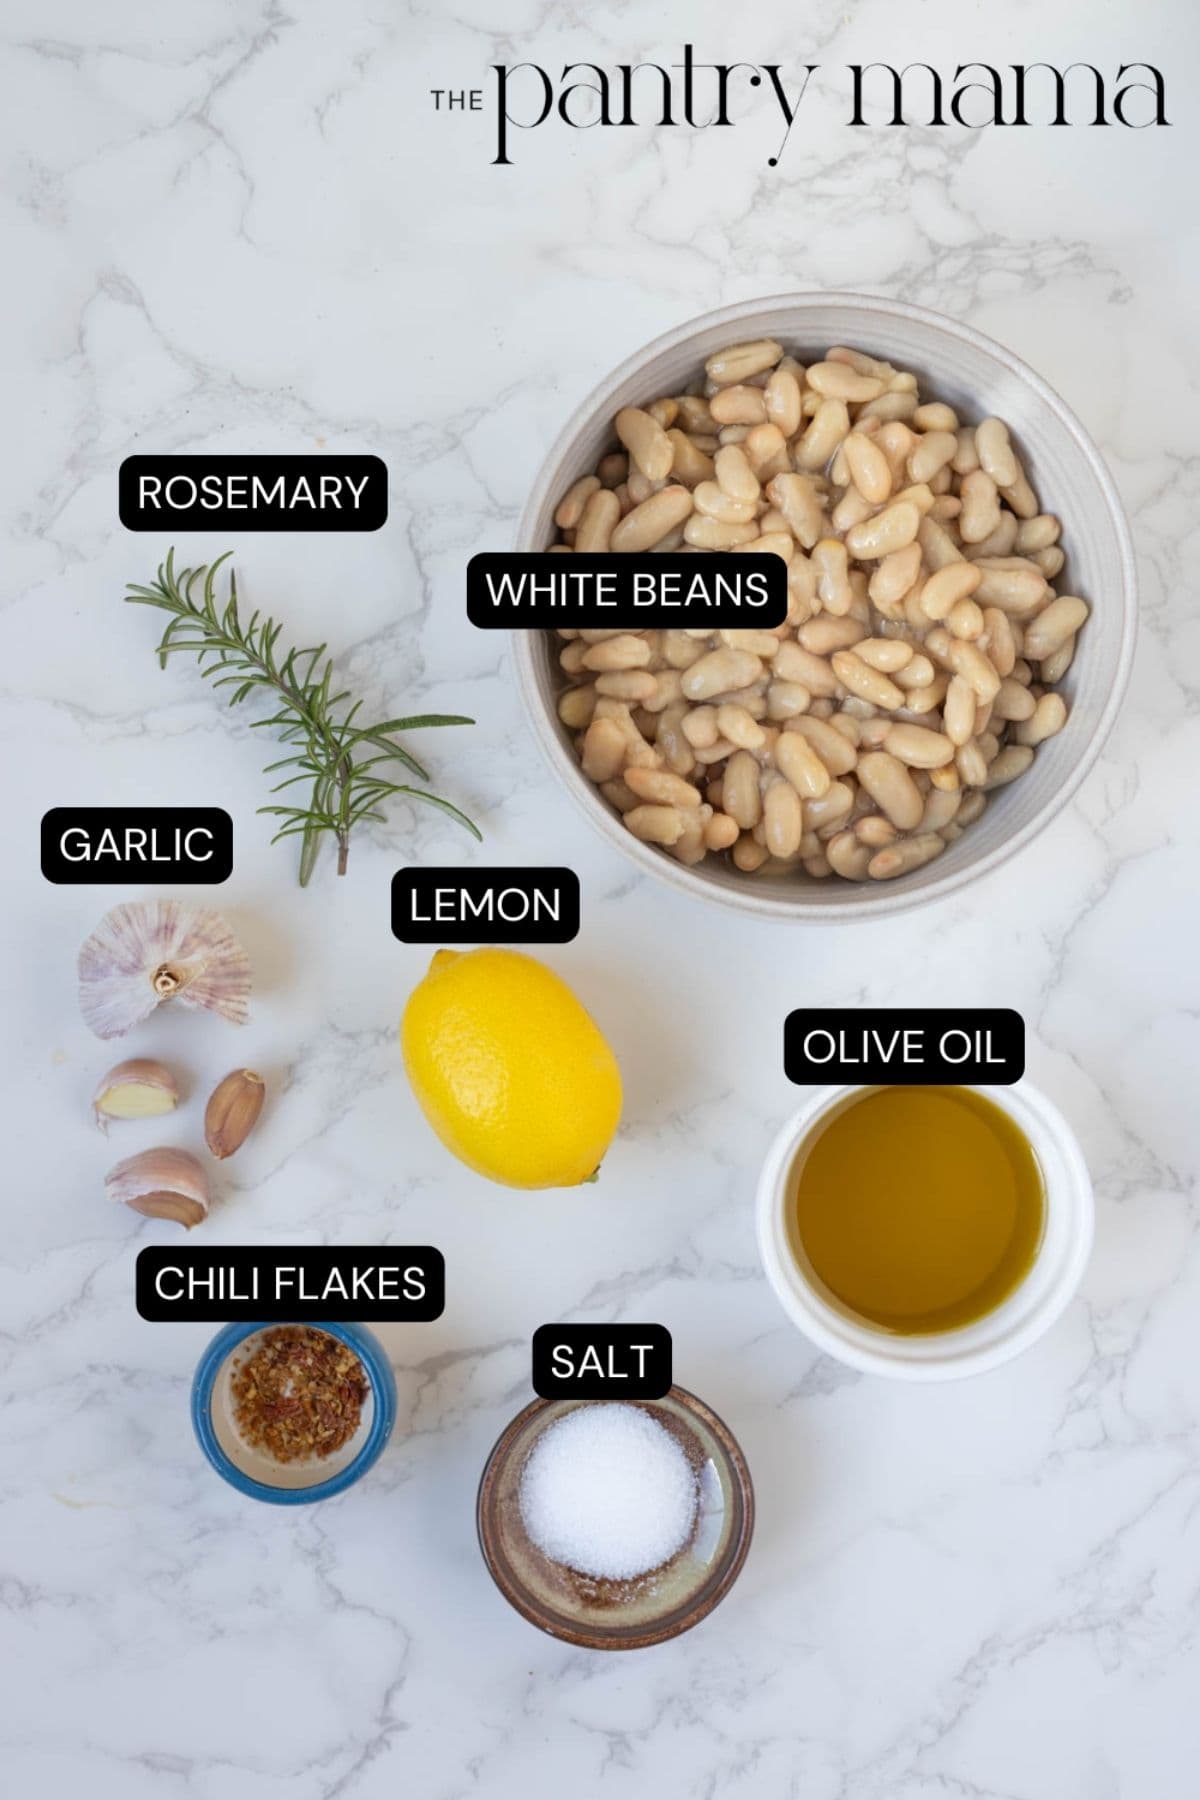
- White Beans - I usually use cannellini beans, but butter beans or Great Northern beans are also good options.
- Olive Oil - Use a good quality extra virgin olive oil for the best flavor. You’ll use half in the dip itself and half to gently infuse with rosemary. Because this recipe is so simple, the flavor of the oil really shines through.
- Lemon - I love fresh lemon here for a bright and zesty lift. You’ll want an unwaxed lemon since you’ll be using the zest along with the juice.
- Salt
- Fresh Garlic - A hit of fresh garlic adds lots of flavor to this white bean dip, but you could use garlic powder or granules if that’s what you have on hand.
- Fresh Rosemary - You could use another sturdy herb like thyme as well.
- Chili Flakes
How to Make White Bean Dip
This recipe is really simple, comes together in the food processor, and is all about flavoring to your liking. It's similar to my easy hummus recipe, but with even less ingredients.
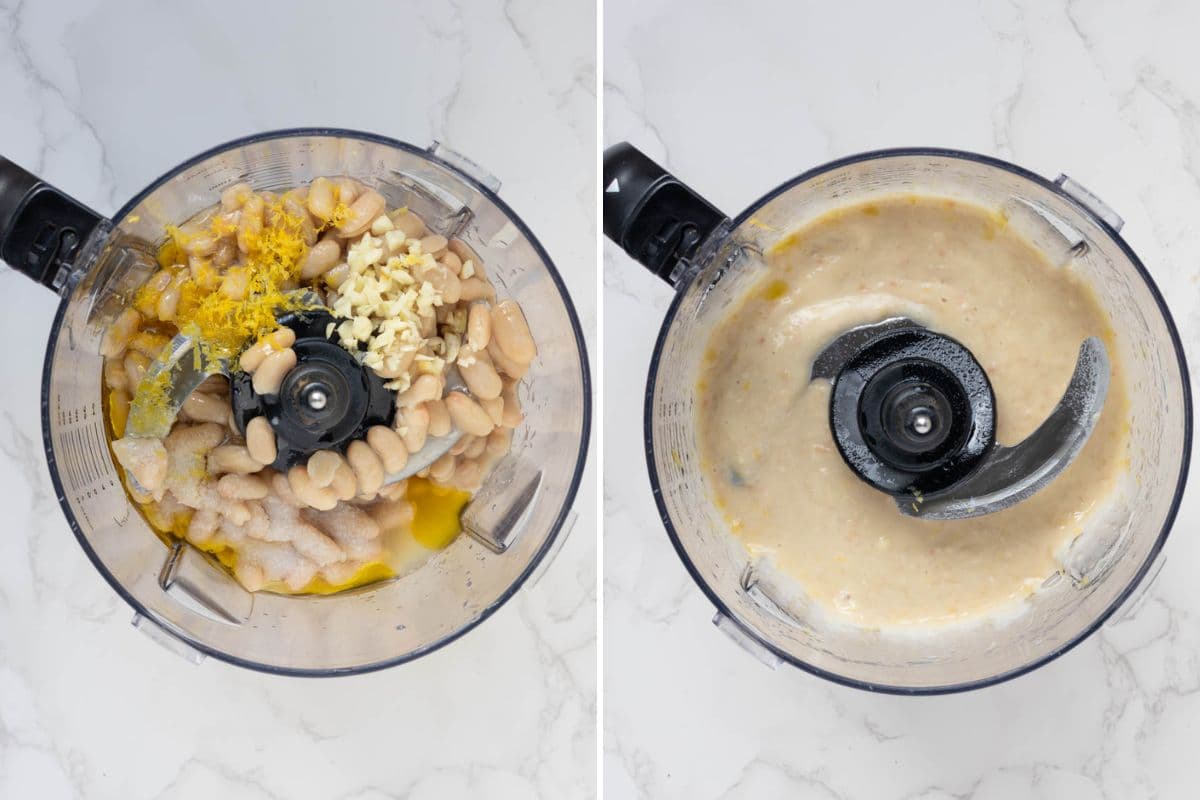
Drain the beans (if they come in a good stock or brine, reserve the liquid to thin out the dip if needed, or you can use water). Combine the beans, half of the olive oil, lemon juice and zest, salt, and garlic in the bowl of a food processor. Pulse until the beans are mostly pureed, leaving a few chunks if you like a thicker dip.
Put the remaining oil and rosemary sprig in a small skillet and heat over medium-high heat. Toast the rosemary in the oil for a few minutes on each side, until crispy, browned and fragrant.
Set the rosemary sprig aside on a paper-towel lined plate (it looks great as a garnish for the dip) and pour the oil into the bowl of the food processor.
Whizz the dip one more time to incorporate the flavored oil, then taste and adjust with additional salt or other spices as desired. If the dip is too thick, add a bit of warm water or reserved bean stock to thin it to your liking.
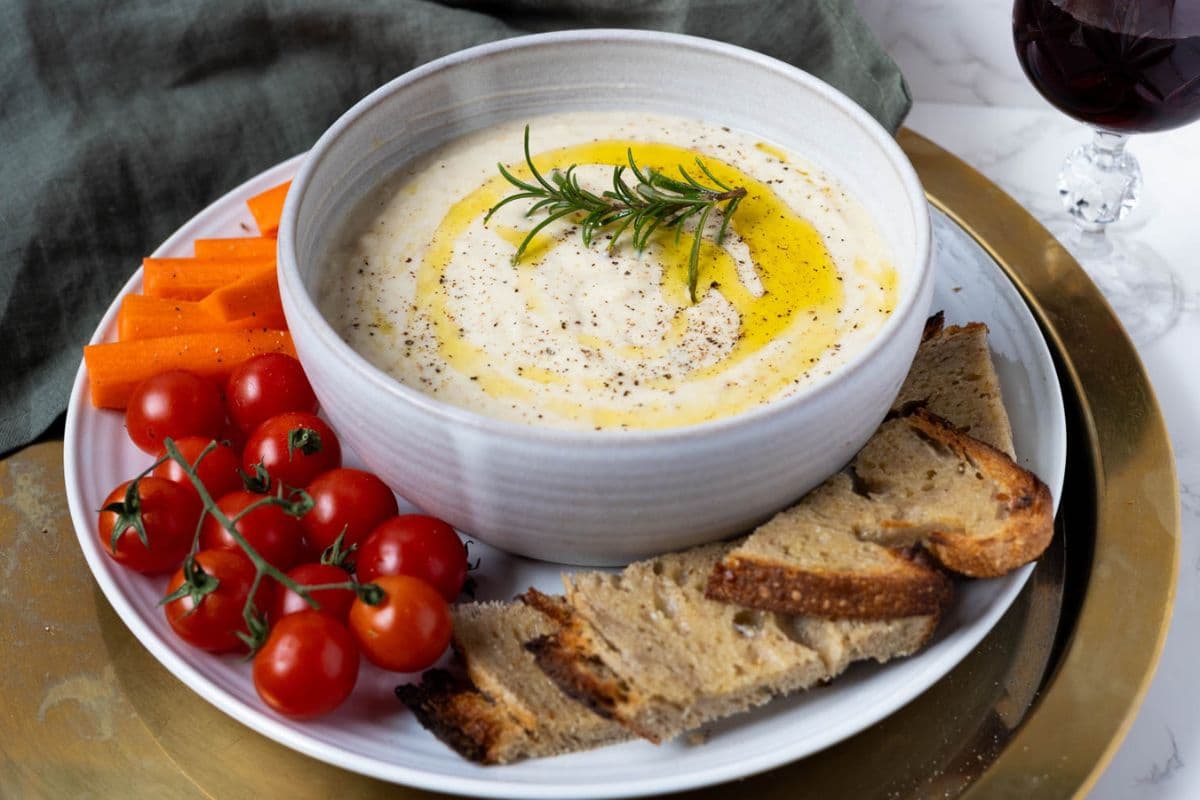
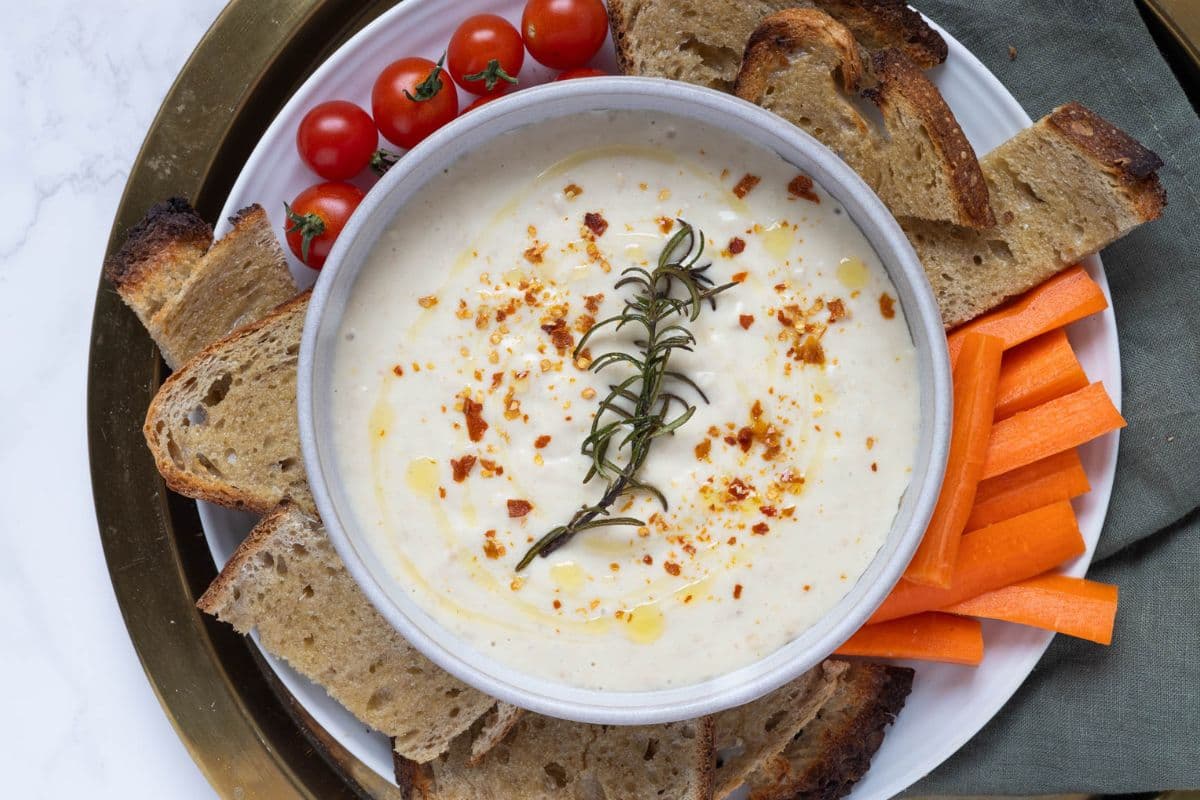
Transfer to a serving bowl and garnish with the fried rosemary, chili flakes, and another drizzle of oil. If you’d prefer a non-spicy garnish, a few grinds of black pepper will do the trick.
Kate’s Recipe Tips
- If you don’t like mincing garlic, put the cloves into the food processor first. Use the pulse function to chop it on its own before adding the beans to ensure the cloves get minced up and you don’t end up with big pieces of raw garlic.
- If you don’t like the liquid that comes with the beans, drain and rinse them first. Then if the dip is too thick, drizzle a spoonful of warm water into the food processor to thin out the dip.
- Try sprinkling with chopped fresh herbs like parsley or basil!
How To Use/What To Eat With
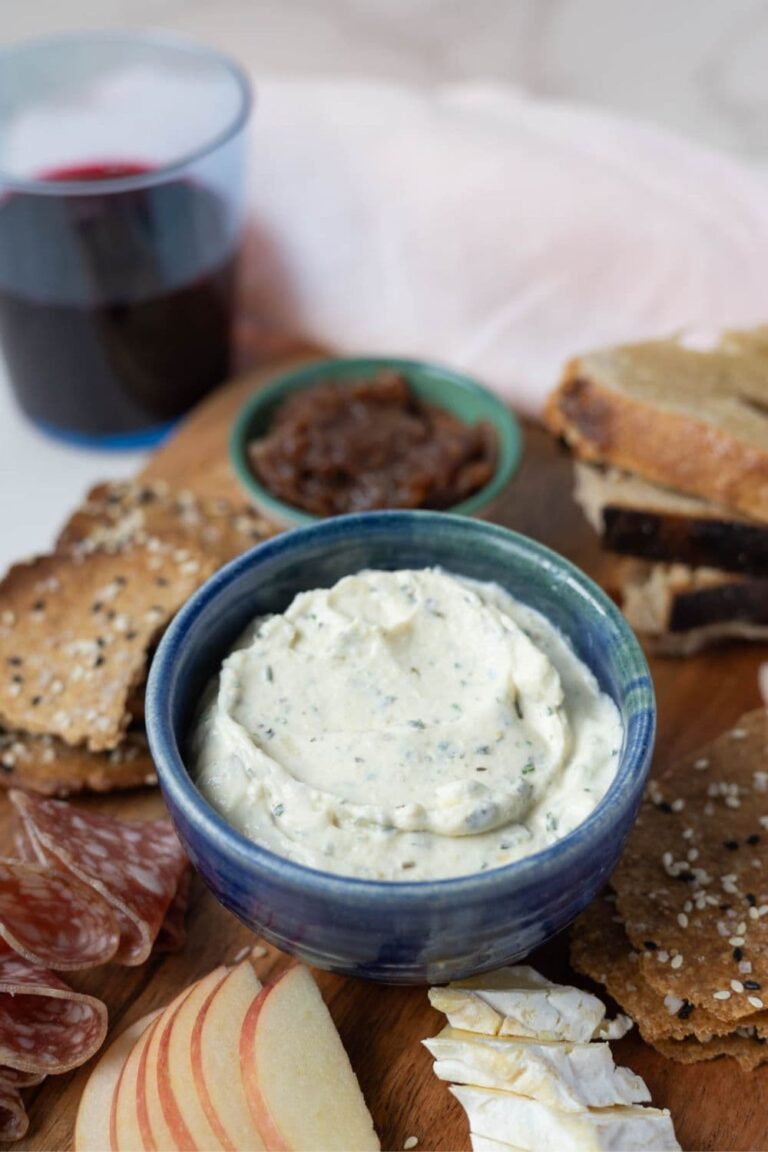
I love serving this white bean dip in a shallow dish with whole wheat sourdough crackers, a simple sourdough focaccia, or a simple sourdough bread (toasted and buttered, of course). During the fall and early winter months, it's especially nice with fresh pomegranate on top.
You can make a cheese or vegetable platter with this dip, and any of my sourdough discard cracker recipes, like sourdough ranch crackers or sourdough lavosh, and fresh cut vegetables like cucumbers and carrots.
This hearty dip would taste great with my Italian herb and cheese sourdough bread.
You can also make an impressive party spread with this white bean dip alongside other accompaniments such as homemade Boursin, beer cheese dip, or red pepper cream cheese dip.
How To Store + Freeze
Store the white bean dip in an airtight container in the refrigerator for up to 5 days. A thin layer of olive oil on top helps keep it fresh and prevents it from drying out.
You can freeze this dip if needed. Spoon it into a freezer safe container, leaving a little room at the top for expansion. Freeze for up to 2 months. Thaw in the refrigerator and give it a whizz in the food processor again if the texture is grainy or watery.
Frequently Asked Questions
Sure, you could use a sprig or two of fresh thyme. Other flavorings that work well toasted in oil include cumin seeds, chili flakes, or another spice of your choice.
Sure, you could use chickpeas to make this more like a hummus, or black beans to make a black bean dip. White beans have a slightly more neutral flavor, so just be prepared for different flavors or textures depending on the bean variety.
Absolutely! This would taste fabulous with your own beans. You’ll make the dip the same way, and I highly recommend adding the bean cooking liquid to flavor the dip as well.

White Bean Dip
Equipment
- Food Processor
- Zester
Ingredients
- 2 cans White Beans such as cannellini beans (about 400g drained)
- 80 g Olive Oil
- 1 Lemon (zest and juice)
- 5 g Salt
- 2 cloves Garlic minced
- 1 sprig Rosemary
- Crushed Chili Flakes for garnish, optional
Instructions
- Combine the beans, half of the olive oil, lemon juice and zest, salt, and garlic in the bowl of a food processor. Pulse until the beans are mostly pureed, leaving a few chunks if you like a thicker dip.
- Place the remaining oil and rosemary sprig in a small skillet and heat over medium-high heat. Toast the rosemary in the oil for a few minutes on each side, until crispy, browned and fragrant.
- Set the rosemary sprig aside on a paper-towel lined plate (I use it to garnish the dip) and pour the oil into the bowl of the food processor. Whizz the dip one more time to incorporate the flavored oil, then taste and adjust with additional salt or other spices as desired. If the dip is too thick, add a bit of warm water or reserved bean stock to thin it to your liking.
- Transfer to a serving bowl and garnish with the fried rosemary, chili flakes, and another drizzle of oil. If you’d prefer a non-spicy garnish, a few grinds of black pepper will do the trick.
Notes
- If you don’t like mincing garlic, put the cloves into the food processor first. Use the pulse function to chop it on its own before adding the beans to ensure the cloves get minced up and you don’t end up with big pieces of raw garlic.
- If you don’t like the liquid that comes with the beans, drain and rinse them first. Then if the dip is too thick, drizzle a spoonful of warm water into the food processor to thin out the dip.
- Try sprinkling the dip with chopped fresh herbs like parsley or basil!
Nutrition