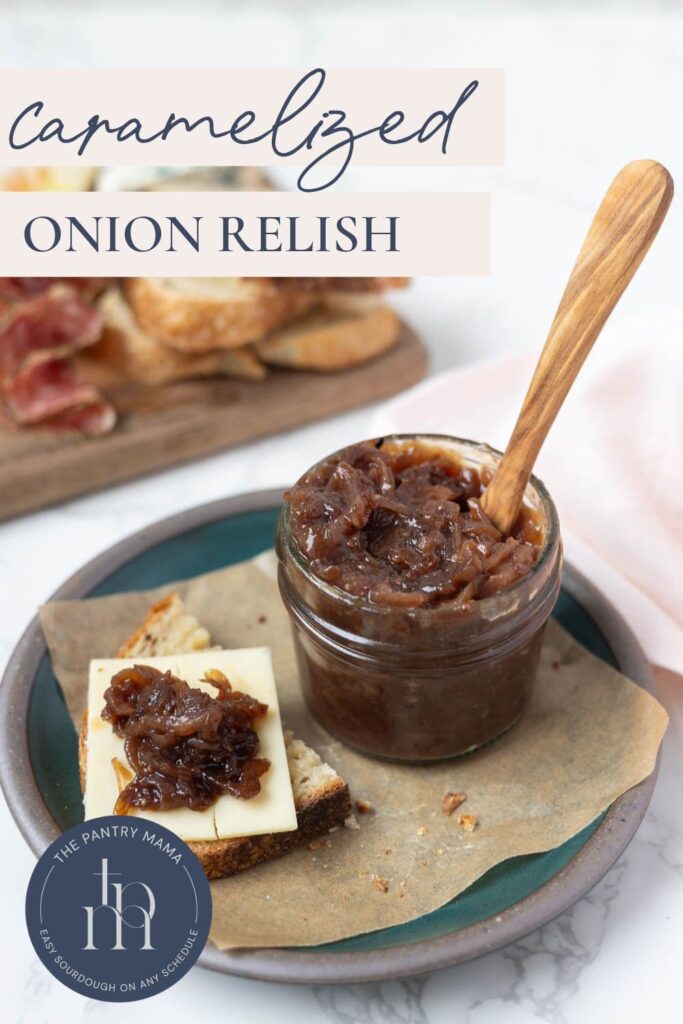
Caramelized Onion Relish
This post may contain affiliate links.
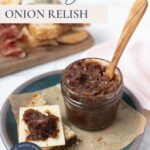
Sweet and savory and good on so many things, this caramelized onion relish just might be your new favorite condiment. A pile of sliced onions gets cooked down in butter, then slowly simmers with brown sugar and both balsamic and red wine vinegar for the perfect balance of flavors. It’s a delicious addition to everything from cheeseboards to burgers, and a jar makes the perfect gift!
Why You’ll Love This Recipe
- Massive Flavor - I already love onions, but caramelizing them in butter, then bringing in sugar and vinegar really takes them to the next level! I find myself pulling the jar out of the fridge for almost every meal to add a big flavor boost.
- Great Use of Extra Onions - If you’ve ever bought a big bag of onions and found yourself with a few you need to use up, this is an ideal recipe. Don’t let any of those good onions go to waste!
- Easy to Customize - If you like a sweeter relish, go ahead and add some extra sugar. If you prefer your condiments tart and tangy, feel free to add more vinegar. And I love the bite of stirring in a spoonful of whole grain mustard at the end, but no worries if that’s not your thing. That’s the best part of homemade relish. You get to make it how you like it!
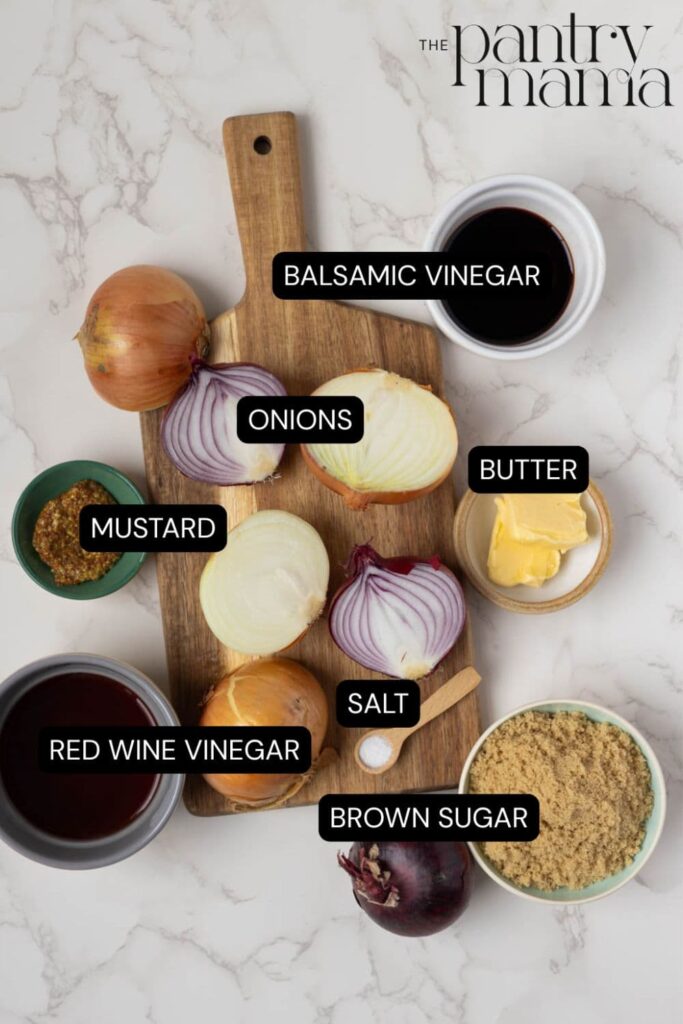
Ingredients
- Onions - You can use any type of onion really, I used a mix because that’s what I had in the kitchen. I do love the pop of color from the red onion but once the brown sugar and vinegar has been added you can’t really tell the difference.
- Butter - I always use salted butter but you can use whatever you have.
- Brown sugar - I like the flavor of brown sugar here, but you can use white sugar as well.
- Red Wine Vinegar and Balsamic Vinegar - I love the depth of flavor you get from using both vinegars.
- Mustard - I like whole grain mustard here but Dijon or brown mustard would work well too.
- Salt - Any kind of salt is fine.
How to Make Caramelized Onion Relish
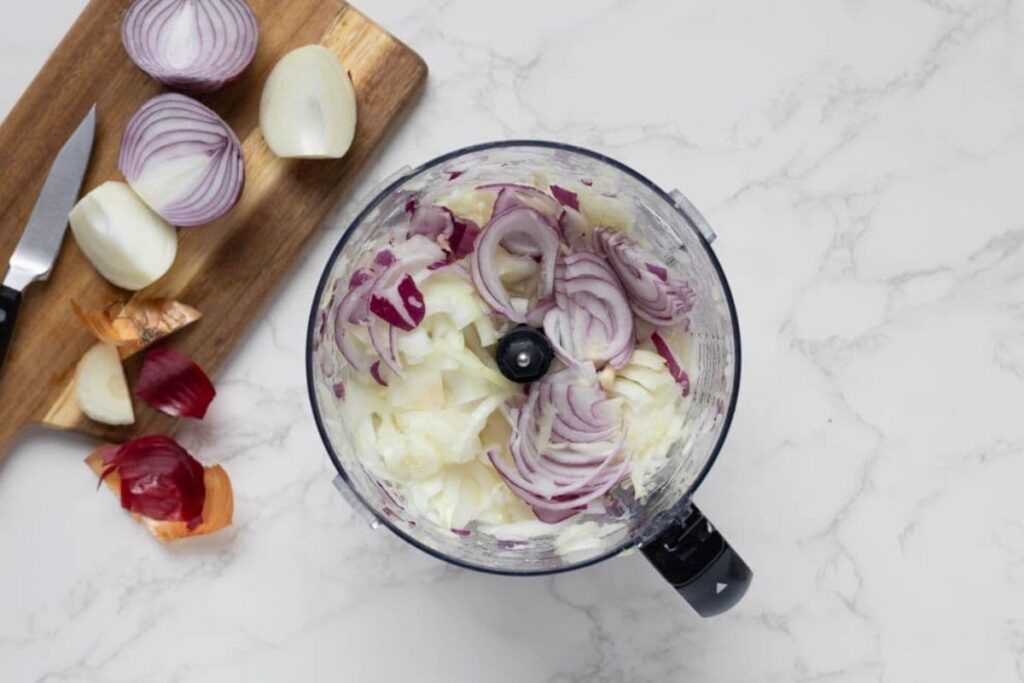
Slice up the onions (I stick them in the food processor since I hate chopping onions. I like the texture of the larger onion pieces but you could also dice them if you prefer).
Melt the butter in a heavy based pot or Dutch oven over medium-high heat. Once the butter has melted, add the onions with a pinch of salt, and stir to combine. Cover the pan and cook, stirring every few minutes and scraping any browned bits off the bottom of the pan. This is a slightly higher temperature than I often use when caramelizing onions, but I realized the medium-high heat makes it go so much faster! Adding the lid also helps trap the heat and bring out more flavor.
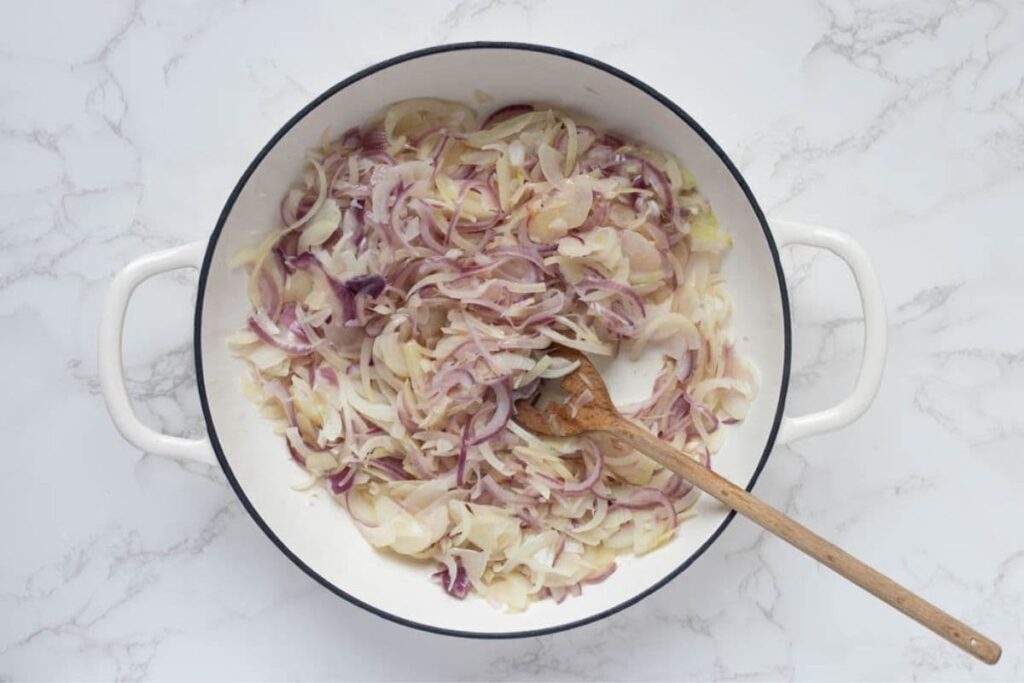
You want to cook until the onions are very soft and lightly caramelized, about 20 minutes, stirring frequently. If the onions start to burn on the bottom of the pan, reduce the heat to medium. And don’t worry if the onions catch a bit, you’ll scrape the pan to remove the browned bits when you add the vinegars.
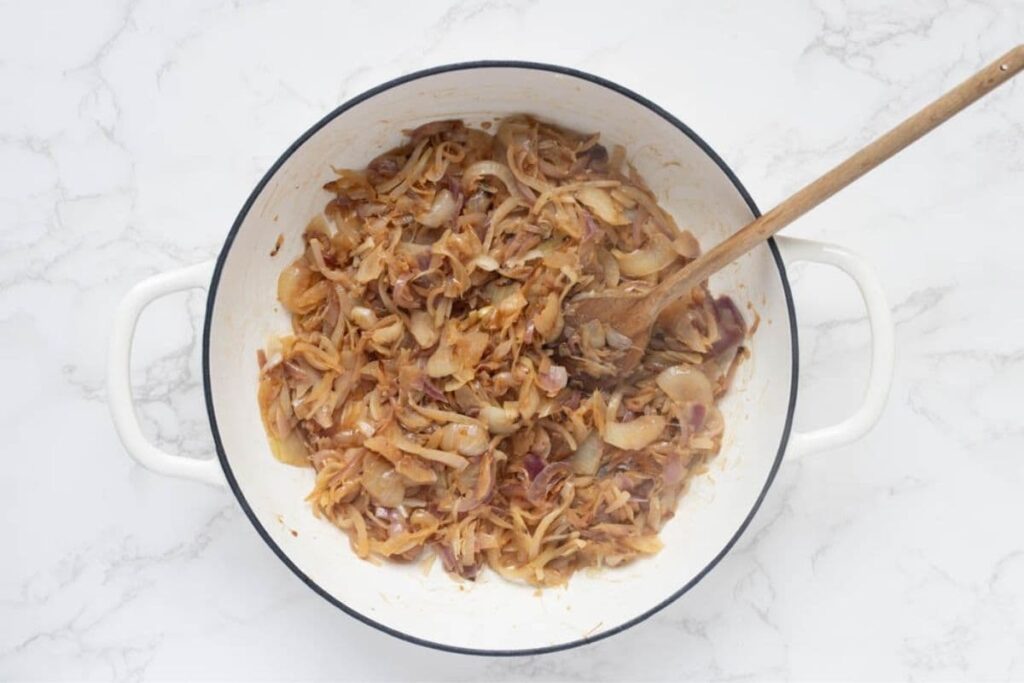
Once the onions are tender and lightly browned all over, add the sugar. Stir to coat the onions until the sugar melts, then add the red wine vinegar, balsamic vinegar, and mustard. Use a wooden spoon or spatula to scrape any browned bits off the bottom of the pan.
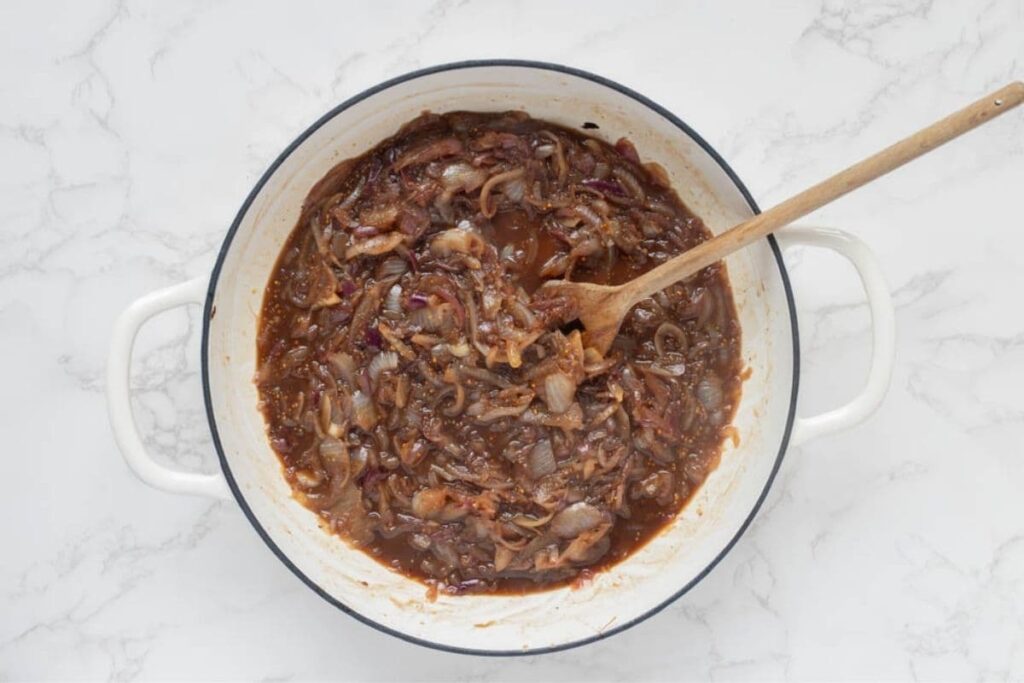
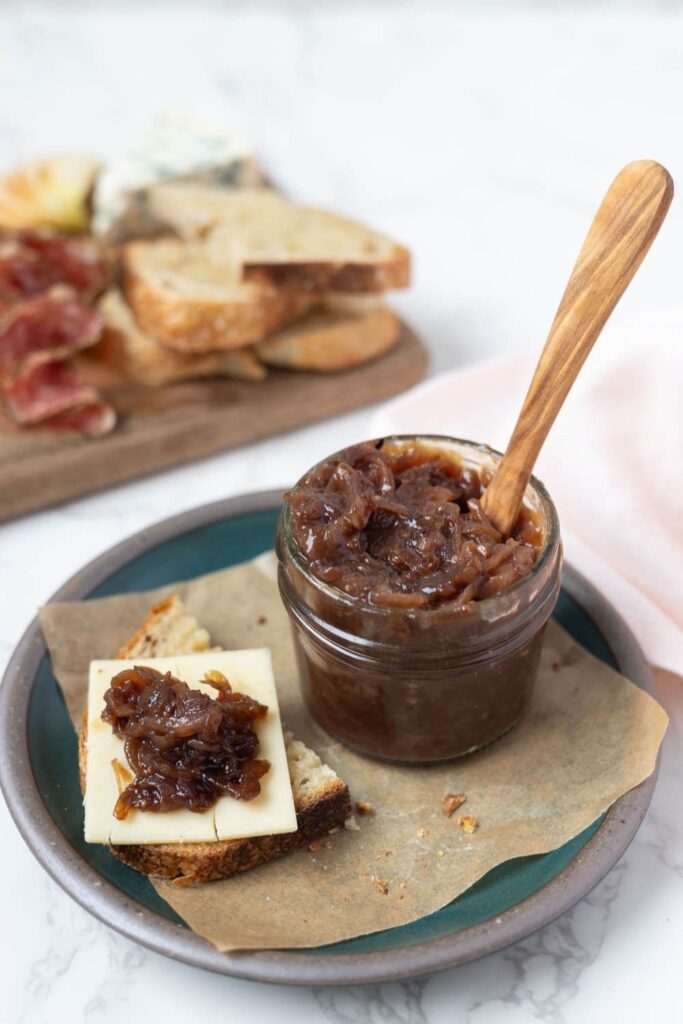
Turn the heat down to medium and keep simmering the mixture until you like the consistency. Mine took about 20 to 25 minutes. I like the relish to be spoonable and spreadable without any excess liquid. If you want to test it, a spoon dragged across the bottom of the pan should take a few seconds to fill in.

You can either store the caramelized onion relish in an airtight container in the fridge or put them in jars for longer storage. If you’re using jars, pour boiling water into your jars and allow to sit for a few minutes before carefully emptying them out. Using a stainless steel jar funnel and ladle, carefully fill the jars, leaving around 1cm head room at the top of the jar. Place the lids on and seal immediately. Let the jars cool on the counter and store in the fridge.
Tips For Success
- I hate cutting onions, but it really does help to have these onions cut pretty evenly or the bigger pieces won’t caramelize properly. I let the food processor do almost all the work, but if I notice any really big pieces have made it through I’ll quickly slice them up by hand.
- I recommend a wide pan here so the onions have enough room to caramelize instead of steaming in a big pile.
- You’ll want a sturdy wooden spoon or spatula for scraping the bottom of the pan after adding the vinegars, they’ll help release any browned bits from the pan, which adds lots of flavor.
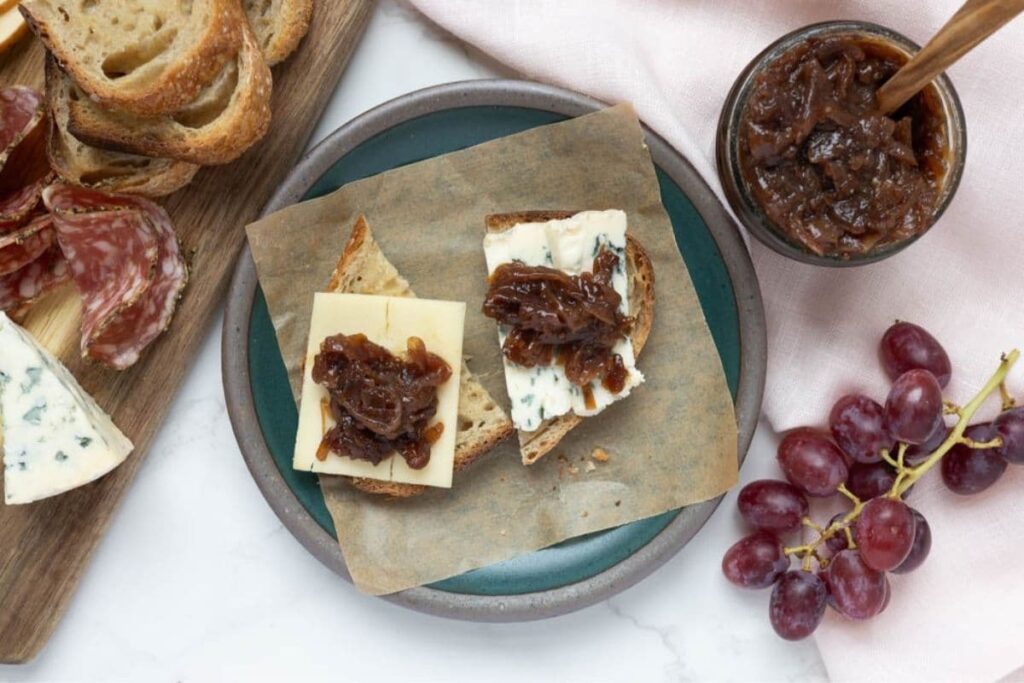
How To Use/What To Eat With
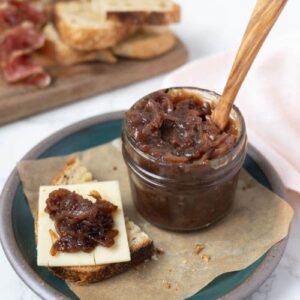
I love eating a sourdough grilled cheese sandwich with a nice strong cheddar and stuffing in a lot of this caramelized onion relish! Seriously, it’s such a good combo.
The relish is also fantastic as a topping for burgers and hot dogs. Try a burger with my sourdough burger buns and this relish, I think you’re going to love it.
It’s so fun to plate up a simple cheeseboard with this caramelized onion relish as a feature! It’s so good on toasted buttered sourdough with cheddar or blue cheese, or try it with these delicious 2 ingredient sourdough crackers.
You know we’re all about family pizza night, and this relish makes a fabulous pizza topping (we love using my sourdough discard pizza dough)!
How To Store + Freeze
If you think you’ll eat this relish soon, you can just store it in an airtight container in the fridge and it should last at least a week. I’ve found it disappears from my kitchen way faster than I think it will! If you’re looking for longer term storage, store the relish in sealed sterilized jars according to the above instructions and it should last in the refrigerator for a few months. You can also freeze the onion relish with a bit of extra room, although it won’t expand much as there’s not a ton of liquid.
Frequently Asked Questions
Yes, you can make this relish in a slow cooker by cooking the onions and butter on High, stirring occasionally, until soft and caramelized, usually about 2 to 3 hours. Add the sugar, vinegars, and mustard and cook, uncovered, on High for another 2 to 3 hours, or until the mixture reaches a consistency you like.
You could swap in a white wine vinegar for the red wine vinegar if that’s what you have. And if you don’t have balsamic vinegar, you could use all red wine vinegar, but it won’t have the same depth of flavor. I don’t recommend a white vinegar as the flavor is quite strong.
Yes, you can use a neutral oil or an olive oil instead of butter to caramelize the onions, which would make this caramelized onion relish both vegan and dairy-free. I generally recommend checking your ingredient labels just to be sure though.
Caramelized Onion Relish
Equipment
- Heavy Based Pan
- Sharp Knife and Cutting Board
- Food Processor (optional)
- Wooden Spoon or Spatula
- Stainless Steel Ladle and Jar Funnel
- 2 Jars (2 x 350mls jars)
Ingredients
- 30 g Butter
- 750 g Sliced onions (approx. 5 onions)
- 2 g Salt (just a pinch)
- 120 g Brown Sugar (light or dark is fine)
- 100 g Red Wine Vinegar
- 60 g Balsamic Vinegar
- 15 g Wholegrain Mustard
Instructions
- Melt the butter in a heavy based pot or Dutch oven over medium-high heat. Once the butter has melted, add the onions with a pinch of salt, and stir to combine. Cover and cook, stirring every few minutes, until the onions are very soft and caramelized, about 20 minutes. Scrape up any brown bits as you go. If the onions start to burn on the bottom of the pan, reduce the heat to medium. (Don’t worry though, you’ll scrape the pan to remove the browned bits when you add the vinegar. )
- Once the onions are lightly browned, add the sugar and stir until melted. Add the red wine vinegar, balsamic vinegar, and mustard. Turn the heat down to medium and simmer for about 20 to 25 minutes, or until you like the consistency. (A spoon dragged across the bottom of the pan should take a few seconds to fill in.)
- The relish can simply be stored in an airtight container in the fridge, or transferred to jars. If storing in jars, prepare by pouring boiling water into your containers and allow to sit for a few minutes before carefully emptying them out. Using a stainless steel jar funnel and ladle, carefully fill the jars, leaving around 1cm head room at the top of the jar. Place the lids on and seal immediately, then let cool on the counter before transferring to the fridge.
Nutrition


How much butter? I don’t see it in the re pie. Thanks
I use 30g of butter 🙂
I am trying to get into canning. Can this recipe be canned?
Yes it can be canned 🙂