This post contains affiliate links. Please see our disclosure policy.
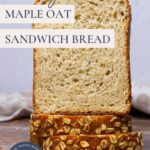
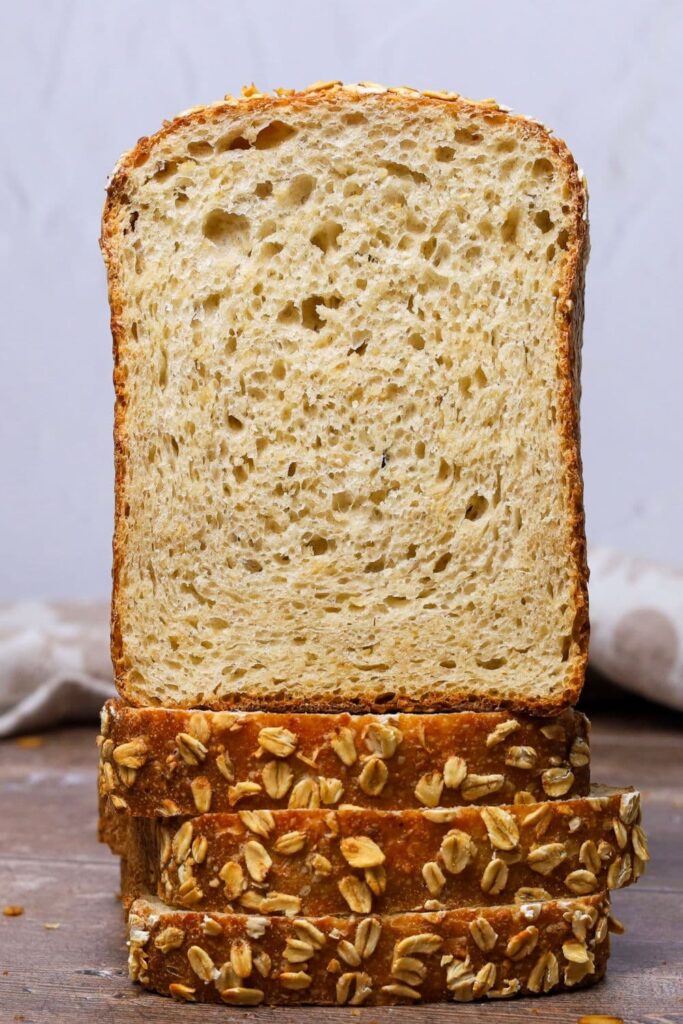
There’s something incredibly comforting about a soft, hearty loaf of homemade sandwich bread, especially when it’s naturally leavened with sourdough and subtly sweetened with maple syrup. This sourdough maple oat sandwich bread is everything you want in a slice. It’s soft yet sturdy, slightly nutty from the oats, with a hint of earthy sweetness from real maple. Perfect for everything from PB&J to grilled cheese to your morning toast with butter.
Why You’ll Love This Recipe!
Dairy Free – this recipe is dairy free and perfect if you need to avoid butter, which is in a lot of sandwich loaves. I’ve used olive oil in place of the butter but you can replace the olive oil with coconut oil or even avocado oil if you prefer.
Perfect All Round Loaf – while this loaf is labelled as a sandwich loaf, it’s also perfect for serving alongside soups or a special lunch or dinner. This bread is simple enough to make everyday, yet special enough to be served at any occasion!
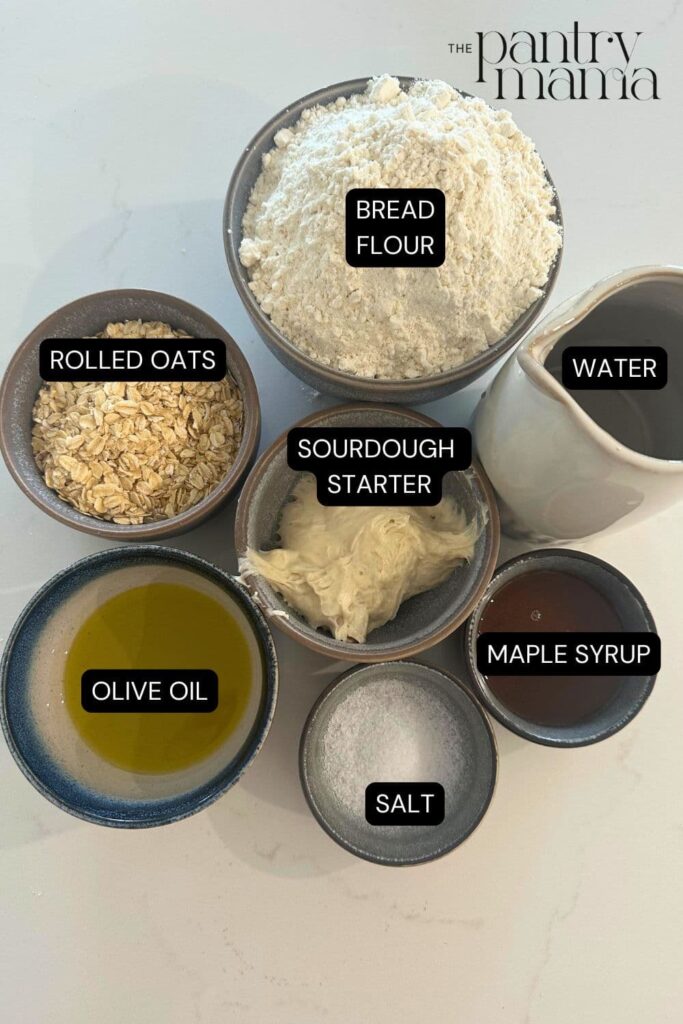
Ingredients
- Sourdough Starter – You’ll need an active sourdough starter that has been fed and is at it’s peak to make this loaf.
- Water
- Maple Syrup – I’ve used maple syrup here as an alternative to honey because it means this loaf is perfect if you’re following a vegan diet. We also just love the maple syrup flavor!
- Rolled Oats – it’s important to use traditional rolled oats here and not quick oats. I love that this is an easy way to add extra nutrients into the bread my kids are eating!
- Salt – salt is used for flavor and to strengthen the gluten network for this loaf.
- Olive Oil – I’ve used olive oil to create a dairy free bread. I also find that it makes the crumb of this loaf lighter than it would when using butter. If you are ok with butter, you can of course use it. If you don’t want to use olive oil, coconut oil or avocado oil are good alternatives.
- Bread Flour – as always a good quality, high protein bread flour will give you the best result.
How To Make Sourdough Maple Oat Sandwich Bread
Add sourdough starter, water, maple syrup, olive oil and rolled oats to a mixing bowl. Stir ingredients together so that the sourdough starter is dissolved and the oats are coated in water.
Now add the bread flour and salt and bring it all together in a dry, barely mixed together dough. This sandwich bread is lower in hydration so it will be quite a dry dough. Cover the dough and allow to sit for around one hour.
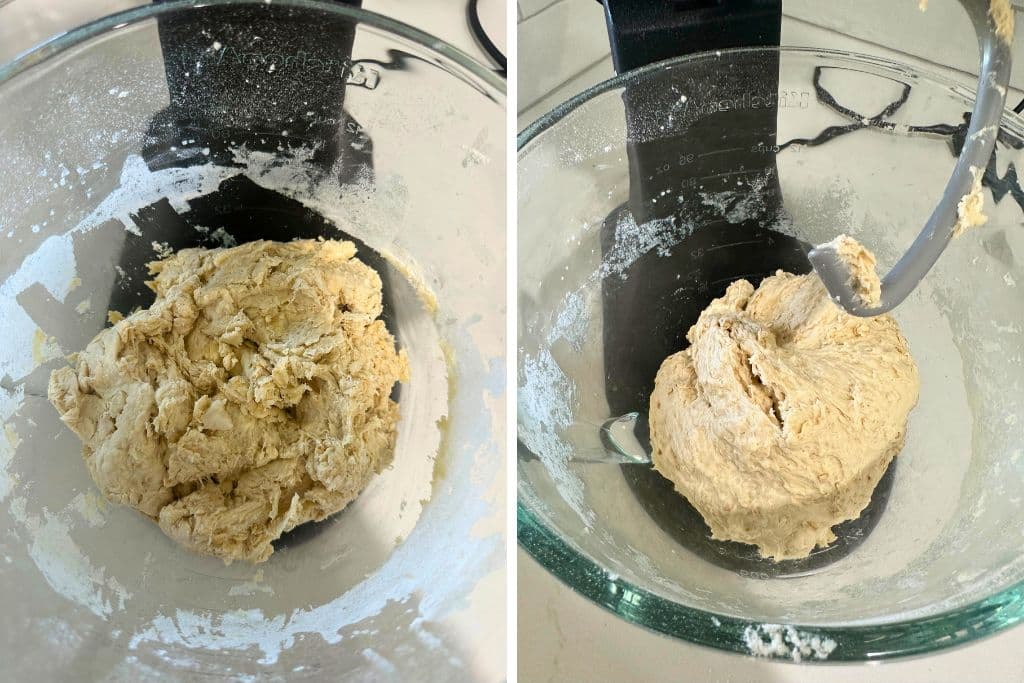
Tip the dough out onto a clean surface and knead it until it forms a soft, elastic dough. You won’t need any extra flour for this one as it won’t be sticky at all.You can easily do this step in a stand mixer using the dough hook attachment on speed 1-2 if you prefer. It is much quicker and easier!
Pop the smooth, kneaded dough into a bowl and cover. Set aside for the dough ferment. You want it to rise around 30 to 50% – you do not want it to double for this recipe. Because it’s a lower hydration dough it will take time to rise so be patient.
Once the dough has risen, tip it out onto a clean surface and pull the dough into a rough rectangle with the short edge facing you. All you need to do here is roll the dough up into a log – there’s literally no shaping needed!
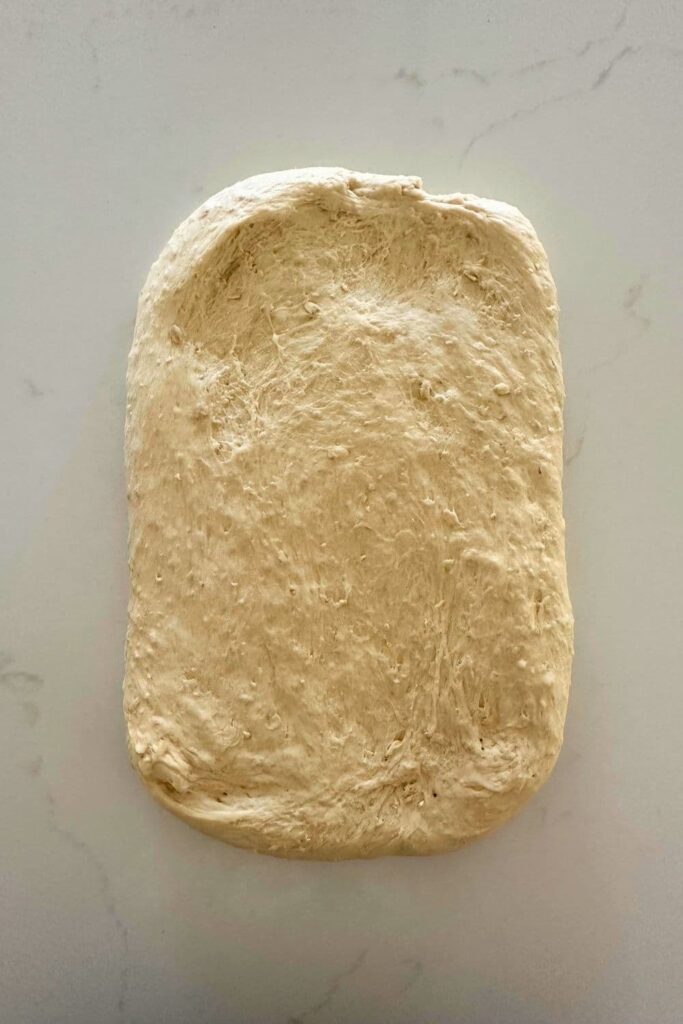
If you want to add rolled oats to the top of the dough, I recommend doing it at this stage. Sprinkle a few rolled oats out onto the counter and roll the dough into the oats before placing the dough log into a well oiled bread pan.
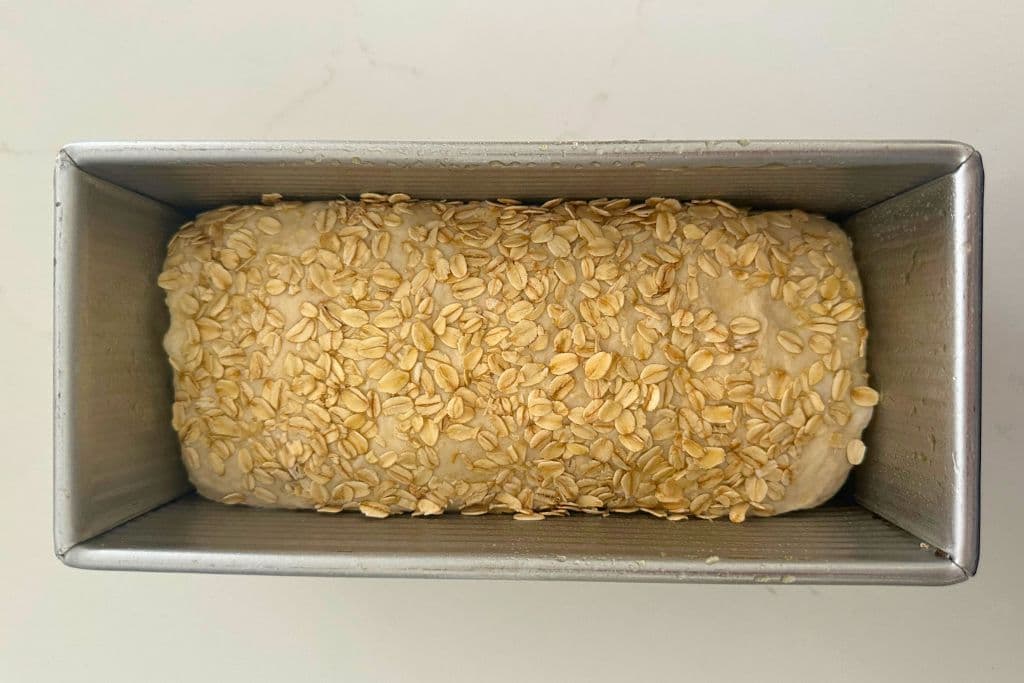
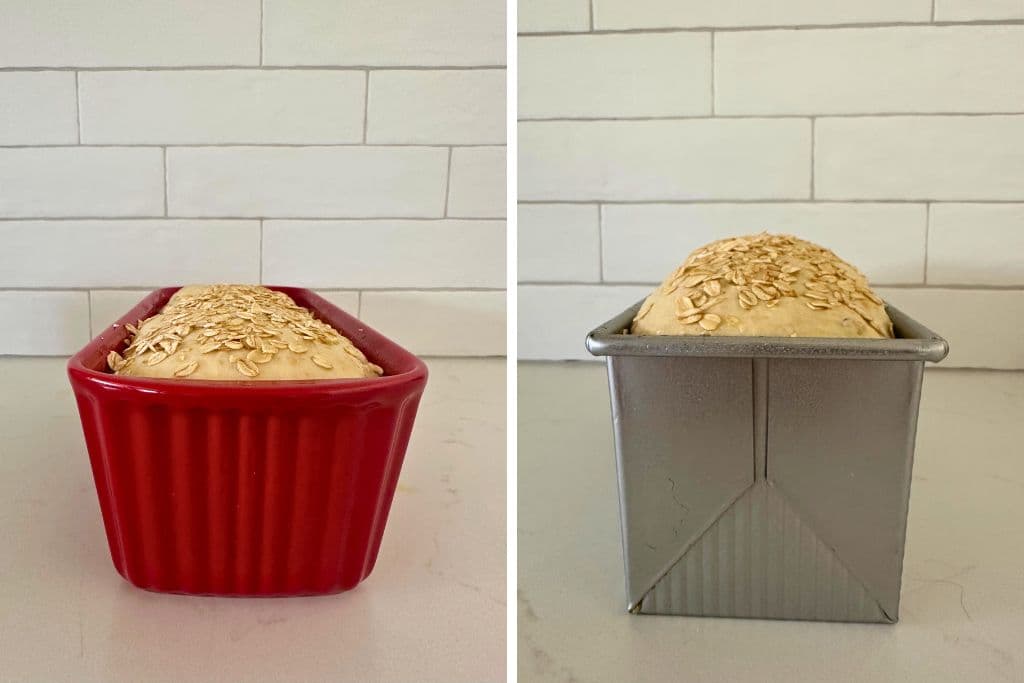
Cover the pan and allow the dough to rise up over the lip of the bread pan just a little. Ideally you want that domed top. Again because this is a lower hydration dough this will take some time (you can see my dough in the pan a little further down).
When the bread is ready to bake, preheat your oven to 200C (390F).
Spritz the top of the dough with water and place the bread pan into the oven for around 30 minutes. Keep an eye on this one as the top is prone to getting very brown due to the maple syrup.
When the bread is golden brown, remove from the oven and tip out of the tin to cool on a wire rack. Allow the bread to cool fully before slicing.
Baker’s Timeline
This is a rough timeline for making a loaf of sourdough maple oat sandwich bread. This particular timeline sees the loaf placed into the fridge for an overnight cold fermentation. This is definitely not necessary, especially with a sandwich loaf, however it’s always a handy option if you don’t want to bake it that night. I just wanted to show you some options with this loaf!
| TIME | PROCESS |
|---|---|
| 9 pm | Feed sourdough starter before bed (1:3:3 ratio so it peaks early the next morning). |
| 7 am | Mix dough and allow to rest before kneading. |
| 8 am | Knead dough until soft and elastic. Leave on counter to bulk ferment til risen by around 30 to 50% (remember this is a low hydration dough so it takes a long time). |
| 8.30 am | Leave on counter to bulk ferment til risen by around 30 to 50% (remember this is a low hydration dough so it takes a long time). |
| 2 pm | Shape dough and place into loaf pan to finish bulk fermentation. |
| 8 pm | Place loaf into the fridge overnight so you can bake first thing tomorrow morning. Of course you could bake the loaf tonight and allow it cool overnight and slice when you get up (flexibility is key here). |
| 6 am | Make coffee and preheat the oven. |
| 6.30 am | Bake sourdough maple oat sandwich loaf ready for breakfast! |
What Size Loaf Pan
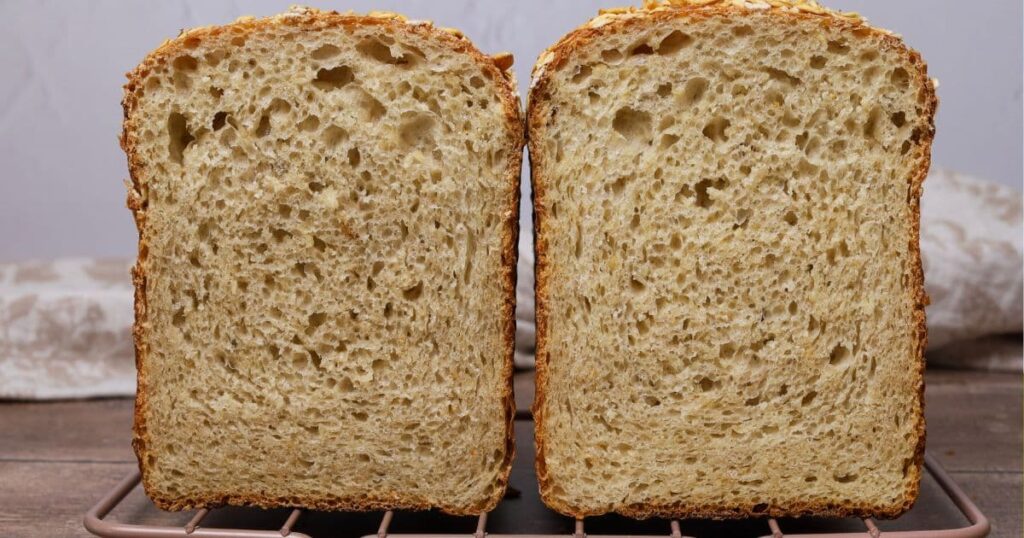
I have baked this sandwich loaf in a few different pans. I’ve tested it in my Emile Henry Ceramic Loaf Pan (pictured in red below) which measures 31.5cm x 13.5cm x 9cm or 12.4″D x 5.3″W x 3.5″H. It makes a longer, more shallow loaf.
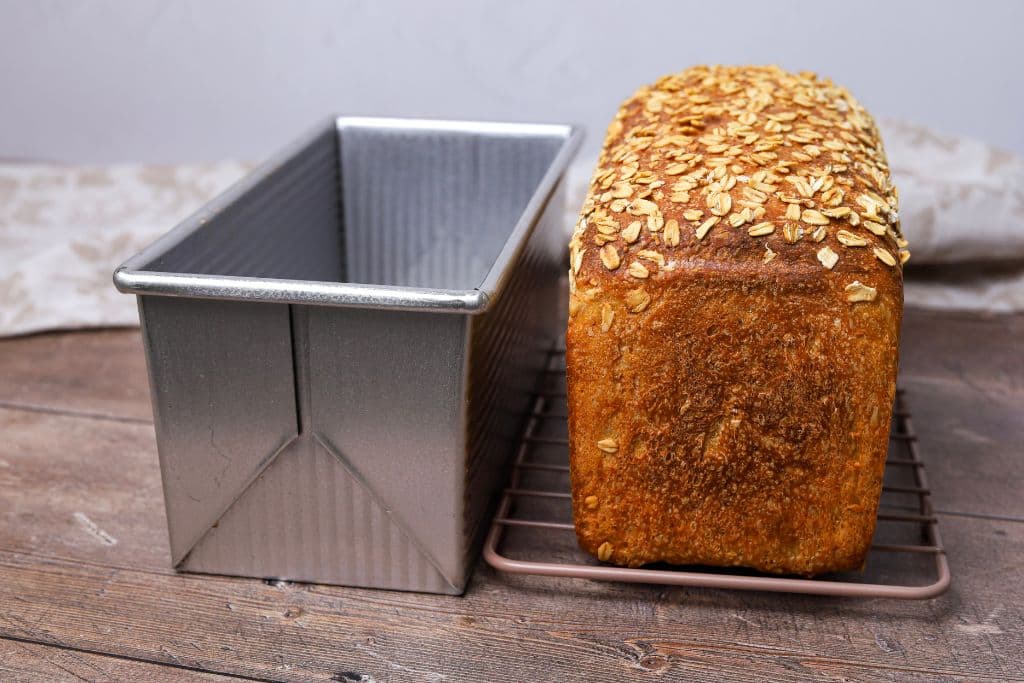
I’ve also baked it successfully in a USA Bakeware Pullman Loaf Pan measuring 9″ x 4″ without the cover on and a USA Bakeware 1.5 pound loaf pan measuring 5″D x 10″W x 3″H.
The bread you can see photographed in this post has been baked in this USA Bakeware Pullman Loaf Pan measuring 9″ x 4″ without the cover on (pictured below). This is definitely my favorite pan to bake in and this particular loaf comes out cleanly and easily with a great shape!
Frequently Asked Questions
No, you don’t have to soak the rolled oats at all! I’ve tested the recipe with soaking the oats and without soaking the oats and found no difference in texture or crumb. And you know I’ll always make it easy for you, so just throw those oats in and make the dough, no soaking required!
Yes you can swap out the maple syrup for honey if you prefer. I’ve used maple syrup because it makes it a good vegan option for those who choose not to eat honey. My eldest son also loves maple syrup, so this was a recipe I made for him (and now continue to make every week because he loves the flavor so much).
Yes, you can replace the active sourdough starter with sourdough discard if you prefer. I would recommend using 7g of instant yeast along with your discard, especially if your sourdough starter is still in the earlier stages.
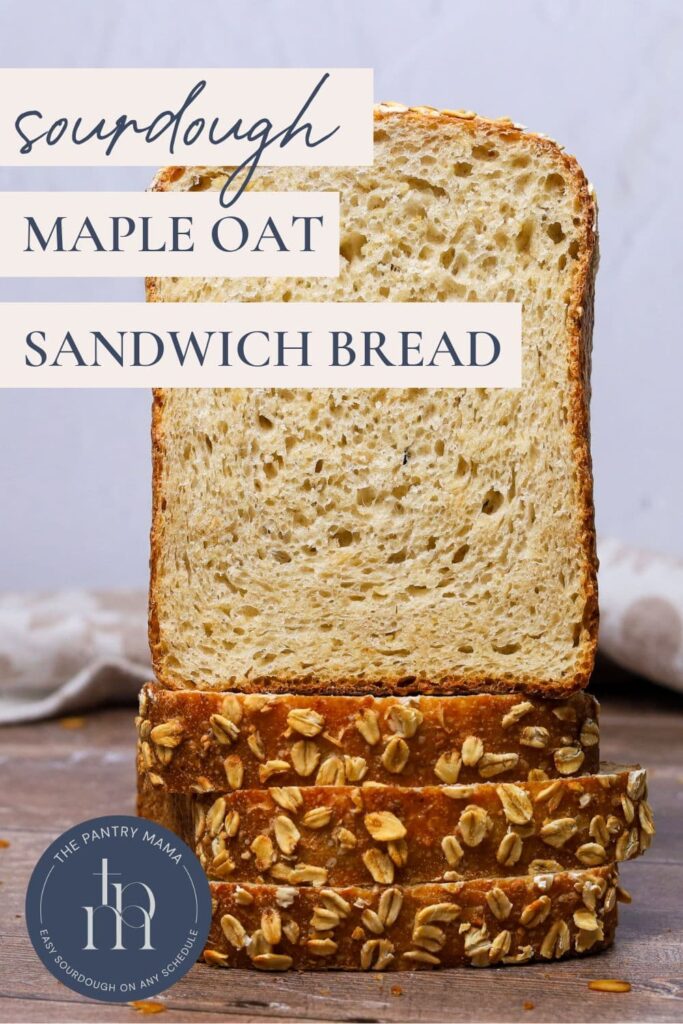

Sourdough Maple Oat Sandwich Bread
Equipment
- Stand Mixer (optional)
- Bread Pan (see notes for size)
Ingredients
- 100 g Sourdough Starter
- 250 g Water
- 60 g Maple Syrup
- 20 g Olive Oil, (can use melted butter if you prefer)
- 100 g Rolled Oats, (traditional oats not quick oats)
- 400 g Bread Flour
- 8 g Salt
Instructions
- Add sourdough starter, water, maple syrup, olive oil and rolled oats to a mixing bowl. Stir ingredients together so that the sourdough starter is dissolved and the oats are coated in water.
- Now add the bread flour and salt and bring it all together in a dry, barely mixed together dough. This sandwich bread is lower in hydration so it will be quite a dry dough. Cover the dough and allow to sit for around one hour.
- Tip the dough out onto a clean surface and knead it until it forms a soft, elastic dough. You won't need any extra flour for this one as it won't be sticky at all.You can easily do this step in a stand mixer using the dough hook attachment on speed 1-2 if you prefer. It is much quicker and easier!
- Pop the smooth, kneaded dough into a bowl and cover. Set aside for the dough ferment. You want it to rise around 30 to 50% – you do not want it to double for this recipe. Because it's a lower hydration dough it will take time to rise so be patient.
- Once the dough has risen, tip it out onto a clean surface and pull the dough into a rough rectangle with the short edge facing you. All you need to do here is roll the dough up into a log – there's literally no shaping needed!
- If you want to add rolled oats to the top of the dough, I recommend doing it at this stage. Sprinkle a few rolled oats out onto the counter and roll the dough into the oats before placing the dough log into a well oiled bread pan (see notes for size).
- Cover the pan and allow the dough to rise up over the lip of the bread pan just a little. Ideally you want that domed top. Again because this is a lower hydration dough this will take some time.
- When the bread is ready to bake, preheat your oven to 200C (390F).
- Spritz the top of the dough with water and place the bread pan into the oven for around 30 minutes. Keep an eye on this one as the top is prone to getting very brown due to the maple syrup.
- When the bread is golden brown, remove from the oven and tip out of the tin to cool on a wire rack.
- Allow the bread to cool fully before slicing.
Notes
Nutrition
Nutrition information is automatically calculated, so should only be used as an approximation.
Like this? Rate and comment below!


This bread looks wonderful. Do you think I could use whole wheat flour for it? I make your 100% whole wheat sandwich loaf all the time and love it!
Yes you can do this, but if using 100% whole wheat flour I would increase the water amount by at least 20g and maybe even more depending on how the dough feels as whole wheat is very thirsty (especially with the rolled oats as well). I’m so glad you love the 100% whole wheat sandwich loaf recipe 🙂 xo
Is it okay to cover the loaf pan with another pan to bake to keep it from getting to brown?
Yes absolutely you can do this 🙂
Looks delicious! Can I bake in a Pullman pan (9×4) with the lid on?
I bake it without the lid and it goes above the rim, so no I wouldn’t put the lid on. I would either reduce the dough weight by about 20% or use a larger pullman pan 🙂
Will be making this recipe tomorrow morning! Love the step “Make coffee” 🙂 Thanks Kate!
Haha! Coffee is essential I say!! Enjoy your coffee and your sourdough bread! I’d love to know what you think of this recipe so make sure you come back and tell me how yours turned out 🙂 xx
Thank you for sharing your recipe! I made it yesterday and was a little concerned that my results weren’t going to be that great as the bread didn’t rise as much as I was expecting. However, I cut into it thus morning after letting it cool overnight on the rack, and it’s soooo good!! My crust is a little hard as I baked it longer than the specified time to reach an internal temp of 200° F, but it doesn’t detract from how delicious the bread is. I will be making this bread on repeat.
I put the dough, after bulk fermentation, into fridge to bake in the morning.
The dough deflated a bit overnight.
You could try something a little different next time to stop this from happening. The next time you bake it, place the loaf into the loaf pan and then put it straight into the fridge. The next day, take it out of the fridge and leave it to rise at room temperature. Once it’s risen above the lip of the pan, preheat the oven and bake it 🙂 Hope that helps xo
Sounds great! I’ll try it!!
This loaf was a pleasure to make, not too sticky at all. It turned out very tasty and just chewy enough. It’s a bit gummy but it’s my fault, probably should have let it proof longer. Still quite nice and toasted up beautifully! I’ve made your Honey Oat Bread quite a few times, by request from my son. I think he will like this one too, when he is back at home in August. Thank you!
Excellent recipe! What internal temperature would you suggest to bake ? I baked to 190 degreees !
Thanks so much, I’m so glad you loved it 🙂 I don’t actually use internal temperature to measure the “doneness” of a loaf 🙂 I look at other factors that I go through in this post. Hope that helps xo
Do you have a bread machine option for this loaf?
I’m sorry I haven’t tried this loaf in a bread machine. Have you tried this recipe for sourdough bread in a bread machine?
Hi! I just finished putting the bread dough into the pan to do final rise and wondered if I put in the fridge to bake in the morning, will the bread flavor be better than if I bake it tonight? I enjoyed making this loaf and if I love the resulting bread it will likely be my go to sandwich bread! Can’t wait to taste it! Thanks
You can put it in the fridge to bake the next morning, it will definitely have a more “sourdough” flavor if you do a cold fermentation overnight.
Hello, I made this recipe and put in bread pan as described in Step 7,,,it rose and then I put in frig to bake the next morning. It deflated overnight and remained deflated after baking. Any suggestions??
It tastes good but very dense.
Thank you.
You could try something a little different next time. The next time you bake it, place the loaf into the loaf pan and then put it straight into the fridge. The next day, take it out of the fridge and leave it to rise at room temperature. Once it’s risen above the lip of the pan, preheat the oven and bake it 🙂 Hope that helps xo
This looks really good. Want to bake this with some whole grain dinkel. I was thinking of about 100 g. What do you think?
Could you make this into round loaves?
Yes you could shape this into round loaves if you prefer 🙂
Good Morning – love the recipe, would you explain – Feed sourdough starter before bed (1:3:3 ratio so it peaks early the next morning). It is the 1:3:3 ratio I need explanation for. Thank you.
I’ve written a post explaining sourdough starter ratios here 🙂
Hi I’ve bake tis bread d top is brown n d sides n bottom is white its not all over brown like d top can u tell me wat happen? I used Pullman loaf tin😢
Beautiful bread-but the rising times took FOREVER.
I took starter out of fridge and fed at 6am. She was good to go by 9. Kneaded and autolyzed per recipe. 6pm to get to 30% bulk rise then 9:30 pm ready to bake at last. Very warm place to rise .
Will try this one again. First go didn’t turn out. It was too doughy after baking.
This is my error however. I didn’t have bread flour, I didn’t soak the oats, I didn’t do the steps in the correct order. I think I let it rise too much. I was making 3 loaves of regular sourdough and didn’t realize this wasn’t a mix and go recipe. What did turn out was really good so I am going to try it again. I think if I can figure it out my family will love it.
If I wanted to make this in a 13 x 4 loaf pan would it fit if I doubled recipe?
I would probably do a 1.5 batch for this size 🙂
I made this bread and the top of the loaf split open. I did have another tin on the top. Wondering what I did wrong?
This can point to under fermentation so I would say increase the bulk fermentation and proofing time to ensure this doesn’t happen again. You can also score the loaf down the middle if you want to control the score more 🙂
The best bread ever!
This has been the BEST sandwich bread I’ve ever made!! Highly recommended.
This can be eaten on its own and as sandwiches bread. I was amazed how sweet and yummy this was!
This was absolutely delicious. I’ve never successfully made sandwich bread before, but this was a great recipe!
By far the tastiest and easiest sourdough sandwich bread I’ve tried. This will definitely be my go to recipe. I followed the timeline as published with one exception. I left the dough in the pan on the counter overnight instead of putting in the fridge. My kitchen gets down to 16 Celsius so figured it would be cold enough. Bread rose perfectly then baked perfectly.
If I would cut the maple syrup to 30 grams, should I add an additional 30 grams of water?
You can add a little more water yes 🙂
I just start off by saying you are my hero. There is no one I’ve come across that does sourdough quite like you. I absolutely love every single recipe you post. Your videos are wonderful and you make sourdough baking fun, as it should be 😁🎉
Your encouragement and enthusiasm is what initially drew me to your website and gave me the motivation I needed to begin my own journey into the sourdough world. When anyone ever asks me anything about sourdough I tell them go to The Pantry Mama website,, because all the answers are right there, written in terms that are easy to understand, and you covers all the bases. You so deserve a trophy, a gold medal and a gold star for sourdough baking 🏆🥇⭐
Thank you so much for your kind words, I think that’s the loveliest comment anyone has ever left for me 🙂 I’m so happy that I have been able to help you (and your friends) on your sourdough journey, that’s the whole reason I do what I do 🙂 Thank you Andrea xox
Made the Maple Oatmeal sourdough bread yesterday. It was an easy recipe that baked up beautifully. It is delicious! I’ll definitely make it again.
This is quite possibly the best sandwich loaf I have ever made! incredibly soft with just enough sweetness from the maple syrup.
I baked it covered with another loaf pan for the first 20 minutes and removed the pan for the last 10 minutes. perfection!