High Protein Sourdough Bread
This post may contain affiliate links.
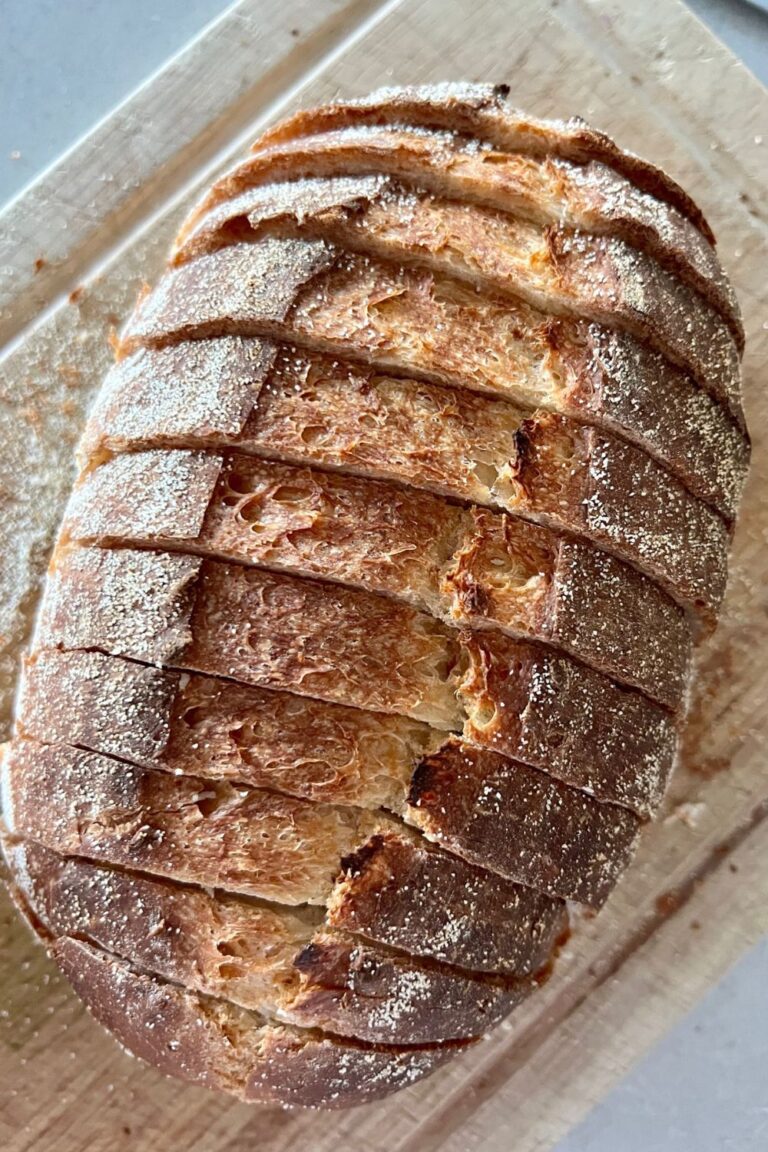
If you're looking for a higher protein sourdough bread, this is the recipe for you. While there are lots of ways to increase the protein content of your sourdough bread, this recipe uses a high protein mix of nuts and seeds, as well as a high protein bread flour.
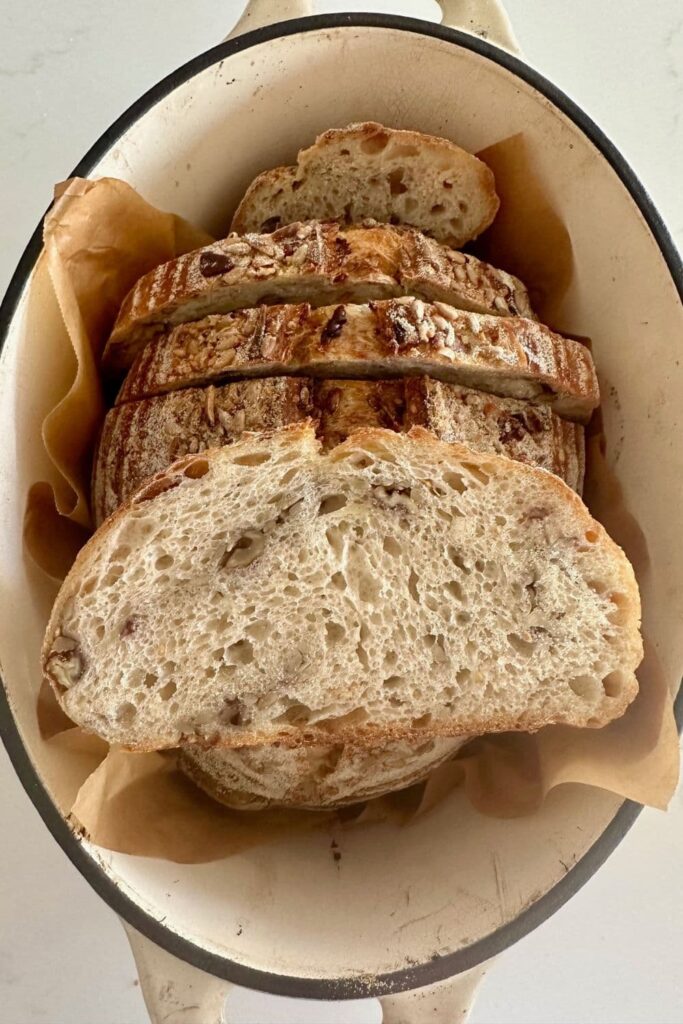
I created this recipe because I was looking for a way to increase the protein in my diet to help with hunger and help keep me fuller for longer. I added the extra nuts and seeds because it was an easy and tasty way to increase the protein per slice. Please note that this recipe is not intended for nutrional purposes. If you have specific nutritional requirements, please consult a medical professional.
If you are looking for other higher protein sourdough bread recipes, you might enjoy this sourdough rye bread, sourdough pumpernickel bread or this sourdough multigrain bread. You might also be interested in how many calories there are in a slice of sourdough bread or this delicious jalapeño cheddar sourdough.
Why You'll Love This Recipe!
Add The Protein You Love - this recipe can be customised to suit the nuts and seeds that you like to eat. Use a custom blend of nuts and seeds like walnuts, almonds, hemp seeds and sunflower seeds - or whatever you have in the pantry. You can calculate the protein per slice based on the nuts and seeds you add in.
Even More Beneficial Sourdough - adding extra protein to your already delicious sourdough bread means that not only are you eating a bread with beneficial lacto-bacillus bacteria and wild yeast, you're increase the amount of protein you're eating too!
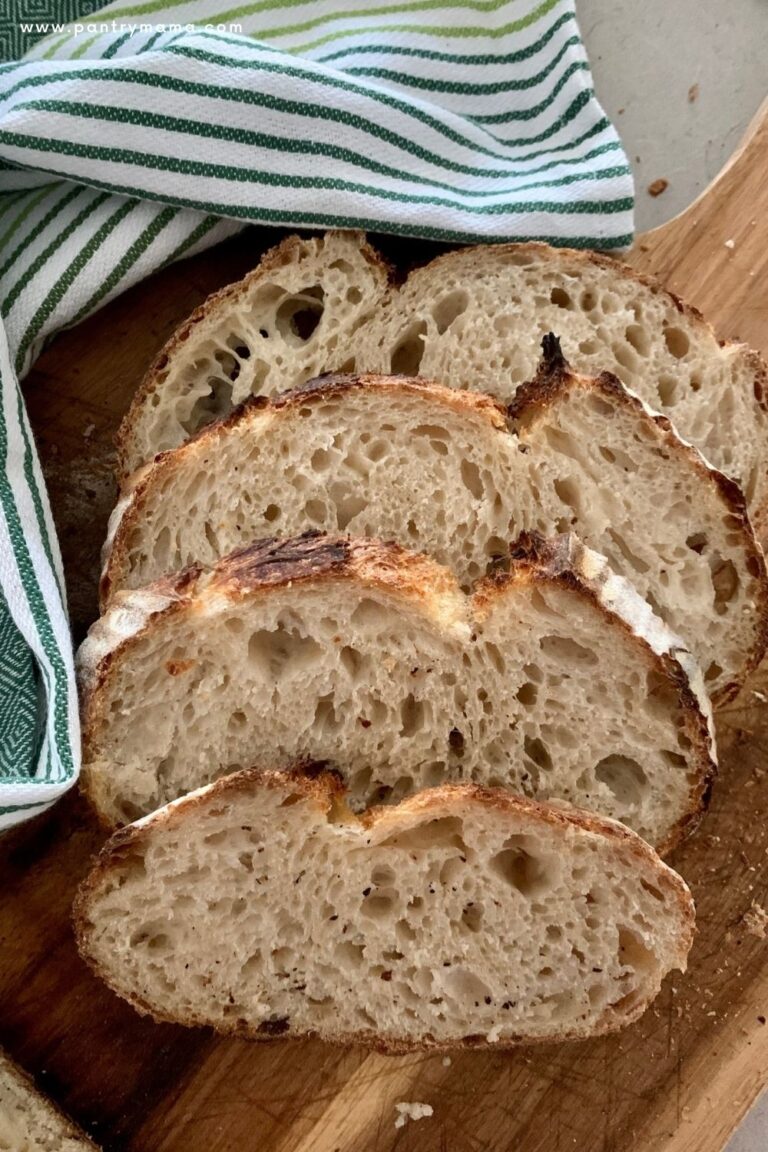
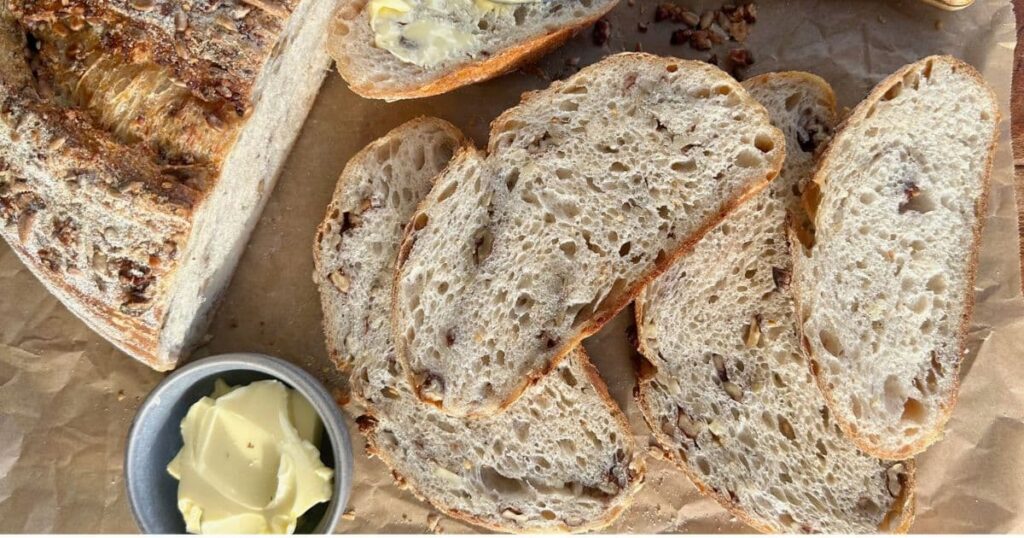
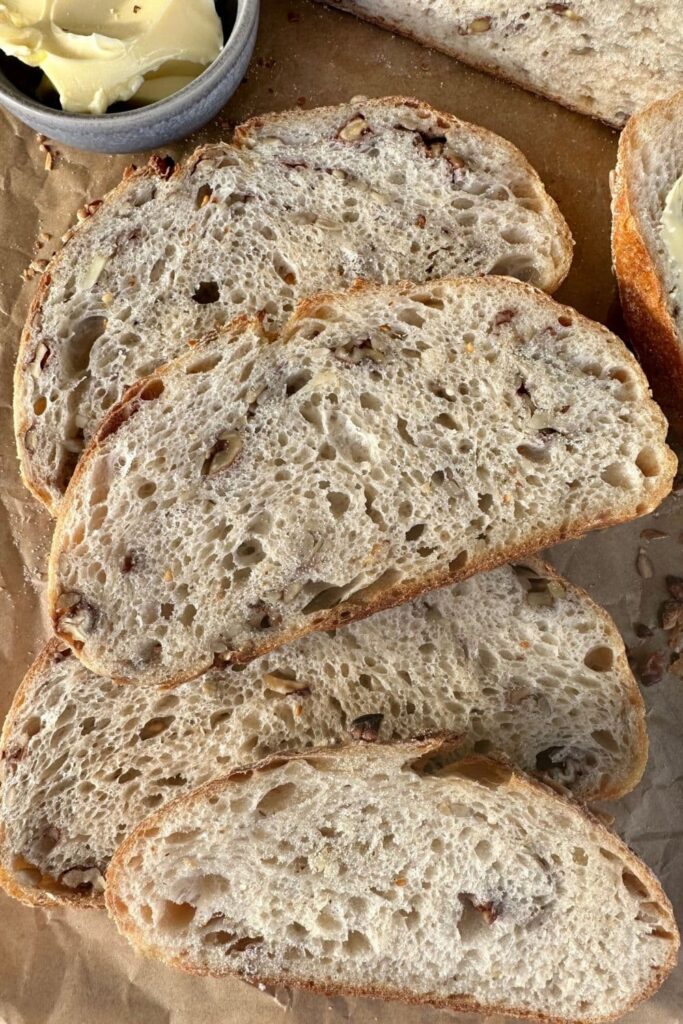
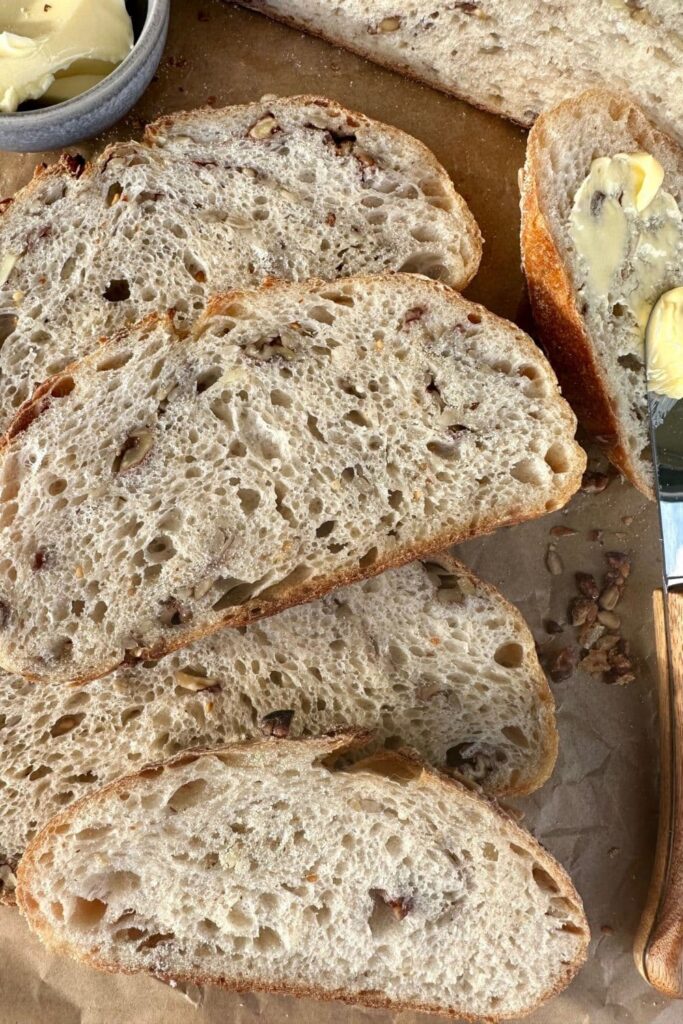
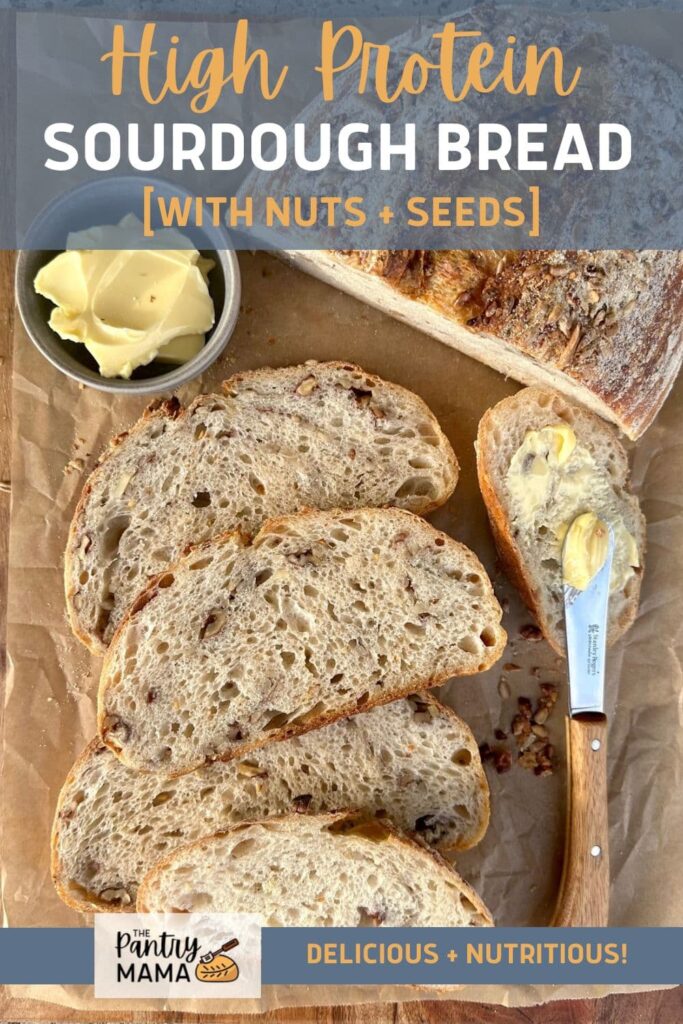
It's So Pretty! - Look at that crumb! It's got a lovely lacy, airy crumb, without being too open ... so you can add some cultured butter without it all dripping out the holes!
How Much Protein is in Sourdough Bread?
It can be really hard to get a definitive answer on how much protien is in a slice of sourdough bread. If you type this question into Google, you'll get a range of answers from 2g to 12g.
Of course, this will vary depending on the size of the slice of bread and the individual ingredients used to create the loaf. That's the thing about homemade sourdough bread (and in fact all homemade bread), it can be difficult to know exactly how much you're eating, unless you're weighing each slice.
The most accurate way to determine how much protein is in your sourdough bread is to calculate the ingredients manually or add the individual ingredients into a nutrition calculation app.
Why Increase the Protein in Sourdough Bread?
You might be wondering why you would want to increase the protein in your sourdough bread. Now the answer to this is really ... it depends. Stay with me.
On one hand, you will hear protein being associated with the actual protein content in the flour that is used to make the sourdough bread. This is because higher protein flour (bread flour) allows the gluten network to develop more easily, giving you a better loaf of sourdough bread.
On the other hand, you might be more worried about the actual protein content of the sourdough bread you eat for nutrition or weight loss purposes. This means that you want to increase the amount of protein in each slice of sourdough bread that you eat. This is more the type of "protein" that I am talking about here.
Like I said earlier, I created this recipe because I was struggling with hunger and needed extra protein to keep me feeling fuller for longer.
If you do want to understand more about protein in flour, then I recommend this article on the best flour for sourdough bread.
How To Increase Protein in Sourdough Bread
To increase the protein content in your sourdough bread, you can try the following methods:
Use high-protein flour: Opt for bread flour or strong flour, which has a higher protein content compared to all-purpose flour. Bread flour typically contains around 12-14% protein, while all-purpose flour has around 9-12% protein. You can read about the differences between bread flour and all purpose flour here and you can read about how to use all purpose flour in sourdough baking here.
Add vital wheat gluten: You can add vital wheat gluten to your bread recipe. It's a concentrated form of wheat protein and can significantly boost the protein content. Start by adding around 10g of vital wheat gluten per 500g of flour and adjust based on your preference. You would generally use vital wheat gluten with all purpose flour, but you can use it with bread flour if you want to increase the protein even further.
Incorporate whole grains: Mix whole grain flours like whole wheat, rye, or spelt into your sourdough starter or dough. These flours contain more protein than white flour and will naturally increase the overall protein content. You can find a recipe for rye sourdough bread here and spelt sourdough here.
Add seeds or nuts: Incorporate protein-rich ingredients like seeds (e.g., sunflower seeds, pumpkin seeds) or nuts (e.g., chopped almonds, walnuts) into your sourdough bread dough. This not only adds protein but also enhances texture and flavor.
Use whey instead of water: Replace some of the water in your sourdough recipe with whey. Leftover from making yogurt and cheese, whey contains a lot of protein and will subsequently increase the protein content of your sourdough bread. You can read more about using whey in sourdough bread here.
Enhance your starter: If you want to increase protein in the sourdough starter itself, you can periodically "refresh" it with a higher-protein flour, such as whole wheat or rye, instead of white flour. You can read more about strengthening your sourdough starter here.
Remember that increasing the protein content may affect the texture and flavor of your sourdough bread, so it's essential to find the right balance that suits your taste preferences. You might need to adjust your recipe and techniques to accommodate these changes.
How To Make High Protein Sourdough Bread With Nuts and Seeds
Making a loaf of sourdough bread with higher protein is really easy! You just need to make a dough, as you normally would, and then add some extra protein containing ingredients at shaping.
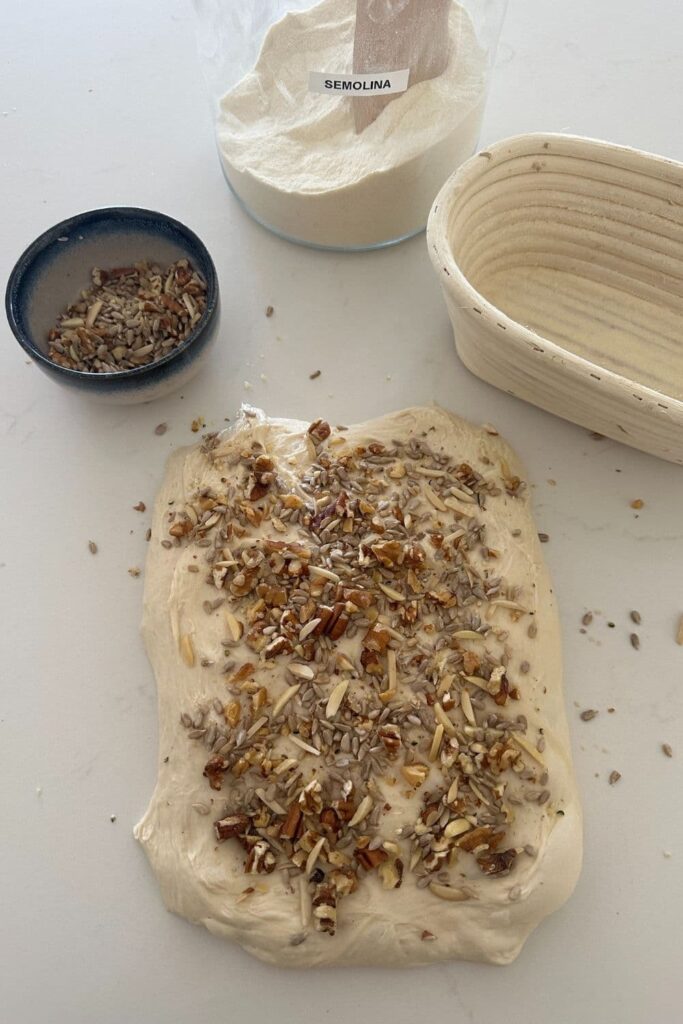
I have used 150g of a high protein nut and seed mix containing sunflower seeds (56%), almonds 21%), walnuts (15%) and hemp seeds (8%). 100g of this mix contains 21.4g of protein, so the 150g I've used in this recipe contains 32.1g. If you sliced your loaf into 10 slices, this would add an extra 3.2g of protein to each slice.
It's really up to you as to what nuts and seeds you'd like to include, but you can certainly use my mix as a guide.
Autolyse - Premixing The Dough
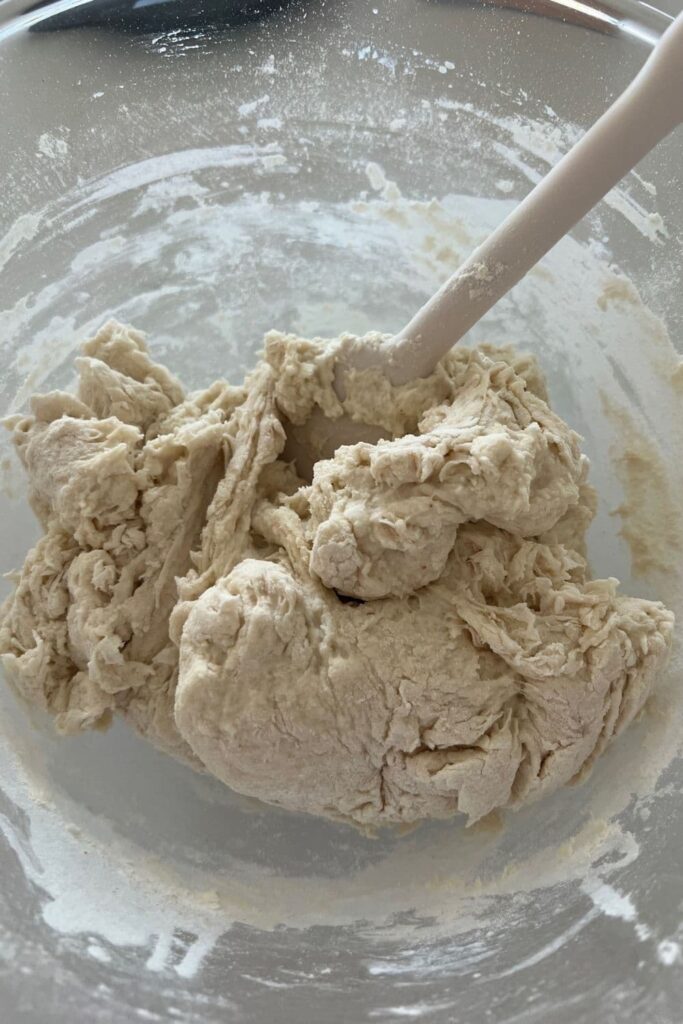
Weigh out your sourdough starter and water into a large ceramic or glass bowl.Mix the water and starter together briefly. Then add your flour and salt and mix whole lot together to form a shaggy dough.
Cover your bowl with cling film or a damp tea towel and let it sit for around 1 hour.
Forming Up The Dough
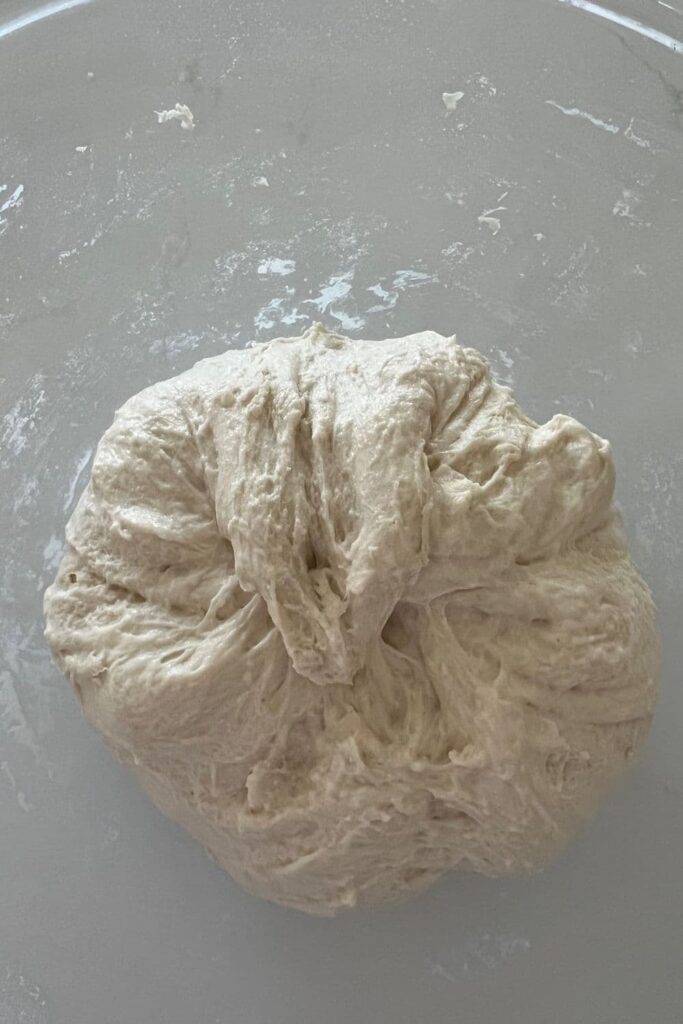
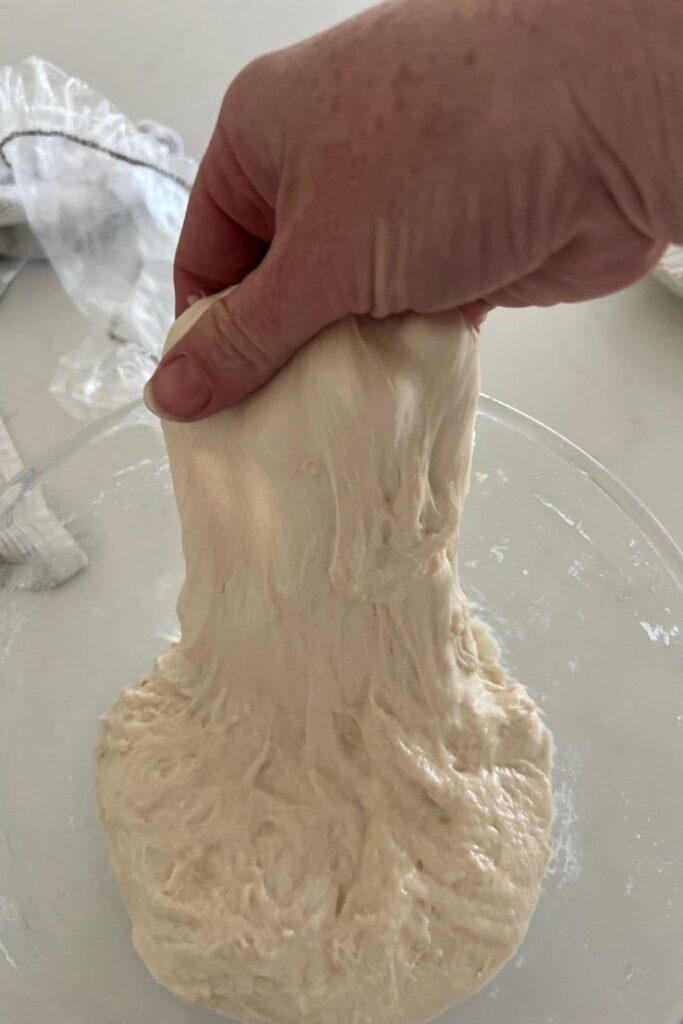
After the dough has been through autolyse you need to bring it together into a ball. Work your way around the bowl, grabbing the dough from the outside, stretching it up and over itself, into the centre, until a smooth ball is formed. You shouldn't need more than about 20-30 stretches to form the ball.
You'll notice that the dough is fully hydrated after soaking all the water up. It will be fairly sticky but as you bring it into a ball, it will become smoother and shinier.
Once the dough has formed into a smooth ball, pop the cling film back on and let it rest for 30 minutes.
Stretch & Fold - Creating Structure
Over the next few hours you need to create some structure for your dough by "stretching and folding".
Aim to do around 4-6 sets of stretches and folds.
For each set, stretch the dough up and over itself 4 times. Leave around 15 minutes in between each set. Again you do not have to be exact with time, but you need to do at least 4 sets over 2 hours.
Bulk Ferment
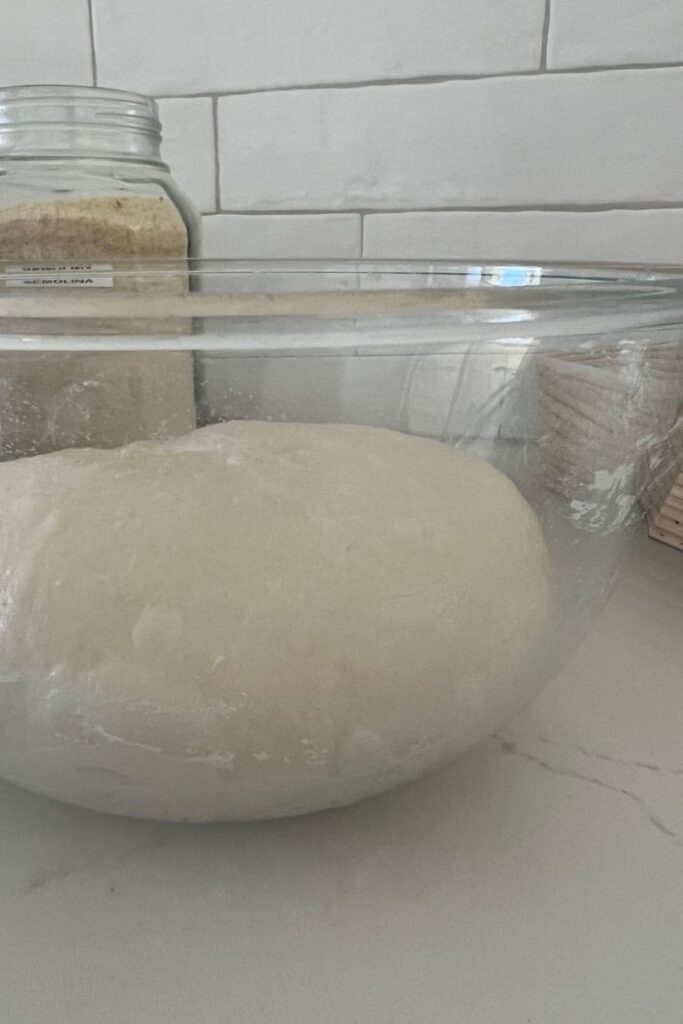
Once you've finished your stretch and folds, place the cling film or damp tea towel back over your dough and let it rest and ferment at room temperature (a plastic cover is a better option for this stage).
You want the dough to double at this stage - the time it takes will depend on many factors including the strength of your sourdough starter and the temperature of your dough and kitchen.
You can read more about bulk fermentation here.
Shaping The Dough
Once your dough has finished its first ferment, it's time to shape it and add the high protein nut and seed mix.
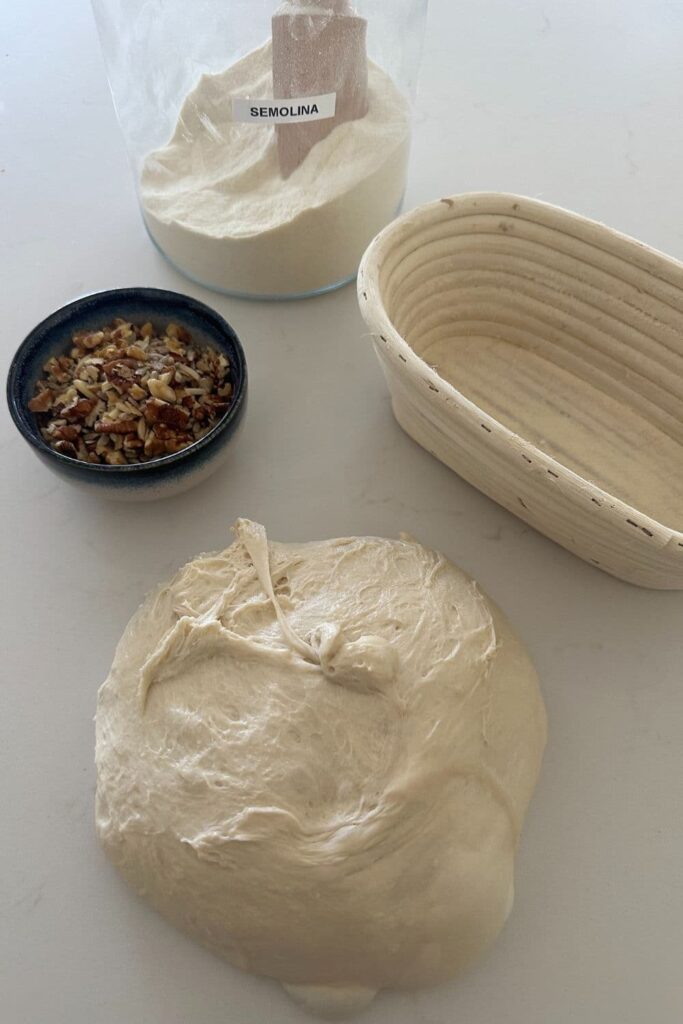
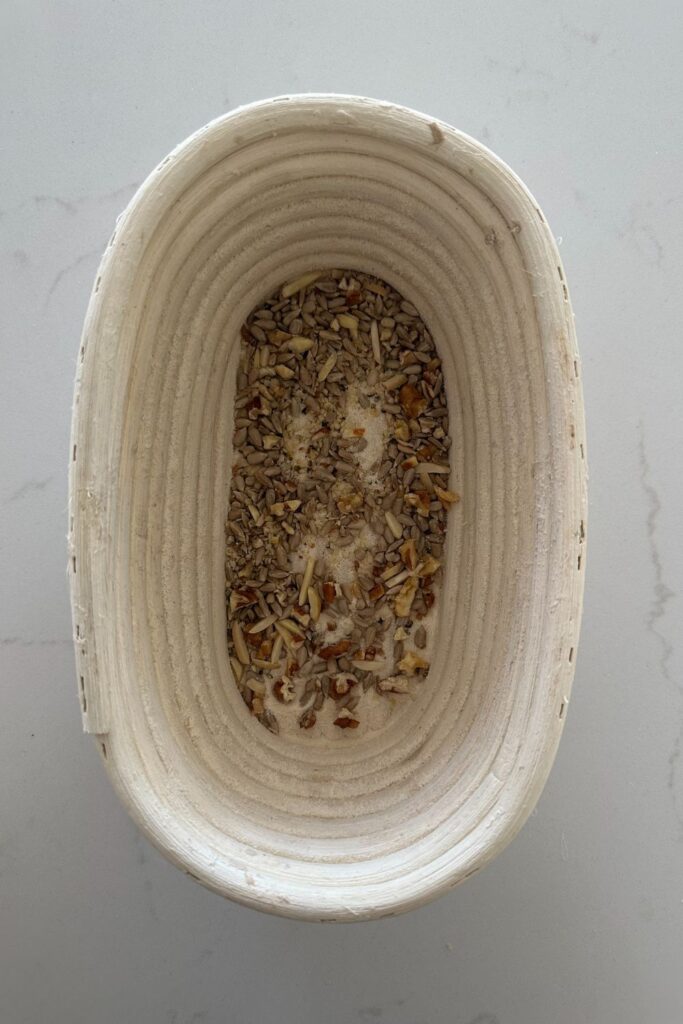
Before you start, grab the banneton you're going to be using and sprinkle some rice flour or semolina on the bottom of the banneton. Then add a handful of the nut and seed mix to the banneton as well (this means that it will stick to the top of the dough once it's placed on top).
Right, let's shape that dough. Use a dough scraper to gently ease the dough out of the bowl (your hands work just fine if you don't have one). You want it to land upside down on your counter so that the smooth top of the dough is on the countertop and the sticky underside is facing up. This will make it easier to shape.Before you shape the dough, pull it out into a rough rectangle.
Sprinkle some of the nut and seed mix over the dough. As you shape it into a batard, keep sprinkling the nut and seed mix on every fold (you can see photos of me doing this below).
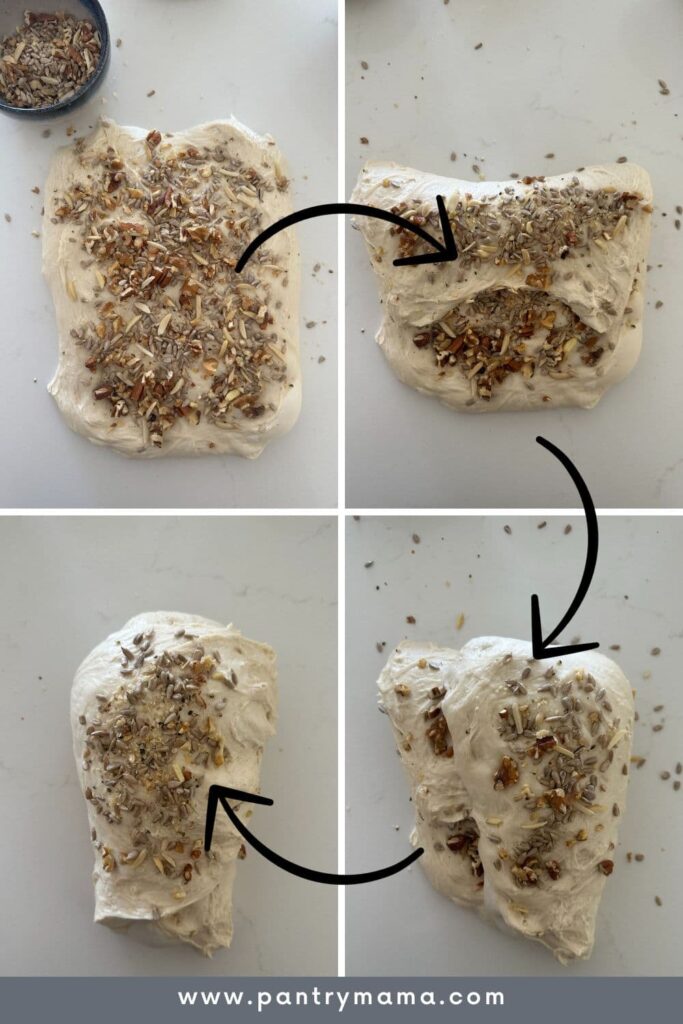
You can also see a video of me shaping a batard here. When you have finished shaping, the nut and seed mix should be neatly tucked inside the dough.
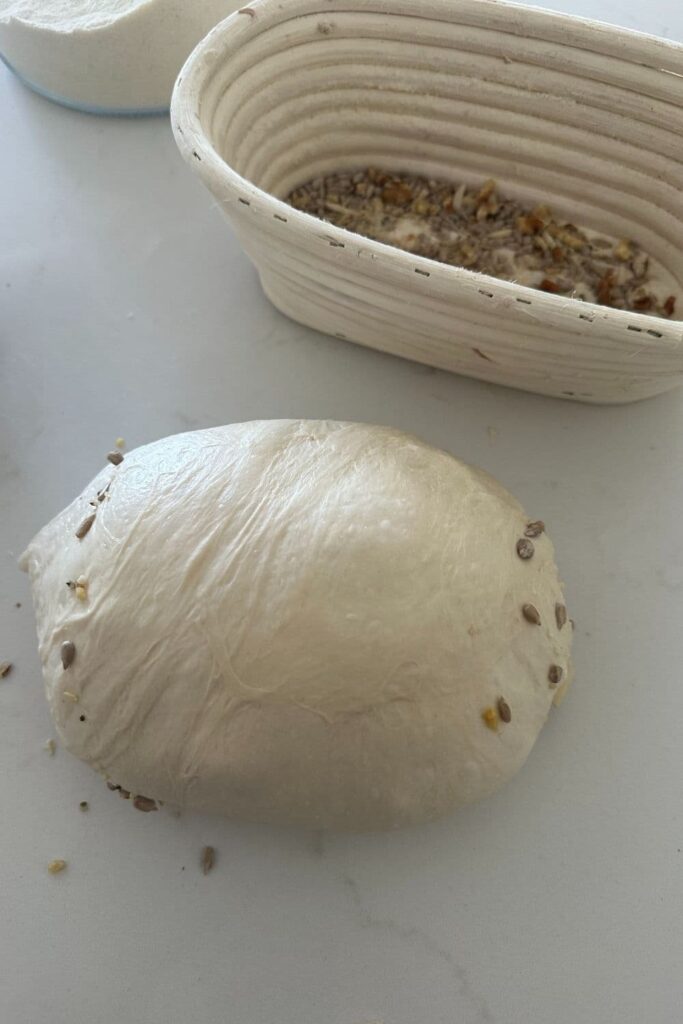
Placing Into A Banneton
Once the dough is shaped, place it into your banneton smooth side down, so your seam is on the top. The nut and seed mix you placed in the bottom of the banneton will stick to the top of the dough while it proofs.
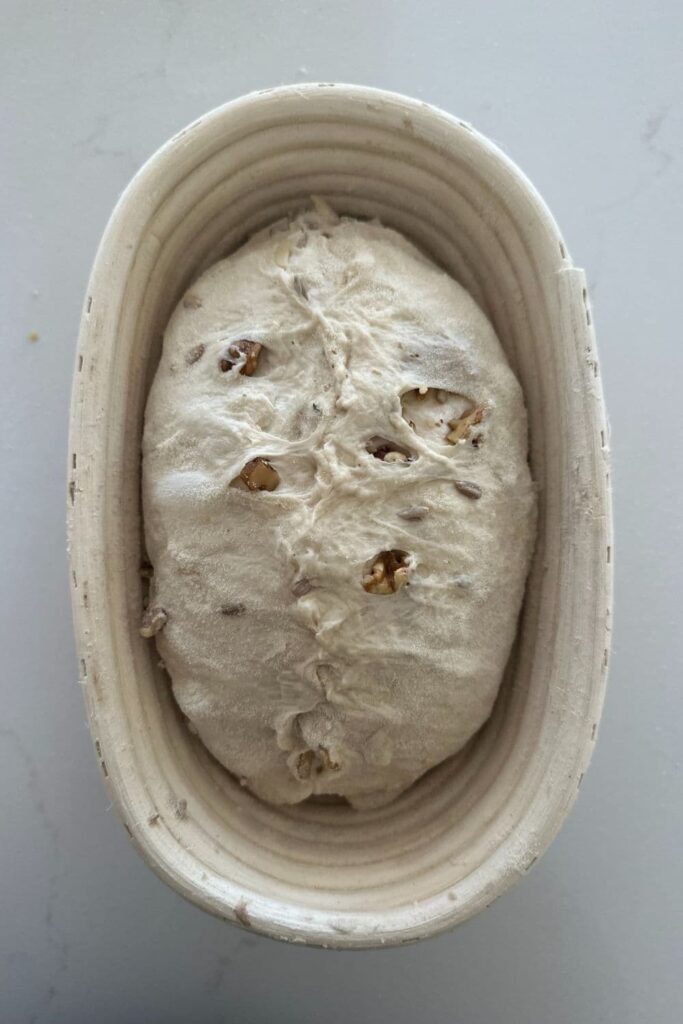
Lift your dough around the edges to pop a little more rice flour if you feel it needs it. Just try to handle the dough as little as possible and be really gentle as you really want to preserve all the gases and air bubbles that have formed during your bulk ferment.
Cold Ferment
Now the dough is in its "shaping container" cover it loosely with a plastic bag or elastic food cover and place into the fridge.
Try to leave it in the fridge for a minimum 5 hours up to a maximum of around 36 hours.
Preparing To Bake
Once you're ready to bake your sourdough, you'll need to preheat your oven to 230C/450F.
Place your Dutch Oven into the oven when you turn it on so it gets HOT. Try to preheat for around 1 hour to ensure your oven is super hot - but you know your oven so just adjust this time if you need to.
Leave your dough in the fridge until the very last minute - placing a cold dough into a hot oven will give you a great "spring".
Bake Time!
Now it's time to bake!
When your oven is at temperature, take your sourdough out of the fridge. Gently place it onto a piece of baking paper.
Make sure that you make the baking paper big enough to use the edges as a handle to lower to dough into your Dutch Oven.
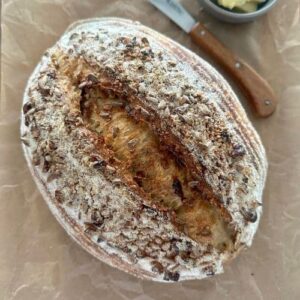
Gently score your bread with a lame, clean razor blade or knife. I've just done a single score on this loaf as it can get a little tricky with the nut and seed topping.
You can find my full guide on how to score sourdough bread here.
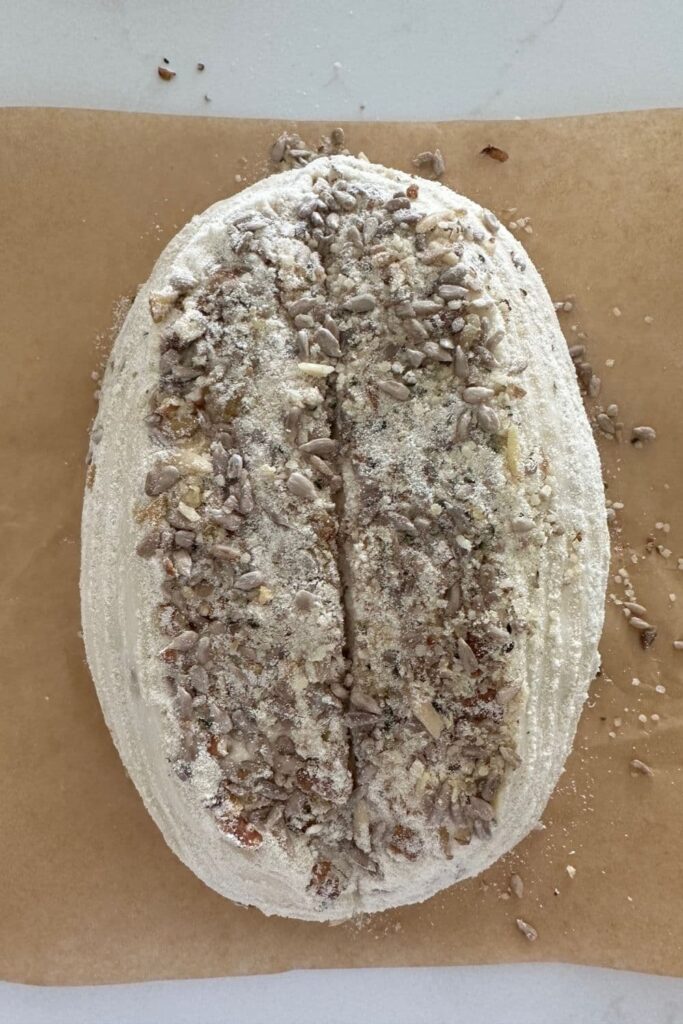
Carefully take your dutch oven out of the oven. Place the sourdough into the pot using the baking paper as a handle. Put the lid on and place into the hot oven.
BAKE TIME:
30 Minutes with the lid on at 230C/450F plus
10-15 Minutes with the lid off at 210C/410F
Finishing The Bake
When you remove your dough from the oven, carefully remove it from the dutch oven as soon as possible and place on a wire rack to cool.
High Protein Sourdough Bread
Equipment
- Mixing Bowl
- Digital Scales
- Banneton (size guide for bannetons)
- Dutch Oven (size guide for Dutch Ovens)
Ingredients
- 500 g Bread Flour
- 350 g Water (can increase by 20 to 30g if you wish)
- 100 g Sourdough Starter
- 10 g Salt
- 150 g High Protein Nut & Seed Mix (see notes for specific ingredient breakdown)
Instructions
- Autolyse - Premixing The DoughWeigh out your sourdough starter and water into a large ceramic or glass bowl. Mix the water and starter together briefly. Then add your flour and salt and mix whole lot together to form a shaggy dough.
- Cover your bowl with cling film or a damp tea towel and let it sit for around 1 hour.
- Forming Up The DoughAfter the dough has been through autolyse you need to bring it together into a ball. Work your way around the bowl, grabbing the dough from the outside, stretching it up and over itself, into the centre, until a smooth ball is formed. You shouldn't need more than about 20-30 stretches to form the ball. You'll notice that the dough is fully hydrated after soaking all the water up. It will be fairly sticky but as you bring it into a ball, it will become smoother and shinier.
- Once the dough has formed into a smooth ball, pop the cling film back on and let it rest for 30 minutes.
- Stretch & Fold - Creating StructureOver the next few hours you need to create some structure for your dough by "stretching and folding". Aim to do around 4-6 sets of stretches and folds. For each set, stretch the dough up and over itself 4 times. Leave around 15 minutes in between each set. Again you do not have to be exact with time, but you need to do at least 4 sets over 2 hours.
- Bulk FermentOnce you've finished your stretch and folds, place the cling film or damp tea towel back over your dough and let it rest and ferment at room temperature (a plastic cover is a better option for this stage).See notes below for more info on this step.
- Shaping The DoughOnce your dough has finished its first ferment, it's time to shape it and add the high protein nut and seed mix.Before you start, grab the banneton you're going to be using and sprinkle some rice flour or semolina on the bottom of the banneton. Then add a handful of the nut and seed mix to the banneton as well (this means that it will stick to the top of the dough once it's placed on top).Right, let's shape that dough.Use a dough scraper to gently ease the dough out of the bowl (your hands work just fine if you don't have one). You want it to land upside down on your counter so that the smooth top of the dough is on the countertop and the sticky underside is facing up. This will make it easier to shape.Before you shape the dough, pull it out into a rough rectangle. Sprinkle some of the nut and seed mix over the dough. As you shape it into a batard, keep sprinkling the nut and seed mix on every fold (you can see photos of me doing this above). You can also see a video of me shaping a batard here.When you have finished shaping, the nut and seed mix should be neatly tucked inside the dough.
- Placing Into A BannetonOnce the dough is shaped, place it into your banneton smooth side down, so your seam is on the top. The nut and seed mix you placed in the bottom of the banneton will stick to the top of the dough while it proofs.Lift your dough around the edges to pop a little more rice flour if you feel it needs it. Just try to handle the dough as little as possible and be really gentle as you really want to preserve all the gases and air bubbles that have formed during your bulk ferment.
- Cold FermentNow the dough is in its "shaping container" cover it loosely with a plastic bag and place into the fridge. I use a large plastic bag to cover it - I just reuse it each time. Try to leave it in the fridge for a minimum 5 hours up to a maximum of around 36 hours.
- Preparing To BakeOnce you're ready to bake your sourdough, you'll need to preheat your oven to 230C/450F. Place your Dutch Oven into the oven when you turn it on so it gets HOT. Try to preheat for around 1 hour to ensure your oven is super hot - but you know your oven so just adjust this time if you need to.Leave your dough in the fridge until the very last minute - placing a cold dough into a hot oven will give you a great "spring".
- Bake Time!Now it's time to bake!When your oven is at temperature, take your sourdough out of the fridge. Gently place it onto a piece of baking paper. Make sure that you make the baking paper big enough to use the edges as a handle to lower to dough into your Dutch Oven.Gently score your bread with a lame, clean razor blade or knife. You can find my full guide on how to score sourdough bread here.Carefully take your dutch oven out of the oven. Place the sourdough into the pot using the baking paper as a handle. Put the lid on and place into the hot oven. BAKE TIME:30 Minutes with the lid on at 230C/450F plus10-15 Minutes with the lid off at 210C/410F
- Finishing The BakeWhen you remove your dough from the oven, carefully remove it from the dutch oven as soon as possible and place on a wire rack to cool.
Notes
- PLEASE NOTE - I created this recipe because I was looking for a way to increase the protein in my diet to help with hunger and help keep me fuller for longer. I added the extra nuts and seeds because it was an easy and tasty way to increase the protein per slice. Please note that this recipe is not intended for nutrional purposes. If you have specific nutritional requirements, please consult a medical professional.
- High Protein Nut & Seed Mix: I used 150g of a high protein nut and seed mix containing sunflower seeds (56%), almonds 21%), walnuts (15%) and hemp seeds (8%). 100g of this mix contains 21.4g of protein.
- Notes on Sourdough Starter: This recipe is based on you having an active starter that you have fed a few hours before starting your bake. For info on how to make a sourdough starter, go here.
- Notes on Stretch & Folds: If you are going to do the stretch & folds on your bench top, spray your surface with water mist rather than using flour. You can leave the dough in the bowl if you want to. Wet your hands to stop the dough sticking - although it shouldn't be too sticky. It will get less sticky as you do your stretches and folds. For more information on how to do stretch and folds, go here.
- Notes on Bulk Fermentation: If your home is warm then your dough will ferment a lot faster and could be done in as little as a few hours. If it's colder, it will take longer, possibly overnight.
I would recommend that you try to do your first few bulk ferments during daylight hours so that you can watch your dough closely.
Once you're more familiar with the process - and the temperature of your home - you will be able to do overnight ferments. You will know your dough is ready to move to the next stage when it has *just* doubled in size. It will be fairly wobbly and full of bubbles. You should be able to see large air bubbles under the surface of the dough.
You don't want to let it go any further than doubled as it will be over fermented.
If you want to do an overnight ferment, but your home is warm, consider using a little less starter (ie 25g).
Less starter means your dough will take longer to ferment and you will reduce the risk of over fermenting your dough. You'll find more information on these topics here:
When is my bulk ferment finished? What is the difference between cold ferment and bulk ferment? Why does the amount of starter matter?
- Notes on Dutch Oven: You can use either a round or oval Dutch Oven, depending on the shape of the loaf you're making. I recommend a 5Q or 5L Dutch oven for each one, however as long as your banneton fits inside with a little wiggle room, you will be able to fit your loaf inside. You can find more information on the best Dutch Oven to use for sourdough bread here.
- Notes on Baking: If you're worried about the base of your bread burning, place a baking sheet on shelf underneath your Dutch Oven - it works! If you're worried about your bread not being cooked all the way through at the end of cooking time, turn the oven off and place your dough straight onto the oven rack. Leave the door ajar and let your bread rest there for a few hours. Make sure you don't close the door or your sourdough will sweat and you'll get a wrinkly, soggy crust. Remember not to cut into your loaf too soon - you'll need to let it cool for at least a few hours (4-6 is best).
Nutrition

