Funfetti Sourdough Bread
This post may contain affiliate links.

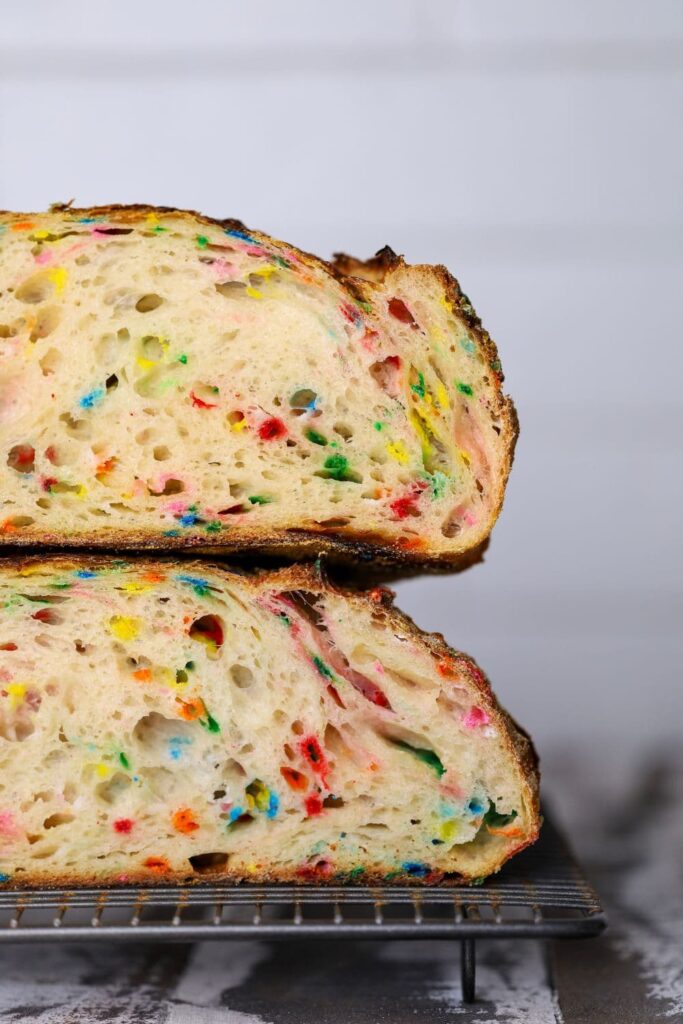
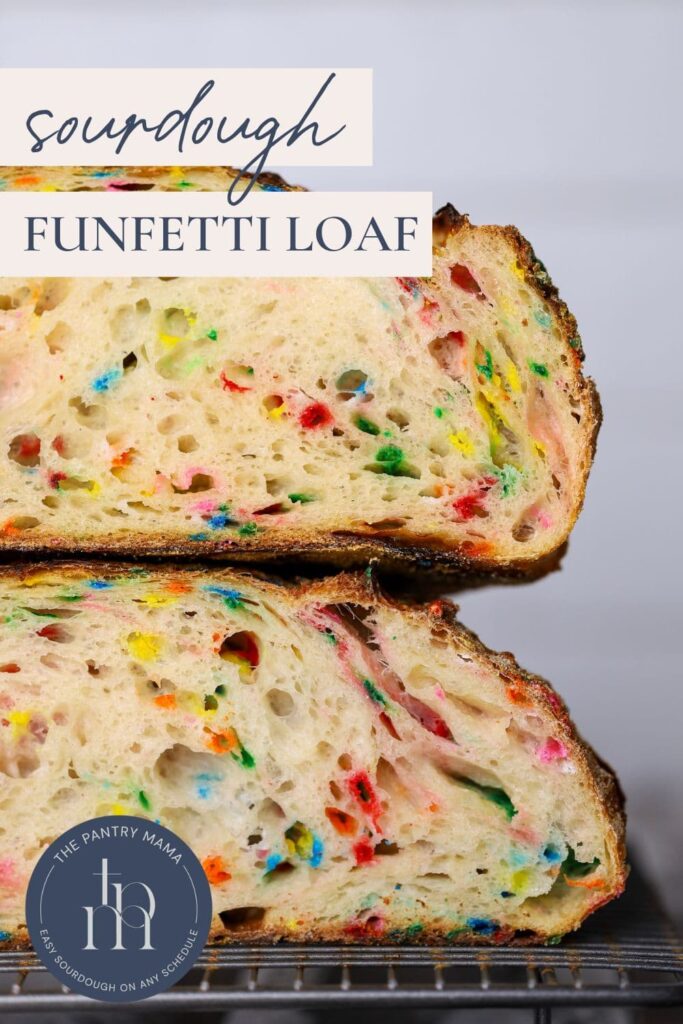
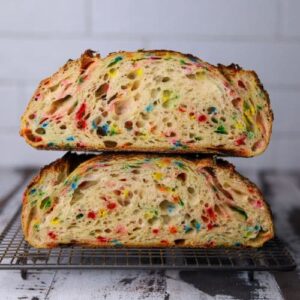
There’s something magical about slicing into a loaf of sourdough and finding bursts of colour peeking out from the crumb. This Funfetti Sourdough Loaf is tangy, fluffy, and joyfully speckled with rainbow sprinkles. It's perfect for birthdays, celebrations, or brightening up an ordinary Tuesday. It’s the bread that says, “Life’s too short not to eat sprinkles.”
If you’ve baked sourdough before, you’ll love how easy this is to adapt. And if you’re new to baking with colour, don’t worry, I’ll share all my tips for keeping those sprinkles vibrant and your loaf perfectly soft.
If you love combining sourdough with all things sprinkles, don't miss these sourdough funfetti cookies or these sourdough vanilla cupcakes!

Why You’ll Love This Funfetti Sourdough
It’s a celebration in bread form – bright, fun, and eye-catching and completely customisable, you can match your sprinkle colours to the occasion. My kids have already ordered a Halloween loaf!
Still naturally leavened – no instant yeast, just your trusty starter. If you want to use naturally colored sprinkles you can, but you might not get the bright colors like the photos you see in this post.
Kid-approved and party-perfect – guaranteed to make them smile. It's like a birthday cake but in sourdough bread form!
Ingredients You’ll Need
Here’s what you’ll need to make your own loaf of sprinkle-studded joy:
- Active sourdough starter – bubbly and ready to bake.
- Bread flour
- Water
- Salt
- Sprinkles – I recommend “jimmies” as they hold their colour better.
- White Chocolate - I've used chopped white chocolate but you can use white chocolate chips if you prefer. This totally gives birthday cake vibes.
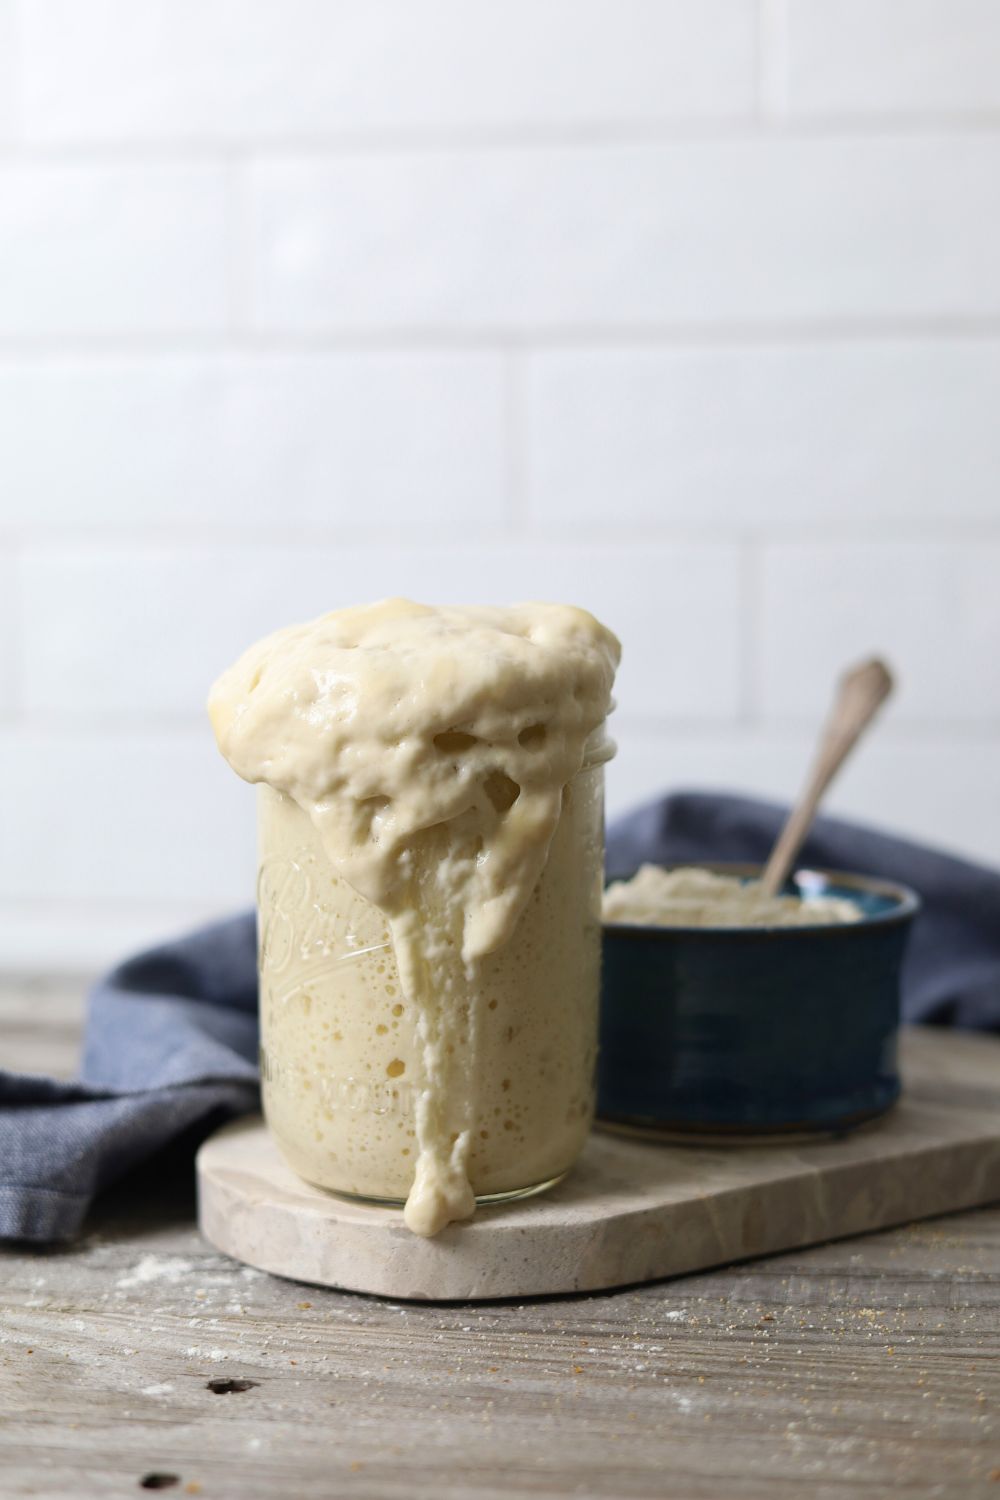
Create Your Own Sourdough Starter
Learn how to easily create & nurture your very own sourdough starter so you can start making delicious sourdough bread.
Choosing the Right Sprinkles
Not all sprinkles are created equal when it comes to baking, especially when you're adding them to sourdough bread which is full of microbes, acetic acid and bacteria!
- Best choice: Jimmies – those long, rod-shaped sprinkles you see on cupcakes. They bleed less colour in dough. I've used Betty Crocker Parlour Perfect Rainbow Sprinkles which are quite large in terms of sprinkles but held their color perfectly!
- Avoid: Nonpareils – the tiny round balls tend to lose their colour quickly and can create a muddy crumb.
How to Make Funfetti Sourdough Bread
Making a sourdough funfetti loaf is fairly simple and uses my basic sourdough recipe as it's base, layered with rainbow sprinkles and white chocolate for a perfect mix of color and sweetness. Let's get started!
Pre Mix & Autolyse
Weigh out your starter and water in a glass or ceramic bowl. Mix them together so that the sourdough starter is well distributed through the water.Then add your flour and salt and mix altogether. The dough will be fairly shaggy and only just brought together.Cover your bowl with cling film or a damp tea towel and let it sit for around 1 hour.
Forming Up Your Dough
Work your way around the bowl, grabbing the dough from the outside, stretching it up and over itself until a smooth ball is formed. You shouldn't need more than about 20-25 folds to form the ball.Once the dough has formed into a smooth ball, pop the cling film back on and let it rest for 30 minutes.
Stretch & Fold - Creating Structure
You need to add half of the sprinkles and all of the white chocolate during the stretch and fold process. Try to add them around the second or third set of stretch and folds. So do your first set of stretch and folds with the dough as is and then add the inclusions on the second (or third) set depending on how your dough is behaving.Try to do around 4 sets of stretch and folds with around 15 to 30 minutes between each set.
Bulk Ferment
Once you've finished your stretch and folds, place the cling film or damp dish towel back over your dough and let it rest and bulk ferment at room temperature. You want your dough to double at this stage.
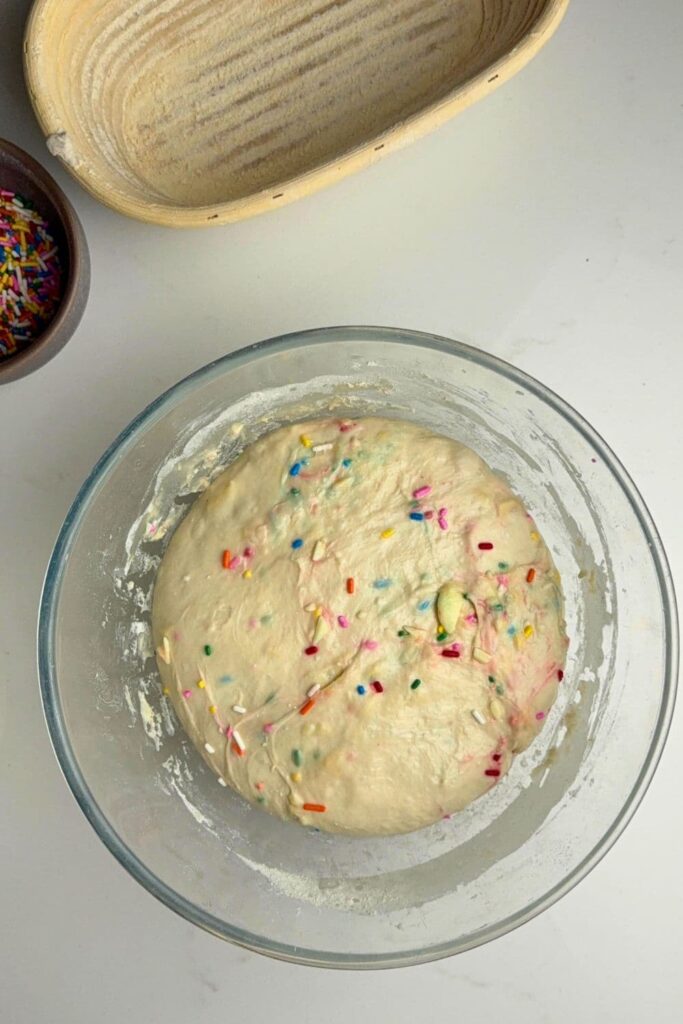
Shaping Your Dough
Once your dough has finished its first ferment, it's time to give it some shape and surface tension and add the other half of the sprinkles you kept aside. I think this recipe lends itself to a batard however it's completely up to you what shape you would like.
Stretch your dough out into a rough rectangle and sprinkle over a generous amount of sprinkles.
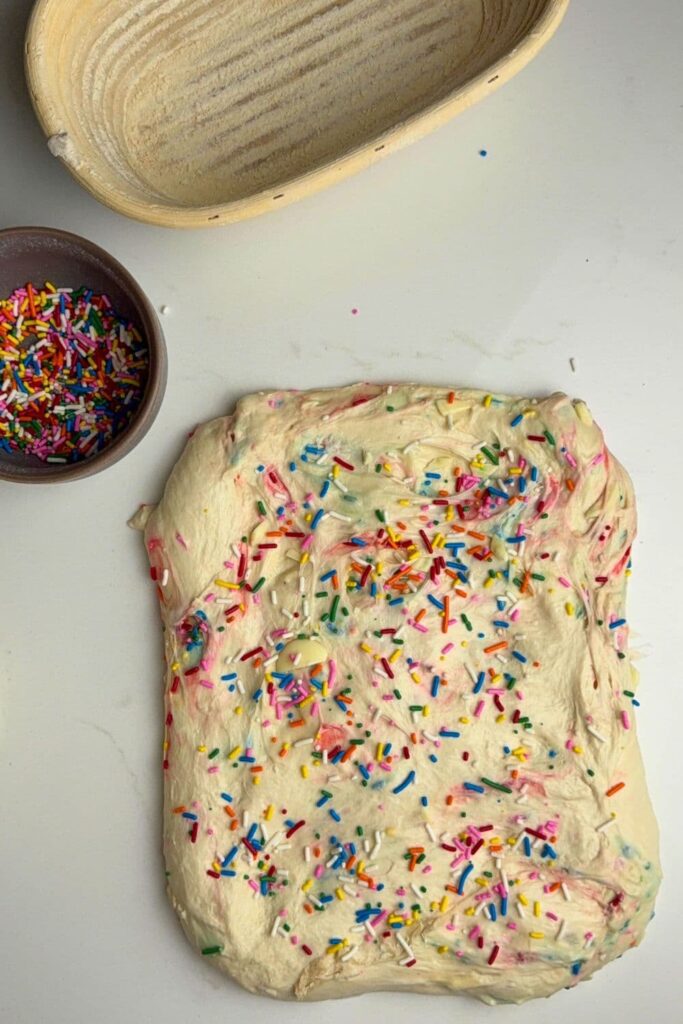
Fold the top down and sprinkle on some more. Fold the sides in, sprinkle some more. Roll up the dough like a burrito and pull it towards you to create some surface tension and ensure all of those beautiful sprinkles are tucked up inside.
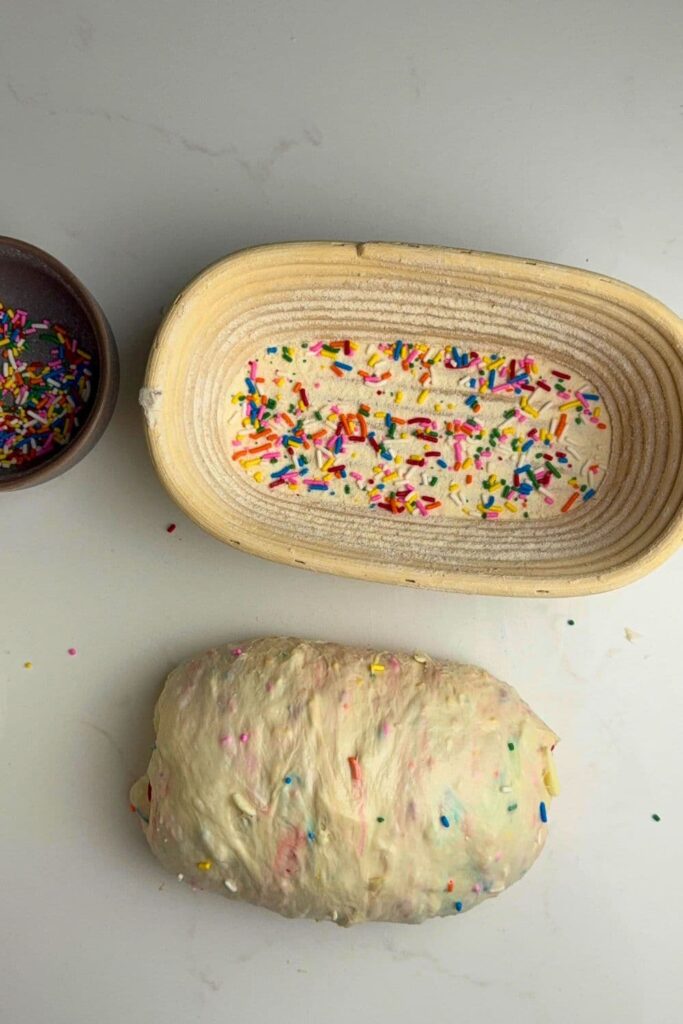
Sprinkle a few sprinkles in the base of the banneton before you put the dough in so that they stick to the top of the dough during proofing. Place the shaped dough into your banneton with the seam side up. Stitch the base together if you need to.
Cold Ferment
Now your dough is in it's "shaping container" cover it loosely with a plastic bag or damp tea towel and place into the fridge to cold ferment.Try to leave it in the fridge for a minimum of 5 hours. It will really depend on which kind of sprinkles you use as to how long you leave this one. I used Betty Crocker Parlour Perfect Sprinkles and they didn't bleed, even when I left this in the fridge for 24 hours.
Preparing to Bake Your Sourdough
Once you're ready to bake your sourdough, you'll need to preheat your oven to 230C/450F.Place your Dutch Oven into the oven when you turn it on so it gets hot. Try to preheat for around 1 hour to ensure your oven is super hot - but you know your oven so just adjust this time if you need to.
Baking Your Sourdough
Now it's time to bake! When your oven is at temperature. Take your sourdough out of the fridge. Gently place it onto a piece of baking paper. Gently score your bread with a lame, clean razor blade or knife.
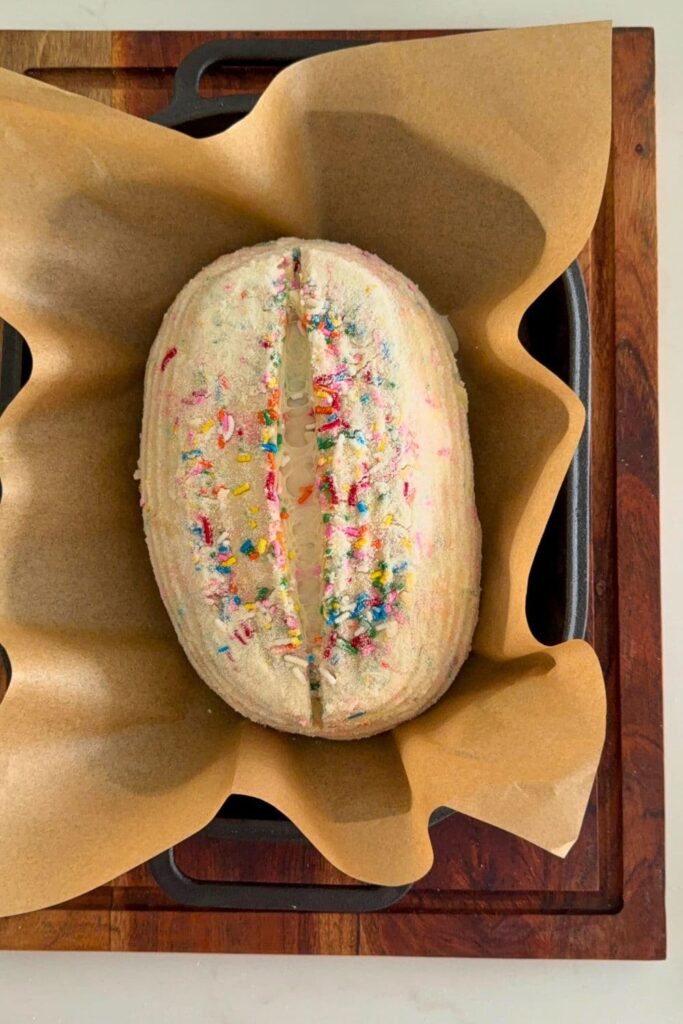
Carefully take your dutch oven out of the oven. Place the sourdough into the pot using the baking paper as a handle. Put the lid on and place into the hot oven.
BAKE TIME:
30 Minutes with the lid on at 230C/450F
plus10-15 Minutes with the lid off at 210C/410F
If you're worried about the base of your bread burning, place a baking sheet on shelf underneath your Dutch Oven - it works!
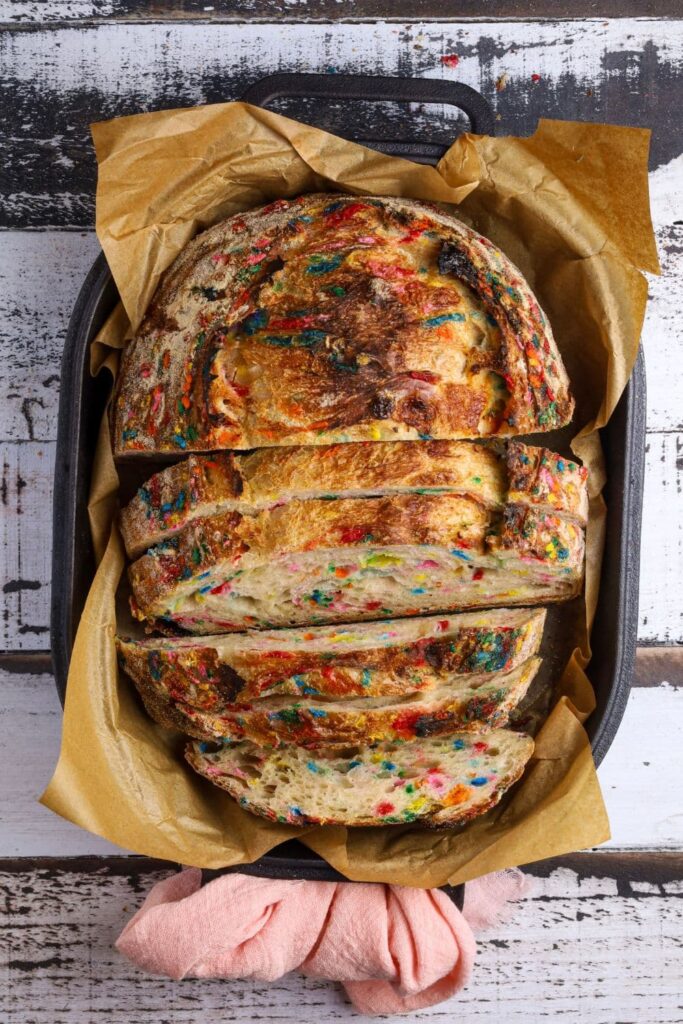
When you remove your dough from the oven, carefully remove it from the dutch oven as soon as possible and place on a wire rack to cool.
Kate's Recipe Tips
- Double the Sprinkles - add some sprinkles during stretch and folds and some during shaping to layer the color and ensure the sprinkles don't all dissolve.
- Chill the dough slightly before mixing sprinkles in, it slows down colour bleeding. It will slow down bulk fermentation, but it won't stop it completely.
- Don’t overload – too many sprinkles can melt and make the crumb gummy.
Baking Timeline
| TIME | PROCESS |
|---|---|
| 9 am | Premix and autolyse for around an hour, forming up the dough and leaving to rest for another 30 minutes before stretch and folds. |
| 11 am | 1st stretch and fold |
| 11.30 am | 2nd stretch and fold - add half the sprinkles and all of the white chocolate. |
| 12 pm | 3rd stretch and fold. |
| 12.30 pm | 4th stretch and fold. |
| 1 pm | Bulk fermentation at room temperature remembering to keep the dough from getting too warm so that the sprinkles don't bleed too much. |
| 6 pm | Shape dough into a batard, place into banneton and then into fridge for cold fermentation. |
| 9 am | Wake and bake! The next morning, you can get up, make a coffee and bake your beautifully bright funfetti sourdough loaf! |
Serving Ideas
- Slice, toast and serve warm with homemade butter for breakfast. I love serving it with this delicious whipped chocolate butter.
- Spread with vanilla cream cheese frosting for an over-the-top celebration bread. I love making the frosting from these sourdough cinnamon rolls to go with this loaf!
- Make colourful French toast for a weekend brunch. What a way to impress!
How to Store + Freeze
Like most sourdough bread, this sourdough funfetti loaf is best eaten fresh or within 24 hours of baking. It can be stored at room temperature for a few days, however, after 24 hours, it will lose it's crisp crust and soft crumb. The sprinkles may start to bleed if you store this loaf in plastic as they can sweat.
Freeze slices in a ziplock bag for up to 3 months, they're perfect for surprise lunchbox treats.
Funfetti Sourdough Bread
Equipment
- Mixing Bowl
- Digital Scale
- Banneton
- Dutch Oven
Ingredients
Bread Dough
- 100 g Sourdough Starter
- 350 g Water
- 500 g Bread Flour
- 10 g Salt
Added During Stretch and Folds
- 100 g White Chocolate Chips (or chopped white chocolate)
- 50 g Sprinkles (see notes
Added During Shaping
- 50 g Sprinkles (see notes)
Instructions
- Pre Mix & Autolyse:Weigh out your starter and water in a glass or ceramic bowl. Mix them together so that the sourdough starter is well distributed through the water.Then add your flour and salt and mix altogether. The dough will be fairly shaggy and only just brought together.Cover your bowl with cling film or a damp tea towel and let it sit for around 1 hour.
- Forming Up Your Dough:Work your way around the bowl, grabbing the dough from the outside, stretching it up and over itself until a smooth ball is formed. You shouldn't need more than about 20-25 folds to form the ball.Once the dough has formed into a smooth ball, pop the cling film back on and let it rest for 30 minutes.
- Stretch & Fold - Creating Structure:You need to add half of the sprinkles and all of the white chocolate during the stretch and fold process. Try to add them around the second or third set of stretch and folds. So do your first set of stretch and folds with the dough as is and then add the inclusions on the second (or third) set depending on how your dough is behaving. Try to do around 4 sets of stretch and folds with around 15 to 30 minutes between each set.
- Bulk Ferment:Once you've finished your stretch and folds, place the cling film or damp dish towel back over your dough and let it rest and bulk ferment at room temperature. You want your dough to double at this stage.
- Shaping Your Dough:Once your dough has finished its first ferment, it's time to give it some shape and surface tension and add the other half of the sprinkles you kept aside.I think this recipe lends itself to a batard however it's completely up to you what shape you would like. Stretch your dough out into a rough rectangle and sprinkle over a generous amount of sprinkles. Fold the top down and sprinkle on some more. Fold the sides in, sprinkle some more. Roll up the dough like a burrito and pull it towards you to create some surface tension and ensure all of those beautiful sprinkles are tucked up inside.Sprinkle a few sprinkles in the base of the banneton before you put the dough in so that they stick to the top of the dough during proofing.Place the shaped dough into your banneton with the seam side up. Stitch the base together if you need to.
- Cold Ferment:Now your dough is in it's "shaping container" cover it loosely with a plastic bag or damp tea towel and place into the fridge to cold ferment.Try to leave it in the fridge for a minimum of 5 hours. It will really depend on which kind of sprinkles you use as to how long you leave this one. I used Betty Crocker Parlour Perfect Sprinkles and they didn't bleed, even when I left this in the fridge for 24 hours.
- Preparing to Bake Your Sourdough:Once you're ready to bake your sourdough, you'll need to preheat your oven to 230C/450F. Place your Dutch Oven into the oven when you turn it on so it gets hot. Try to preheat for around 1 hour to ensure your oven is super hot - but you know your oven so just adjust this time if you need to.
- Baking Your Sourdough:Now it's time to bake!When your oven is at temperature. Take your sourdough out of the fridge. Gently place it onto a piece of baking paper.Gently score your bread with a lame, clean razor blade or knife.Carefully take your dutch oven out of the oven. Place the sourdough into the pot using the baking paper as a handle. Put the lid on and place into the hot oven. BAKE TIME:30 Minutes with the lid on at 230C/450F plus10-15 Minutes with the lid off at 210C/410FIf you're worried about the base of your bread burning, place a baking sheet on shelf underneath your Dutch Oven - it works!
- Finishing Your Bake:When you remove your dough from the oven, carefully remove it from the dutch oven as soon as possible and place on a wire rack to cool.
Notes
- Notes on Sourdough Starter - This recipe is based on you having an active starter that you have fed a few hours before starting your bake. For information on whether your starter is ready, go here. I've used 100g of starter, but you can use less if you're baking in warmer temperatures. You can read about how to adjust the amount of starter you use here.
- Notes on Sprinkles - I've used Betty Crocker Parlour Perfect Sprinkles. These didn't bleed too much, even when fermented in the fridge for 24 hours and then cooking them at 240C. They maintained their color beautifully.
- Notes on Stretch & Folds - This loaf requires you to add a lot of inclusions during stretch and folds so just take it easy. The dough will tear a little but just let it rest and it will recover and absorb all of the inclusions.
- Notes on Baking - If you're worried about the base of your bread burning, place a baking sheet on shelf underneath your Dutch Oven - it works! If you're worried about your bread not being cooked all the way through, turn the oven off and place your dough straight onto the oven rack. Leave the door ajar and let your bread rest there for a few hours. Remember not to cut into your loaf too soon - you'll need to let it cool for at least a few hours (4-6 is best).
Nutrition


I baked this recipe last weekend and shared it with my coworkers. It was a hit. I did leave out the white chocolate and added 1tbl-vanilla and 1/2tsp-almond extract. Smelled great while baking but could of been stronger in flavor. Next one gets the chocolate.
I'm so glad it was a hit! Yes the chocolate chips definitely help to add sweetness, but you can certainly add the vanilla and almond extracts too ... it will taste like a birthday cake bread! xo
I made this and yes it does take time, but is so worth it!!! Almost ate it all myself. Such a great sweet bread with a dallop of Greek yogurt on top. Bet it’s good toasted, too!
Excited to make this but am confused by this note -“Chill the dough slightly before mixing sprinkles in, it slows down colour bleeding. It will slow down bulk fermentation, but it won't stop it completely.”
When do we chill, before stretch and folds? Thanks in advance!
You can place the bowl of dough into the fridge for around an hour before you add the sprinkles, it doesn't have to be long, just enough to cool the dough slightly and stop the sprinkles from bleeding too much through the dough. This is optional though, so you don't have to do it 🙂
Thank you! baked it off this afternoon and now waiting for it to cool!!
Hi! I’ve tried to make this recipe twice now and each time I have the same problem. I add the sprinkles during my third set of stretch and folds, but during the bulk ferment process, there is so much liquid that’s formed from the sprinkles and it makes me dough slimy. What could I be doing wrong?
I haven't had this issue, but happy to help you try and work out what the issue is. What type of sprinkles are you using? Are you sticking to the hydration in the recipe, is your sourdough starter really runny or is it a thicker consistency?