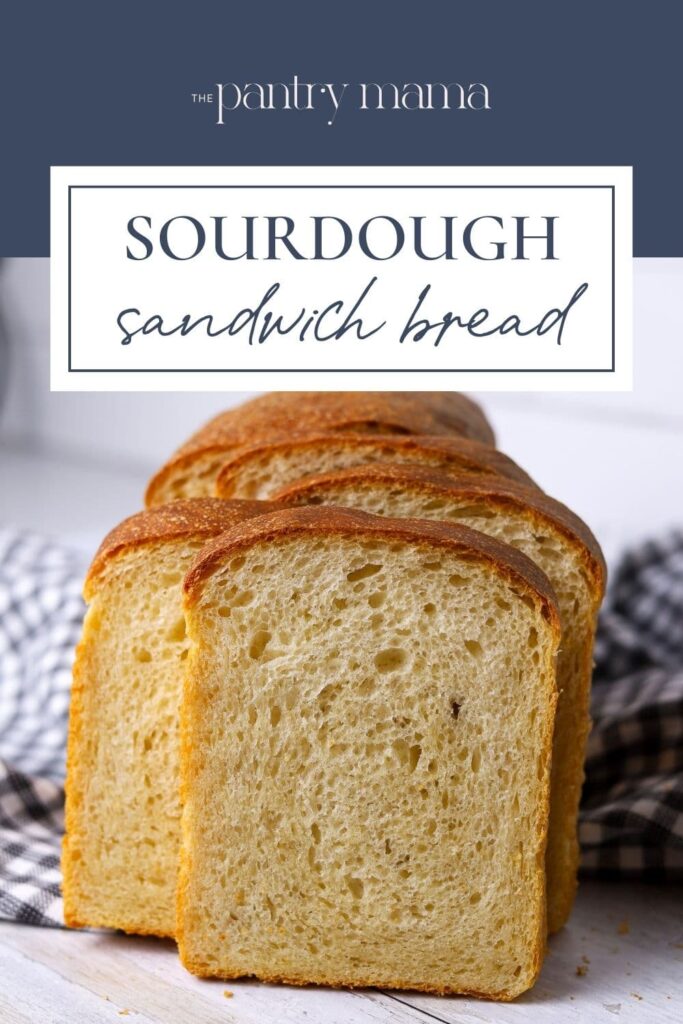
Sourdough Sandwich Bread
This post may contain affiliate links.

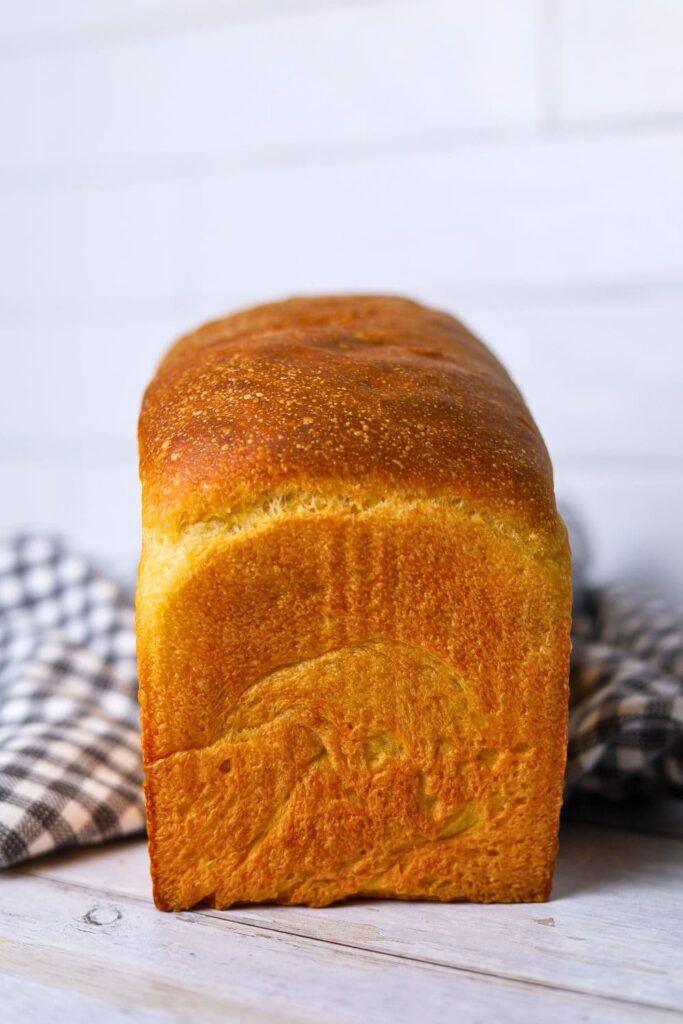
One of the recipes I get asked for the most is a soft sourdough sandwich bread made in a loaf pan. After trialling many inclusions and getting my family to vote on the best one, this easy recipe has become our family's go to soft sourdough sandwich loaf. Easy to bake and freeze, as well as the perfect toasting loaf, I'm sure you and your family will love it too!
Why You'll Love This Recipe!
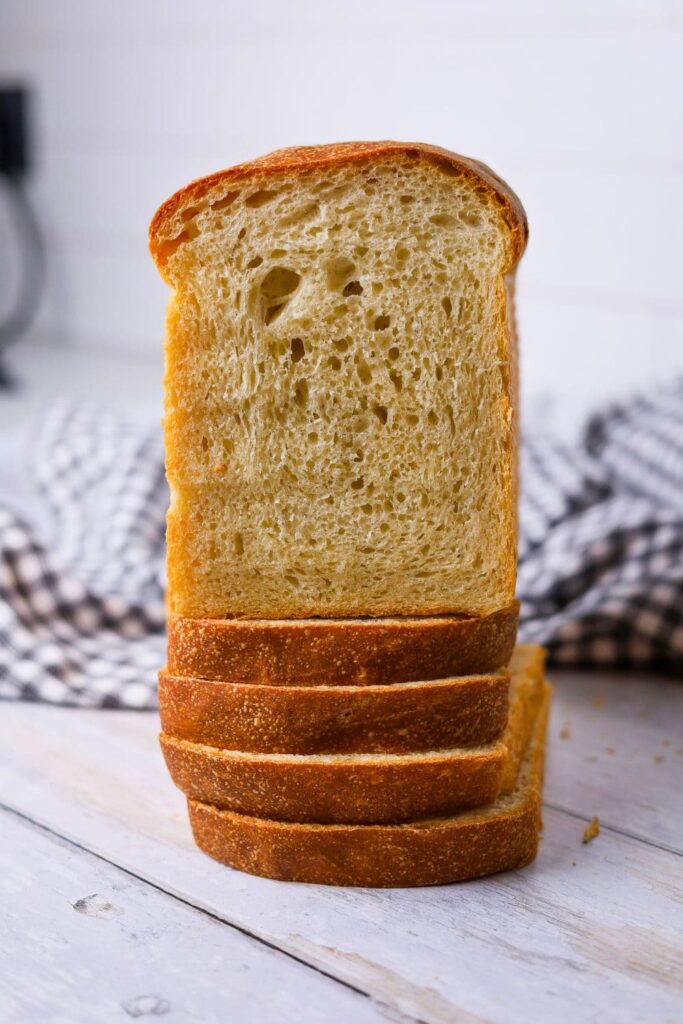
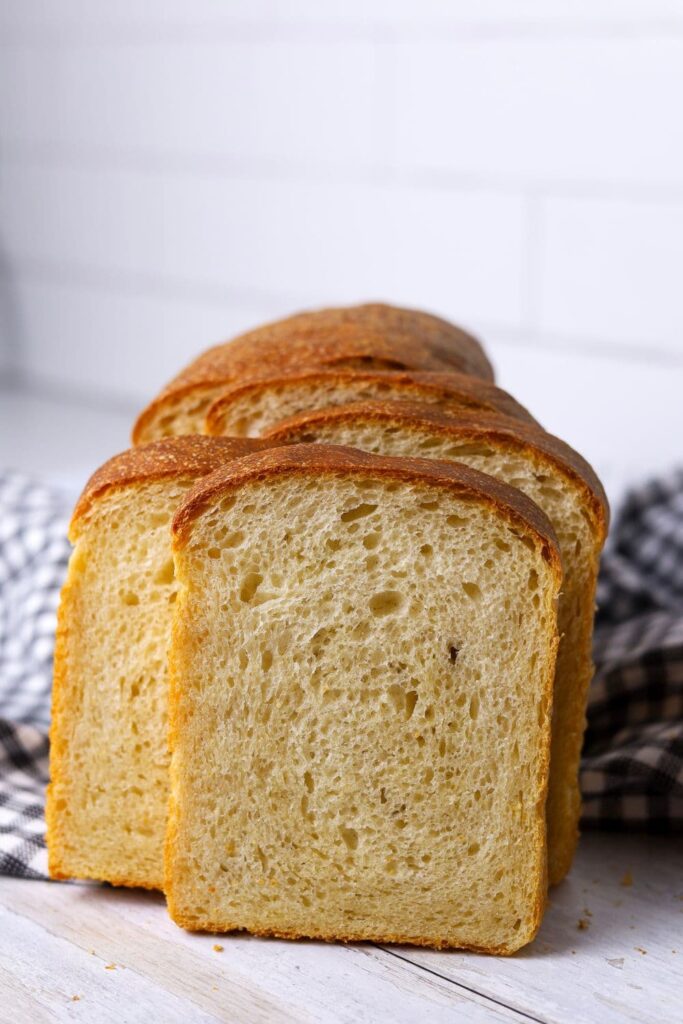
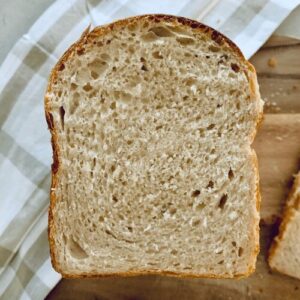
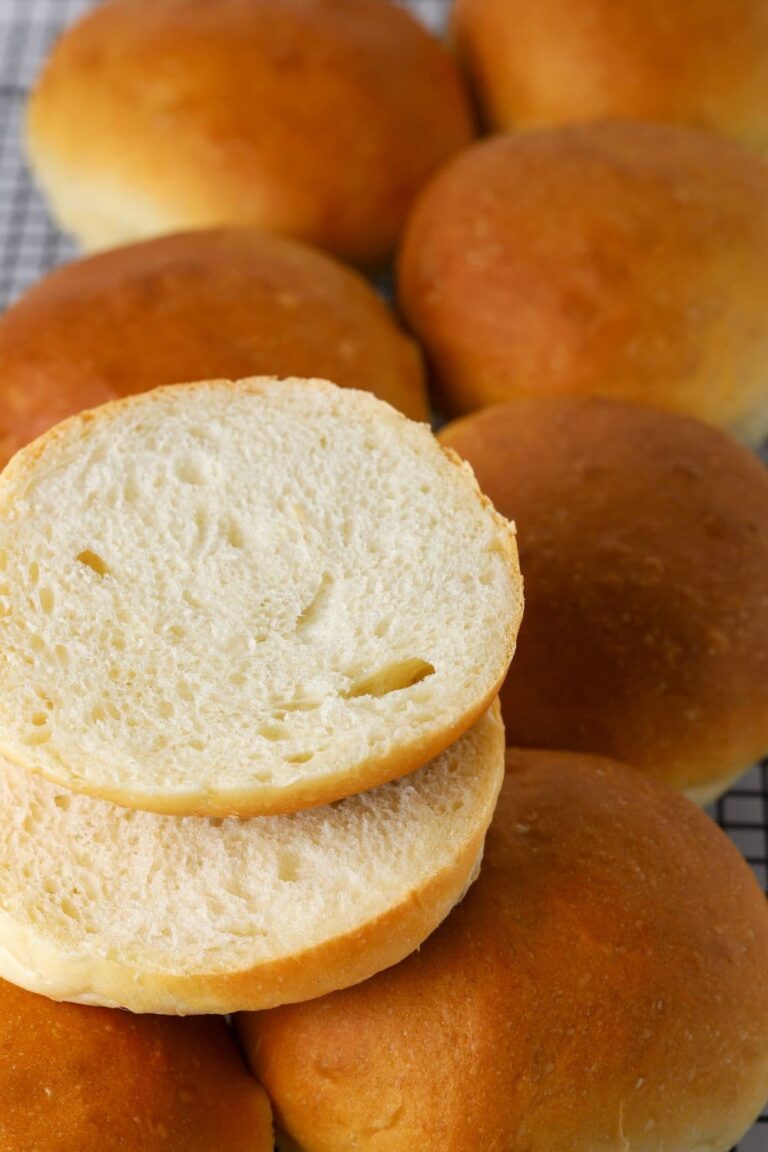
Soft, Closed Crumb - A good sourdough sandwich bread needs to have a closed crumb (so the fillings don't fall out) and a light airy texture. I personally like a softer crust on my sandwich bread, but you can certainly make this sandwich loaf with a crustier crust.
It's So Forgiving - Unlike other sourdough bread where you have to be a little more gentle to preserve the bubbles and shape, this sourdough sandwich loaf is totally forgiving and needs no special treatment!
Makes Perfect Sandwiches - Always soft, never crumbly, this soft sourdough sandwich loaf makes the perfect sourdough sandwiches!
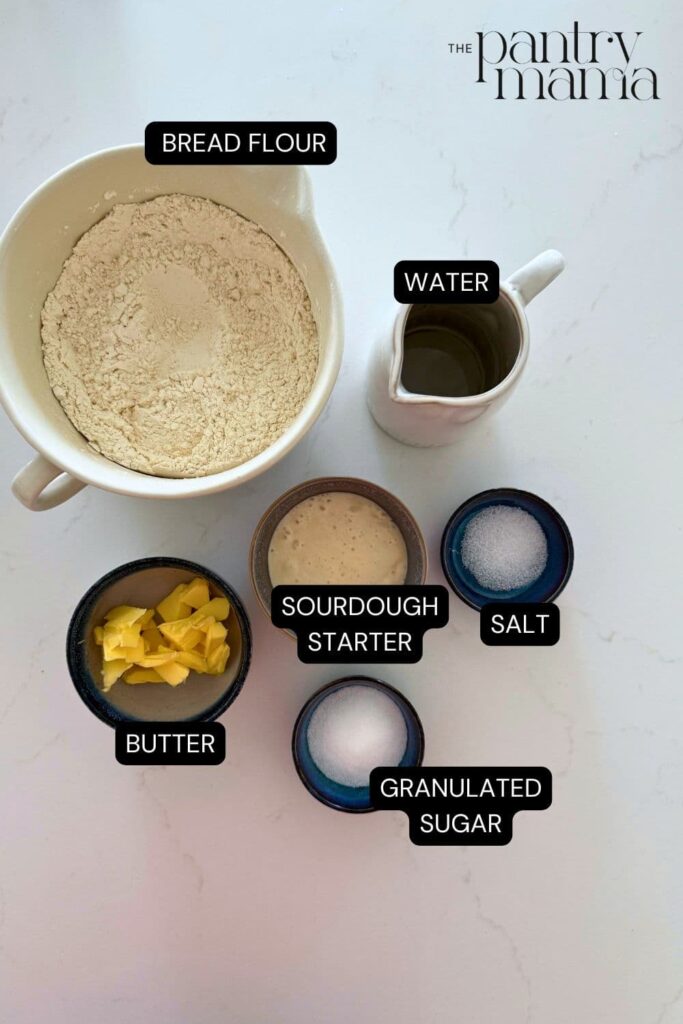
Ingredients
- Bread Flour - I prefer to make my sandwich loaves with protein rich bread flour rather than all purpose flour. If you're looking for a whole wheat flour alternative, I recommend this whole wheat sourdough sandwich bread.
- Sourdough Starter - You'll need active sourdough starter. I generally use 100g of starter in this loaf and don't have any issues bulk fermenting overnight, so long as the temperature isn't above 21ºC (69.8ºF). If you want to leave your sandwich loaf to bulk ferment overnight (and it's a bit warmer where you live), I recommend using just 50g of starter. You don't have to adjust anything else in the recipe. You can read about the effect of the starter amount on your sourdough.
- Water
- Butter & Sugar - To give this sourdough sandwich bread it's light, airy crumb I've added some butter and sugar. The butter and sugar help to give the bread a softer crust, perfect for a sandwich loaf. You can use the same weight in olive oil or coconut oil as butter if you want to make the loaf dairy free. You can use maple syrup instead of sugar, or leave it out altogether if you wish, but this will change the flavor and texture of the loaf.
- Salt
Equipment
Bread Pans - you'll need a selection of sandwich loaf pans to bake your bread. Having 2 or even 4 is a great idea if you want to bake several loaves at once. I love using USA pans and almost always bake this loaf in a USA Pan Pullman Pan (I do not use the lid) measuring 4"D x 4"W x 9"H or USA Pan 1.5 Pound Loaf Pan measuring 5"D x 10"W x 3"H.
Plastic Bread Bags - these are a great way to store your bread and fantastic if you're making multiple loaves at once. I do freeze my bread in these if I'm not freezing it for long, but if you are going to freeze your sourdough sandwich loaves for a few months, I recommend using freezer safe Ziplock bags.
Bread Slicing Guide - these are super handy if you're wanting perfectly sliced sandwich bread, although just having a great bread knife can be just as important to get even slices.
Overview: How To Make Sourdough Sandwich Bread
This sourdough sandwich bread recipe is written for a stand mixer (or Thermomix), which makes the process so much easier and saves time—something I appreciate with three kids in the house! There’s no stretching and folding involved, just straightforward kneading, which is perfect if you’re short on time. That said, you can absolutely knead this dough by hand. It does take a bit more effort to work in the butter and sugar, but it’s completely doable. However you knead it, the dough should be silky and elastic by the end, with no stickiness since this is an enriched dough.
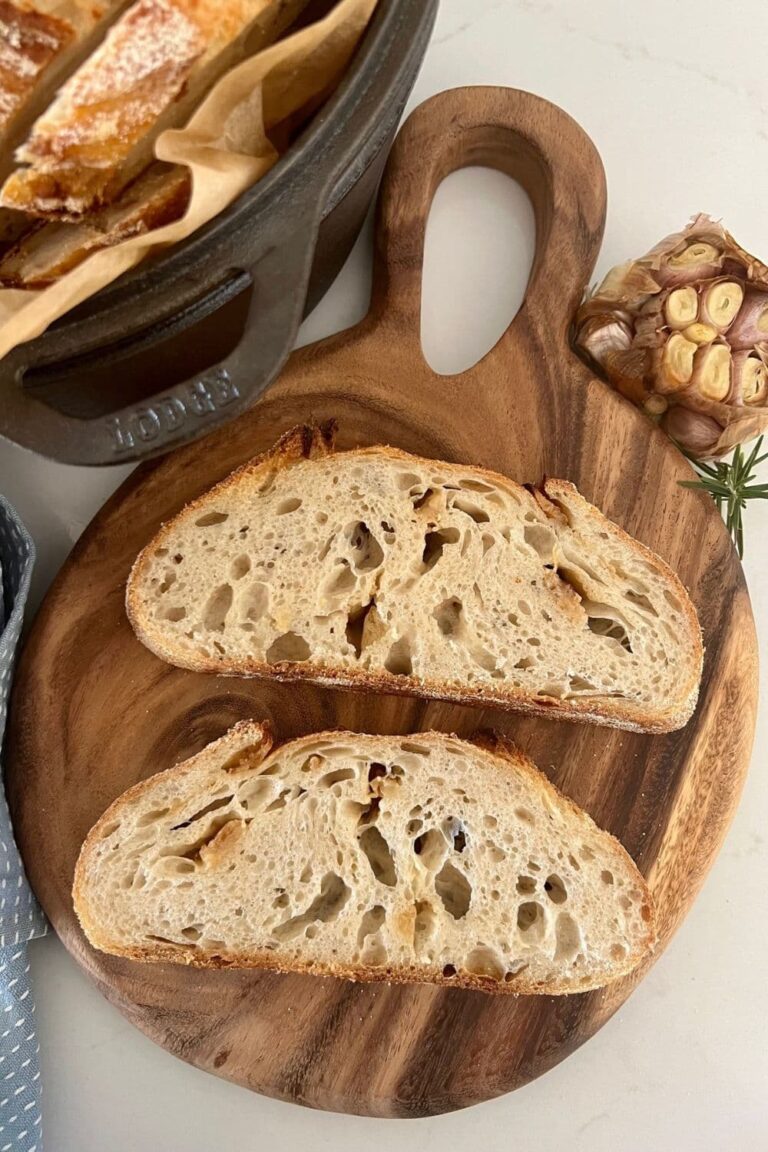
Sourdough sandwich bread is a little different from a traditional sourdough loaf. The crumb is tighter, the crust thinner, and it doesn’t require a cold ferment. Instead, it goes through a bulk ferment followed by a second rise after shaping, where the dough fills the loaf pan at room temperature. You can delay baking by placing the dough in the fridge once it has filled the pan, though I wouldn’t leave it more than 24 hours. For the best results, it’s usually better to bake it right away.
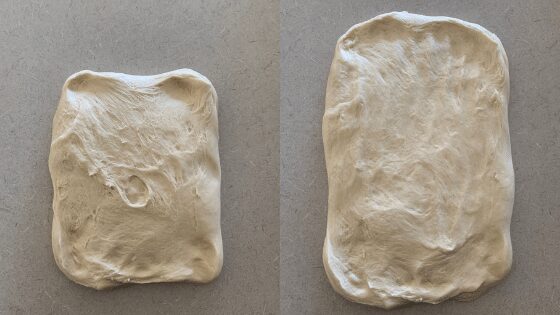
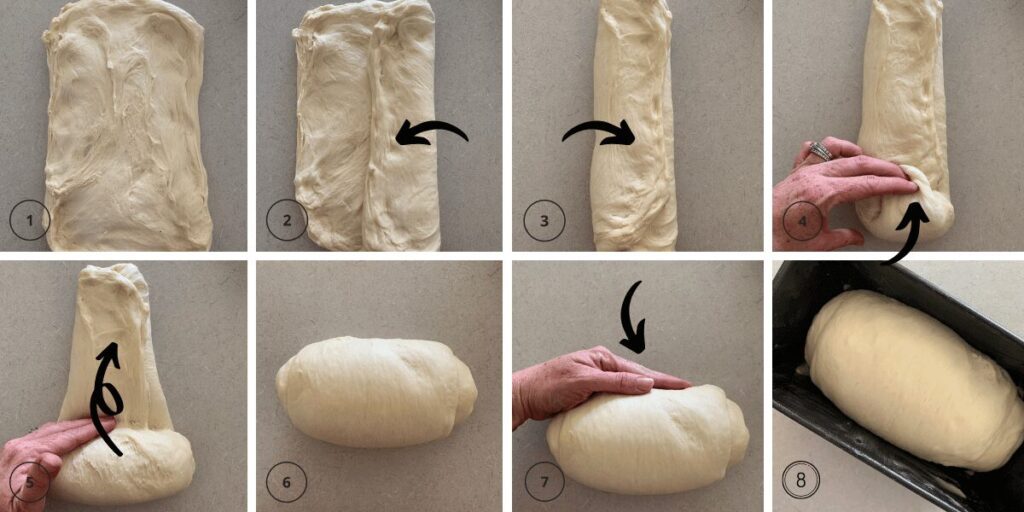
Shaping a sourdough sandwich loaf is wonderfully simple. Once your dough has finished its bulk ferment, tip it onto the counter with the smooth side down and the sticky side up. Ease it into a rough rectangle with the short edge facing you, then gently pop any large bubbles and press it out lightly with your fingertips. Roll the dough into a log, tucking the ends under neatly, and let it rest on your work surface for about 30 minutes. After resting, tighten the log slightly by pulling it against the counter to create surface tension, then place it seam side down into a buttered loaf pan. Unlike shaping a boule or batard, you don’t need to overthink this step. If the top isn’t perfectly tight, don’t worry—the loaf will still rise beautifully above the rim of the pan and taste absolutely delicious when it comes out of the oven.
You'll find step by step instructions in the recipe card at the end of this post, as well as a video.
Baking Timeline
You can easily make this sourdough bread fit your schedule, it just needs a little tweaking. But since we are all about easy sourdough on any schedule here at The Pantry Mama, I've got your back! Here's the schedule I follow when making this sourdough sandwich loaf. A few things to note when thinking about tweaking this schedule:
- Bulk Fermentation - this is a low hydration loaf, as well as an enriched loaf, hence bulk fermentation and proofing will be fairly slow.
- Proofing - this loaf involves allowing the dough a second rise and you'll want to ensure the dough rises about the lip of the pan.
| TIME | PROCESS |
|---|---|
| 8:00 AM | Premix the dough and allow it to rest. |
| 8.30 AM | Add the salt, butter and sugar. |
| 9.30 AM | Knead the dough, resting when you need to. |
| 10.00 AM | Cover the dough, allowing it to bulk ferment. |
| 4.00 PM | Time to shape your sourdough sandwich loaf and place into your loaf pan. |
| 4.30 PM | Cover the pan and leave your loaf for the second rise. You want the dough to rise above the lip of the pan. |
| 9.00 PM | Bake your sourdough sandwich loaf. |
| 9.40 PM | Leave the loaf to cool on the counter overnight, ready for toast and sandwiches in the morning. |
Flavor Variations
While this recipe will never do you wrong, you can always add a few variations to make it a little more exciting! Try some of these:
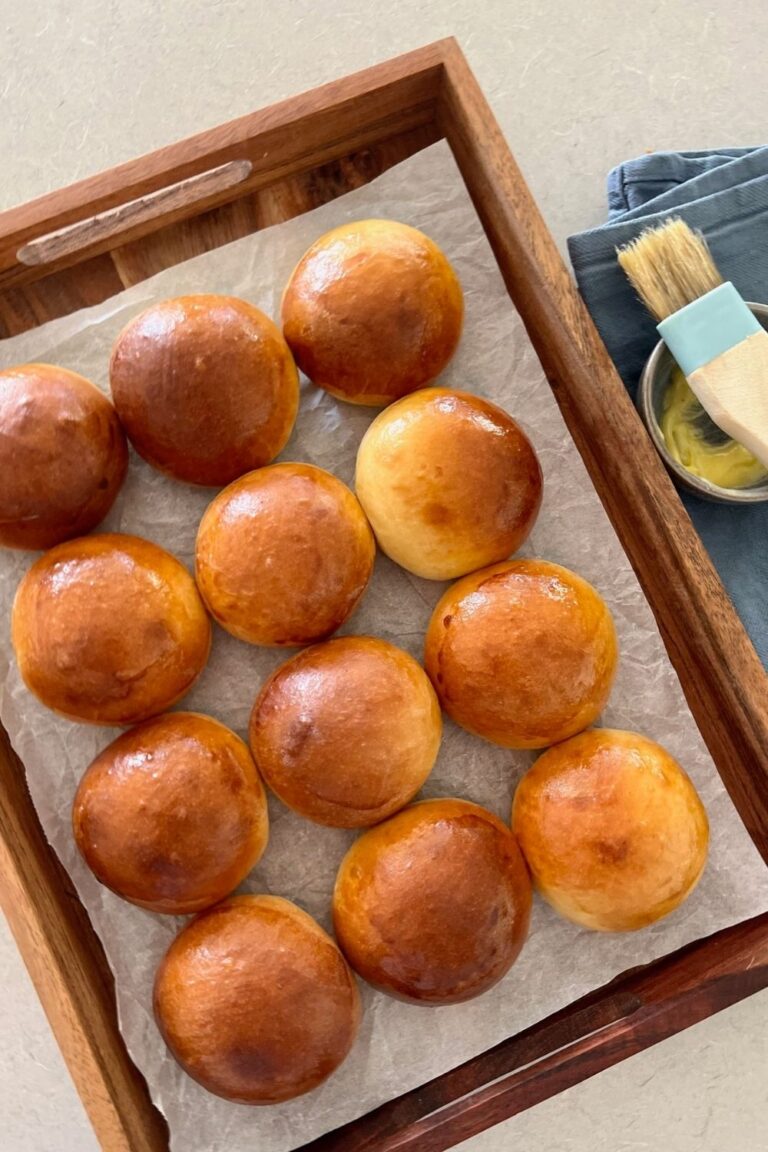
- Hawaiian Loaf – Replace the water with pineapple juice for a delicious variation. It tastes quite similar to these sourdough Hawaiian rolls.
- Honey & Oat Sandwich Loaf – Add 20g of honey and 50g of oats to the mixture when you add the butter, sugar and salt. If you’d like to add oats to the top you should do so when you put the dough into the tin – spray the loaf lightly with water so the oats stick to the top.
- Multigrain Sandwich Loaf – Add 50 to 100g of your favorite seeds to the mixture when you add the butter, sugar and salt. Seeds like sesame, sunflower, pumpkin and flax work really well.
How to Store + Freeze
I make a lot of this sourdough sandwich bread! So here's how we store and freeze it in my home:
Store at Room Temperature - I use large ziplock bags or these plastic bread bags to store sliced loaves at room temperature. It lasts around 48 hours at room temperature once sliced. After that, it's suitable for toast.
Freezer - I store unsliced loaves in large ziplock bags for convenience. I tend to slice them once thawed.
Sandwiches - If you're a mama and you're making school lunches, this bread works so well! I even make a big batch of sandwiches and freeze them, making school mornings so much easier!
Things like ham and cheese, plain ham, peanut butter and jelly, honey or jam work the best when freezing. They defrost easily and you wouldn't even know they were frozen! To store frozen sandwiches, you can place each sandwich in a plastic ziplock bag. This makes them easy to place in lunchboxes in the morning.
Frequently Asked Questions
This dough is very slow to rise, so your dough may be rising, just a little more slowly than you're used to. It's not uncommon for this dough to take 12 hours for bulk fermentation. Make sure you keep the dough warm. One of the most common reasons for sourdough bread dough not to rise is that your sourdough starter is not active enough or not mature enough.
Gumminess is generally a sign that your sandwich loaf is under fermented. You'll generally see a line of under cooked dough at the base of the loaf to go along with the gummy crumb.
You can add inclusions to this recipe if you want to. I find the best time to add them is during the kneading of the dough.
This dough is very quick to knead with a stand mixer, but will take around 8-10 minutes to knead by hand.
Sourdough Sandwich Bread Recipe
Video
Equipment
- Stand Mixer
- Loaf Pan (USA Pullman Pan 9" x 4" x 4" with no lid)
Ingredients
- 500 g Bread Flour
- 100 g Sourdough Starter (active, fed and bubbly)
- 280 g Water
- 60 g Butter (soft, cubed)
- 10 g Salt
- 20 g Granulated Sugar
Instructions
- Premix & Autolyse:Add your sourdough starter, flour and water into the bowl of your stand mixer.Knead the ingredients for around 30 seconds (using your dough hook) until they are just combined into a shaggy dough. Leave to autolyse for around 30 minutes.
- Now add the rest of your ingredients - salt, butter and sugar.Knead the ingredients for around 1 minute or until they are combined together. Now leave to rest for around 30 minutes.
- Kneading Your Sandwich Dough:Using the dough hook, knead the dough for around 3 minutes. The dough should become very elastic. You won't be able to see the butter as it will be well combined into the dough. Now give your dough a 30 minute rest.
- Now, knead your dough in the mixer for another 2-3 minutes. You'll know it's ready when it is slapping the sides of the bowl, it's soft and pliable and you can touch it without it sticking to your hands.If it's not quite there, it's ok to knead for a few more minutes to develop the gluten and get it to where it needs to be.
- Bulk Ferment:Once your dough is kneaded sufficiently, you need to bulk ferment it. At this point, you can just leave the dough as it is, covering it with some plastic wrap to stop it drying out. If you prefer your dough to be a bit neater, you can wet your hands and fold it into a neat ball.As with any sourdough bread, the bulk ferment time will depend on the temperature in your kitchen and of course the strength of your starter. You're looking for your dough to be just UNDER double.
- Shaping:Once your dough has finished its bulk ferment you can shape your dough. Before you start shaping, lightly butter your loaf pan.Ease your dough out of the bowl using a silicone dough scraper, remembering to have the smooth side on the counter and the sticky side facing up. You shouldn't need any flour for this as your dough shouldn't stick (it's such a beautiful silky, enriched dough).Gently ease your dough out into a rough rectangle, with the shortest side in front of you.Pop any large bubbles and gently flatten the dough using your fingertips. Then roll the dough up into a log (using the short side) and tuck the ends under. Leave the dough to sit and relax for around 30 minutes. After 30 minutes, tighten up the log by pulling the dough a little, using the sticky underside to create tension. Then simply plop the log into your buttered pan.
- Second Rise:Once your bread has been shaped and is in the tin, you'll need to let it rise again so that it fills up the shape of the pan. This should only take a few hours, but like the bulk ferment, this will depend on the strength of your starter and the temperature of your kitchen. You'll know it's done when it's risen above the lip of the pan (if you're using an open pan). It will be rounded on the top. When you poke it it will leave a slight indent but spring back nice and slowly. If you shaped it quite tight, you'll see some tension on the top of the dough as it's risen.
- Baking Your Sandwich Bread:Preheat your oven to around 180C/350F. Bake your sourdough sandwich loaf for approximately 40 minutes or until the top is golden brown. It may take a little longer depending on your oven. Once the loaf is baked, carefully place it on a rack to cool. Try to leave it at least one hour before you slice into it.
Notes
Nutrition


When you mentioned 60g of butter is that soft room temp butter or cold refrigerated butter? I’ve made this a few time but get inconsistent results. I know time and temperature play a roll. Water is room temp and my house stays at 68F and colder for the bulk temperature (night)
I'm confused about the term autolyse. I read a page here on pantrymama explaining the difference between autolyse and fermentolyse. I think this recipe is using fermentolyse. Is it correct, if I wanted a whole wheat loaf, I would use autolyse rather fermentolyse method as described in this recipe? Thank you for any insight to my confusion!
Hi I'm anxious to try this! Question - how are you figuring 12 hours of bulk fermentation? Could you give me a sample timeline from start to finish? Just wondering if you are doing this in 1 day. thanks!
Looking for a sandwich loaf without sugar. Honey instead? Omit?
You can definitely sub the sugar with honey, or leave it out if you wish.
It would be nice if you answered these comments. People have real questions that need answers.
Omit and it's wonderful. Didn't add or increase anything, just no sugar
Hi! I know this is sourdough but is there anyway to offset the sour taste? I haven’t tried it yet but looking for something to make for my kiddos and I know they would prefer a mild flavor. Thanks!
I love this recipe, I've used it a few times, however, my 2nd rise takes about 4-5 hours to rise over the rim of the pan, is there an explanation to this?
To make this dairy free, can I leave out the butter? Or substitute olive oil (low flavor)?
You can sub for vegan butter or olive oil yes 🙂
Would you use the same amount of grams in olive oil as you do butter?
Do you have a timeline you could post?
I made this twice, the second time oil instead of butter with the same weight. Used 2/3 avocado oil and 1/3 olive oil. It came out perfectly. Full olive oil would likely impart a lot of olive oil flavor. Not necessarily a bad thing, but with only 1/3 olive oil, there's a hint of that flavor, but its subtle, which is what I wanted.
This is a fantastic recipe
This looks like a really useful recipe. I’ve been making sourdough for nearly 4 years now and have made several of your other recipes. I’d like to have a go at making this but don’t have a mixer. Can it be kneaded by hand and, if so, do you have any tips for doing so? Thanks.
This looks amazing. My dough came out a little less firm and a tad sticky after the bulk ferment. What did I do wrong?
When I click on the link for the plastic bread bags it states that the bags are NOT suitable for freezing…?
How can I adapt this recipe to high altitude please?
Looks like you have some whole wheat in your loaf pictured. If so, what % did you use?
I heard about the benefits of eating sourdough products after staying away from bread for a few years. I started with a sourdough that challenged me because everything was "different". Now I'm making the sandwich loaf and after a few mishaps I finally have it! I make three tiny loaves and set them in a regular loaf pan side by side. After they cool I separate them and store them individually in sandwich bags in the freezer. That one practice helps thaw one out in a short time and keeps us from eating more than we should. I love it!
P.S.
I followed your link to Amazon to get the bread bags you suggested but it says right in their description that their bags are not meant for freezer storage.
Hi, would the result be as good with spelt flour instead of baker's flour?
I know the powdered milk is optional, but what do you think about substituting milk for some of the water.
What is the milk powder for and if you don’t use it what’s the difference?
Thank you for this recipe (and for your artisan loaf recipe, which is very easy to follow!) If I want to replace the sugar with honey, how much would you recommend using?
Although I missed the step for the final rest before plopping in the pan, this loaf came out beautifully. I had no soft butter so grated frozen butter and that works well!
Sorry to bug you twice with the same question, but I’ve have been so lucky in receiving answers (I know you’re a busy mama). My husband has eaten sourdough sandwich bread (bought) for over 40 years and now I’m trying to make it. With your loaf pan recipe, there’s only the one ferment to keep the crumb “not so open”. He also doesn’t like “soft and squishy”. If I did do the 2 ferments would that result in a more open crumb or would I just leave out the butter and sugar?
Can I do the second rise in the refrigerator overnight?
I want to have a strong sour dough flavor. This is what I’m thinking, please tell me if it’s correct: For the second rise, put it in the fridge for 18-24 hours, then bring to room temperature and complete the rise, then bake. I’d love an expert opinion since I’m a newbie.
You are my Sourdough Sherpa! I've been making gorgeous sourdough loaves for a year now using your recipes and techniques.
I live on a sailboat, currently cruising in Mexico, so I have some unique challenges. One is that I'm running out of high-protein bread flour, and won't be able to get anymore for a few months. The only flour I can find right now is AP, and in one of your articles you mentioned that your sandwich loaf recipe works well with AP. So I gave this one a try.
I don't have a stand mixer, so I have to knead this by hand. I found the dough to be VERY sticky! So much so that I couldn't knead it by hand at all. I ended up using a metal scraper. Which did work well, and kept all the dough together instead of stuck to the surface or my hands. But I'm wondering if it's the AP flour that caused it to be sticky? Should I alter the recipe at all for AP flour? Or could the stickiness have been due to the temps? It's pretty warm here and we don't have AC on our boat, so my galley temp was about 81 when I was doing this.
Also, since I wasn't doing it in a mixer, I wasn't sure how long to knead it for. Any suggestions?
By the way, the loaf came out FANTASTIC! So even with my kneading issues, this is clearly a very forgiving recipe.
How do you store your leftover loaves? I'm assuming you put them in the freezer, but do you find it's better to slice them first or just put them in whole? And how do you wrap them? Thank you for a great recipe! 🤗
Can you use whole milk instead of powdered milk?
You can - but you'd need adjust the recipe 🙂
Would you adjust by omitting the milk powder? Anything other change?
Hi! To adjust the recipe, would I just exchange some of the water for the milk? Like 50g of milk, so 230g of water? Thanks!
I am diabetic, so eating bread is a challenge for me. Is this loaf as healthy as your Long Fermented Sourdough Bread recipe?
I haven't baked for a couple of years now because I can only eat so little, but found your site and am SO inspired to get going again. Husband loves the look of this loaf.
Do you recommend using unsalted butter vs salted butter?
I always use salted butter 🙂
Loved this recipe - the beautifully soft sandwich bread was a big hit with our family.
However I would caution Thermomix users. I let the dough rise in my TM bowl and then went to knead it in my TM bowl and it struggled big time. So much so it actually stripped my blades and the base of the blades snapped off, so I will need to replace it now. The blades are 9 years old though so it was probably accumulative but I shouldn't have persevered in the TM when I heard the machine struggling. Next time I think I will remove from the bowl to let it rise and put it back in smaller pieces very cautiously or maybe just mix by hand. A costly mistake!
Thank you! I will try that. I made this loaf for the first time the other day and it turned out beautifully! Perfectly delicious!
If I use oil in place of butter, what kind of oil is best and how much should be used ?
Do you cook it to a certain temperature or how do you know when it is done?
Love this recipe thanks, but my thermi was struggling with the second knead, so now I tuck the 60g butter in slivers around the edge of thermi bowl immediatley after autolysing which has been super successful! Thanks for your great recipes