Sourdough Sandwich Bread
This post may contain affiliate links.
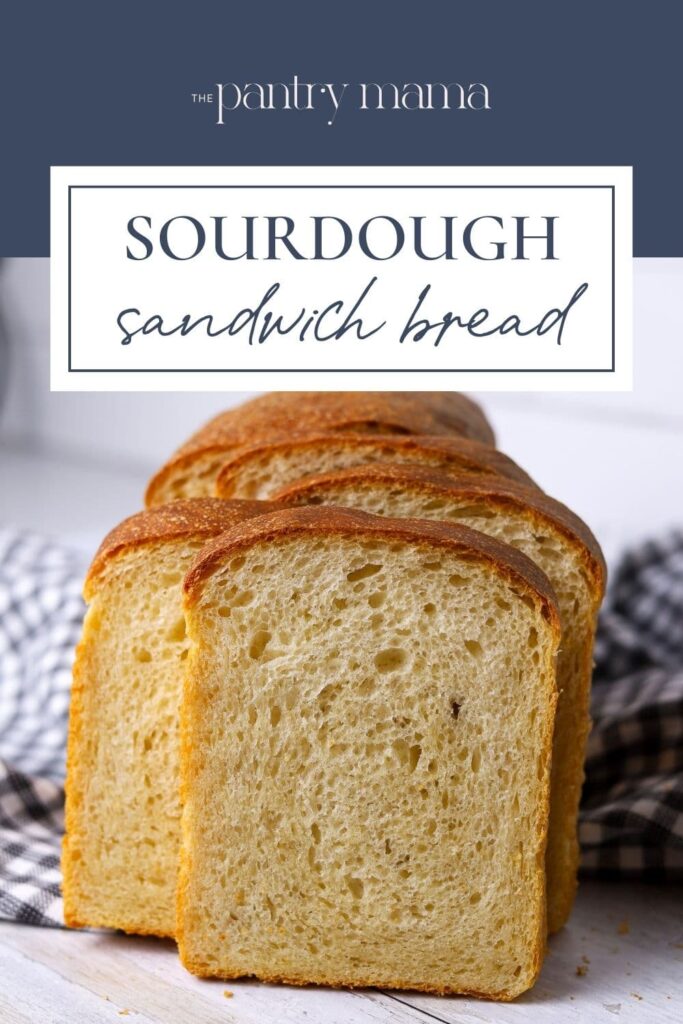
One of the recipes I get asked for the most is a soft sourdough sandwich bread made in a loaf pan. After trialling many inclusions and getting my family to vote on the best one, this easy recipe has become our family's go to soft sourdough sandwich loaf. Easy to bake and freeze, as well as the perfect toasting loaf, I'm sure you and your family will love it too!
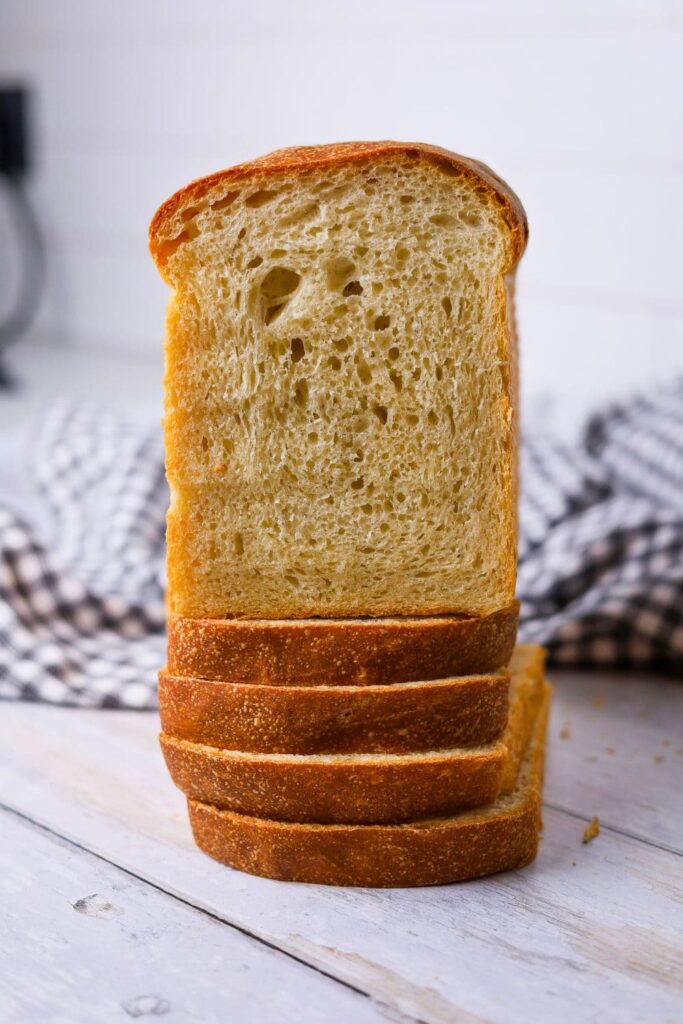
Why You'll Love This Recipe!
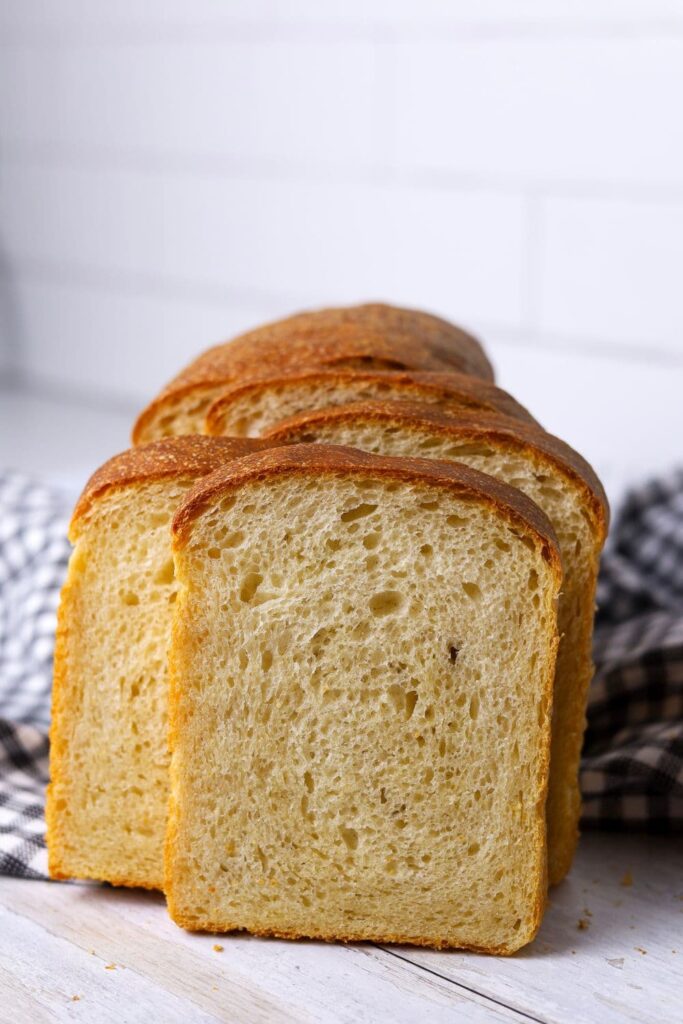
Soft, Closed Crumb - A good sourdough sandwich bread needs to have a closed crumb (so the fillings don't fall out) and a light airy texture. I personally like a softer crust on my sandwich bread, but you can certainly make this sandwich loaf with a crustier crust.
It's So Forgiving - Unlike other sourdough bread where you have to be a little more gentle to preserve the bubbles and shape, this sourdough sandwich loaf is totally forgiving and needs no special treatment!
Makes Perfect Sandwiches - Always soft, never crumbly, this soft sourdough sandwich loaf makes the perfect sourdough sandwiches!
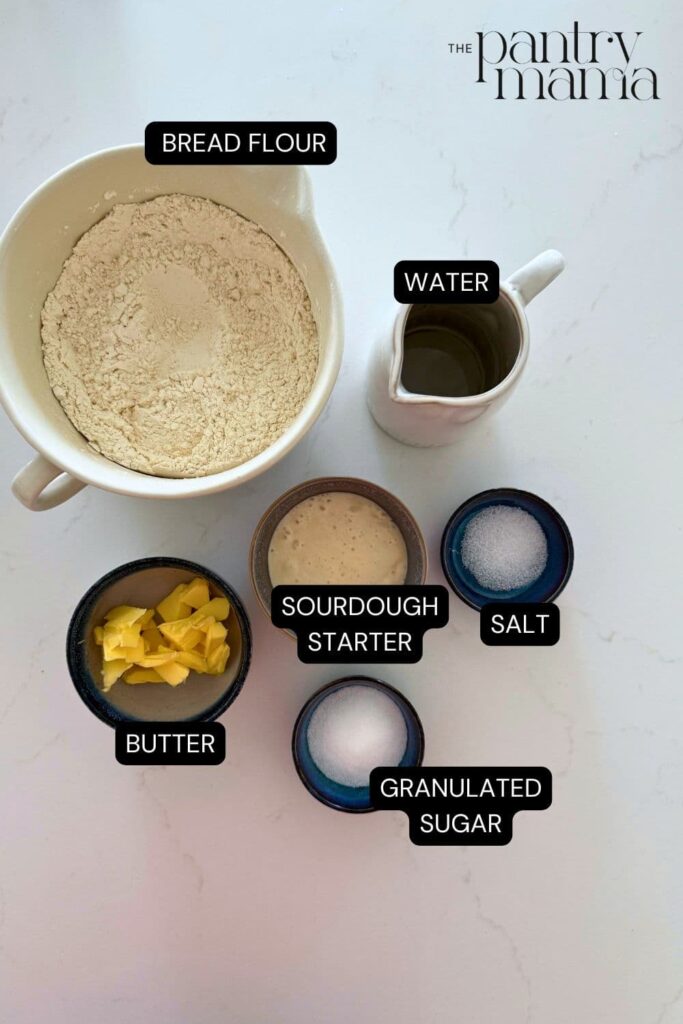
Ingredients
- Bread Flour - I prefer to make my sandwich loaves with protein rich bread flour rather than all purpose flour. If you're looking for a whole wheat flour alternative, I recommend this whole wheat sourdough sandwich bread.
- Sourdough Starter - You'll need active sourdough starter. I generally use 100g of starter in this loaf and don't have any issues bulk fermenting overnight, so long as the temperature isn't above 21ºC (69.8ºF). If you want to leave your sandwich loaf to bulk ferment overnight (and it's a bit warmer where you live), I recommend using just 50g of starter. You don't have to adjust anything else in the recipe. You can read about the effect of the starter amount on your sourdough.
- Water
- Butter & Sugar - To give this sourdough sandwich bread it's light, airy crumb I've added some butter and sugar. The butter and sugar help to give the bread a softer crust, perfect for a sandwich loaf. You can use the same weight in olive oil or coconut oil as butter if you want to make the loaf dairy free. You can use maple syrup instead of sugar, or leave it out altogether if you wish, but this will change the flavor and texture of the loaf.
- Salt
Equipment
Bread Pans - you'll need a selection of sandwich loaf pans to bake your bread. Having 2 or even 4 is a great idea if you want to bake several loaves at once. I love using USA pans and almost always bake this loaf in a USA Pan Pullman Pan (I do not use the lid) measuring 4"D x 4"W x 9"H or USA Pan 1.5 Pound Loaf Pan measuring 5"D x 10"W x 3"H.
Plastic Bread Bags - these are a great way to store your bread and fantastic if you're making multiple loaves at once. I do freeze my bread in these if I'm not freezing it for long, but if you are going to freeze your sourdough sandwich loaves for a few months, I recommend using freezer safe Ziplock bags.
Bread Slicing Guide - these are super handy if you're wanting perfectly sliced sandwich bread, although just having a great bread knife can be just as important to get even slices.
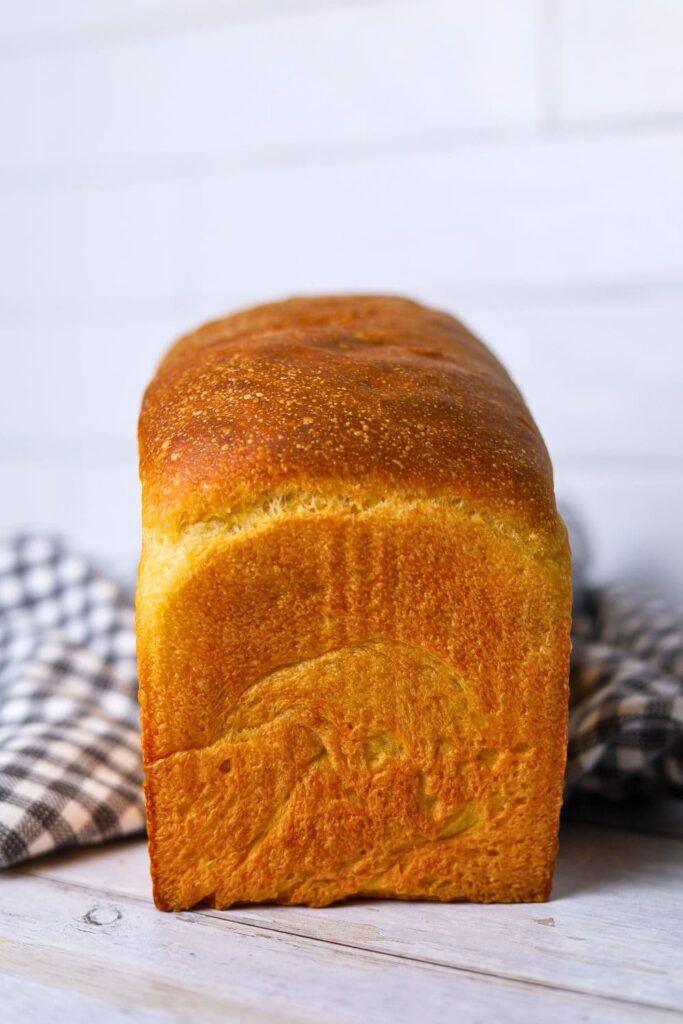
Overview: How To Make Sourdough Sandwich Bread
This sourdough sandwich bread recipe is written for a stand mixer (or Thermomix), which makes the process so much easier and saves time—something I appreciate with three kids in the house! There’s no stretching and folding involved, just straightforward kneading, which is perfect if you’re short on time. That said, you can absolutely knead this dough by hand. It does take a bit more effort to work in the butter and sugar, but it’s completely doable. However you knead it, the dough should be silky and elastic by the end, with no stickiness since this is an enriched dough.
Sourdough sandwich bread is a little different from a traditional sourdough loaf. The crumb is tighter, the crust thinner, and it doesn’t require a cold ferment. Instead, it goes through a bulk ferment followed by a second rise after shaping, where the dough fills the loaf pan at room temperature. You can delay baking by placing the dough in the fridge once it has filled the pan, though I wouldn’t leave it more than 24 hours. For the best results, it’s usually better to bake it right away.
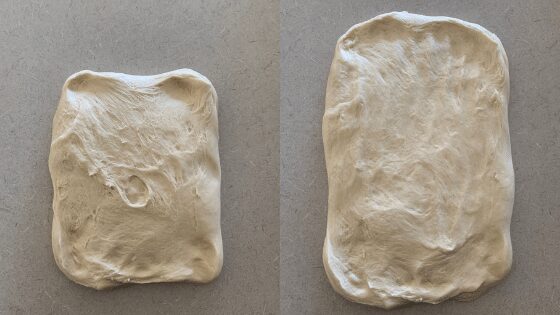
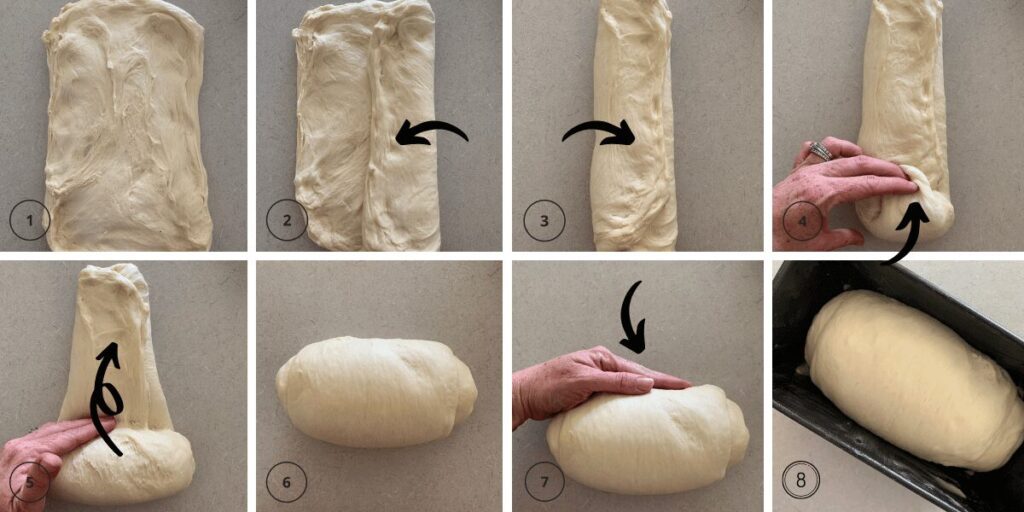
Shaping a sourdough sandwich loaf is wonderfully simple. Once your dough has finished its bulk ferment, tip it onto the counter with the smooth side down and the sticky side up. Ease it into a rough rectangle with the short edge facing you, then gently pop any large bubbles and press it out lightly with your fingertips. Roll the dough into a log, tucking the ends under neatly, and let it rest on your work surface for about 30 minutes. After resting, tighten the log slightly by pulling it against the counter to create surface tension, then place it seam side down into a buttered loaf pan. Unlike shaping a boule or batard, you don’t need to overthink this step. If the top isn’t perfectly tight, don’t worry—the loaf will still rise beautifully above the rim of the pan and taste absolutely delicious when it comes out of the oven.
You'll find step by step instructions in the recipe card at the end of this post, as well as a video.
Baking Timeline
You can easily make this sourdough bread fit your schedule, it just needs a little tweaking. But since we are all about easy sourdough on any schedule here at The Pantry Mama, I've got your back! Here's the schedule I follow when making this sourdough sandwich loaf. A few things to note when thinking about tweaking this schedule:
- Bulk Fermentation - this is a low hydration loaf, as well as an enriched loaf, hence bulk fermentation and proofing will be fairly slow.
- Proofing - this loaf involves allowing the dough a second rise and you'll want to ensure the dough rises about the lip of the pan.
| TIME | PROCESS |
|---|---|
| 8:00 AM | Premix the dough and allow it to rest. |
| 8.30 AM | Add the salt, butter and sugar. |
| 9.30 AM | Knead the dough, resting when you need to. |
| 10.00 AM | Cover the dough, allowing it to bulk ferment. |
| 4.00 PM | Time to shape your sourdough sandwich loaf and place into your loaf pan. |
| 4.30 PM | Cover the pan and leave your loaf for the second rise. You want the dough to rise above the lip of the pan. |
| 9.00 PM | Bake your sourdough sandwich loaf. |
| 9.40 PM | Leave the loaf to cool on the counter overnight, ready for toast and sandwiches in the morning. |
Flavor Variations
While this recipe will never do you wrong, you can always add a few variations to make it a little more exciting! Try some of these:
- Hawaiian Loaf – Replace the water with pineapple juice for a delicious variation. It tastes quite similar to these sourdough Hawaiian rolls.
- Honey & Oat Sandwich Loaf – Add 20g of honey and 50g of oats to the mixture when you add the butter, sugar and salt. If you’d like to add oats to the top you should do so when you put the dough into the tin – spray the loaf lightly with water so the oats stick to the top.
- Multigrain Sandwich Loaf – Add 50 to 100g of your favorite seeds to the mixture when you add the butter, sugar and salt. Seeds like sesame, sunflower, pumpkin and flax work really well.
How to Store + Freeze
I make a lot of this sourdough sandwich bread! So here's how we store and freeze it in my home:
Store at Room Temperature - I use large ziplock bags or these plastic bread bags to store sliced loaves at room temperature. It lasts around 48 hours at room temperature once sliced. After that, it's suitable for toast.
Freezer - I store unsliced loaves in large ziplock bags for convenience. I tend to slice them once thawed.
Sandwiches - If you're a mama and you're making school lunches, this bread works so well! I even make a big batch of sandwiches and freeze them, making school mornings so much easier!
Things like ham and cheese, plain ham, peanut butter and jelly, honey or jam work the best when freezing. They defrost easily and you wouldn't even know they were frozen! To store frozen sandwiches, you can place each sandwich in a plastic ziplock bag. This makes them easy to place in lunchboxes in the morning.
Frequently Asked Questions
This dough is very slow to rise, so your dough may be rising, just a little more slowly than you're used to. It's not uncommon for this dough to take 12 hours for bulk fermentation. Make sure you keep the dough warm. One of the most common reasons for sourdough bread dough not to rise is that your sourdough starter is not active enough or not mature enough.
Gumminess is generally a sign that your sandwich loaf is under fermented. You'll generally see a line of under cooked dough at the base of the loaf to go along with the gummy crumb.
You can add inclusions to this recipe if you want to. I find the best time to add them is during the kneading of the dough.
This dough is very quick to knead with a stand mixer, but will take around 8-10 minutes to knead by hand.
Sourdough Sandwich Bread Recipe
Video
Equipment
- Stand Mixer
- Loaf Pan (USA Pullman Pan 9" x 4" x 4" with no lid)
Ingredients
- 500 g Bread Flour
- 100 g Sourdough Starter (active, fed and bubbly)
- 280 g Water
- 60 g Butter (soft, cubed)
- 10 g Salt
- 20 g Granulated Sugar
Instructions
- Premix & Autolyse:Add your sourdough starter, flour and water into the bowl of your stand mixer.Knead the ingredients for around 30 seconds (using your dough hook) until they are just combined into a shaggy dough. Leave to autolyse for around 30 minutes.
- Now add the rest of your ingredients - salt, butter and sugar.Knead the ingredients for around 1 minute or until they are combined together. Now leave to rest for around 30 minutes.
- Kneading Your Sandwich Dough:Using the dough hook, knead the dough for around 3 minutes. The dough should become very elastic. You won't be able to see the butter as it will be well combined into the dough. Now give your dough a 30 minute rest.
- Now, knead your dough in the mixer for another 2-3 minutes. You'll know it's ready when it is slapping the sides of the bowl, it's soft and pliable and you can touch it without it sticking to your hands.If it's not quite there, it's ok to knead for a few more minutes to develop the gluten and get it to where it needs to be.
- Bulk Ferment:Once your dough is kneaded sufficiently, you need to bulk ferment it. At this point, you can just leave the dough as it is, covering it with some plastic wrap to stop it drying out. If you prefer your dough to be a bit neater, you can wet your hands and fold it into a neat ball.As with any sourdough bread, the bulk ferment time will depend on the temperature in your kitchen and of course the strength of your starter. You're looking for your dough to be just UNDER double.
- Shaping:Once your dough has finished its bulk ferment you can shape your dough. Before you start shaping, lightly butter your loaf pan.Ease your dough out of the bowl using a silicone dough scraper, remembering to have the smooth side on the counter and the sticky side facing up. You shouldn't need any flour for this as your dough shouldn't stick (it's such a beautiful silky, enriched dough).Gently ease your dough out into a rough rectangle, with the shortest side in front of you.Pop any large bubbles and gently flatten the dough using your fingertips. Then roll the dough up into a log (using the short side) and tuck the ends under. Leave the dough to sit and relax for around 30 minutes. After 30 minutes, tighten up the log by pulling the dough a little, using the sticky underside to create tension. Then simply plop the log into your buttered pan.
- Second Rise:Once your bread has been shaped and is in the tin, you'll need to let it rise again so that it fills up the shape of the pan. This should only take a few hours, but like the bulk ferment, this will depend on the strength of your starter and the temperature of your kitchen. You'll know it's done when it's risen above the lip of the pan (if you're using an open pan). It will be rounded on the top. When you poke it it will leave a slight indent but spring back nice and slowly. If you shaped it quite tight, you'll see some tension on the top of the dough as it's risen.
- Baking Your Sandwich Bread:Preheat your oven to around 180C/350F. Bake your sourdough sandwich loaf for approximately 40 minutes or until the top is golden brown. It may take a little longer depending on your oven. Once the loaf is baked, carefully place it on a rack to cool. Try to leave it at least one hour before you slice into it.
Notes
Nutrition




So I am still learning but can you help me with something. I do a double recipee and then split it in half, adding the oats and honey to one of them. This one rises so much faster than the regular sour dough, especially on the second rise. How long does it take your sourdough loaf to do the second rise?
Thanks
I love all that you do! Thank you for all your heard work making sourdough baking a joy!
Question! I have a stainless steal mixing bowl. May I bulk ferment in this? I saw that you said to turn the dough out of the Thermomix into glass or ceramic and I don't know what the Thermomix container is made of so thought I'd ask.
Thank you!
You can use stainless steel if you prefer. It's a non reactive metal so is fine for sourdough.
I've made this a few times and although the finished product turns out ok, it is a sloppy mess in the process. When I turn the dough onto the counter after the bulk rise, it is very sticky, sticks to the counter, my hands, and I can't really roll it but end up just plopping the sticky blob into the bread tin. Thoughts?
Mine rose nicely in the dish and over the loaf pan but is super heavy. Should it be light?
My loaf was dense and heavy. I used the mixer.
This troubleshooting guide may help. It has some possible reasons for dense bread.
This recipe is perfect for sandwich bread and when it gets a bit old, it is perfect for French toast. Thank you for sharing this beginner friendly recipe!
That's such a great idea, Gina! Thank you so much.
Hi 🙂 Made this bread yesterday and it came out great. However my kids are not liking the sour taste to their sandwiches. I saw your guide on how to make your sourdough less tangy, and it mentions you could double the amount of starter.
I was thinking of giving this a go next time, but just wondering would you keep everything else the same?
Thanks ❤️
Hi 🙂 Made this bread yesterday and it came out great. However my kids are not liking the sour taste to their sandwiches. I saw your guide on how to make your sourdough less tangy, and it mentions you could double the amount of starter. I was thinking of giving this a go next time, but just wondering would you keep everything else the same? Thanks ❤️
Sorry I put a typo in email before
Yes you can double the amount of starter for sure. It should be ok. I would add half the liquid to the recipe and then add the rest bit by bit as you don't want the dough too wet 🙂 Your kids might also like this recipe, it's not sour at all 🙂
I have been bulk fermenting for 20 hours, and not alot of rise. I used 50g starter. Is this to long?
20 hours is a long time for BF, however with only 50g of starter it will take a while. I would try 100g of starter next time and keep the dough warm to ensure it doesn't take so long. The problem with a longer BF is that the gluten network starts to break down.
Regarding the question of fridging for the bulk rise ... I timed mine poorly and the bulk rise started at night. I could see it would be done rising well before morning, so I took a chance and put it in the fridge. When I took it out in the morning, it took about 4 hours (in an oven with the light on) to wake up again, but it did and rose nicely. I was able to bake my bread that evening. This is some of the best bread I've ever made! The dough goes from being very stiff, dry, and shaggy initially to a little wet, soft, and a touch sticky toward the end. In fact, my shaped "log" was spreading out too long so I bypassed the last stretch of the dough and just plopped the log into a bread loaf pan after 20 min. of rising. It finished rising perfectly. In fact, I'm making 2 more loaves this morning! (My recommendation for timing the batch in a 68F kitchen: feed starter and let it sit out overnight to double (around 10-12 hrs). Start dough recipe first thing in the morning. If your starter is well-fed and vigorous, you should be able to bake by evening. Bulk rising in the oven with a light on speeds things up. It rises faster than I thought it would.) Definitely recommend this recipe. It's outstanding! P. S. I didn't add the milk powder.
I made this bread for the first time and it was excellent! I doubled the recipe baked them both in a Pullman pan, one with the lid on and one with the lid off. They were both excellent. I love the squarish shape of the Pullman with lid (pain de mie).
I let the shaped loaves retard in the refrigerator overnight so I could bake in the morning. It took about 3 hours from them to complete the rising after sitting in the cold overnight.
The flavor is very milk and slightly sweet. I’ve been looking for a sourdough sandwich bread and I’m so glad I found one my family loved! I usually make the Tartine country loaf by Chad Robertson (excellent bread).
I will be adding more whole wheat in the future. I did add about 5% vital wheat gluten to the all purpose unbleached flour I used (I didn’t have bread flour) and the results were fantastic.
I froze one loaf and plan on this being a weekly rotation in my bread baking adventure.
Thank you for developing and posting this recipe.
I’ve made this recipe twice. Both times my dough has been very sticky. Could the measurements for flour need to be increased if I’m not using powdered milk? If so would you increase it by the same amount as the powdered milk?
Can I do the bulk ferment overnight in the fridge?
Hi there, Bulk fermentation is always done at room temperature. Cold fermentation is in the fridge. This article will help explain further. 🙂
The most beautiful sourdough and loaf I've ever made!!💕
Just made this today, so amazing I will definitely keep this recipe and make again and again! Seriously this bread exceeded expectations, the sourdough tanginess coupled with the soft texture! Thank you!!
I made a perfect loaf following this recipe! Next time I may try fermenting the dough overnight in the fridge for a more sour taste. Thanks so much for this recipe!
I have a question. Why does sourdough sandwich bread not need a cold fermentation? I have a gluten intolerant family member and I want to be sure this recipe is safe for him. He usually only eat long ferment breads.
This loaf actually takes quite a while to ferment at room temperature, so it would be similar to a cold ferment in terms of the time. You could put it in the fridge after it has risen in the pan if you want to to.
I'm going to ask the group, since I don't think the author will reply.....Has anyone made this in their breadmachine on the dough cycle, thru the first rise? I don't this with other breads but haven't tried this one. Thanks in advance!!
Hi Donna, This is a recipe for making sourdough using your bread machine. And this one is made using the bread machine start to finish with discard. 🙂
Amazing texture!
Tried this recipe a few months ago and loved it. Just came back to it again and see that you’ve removed the measurement for milk powder in the ingredient list but still mention it being an option in the directions and article. Would love to know how much to use so I can finish off the milk powder I bought specifically for this recipe and have no use for otherwise. Thanks.
Sorry I did remove it, it was 50g. I prefer it without the milk powder 🙂
I really enjoyed this recipe and many of the recipes I have tried here. My sandwich loaf was successful! I subbed 1/3 of the flour with whole wheat bread flour. So wish I could share pictures!
The only thing I wished I had a little bit more guidance on is how long to (rough estimate range) bulk fermentation for. I think I ended up bulk fermentation for 16-18 hours over the counter. My apartment is pretty chilled right now sitting at 72 degrees. Overall my bread turn out well. It was appt more forgiving than I anticipated. I am used to seeing the cues for sourdough bread so it was confusing not to get the slight same cues while baking except for some of bubbles during shaping. Overall it smells lovely when it is getting baked. It baked in my oven for 1 hr at 355 degree Fahrenheit.
Is it possible to freeze my starter? I will be on vacation for two weeks???
Yes you can freeze your starter, you'll find instructions for freezing your sourdough starter here.
This is a favorite at our house! I reduce the water to about 260g and don’t use the powdered milk. This bread turns out perfect every time. Thank you!
This is a long shot, I can see most questions haven’t been answered, but I struggled with the texture of this dough. Like others, at the step it should be ready for bulk ferment it is still very sticky and sticking to the side of the bowl. Kneaded for a couple extra minutes, left for a rest and did a stretch and fold. Not sure if it’s actually ready though! Would really appreciate some troubleshooting help for this
This isn't generally a sticky dough, being lower in hydration, it should be quite elastic and smooth rather than sticky. I'd still just let it go into bulk fermentation as the gluten network will develop further during bulk fermentation. If you are having trouble with stickiness, look at the flour you're using, if it's not higher in protein, you might need to change the flour or use just a little less water to reduce the stickiness 🙂
I subbed 100 gms whole wheat and increased hydration by 10 grams as well. Because I used a liquid sweetener, and live in a humid climate, when it was time to shape my dough it was slightly (but not overly) sticky. I did choose to flour my surface, which was the right call (since I have cheap laminate countertops which love sticking lol). I shaped my dough (initial, rest, and tension shaping) and placed immediately in the fridge overnight. I removed from the fridge and popped directly into preheated oven and also an oven-safe pan of boiling water for extra steam/moisture (this makes a big difference for my breads). I was worried it may not spring but it did! It's also the first sandwich loaf I've made that didn't burst somewhere along the top.
I ultimately baked for 50 minutes - it's worth noting I live at a very high altitude, as well. I also baked at a higher initial temp and then brought it down at the 15 minute mark. Beautiful loaf!
Hello,
Can you please help me. You mentioned that there was a place to click to make your Sourdough Sandwich loaf in multiple loafs. I can not find the calculator to find out how much ingredients I need to make this recipe. I want to make 6 loafs. Can you please advise me how much ingredients I need or please tell me where the calcultor is. I hope you see this pretty fast as I need to get this done this week to have them done by Saturday today is Sunday so in a few days I got to start.
Thank you,
Sharon
If you look on the recipe card, next to where it says "ingredients" you'll see 1x 2x 3x - this will allow you to calculate either double or triple the ingredients for bigger batches 🙂
Dear Kate, thank you so much for all your wonderful recipes! This sandwich bread is everyone’s favourite among my friends and family. I add 100g of seeds and it’s just perfect. And so easy to work with!
In using a stand mixer, at what speed do you use?
Knead at speed 1-2 🙂
Just baked this recipe this morning. So easy and delicious. Very tender and tangy. I did second riding in the fridge. Ran out of time, would have been baking after midnight. I let it warm up on the counter for a few hours. What are your thought on using melted and cooled butter? Easier to incorporate with stand mixer. I did subsequent kneading by hand. Love the feel of the dough and triceps workout!!Deborsg
So glad you loved the recipe! It's such a favorite here too! You can most certainly use melted and cooled butter for sure. I have tested this recipe with melted butter and it actually works out just fine 🙂