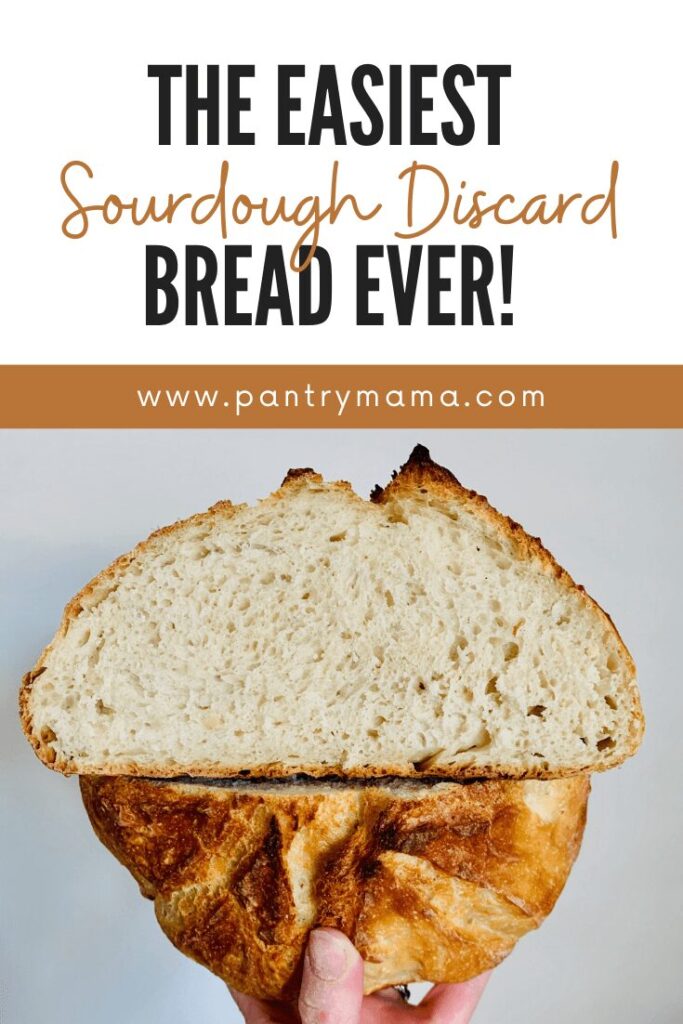
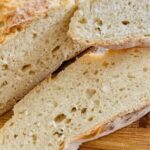
The Easiest Sourdough Discard Bread You'll Ever Make!
This post may contain affiliate links.

If you have a sourdough starter, then chances are you'll have a bit of sourdough discard from time to time - depending on how often you feed it.
Baking true sourdough bread is certainly rewarding, but with our busy lives, we don't always have time for a 2 to 3 day process, right?
So I've created the easiest sourdough discard bread you'll ever make - seriously it's so so simple!
This recipe is perfect if you're still building your sourdough starter, but you really want to bake bread.
Make This Sourdough Discard Bread In Under 2 Hours!
You can make this easy sourdough discard bread within 2 hours if your house is particularly warm. It does use a little commercial yeast - but you will still get some of the sourdough tang from your discard.
If your house is a little cooler, it will take a little longer for the dough to double. Mixing the ingredients takes just seconds!
Experiment With Different Flours
I often make this bread in the evening so I can have a loaf ready for our eggs in the morning. I can knock it out super fast and my kids love to eat it. It's also a great way to experiment with different flours.
While it's super fast to make it from baker's (bread or high protein) flour (AP and plain flour will also work), you could supplement some of the 450g of flour with rye, spelt or even whole wheat.
If you are using different flours, I recommend holding a little of the water back while mixing. It's much easier to add more if you need to, than take it away (or have to add more flour if the mix is too wet).
An Easy Way To Use An Immature Sourdough Starter
This easy sourdough discard bread will also work for you if your starter is not quite ready to start baking true sourdough bread, just like this sourdough discard sandwich bread. The commercial yeast will create the rise that is lacking in your sourdough starter.
If you're having trouble with your sourdough starter, you'll find some tips to boost your starter here.

Extend The Rise
If you don't want to bake your bread immediately once it's risen, you can pop it in the refrigerator for up to 24 hours. Just put the whole bowl in the fridge, covered with a plastic bag or some cling wrap to stop it drying out.
This is a great idea if you want to have it freshly baked for dinner for example or when you first wake up.
When you want to bake it, let it sit out on the kitchen counter for around 30 minutes before it goes in the oven (so take it out when you turn on the oven to preheat).
Want To Give Your Sourdough Discard Loaf A Flavor Boost?
You can add lots of different flavor combinations to this sourdough discard loaf. It's up to you whether you go sweet or savory. Some of my favorite ways to add flavors to this loaf include:
- Jalepeno Cheddar
- Bacon & Cheese
- Olives (you can use whatever olives you love)
- Chocolate chips and orange zest
- Cranberries and walnuts
- Raisins and cinnamon for a fruit loaf
It's best to add the flavors to the dough when you first mix it, that way you can leave it alone to rise rather than have to disturb it to add in the flavors.
Handling The Dough
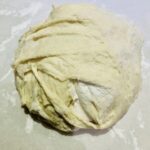
This sourdough discard loaf can be quite a sticky dough. The stickiness will really depend on the consistency of your starter and how wet you choose to make it. But it's certainly not impossible to work with and is one of the most baked recipes in my Facebook Group!
With a little flour and a dough scraper, you should be able to shape it into a roundish shape. It doesn't need to be perfect, it's a rustic type of bread. If you have a bread lame or razor blade, you can score the top to encourage it to spring up in the oven.

Bake Your Discard Bread In A Dutch Oven
To get the best results for your sourdough discard bread, bake it in a Dutch Oven. It keeps the steam inside the pot and enables your bread to get the rise before the crust starts to harden. Keep the lid on your Dutch Oven for the first 30 minutes of your bake, then take it off for the last 10 minutes to give it some crunch and colour. Just like baking true sourdough, the Dutch Oven really is a game changer.

If you love this recipe, you'll enjoy making this sourdough pane di casa bread. It is a lovely rustic sourdough you can enjoy in just a few hours.
Easy Sourdough Discard Bread
Equipment
- Mixing Bowl
- Digital Scales
- Dutch Oven
Ingredients
- 450 g Bread Flour
- 360 g Water Warm
- 10 g Salt
- 7 g Instant Yeast or Rapid Yeast
- 100 g Sourdough Discard unfed sourdough starter
Instructions
- Take a clean ceramic or glass bowl and add your flour, warm water, instant yeast, salt and sourdough discard.
- Use a wooden chopstick or end of a wooden spoon to gently bring all the ingredients together into a shaggy dough. You don't need to it be fully smooth, just ensure that all of the flour is wet.
- Cover the bowl in cling film and set it somewhere warm for 1 - 2 hours. It really depends on the temperature of your house with this one. If your house is warm, 1 hour will be plenty. In the depths of winter or with air con, you may need more than 2 hours. You just want it to double in size, no more or it won't rise in the oven.
- Around 45 minutes before you want to put your bread into the oven, you'll need to put a dutch oven into the oven and preheat it to around 220C/430F.
- Once your dough has doubled in size, grab a piece of parchment paper and lay it out on your counter. Sprinkle on a few tablespoons of rice flour or fine semolina flour (this is just so that the dough doesn't stick to your hands).NOTE - If you are wanting to put your bread in the refrigerator to bake another time (usually within 24 hours) then just pop the cling film over the bowl of doubled dough and put in the fridge. You don't need to do anything to the dough before it goes in.
- Scoop your dough out with your hands - if it's particularly wet it's perfectly fine to pour it onto the paper.If it's not too wet, use the flour and your finger tips to gently bring it into a round shape - you will need to pull each side over each other to do this. If your dough is too wet - don't fret, just try and bring it into some kind of shape without getting too messy.

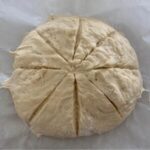
- Score your dough if you're able to - otherwise just leave it and it will open up naturally in the oven.
- Carefully take your dutch oven out of the oven and remove the lid. Use the parchment or baking paper as a handle to gently place your discard bread inside the pot and put the lid back on.
- Bake in the oven, with the lid on for 30 minutes at 220C/430F. Then remove the lid of the pot and bake for a further 10 minutes at 200C/390F. Remove the bread from the oven and allow to cool on a wire rack.
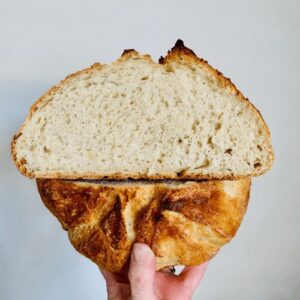
- Try to let it cool for at least an hour before cutting it. It will still taste great if you cut it hot, but it's so much easier to cut if you let it cool!

Nutrition


Hi
I use a steam convection oven. I usually do about 50% steam At 425F when doing bread if it is not on an automatic function.
I do not put a lid on because the lid is to encourage a steam like cooking and mine oven released the steam. , but I do pre heat the crock up first then add the artisan bread. I haven’t made the starter from this site yet. I am going to get a scale and see if that makes a difference
Any other steam convection oven people on here with suggestions of what they do.
Thanks
Anne
A scale makes a difference! I was skeptical but it’s amazing the difference! I have a cheap one from Walmart and it works just fine!
Never made sour dough bread before. This sounds silly but I don’t know how to make the sourdough discard
My dough after mixing everything in is dry? I’ve left it to rise but not sure what I’ve done wrong?
Can I bake this with just 50 g. discard?
No you need 100g 🙂
Can I use more discard? For example 200g discard and reduce the bread flour to 350g and water to 310g?
Is the cooking time the same if I half the recipe?
You can! Just make up for the missing 50g of starter by adding 25g of water and 25g of flour.
Sure you could. Just cut all the other ingredients in half as well.
This recipe is desperately missing salt.
I love this recipe! It’s a tasty way to use up discard, easy to make, & versatile too. I have used it as a base for cheddar-jalapeño, blueberry-lemon, & cranberry-orange discard breads. I share this recipe frequently with others looking for quick & easy discard recipes.
I don't have a cast iron dutch oven. Is there any alternative? Being seniir, I find those pots too heavy plus storage is an issue if I want it in a convenient location for when I bake bread
I used my corning bake ware and it worked just fine, but check the glass lid for temp max, you may need to use tin foil or a baking shee for a lid, if your glass lid isn't safe at the temps needed for this recipe.
Wow, is that sodium content correct? Or is that for the whole loaf?
I made it with 40g today and upped my dart yeast to 8.5g. Turned out perfectly.
If you half everything yes! I did it and it turned out exactly the same 😉
Can you use all purpose flour?
I have used AP flour many times for this recipe. It changes the texture a bit, but I still think it is fantastic! (especially with cinnamon and raisins added)
I do, but I use much less water, all purpose doesn’t hold like bread flour- the first two loaves were with a VERY wet mix .. so I use 300g of water but keep everything else the same!
I have to say, I have made this recipe over 100 times. It is my go to when I don’t have two days to bake sourdough and need a quick option in two hours. It is always delicious and SO easy.
I use Costco cheap flour and it comes out great every time. This is my go to bread recipe!
What is bakers flour? Bread flour? Thanks!
Baker's Flour is a high protein strong white flour used in Bakeries. I'm in Australia so the equivalent in the US would be Bread Flour yes.
What size Dutch oven for this loaf? Is there a second rise before the bake?
Can I make without psyllium husk?😬
Oh my! This was positively delicious! I followed your recipe exactly as written. I will be making this again, and again,and again. Thank you!
I cooked at recommended time and it was still gummy on the inside. Any way to tell when it’s cooked all the way through without using a thermometer?
What are substitutes for a Dutch oven? Can I use a ceramic pan or a stainless pan with glass lid?
This one definitely needs to be enclosed. Any pot with a lid is fine as long as it can cope with higher temperatures.
Please....Can you convert this recipe into the english system of measurements ? Thank you
sorry what is the English system of measurements. I only bake in grams because it's accurate and gives a consistent result, unlike volume measurements 🙂
Hi, I'm new to all this and wonder if I leave the dough in the fridge for 24 hours to bake the following morning, do I bake straight from the fridge or have it come to room temperature? Thank you.
Using your discard sourdough what amount of bread flour can I replace with either Einkorn or Einkorn AP flour?
Can you add herbs, cheese, olives. Etc.
Absolutely you can add herbs, cheese, olives etc.
Just want to put in a good word for using grams and a kitchen scale. I recently bought one to use to bake sourdough and I will never go back to cups. You can end up having to wash three or four measuring cups in the English system (cups, spoons). A kitchen scales with a tare function has transformed my baking.
I’m in the US and use g to bake with as they said it’s way more accurate. Purchase a scale and you should have no problem converting.
I was told by another lady that the crock from your crockpot could be used and if the lid isn’t oven safe for high temps you can use a cookie sheet. I would make sure the crock can handle higher heat.
Can you add jalapeño and cheese to this bread?
I use a Pyrex dish with domed lid. It seems to work pretty well for me.
Hello! Thanks so much for this recipe! I have to admit I was doubting myself when the dough finished proofing it was a sticky shaggy mess! However, I was able to shape and score it and it looks AMAZING after the bake! This is a keeper for sure!
Just baked my very first loaf of bread and I am so thrilled! It was beyond yummy! This recipe is great! I will say I needed to bake it a little longer than the recipe said. Only other complaint is that my white Dutch oven turned brown.. not sure why! But everyone loved the loaf!
The dough is so wet that it’s hard to score - any tips?
That's ok - just let it open up naturally in the oven. It's not essential to score xo
wet your lame
When i have a dough that's too wet to score with a knife or lame -i just snip it with scissors, making 3 or 4 connected cuts to end up with a long arc. Works great.
Really liked this recipe, thanks for posting. '
Reading this idea while mine is baking so too late for me, but what a great suggestion. I have to admit, my dough going into the oven was a sticky mess, so I came to the comments looking for hope that it will work out. Thanks all for the reassurance. Looking forward to tasting it. The dough (stuck to my fingers) was delicious.
Reading this idea while mine is baking so too late for me, but what a great suggestion. My dough going into the oven was a sticky mess, but it came out really good! I have a lot of trouble fitting a 3 day sourdough process into my busy life. This was not the perfect loaf, but honestly it was so good I may adopt this as our everyday bread. The only issue will be keeping up with my sons who scarfed down two loaves of this within a couple hours.
Absolutely love this recipe- quick, easy, and so delicious!
Like others, I need to extend the cooking time to get to 200 degrees to prevent undercooked, gummy center. Typically about 25-30 mins for the uncovered portion of the bake time.
With this minor adjustment it is just fabulous!
Sarah, I refrigerate it in a bowl with generous a amount semolina (or rice flour, so it doesn't stick) over a cloth and cover it for at least a couple of hours before baking it and makes it much easier to score...LOVE this recipe so much!
Kate, THANK YOU for sharing this ...you are a baking genius! <3
This recipe was so quick and fuss free. Great for busy workdays — I just made the dough in the morning and put it in the refrigerator and baked it a little before dinner. I’m always on the lookout for practical recipes for my sourdough discard and this was perfect. Thanks.
Thank you so much! I'm so glad you love it 🙂
Can I cook this in a loaf pan?
If I’ve dried my discard out on paper, can I/must I re-constitute it for this recipe? If so, how much water to re-constitute?
My loaf looked beautiful when it was done. But I found the dough too wet and sticky to work with. I ended up covering the bottom with flour. I think next time I may just put it straight into the Dutch oven on the parchment paper instead of tying to shape it first.
I am wondering how I would double the recipe. Could I bake a double recipe in one dutch oven or would I need two dutch ovens to bake two separate loaves?
I would bake two separate loaves 🙂
I made this bread because we wanted homemade bread but I had not fed my starter in a few days. It absolutely is the easiest and best tasting of all my recipes. Perfect crust. Perfect crumb. Very good as sandwich bread. Excellent recipe ❤️❤️❤️👍🏻
Fantastic! Yes it's a great quick easy recipe - quicker than going to the store 😉
I’m so surprised that there is no leading or stretch and foods?
Why so different from the others?
I’m just now making this. Hope it turns out!
This is a really simple discard loaf so it's a "no knead, no stretch and folds". If you are wanting my master sourdough recipe with stretch and folds using active sourdough starter, I recommend looking at this sourdough bread recipe 🙂
Bread turned out great! 20 hour cold proof, because of my schedule, hence this recipe works out for me.
Great crumb, crunchy crust, I added Feta cheese and kalamata olives.
I just came across this recipe today. I didn't have any fast action yeast, so replaced it with 15g fresh yeast. I used 100g of my starter, that had been sitting neglected and unfed in my fridge for months
(I originally came here, to see if it could be saved!)
The bread came out looking, smelling & tasting beautiful. I wish I could post a picture!
I love the results. My bread was with a great consistency and crust. I su Dea Cluche instead of a Dutch oven and the results were great !!!
You don’t have to knead this dough at all?
I've made this recipe twice and really love it!. I live at high altitude (7,000 feet) and it worked perfectly with the exception that is was super wet so I could not score it but that worked fine. Both times I made it I checked the internal temp at 40 minutes and it was about 195F degrees. I baked longer it in 5 minute intervals checking the temp and it never got above 200 F degrees, but I baked until it was golden, which was about 15 more minutes.
However, the second time I made it I remembered to turn down the oven, still had to bake it another 15 minutes, and it was a little gummy in the middle (and we did not wait the whole hour that time). I think I read that at high altitude oven temps should be higher so I will try that next time.
Regardless, love this recipe! Thank you!!
No knead ?
no knead 🙂
Hello
Is it possible to use some whole wheat or the flour in place of some of the white flour? If so would you know the ratios? TIA
Hello. I'd like to try this, but I don't have instant yeast. Can I sub in regular yeast? Thanks.
This was amazing! My entire family loved it! My son took one bite and said, "This is better than Whole Foods!" Super easy and much faster than my other bread recipes. I was a bit concerned because it was so wet after the first rise, but it came out perfect! I didn't endure cooking it for the last ten minutes because I use a cooking thermometer and it was already at 200 degrees. I usually take it out at 170, but this was perfect!
This is my favorite bread! I have been adding extra flavors with great success. I want to try olive oil and rosemary but am nervous about the oil making it more loose. Any tips?
Hi, I gave a question on sourdough discard. It seems discard starts from day 3 onwards.
1. Do we keep all the discard together in same bottle and just keep stacking on daily discard ?
2. Do I need to feed these discards ?
Sorry but I really needed to ensure I understand this process as I truly want to bake sourdough bread for its benefits.
One more question :
Can I use a combination of all purpose flour and rye flour to do the starter ?
Can I bake it on a pizza stone and pour some water on a baking dish for the steam?
This is the best soft loaf recipe I’ve found. Can I make it with active starter and leave out added yeast please? Linda
you could yes 🙂 xo
I’ll try this again with the yeast. I did use a fresh fed starter…did not rise. 😵💫
How much active starter would you use in place of instant yeast and do you need to adjust any water ratio when doing that substitution? Excited to try this recipe!
This recipe is FABULOUS! I’ve already made 5 loaves, and have requests for more! Quick question… Is it bad to keep it in the fridge for longer than 24 hours?
This is the loaf I always bake. We love it!
I add 1/3c each pumpkin and sunflower seeds and rolled oats. I soak them an hour and only add 350g water.
I was nervous while mixing that I missed a step or misread something because of how simple it was. Start to finish I made a loaf of bread in less than 2 1/2 hours (the dough doubled very quickly in the warm kitchen from the preheating oven) and it’s fantastic. I may never bother the long process of making traditional sourdough again. Thanks
This turned out perfect thank you!!! For once the bottom of my loaf didn't burn!
I'm trying this sourdough discard recipe for the first time and am anxiously waiting for the results. It rose nicely but was too wet and sticky to form anything resembling a ball on the parchment. Is this normal? I've had great success with regular sourdough loaves.
Yes it is a very wet recipe - but it will bake up totally fine 🙂
Thank you for this recipe! I tried my best to follow it exactly, but I only had all purpose flour on hand. It was very sticky and wet ao i had trouble shaping it. I was surprised to see it had risen all the way to the lid when i uncovered it for the last few mins in the oven. It looked awesome, but when i sliced it, there was a hollow part in the middle. Any ideas where I went wrong? I live in a very hot, humid, tropical country (the philippines). Thank you!
Loved it! Tried this recipe today. I only had 70 g of discard starter but still turned out amazing! Great recipe!
Are you familiar with Einkorn flour by Jovial? I am wondering if it will work? Thank you
Are you familiar with Einkorn flour by Jovial? I am wondering if it will work? Thank you
Hi, can we use a banneton for this?
I added grated cheese and Italian herbs. I added a tad more flour and gave it a quick shaping, I was worried I’d bust my bubbles but WOW! Beautiful oven spring! With minestrone soup, I died and went to Heaven. 😍
Did you add the grated cheese and herbs after the dough rose?
One of my favorite everyday recipes 🙂
Is this as good for our tummies as a traditional sourdough bread? And can this be baked in a regular loaf pan? Thanks for your wonderful site!
Hi, i tried making this morning. The crumbs looks nice but ok to eat but it’s actually a bit gummy.