The Easiest Sourdough Discard Bread You'll Ever Make!
This post may contain affiliate links.
If you have a sourdough starter, then chances are you'll have a bit of sourdough discard from time to time - depending on how often you feed it.
Baking true sourdough bread is certainly rewarding, but with our busy lives, we don't always have time for a 2 to 3 day process, right?
So I've created the easiest sourdough discard bread you'll ever make - seriously it's so so simple!
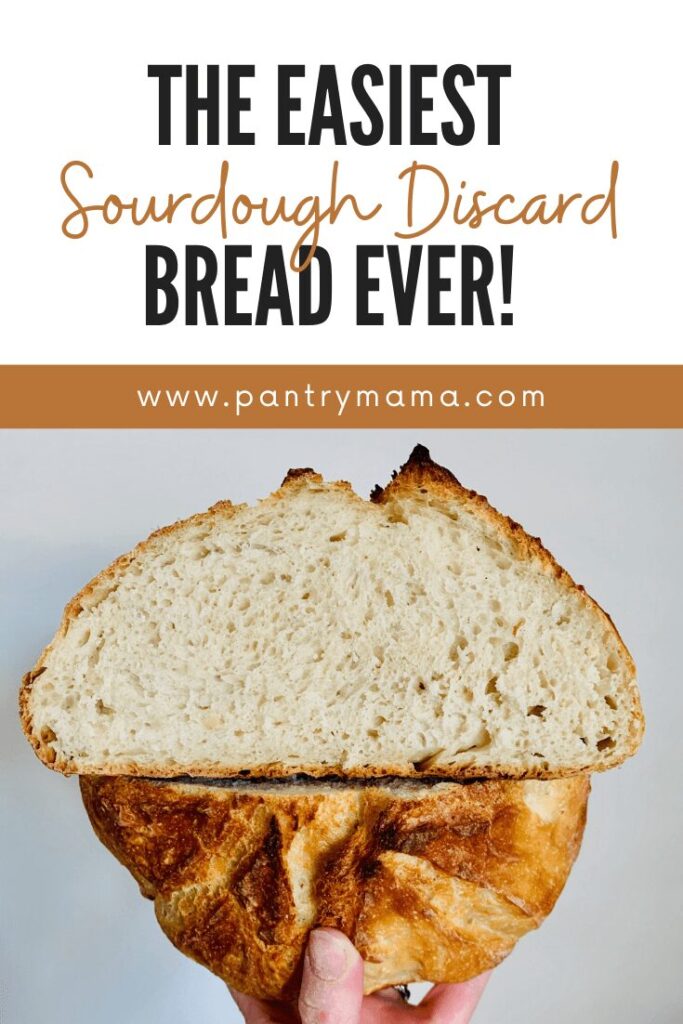
This recipe is perfect if you're still building your sourdough starter, but you really want to bake bread.
Make This Sourdough Discard Bread In Under 2 Hours!
You can make this easy sourdough discard bread within 2 hours if your house is particularly warm. It does use a little commercial yeast - but you will still get some of the sourdough tang from your discard.
If your house is a little cooler, it will take a little longer for the dough to double. Mixing the ingredients takes just seconds!
Experiment With Different Flours
I often make this bread in the evening so I can have a loaf ready for our eggs in the morning. I can knock it out super fast and my kids love to eat it. It's also a great way to experiment with different flours.
While it's super fast to make it from baker's (bread or high protein) flour (AP and plain flour will also work), you could supplement some of the 450g of flour with rye, spelt or even whole wheat.
If you are using different flours, I recommend holding a little of the water back while mixing. It's much easier to add more if you need to, than take it away (or have to add more flour if the mix is too wet).
An Easy Way To Use An Immature Sourdough Starter
This easy sourdough discard bread will also work for you if your starter is not quite ready to start baking true sourdough bread, just like this sourdough discard sandwich bread. The commercial yeast will create the rise that is lacking in your sourdough starter.
If you're having trouble with your sourdough starter, you'll find some tips to boost your starter here.

Extend The Rise
If you don't want to bake your bread immediately once it's risen, you can pop it in the refrigerator for up to 24 hours. Just put the whole bowl in the fridge, covered with a plastic bag or some cling wrap to stop it drying out.
This is a great idea if you want to have it freshly baked for dinner for example or when you first wake up.
When you want to bake it, let it sit out on the kitchen counter for around 30 minutes before it goes in the oven (so take it out when you turn on the oven to preheat).
Want To Give Your Sourdough Discard Loaf A Flavor Boost?
You can add lots of different flavor combinations to this sourdough discard loaf. It's up to you whether you go sweet or savory. Some of my favorite ways to add flavors to this loaf include:
- Jalepeno Cheddar
- Bacon & Cheese
- Olives (you can use whatever olives you love)
- Chocolate chips and orange zest
- Cranberries and walnuts
- Raisins and cinnamon for a fruit loaf
It's best to add the flavors to the dough when you first mix it, that way you can leave it alone to rise rather than have to disturb it to add in the flavors.
Handling The Dough
This sourdough discard loaf can be quite a sticky dough. The stickiness will really depend on the consistency of your starter and how wet you choose to make it. But it's certainly not impossible to work with and is one of the most baked recipes in my Facebook Group!
With a little flour and a dough scraper, you should be able to shape it into a roundish shape. It doesn't need to be perfect, it's a rustic type of bread. If you have a bread lame or razor blade, you can score the top to encourage it to spring up in the oven.
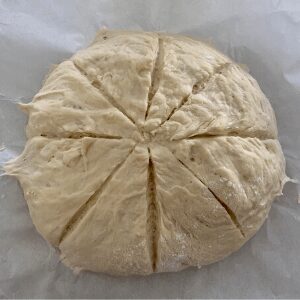
Bake Your Discard Bread In A Dutch Oven
To get the best results for your sourdough discard bread, bake it in a Dutch Oven. It keeps the steam inside the pot and enables your bread to get the rise before the crust starts to harden. Keep the lid on your Dutch Oven for the first 30 minutes of your bake, then take it off for the last 10 minutes to give it some crunch and colour. Just like baking true sourdough, the Dutch Oven really is a game changer.
If you love this recipe, you'll enjoy making this sourdough pane di casa bread. It is a lovely rustic sourdough you can enjoy in just a few hours.
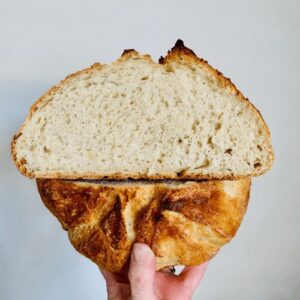
Easy Sourdough Discard Bread
Equipment
- Mixing Bowl
- Digital Scales
- Dutch Oven
Ingredients
- 450 g Bread Flour
- 360 g Water Warm
- 10 g Salt
- 7 g Instant Yeast or Rapid Yeast
- 100 g Sourdough Discard unfed sourdough starter
Instructions
- Take a clean ceramic or glass bowl and add your flour, warm water, instant yeast, salt and sourdough discard.
- Use a wooden chopstick or end of a wooden spoon to gently bring all the ingredients together into a shaggy dough. You don't need to it be fully smooth, just ensure that all of the flour is wet.
- Cover the bowl in cling film and set it somewhere warm for 1 - 2 hours. It really depends on the temperature of your house with this one. If your house is warm, 1 hour will be plenty. In the depths of winter or with air con, you may need more than 2 hours. You just want it to double in size, no more or it won't rise in the oven.
- Around 45 minutes before you want to put your bread into the oven, you'll need to put a dutch oven into the oven and preheat it to around 220C/430F.
- Once your dough has doubled in size, grab a piece of parchment paper and lay it out on your counter. Sprinkle on a few tablespoons of rice flour or fine semolina flour (this is just so that the dough doesn't stick to your hands).NOTE - If you are wanting to put your bread in the refrigerator to bake another time (usually within 24 hours) then just pop the cling film over the bowl of doubled dough and put in the fridge. You don't need to do anything to the dough before it goes in.
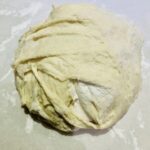
- Scoop your dough out with your hands - if it's particularly wet it's perfectly fine to pour it onto the paper.If it's not too wet, use the flour and your finger tips to gently bring it into a round shape - you will need to pull each side over each other to do this. If your dough is too wet - don't fret, just try and bring it into some kind of shape without getting too messy.

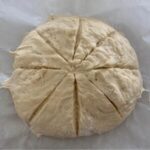
- Score your dough if you're able to - otherwise just leave it and it will open up naturally in the oven.

- Carefully take your dutch oven out of the oven and remove the lid. Use the parchment or baking paper as a handle to gently place your discard bread inside the pot and put the lid back on.
- Bake in the oven, with the lid on for 30 minutes at 220C/430F. Then remove the lid of the pot and bake for a further 10 minutes at 200C/390F. Remove the bread from the oven and allow to cool on a wire rack.

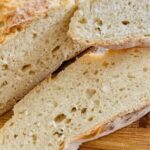
- Try to let it cool for at least an hour before cutting it. It will still taste great if you cut it hot, but it's so much easier to cut if you let it cool!

Nutrition






Can you divide this into 2 loafs for soup bowls
Yes you can or you can use this recipe for sourdough bread bowls 🙂
This recipe turned out just perfectly! Thank you so much!!!
This recipe is great for using up discard. Love that it’s quick & still very tasty.
Thank you.
It is literally impossible to fail at this recipe, and believe you me, I seem to have tried.
I've neglected to flour my parchment paper and made a huge mess. Scraped all that dough onto a floured parchment - beautiful, delicious loaf.
I've run out of bread flour and baked it with mostly APF. Perfect.
I've tried to add cheddar by folding it in using stretch and folds at the one hour mark, let it do the second hour in a banneton trying to get it to somehow keep a shape....then dumped a huge shaggy mess on the parchment. OMGoodness, maybe the best ever.
This recipe does wonders for your confidence and it eliminated the anxiety I developed reading everything that you "need" to do to bake sourdough. My starter loaves turn out better now and I think it's because I am so much more comfortable with the ingredients.
Thank you for this recipe!
I've made this several times. It's a great recipe. If sourdough and French bread got married this is what it would be.
Excellent I made it a few times plain , with cheddar cheese and today it’s linguica and cheeses !
This recipe basic, sourdough discard bread from Pantry Mama was what got me started, two years ago. I use it as the basis for all of my sourdough breads baking both for our family as well as for my several, weekly breads clients. I’ve adapted, using this as inspiration for jumping off to two standards plus variations on these themes: Organic Sprouted Seeded Sourdough Country Loaf and Organic Sprouted Cranberry-Raisin-Cinnamon Loaf. I definitely use a scale and grams as you counseled! Also, a thermometer and I find that all of my standard breads are done nicely at @ 208’ internal temp, +/- a degree or so. I do use the thump test on bottom, too. Also, I never cut into the loaves, but wrap in a towel, place on a wire rack and wait until cooled — @ 4 hours! Cheating, no matter how great the breads smell, doesn’t result in a perfectly done loaf, as breads do continue to finish baking for a while!
Great tips, Suzanne! Thank you so much for your comment. We love to hear that! 🙂
The best bread. I just took my second loaf out of the oven.
This if the best bake I’ve had yet, so thank YOU! My only question is I feel like it could definitely taste more sour. Any tips with that?
I'm so glad you love the recipe 🙂 This is just a discard loaf so it won't have the same flavor as a longer fermented loaf. For a more sour flavor, try this long fermented sourdough bread recipe 🙂
This is delicious and WAY less time consuming than the traditional sourdough bread recipe. Great when you’re in a pinch for time! Totally recommend.
Are the nutritional facts for a slice of bread or the whole loaf?
That's for the whole loaf 🙂
If you were to do chocolate chips and dried cherries, how much would you add of each? (Or any other inclusions, really)
Hi Cheyenne, It depends on how many you want, but I would start with about 1/4 cup of each. 🙂
Can this be made into rolls? I wanting to make pepperoni rolls.
I don't recommend this for pepperoni rolls. I would use this sourdough pizza rolls recipe 🙂
Does anyone know much much this 1 loaf weighs in grams before bake?
You'd just need to add up all the ingredients, so for this one, it would be 927g (as long as you're accurate with the weights) 🙂
Yummy !!
My parchment paper baked right into the bread, and I couldn't get it off....suggestions?
I would recommend using a better quality parchment paper. Generally the cheaper parchment papers stick to the dough and bake right in unfortunately xx
Hi
Do you stench and fold this bread?
Is this artisan bread with stater ?
No you don't need to stretch and fold this dough. This is artisan bread using discard 🙂
Hello! I doubled this recipe and wondering do you split the portion up after it it's risen? And do you just eye ball when portioning it out or do you use a scale? Thanks! Excited to make this recipe!
I don't tend to double this recipe as it can be tricky to separate however you would portion it up after it's risen and just before you shape it, yes. I would just eyeball it as trying to put it on a scale could be tricky 🙂
I love making this bread!!
Wondering if I can omit the yeast. And what difference will it make in the whole scheme of things?
If you're going to omit the instant yeast, I'd just go ahead and make an actual sourdough bread recipe 🙂
I just made this for the first time. I have a question though. What is the texture supposed to be like after it cools. Mine was a little bit spongy. Not sure if that means I should cook it longer.
It shouldn't be spongy, it should have a soft, airy interior, however if you cut it when it was warm it can give it a spongy or gummy texture 🙂
Is it possibleto add inclusions to sourdough discard bread? If so, when should they be added since there are no stretch and folds/coil folds? Thank you so much!!
Absolutely you can do this, there is information in the post above, but I generally do it when I'm mixing the dough initially 🙂
Can I double this loaf for a larger loaf?
I don't recommend making this as a "double" sized loaf as it's already really large and can be difficult to handle when the dough is wet. I would recommend making 2 instead 🙂
First time. Didn't expect much, but the tread turned out very well.. I have lots of discard, so I will be using this recipe a lot. I have several different ancient grains left over from a previous class and added one cup of rye flour this time. I plan to add einkorn and spelt to future tries. Thanks!!
I was ready to quit breadmaking!! This recipe is foolproof! Thankyou! Thankyou! Thankyou! Going to try make a loaf of fruit toast with it. Should I pre-soak the fruit?
That's so awesome! No you don't need to pre soak the fruit 🙂
Kate, Do you have a temperature for when the bread is baked? 190? 200? 205?
I don't use an internal thermometer as I find it problematic. I prefer to go by baking time and the characteristics of the crust and base 🙂
I love love love this recipe. It’s a staple in our household.. Say you wanted to make this into 2 smaller loaves.. how long would you bake them for? I have 2 “bread bowl” dutch ovens (2-3qt) and would like to use this recipe I’m just scared I’ll burn them if I cook them for too long.
I'd cook them for the same amount of time - which I know sounds crazy, but being in the Dutch Oven they won't burn. You can reduce the lid off time at the end if they're getting too brown 🙂
I’ve made this bread with both bread flour and AP flour. Both times the dough was really wet and had to be poured out of the bowl onto parchment for baking. It was as if the pouring out defeated all the dough rise. The bread barely rose at all in baking. I made sure the initial rise wasn’t overdone. The final flavor is great, but texture is denser than expected. Any suggestions?
The dough can be runny, however mine is generally not too wet to shape. I would say that the dough was over fermented if it didn't rise during the bake time. Try cutting the fermentation short and see if that helps 🙂
Should I mix the flour and water together and let it sit for awhile before adding the other ingredients? I’ve let the dough proof 1 to 1 1/2 hours. Made a loaf today and it was even flatter than the first two. Maybe I need to only proof for 30 to 45 minutes to ensure it doesn’t over proof? The flavor is amazing so I’m really disappointed that I’m doing something wrong.
Yes this loaf uses commercial yeast, so doesn't need a lot of rise time. It doesn't need any autolyse time, so just add all the ingredients altogether, but cut the proof time even further 🙂 Also check that your yeast is in date 🙂
I tried the Easy Sourdough Discard bread and my dough was SO sticky and would not hold a shape😜 I know my measurements were right…I’m a beginner🤦🏼♀️
It is a sticky dough but sometimes it can be stickier because of your discard being runnier or your flour not absorbing as much water as mine. Try reducing the water amount by 20g next time you make it and see how you go 🙂
What is considered warm water?
Anywhere around 37C to 40C 🙂
good and easy to follow. thank you.
Can you use the discard straight from the fridge? Or it has to get to room temperature?
You can use it straight from the fridge, it will be fine 🙂