Can You Bake Sourdough In A Loaf Pan?
This post may contain affiliate links.
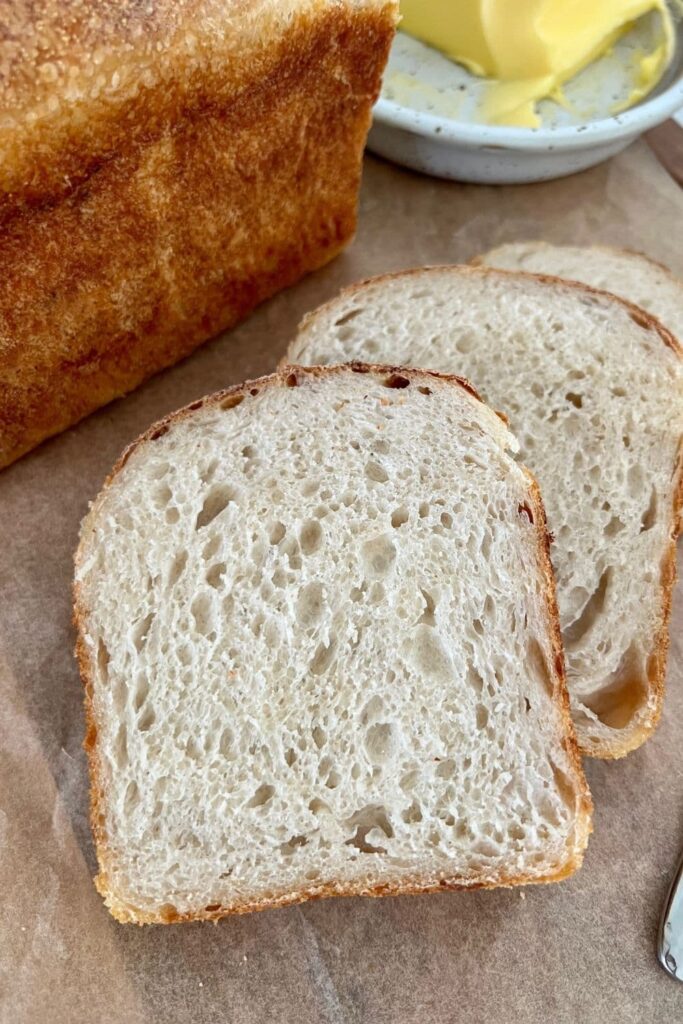
If you've ever wanted to bake sourdough in a loaf pan, then you've come to the right place. I'm going to show you how to bake a basic sourdough bread recipe in a loaf pan so that it's perfect for sandwiches and toast.
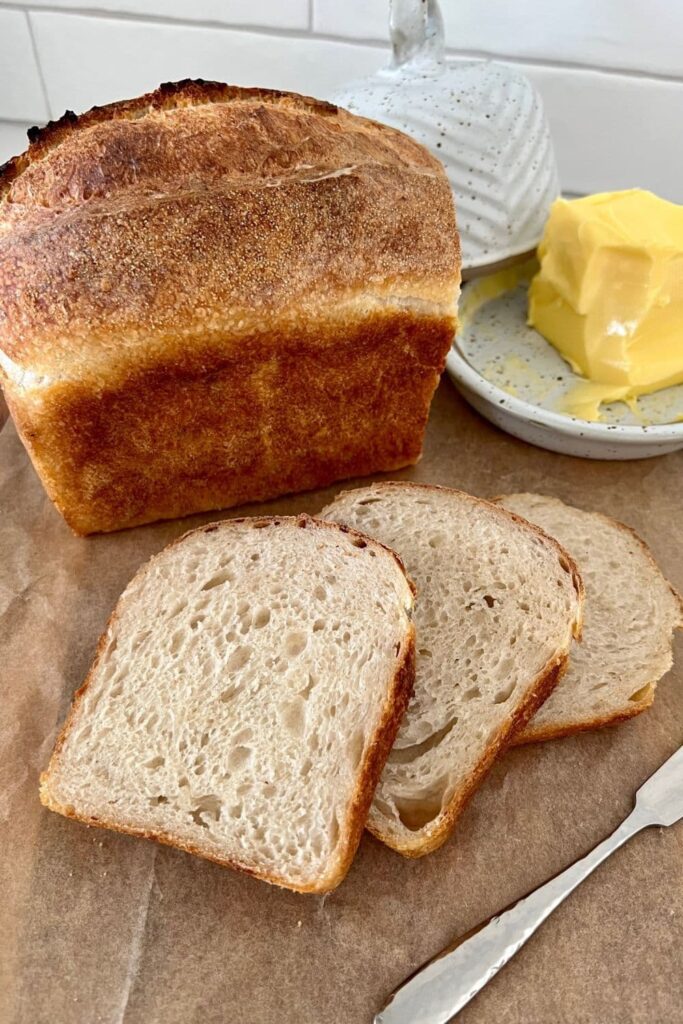
Baking sourdough in a loaf pan gives you a sandwich shaped loaf with all the flavor and goodness of a regular sourdough loaf. It's a great everyday bread and is really easy to slice.
After bulk fermentation, you need to shape your dough into an oval or batard and place it seam side down into your chosen loaf pan. There's no need for a banneton or Dutch Oven for this simple sourdough loaf pan recipe.
This is a lean sourdough recipe, meaning it has no fats, oils or sugar. If you're looking for a sourdough sandwich bread recipe with an enriched dough, you might like to try this sourdough sandwich loaf with a soft crust or this sourdough discard sandwich loaf. You might also love this golden sourdough cheese bread baked in a loaf pan. This sourdough bread recipe is made using an active sourdough starter.
Benefits of Baking Sourdough In A Loaf Pan
The main benefits of baking sourdough in a loaf pan are:
- shaping technique isn't as important
- can bake at lower temperatures
- gives you a softer crust
- perfect shape for sandwiches and toast
- no need for heavy Dutch Oven
- better for over fermented dough as the loaf tin supports the dough
- easier to cut than a boule or batard
Let's look at the benefits of baking sourdough in a loaf pan in more detail.
Shaping Technique Isn't As Important
When baking sourdough bread, the shaping technique you use can affect the oven spring of the loaf and of course the overall look of the loaf once it's baked.
Using a loaf pan to bake sourdough bread means that the shaping technique becomes less important as the dough will take on the shape of the pan during proofing.
As you aren't removing it from the loaf pan to bake, the dough is also supported during baking, meaning it often rises higher and gives you better oven spring overall.
Bake Sourdough At Lower Temperatures
Using a loaf pan means that you can bake your sourdough at lower temperatures, since it is not having any time covered in a Dutch Oven or baking pot.
When baking traditional sourdough bread, you steam the loaf in a piping hot Dutch Oven, generally baking above 230C/446F. When using a loaf pan, the dough is uncovered for the whole bake so you need to lower the temperature to prevent the crust burning or becoming to hard and tough. I recommend 200C/392F for the whole bake, rather than a higher temp first and then dropping down.
Using a lower temperature can be a benefit, particularly if your oven doesn't reach super high temperatures or you're baking sourdough during the summer months.
Softer Crust Sourdough Sandwich Bread
Baking sourdough in a loaf pan will give you a softer outside crust, particularly around the sides and base of the loaf.
Before putting the sourdough bread dough into the loaf pan, you generally butter the pan. The butter helps to soften the loaf during baking time.
If you prefer a softer top crust, you can also brush this with butter when it comes out of the oven.
Perfect Shape for Sandwiches and Toast
One of the biggest benefits of baking sourdough in a loaf pan is that it makes it gives you a traditional loaf of sourdough bread ... just in the perfect shape to make a sandwich and fit your toaster!
If you love the flavor of sandwiches made from a batard or boule, you're going to absolutely love the convenient shape of sourdough bread made in a loaf tin - it makes life so much easier! No more trying to jam that big slice into your little toaster!

No Heavy Dutch Oven
If you have trouble lifting a Dutch Oven in and out of the oven, then using a loaf pan might be just the solution you're looking for. Of course, if you like the idea of covering you sandwich loaf, you could place a loaf tin of the same size on the top of your dough to trap the steam in. This is a popular method to emulate the conditions of a Dutch Oven, but without the weight.
Better for Over Fermented Dough
Using a loaf pan to shape your sourdough bread into a sandwich loaf can also help to support the dough - both during proofing and baking.
If your dough is a little over fermented, using a loaf pan can help to support the dough and allow it to bake up better than it would if you used a banneton and then tipped it out to bake it, where the dough would be unsupported.
A loaf pan can be a good alternative to a banneton for proofing if you want to experiment with allowing your dough to proof more than you normally would as you bake it in the tin, you're not tipping it out where it has to support itself.
Easier To Cut
If you've ever tried to cut through a crusty sourdough ear or an odd shaped loaf, you'll know that it can be quite a challenge - even with the best bread knife for sourdough bread!
Sourdough baked in a loaf tin can be much easier to cut because the crust is softer and the shape is easier to hold. A loaf pan sourdough also fits into a slicing guide much easier than a boule or batard.
How to Bake Sourdough In A Loaf Pan (step by step guide)
Baking sourdough in a loaf pan follows the same basic steps as making my basic sourdough loaf. The main difference comes when it's time for shaping and proofing. The baking temperature for this sourdough recipe is also lower than what you may be used to.
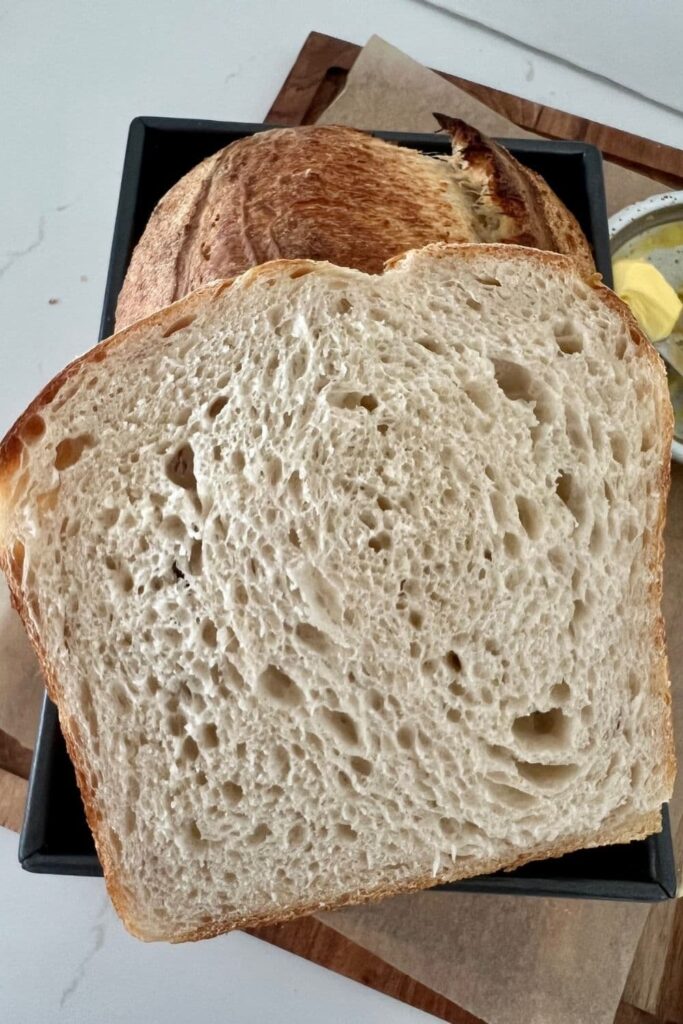
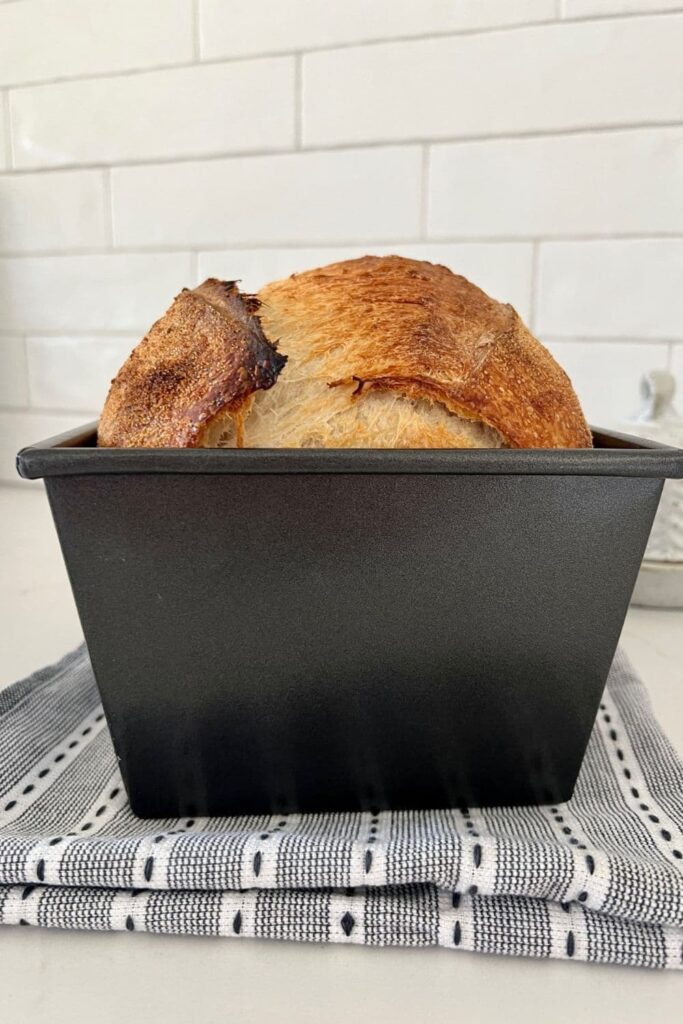
The photographs featured in this section of the post are made using a double batch of dough (you can easily double the dough using the buttons in the recipe card). The dough is baked in a large farmhouse loaf pan (24cm x 16cm) - details of the pan are after the instructions.
Premix the Dough
Weigh out your sourdough starter and water into a large mixing bowl and mix together briefly.
Now add your flour and salt and mix whole lot together to form a dry, shaggy dough.
Cover your bowl with plastic wrap or a damp towel and let it sit for around 1 hour.
This process is called the "autolyse" and allows your flour to soak in all the water and become hydrated.

Forming Up The Dough
Bring the dough together into a ball. Pull the edges of the dough into the centre until it's smoother and more formed.
You'll notice that the dough is fully hydrated after soaking all the water up. It will be fairly sticky but as you bring it into a ball, it will become smoother and shinier.
Once the dough has formed into a smooth ball, pop the cling film back on and let it rest for 30 minutes.
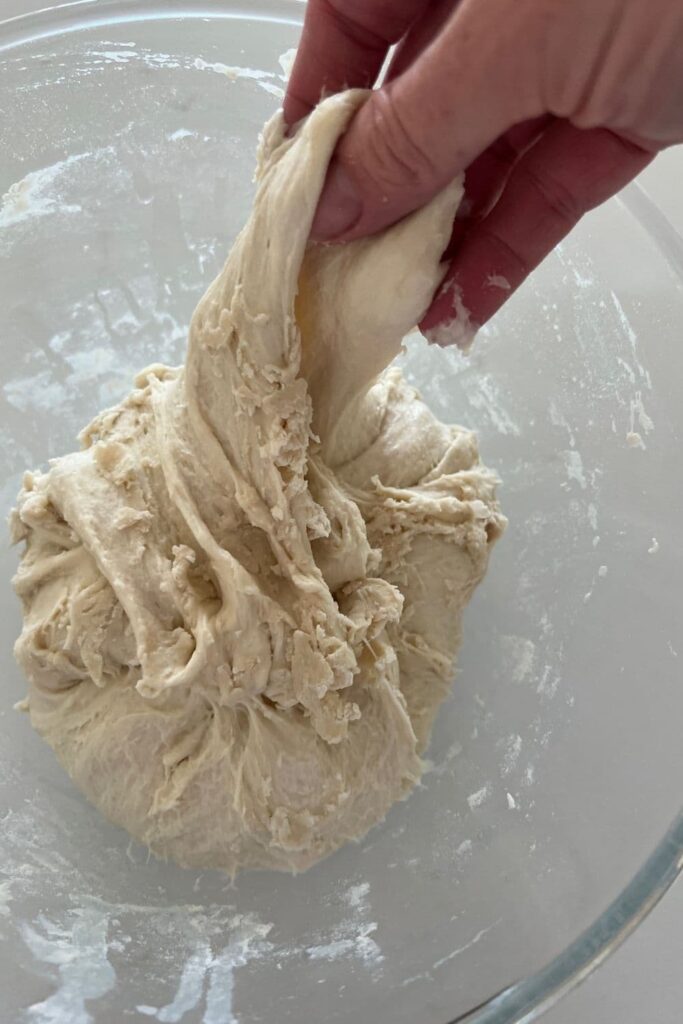
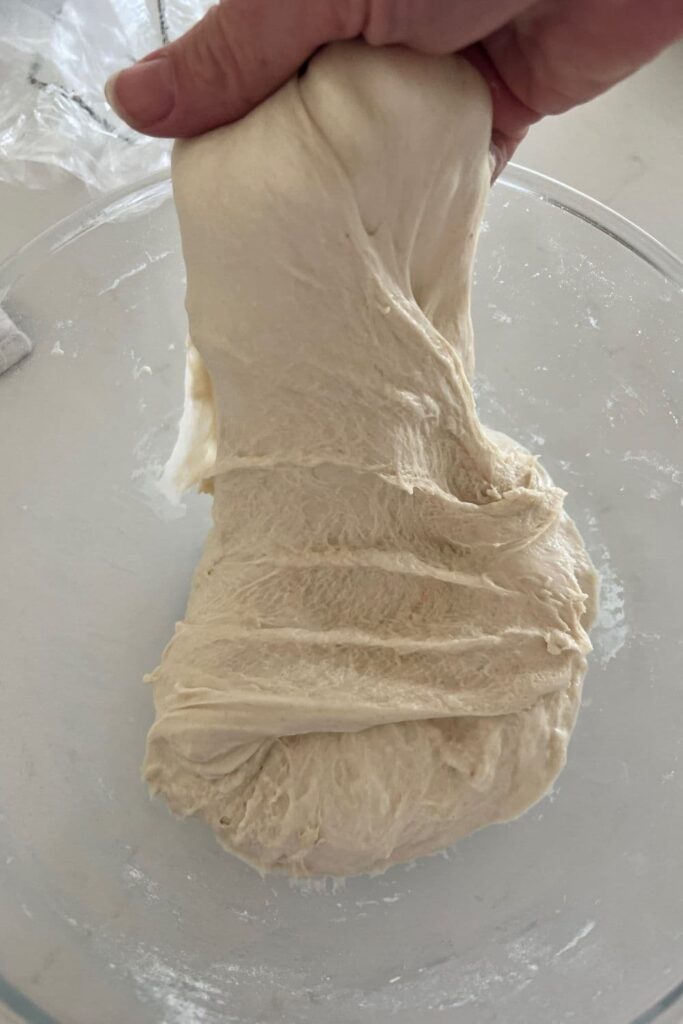
Stretches and Folds
Over the next few hours you need to create some structure for your dough by "stretching and folding".
Aim to do around 4-6 sets of stretches and folds.
For each set, stretch the dough up and over itself 4 times. Leave around 15 minutes in between each set. Again you do not have to be exact with time, but you need to do at least 4 sets over 2 hours.
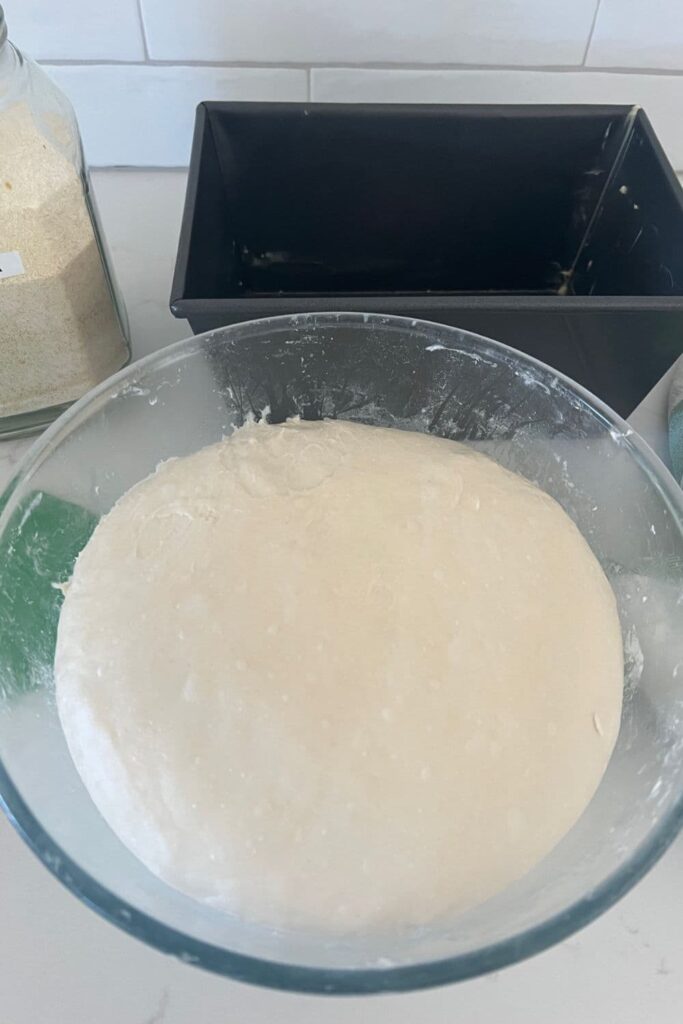
Bulk Fermentation
Once you've finished your stretch and folds, place the cling film or damp tea towel back over your dough and let it rest and ferment (a plastic cover is a better option for this stage). I let it rise to just under double for this recipe because you want it to rise a bit in the pan afterwards.
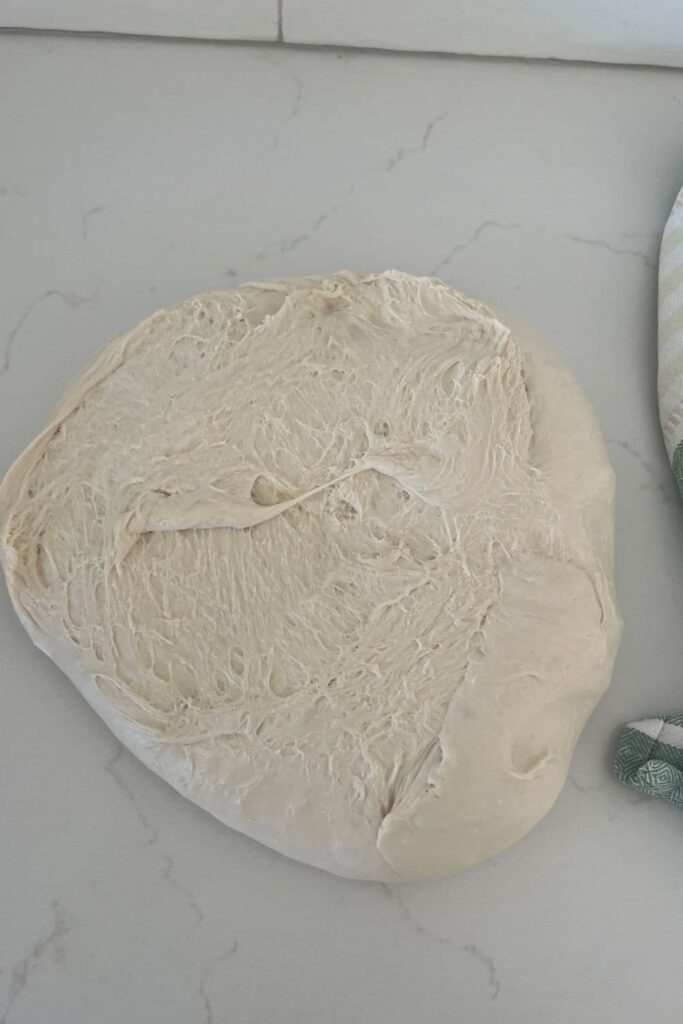
Shaping the Dough
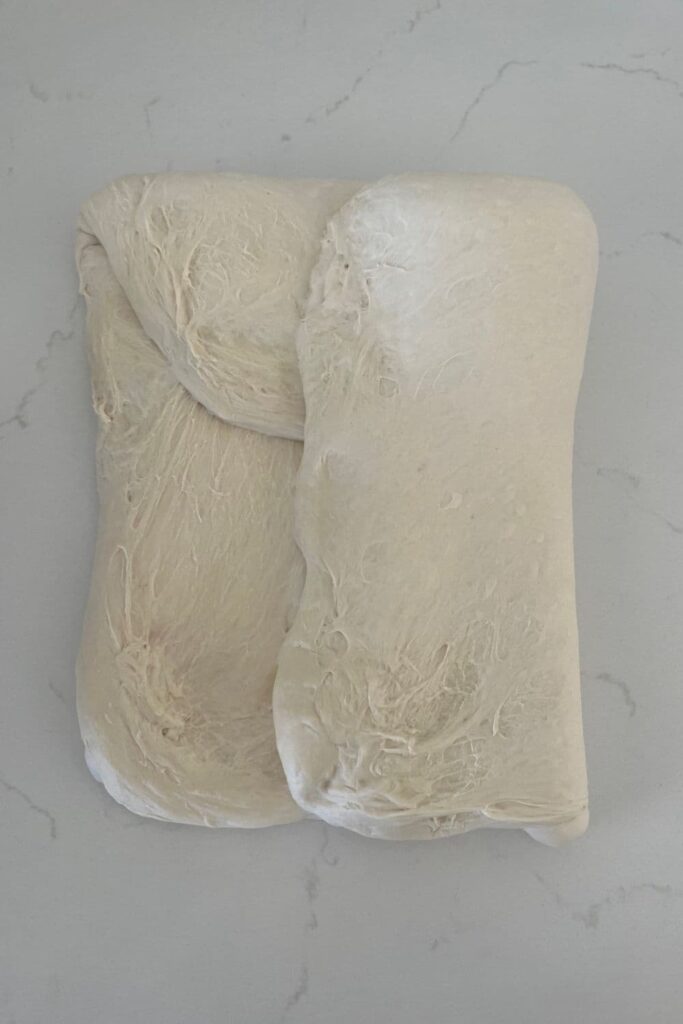
Once your dough has finished it's first ferment, it's time to shape it so that it will fit into your loaf tin. Shaping your dough into a batard is the best for proofing and baking in a loaf tin.
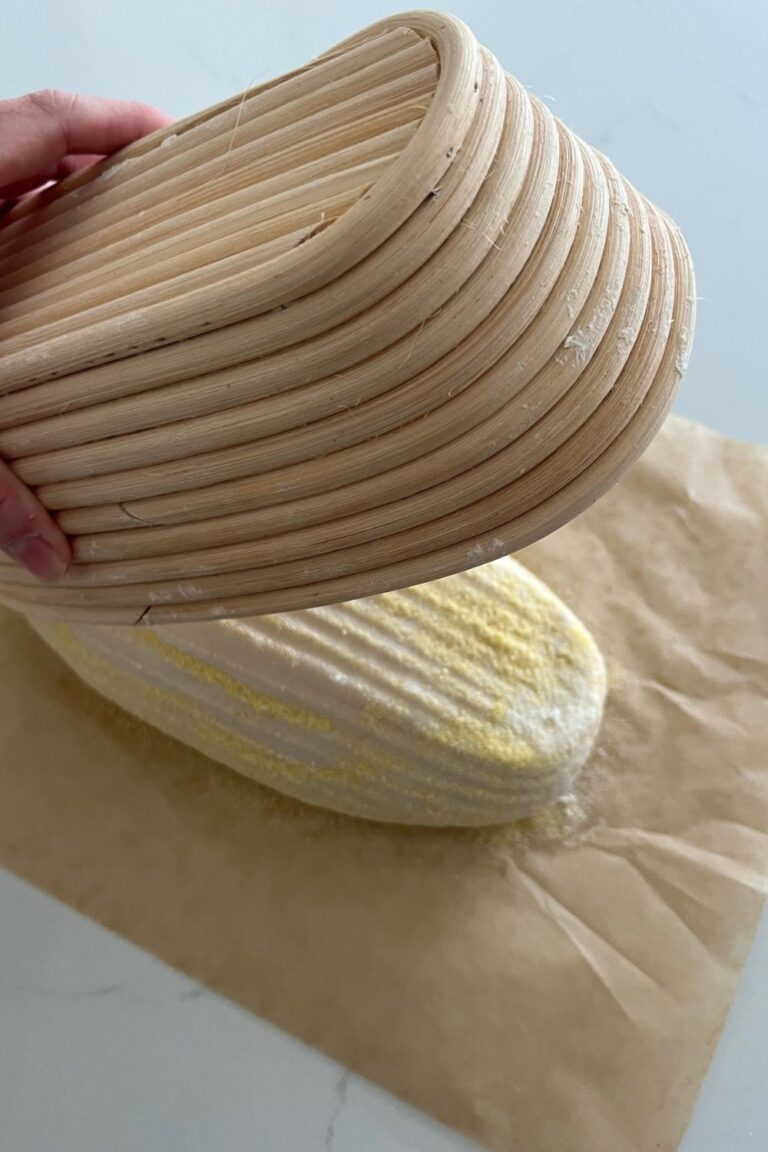
You'll need to flour your counter top with rice flour for this (we use rice flour because it has no gluten). Try to be quite sparing with the rice flour, you only need a very light dusting. Semolina is also a good choice (and is what I have used in these photos).
Use a silicone dough scraper to gently ease the dough out of the bowl. You want it to land upside down on your counter so that the smooth top of the dough is on the countertop and the sticky underside is facing up. This will make it easier to shape.
Shape the dough into a batard or loaf shape (you can see instructions for this here).
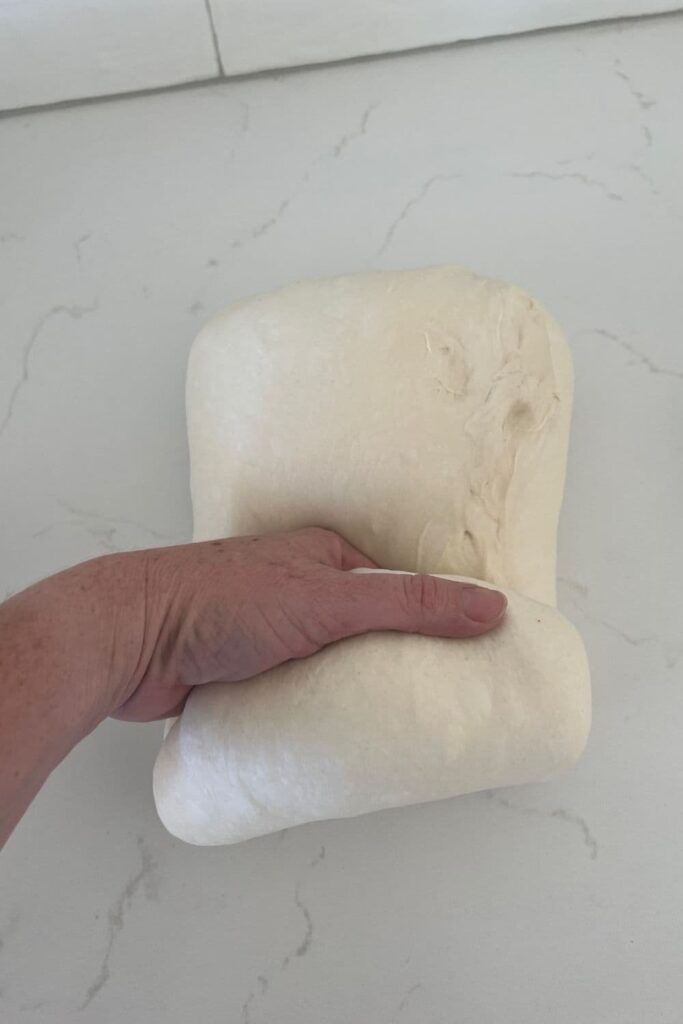

Putting The Sourdough Into the Loaf Pan
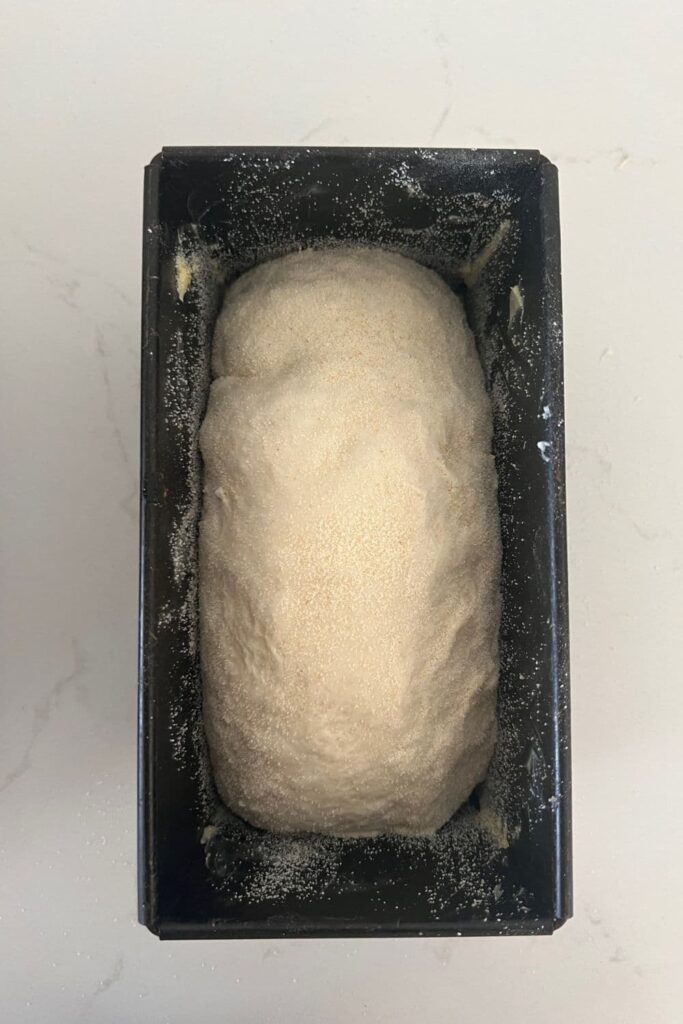
Lightly coat the inside of your loaf tin with butter. Dust it with semolina or rice flour.
Once the dough is shaped, you need to gently lift it into the loaf pan. You need to place it into the loaf tin with the seam on the bottom (opposite to how you would place it into a banneton).
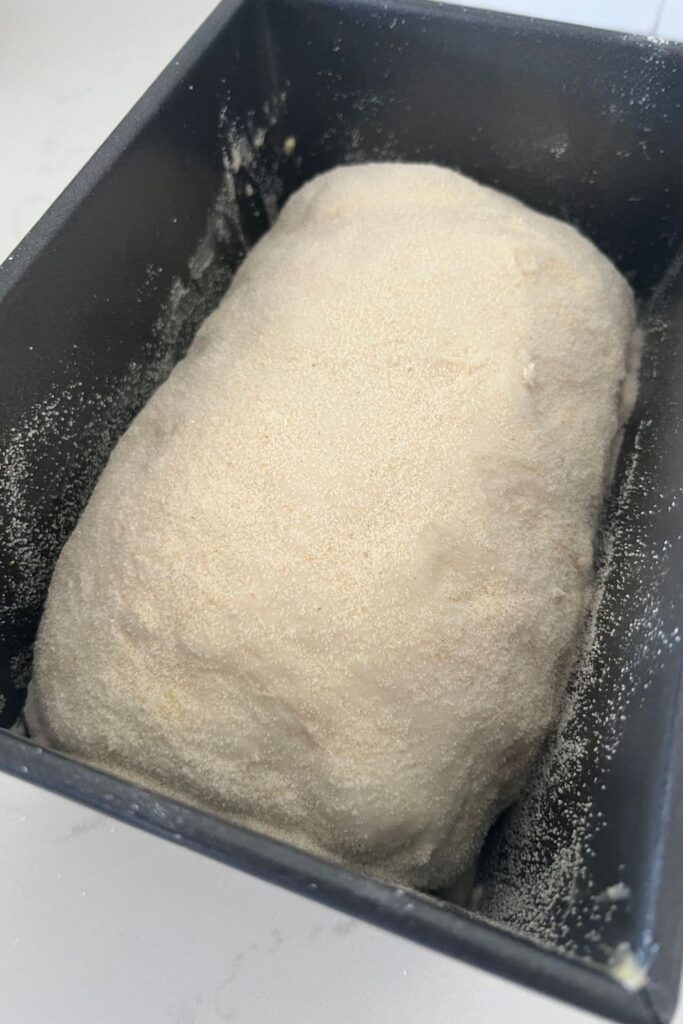
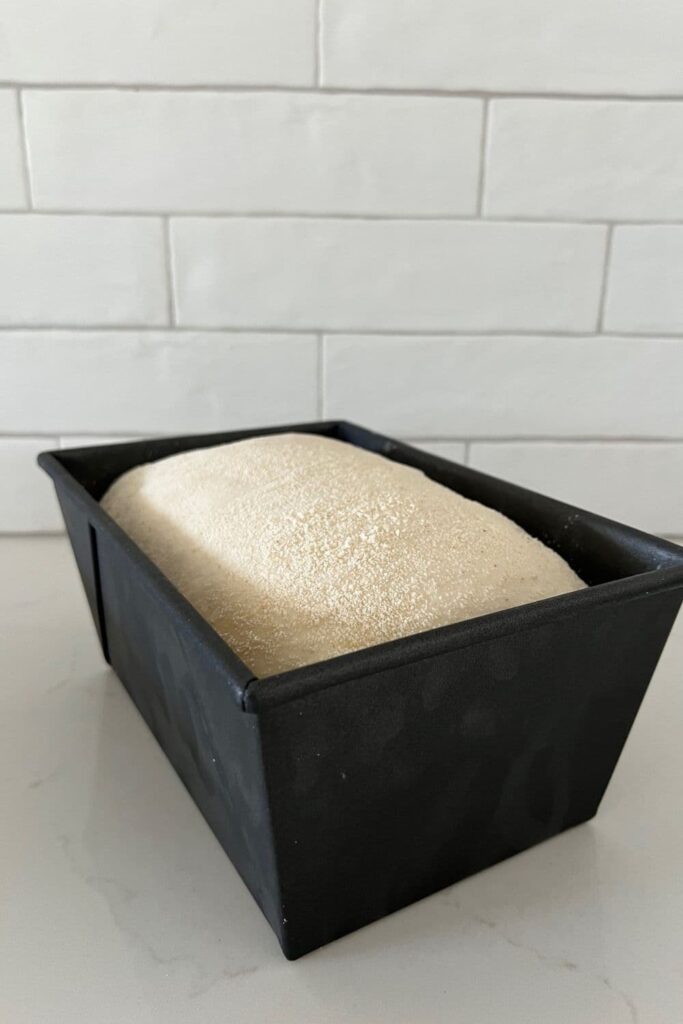
Proofing
Now the dough is in the loaf tin, you need to let it proof. For this sourdough loaf I like to proof it a little on the counter first and then put it in the fridge until I'm ready to bake.
As long as it didn't over ferment during bulk fermentation, allow the dough to puff up a bit before you put it in the fridge for cold fermentation. Don't let it go too far though or you won't have any oven spring.
Preparing To Bake
Once you're ready to bake your sourdough, you'll need to preheat your oven to 200C/392F.
Bake Your Sourdough Bread In A Loaf Pan
Now it's time to bake!
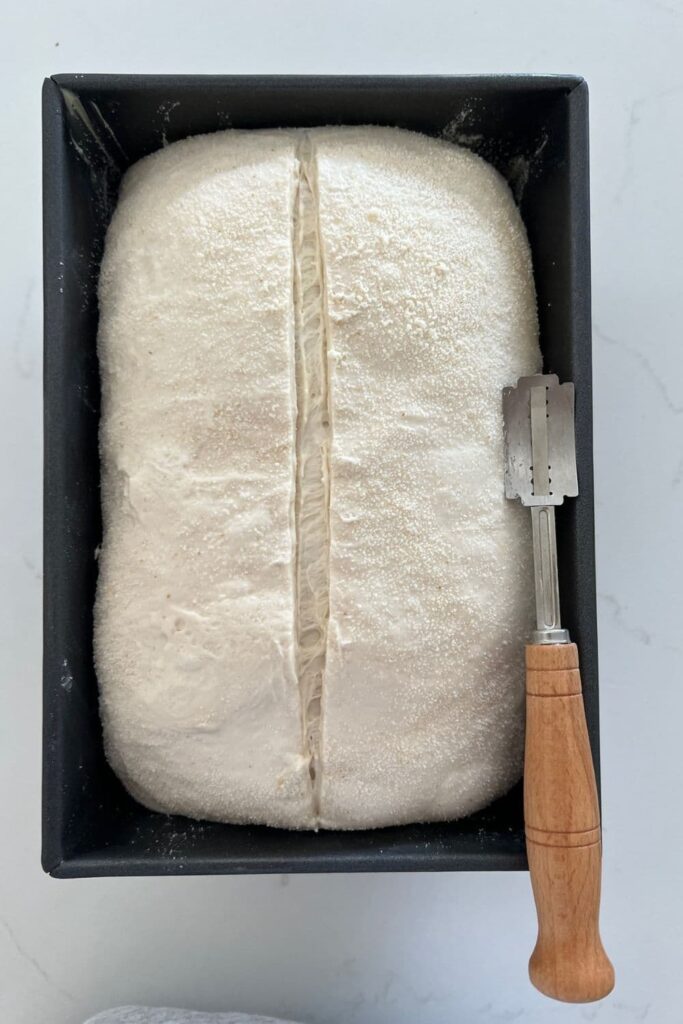
When the oven is at temperature, take your loaf of sourdough out of the fridge and score it (you don't have to score it if you don't want to). Lightly spray the top of the dough with water. Place it into the hot oven.
BAKE TIME:
45 Minutes at 200C/392F
Let Your Bread Cool
When your sourdough is done, remove it from the oven. Let it sit for a few minutes and then carefully remove it from the tin. Place onto a wire rack to cool.
If you wish to soften the crust a little, you can brush the top of the loaf with melted butter if you wish.
What Size Loaf Tin To Use for Sourdough Bread?
The large loaf photographed in this recipe is a double batch of dough baked in a Farmhouse Loaf Pan measuring 24cm x 16cm x 12cm or 9.5" x 6" x 4.7". This pan was purchased here, but you can find a similar size here and here.
For a single batch of dough I recommend a loaf pan measuring 22cm x 10cm x 11cm or 8.5" x 4" x 4.25" (this is the size of the pan used to make the loaf photographed below).
You can easily double or even triple the recipe for this loaf pan sourdough by using the buttons on the recipe card.
You can bake this simple sourdough recipe in either a metal or glass loaf pan. I prefer metal, however use whatever you have on hand.
How Do You Adjust Baking Time for Sourdough In Loaf Pan?
It's fairly simple to adjust the timing for baking sourdough in a loaf pan. Unlike using a Dutch Oven to bake sourdough bread, using a loaf pan means that the loaf is uncovered for the entire time it is in the oven.
This means that you need to reduce the temperature to ensure that the top of the loaf doesn't burn. As a basic rule, I bake sourdough bread in a loaf pan for around 45 minutes at 200C/392F or until the crust is baked to my liking.
As you experiment more with baking sourdough in a loaf pan, you'll find a time that works for your perfect loaf.
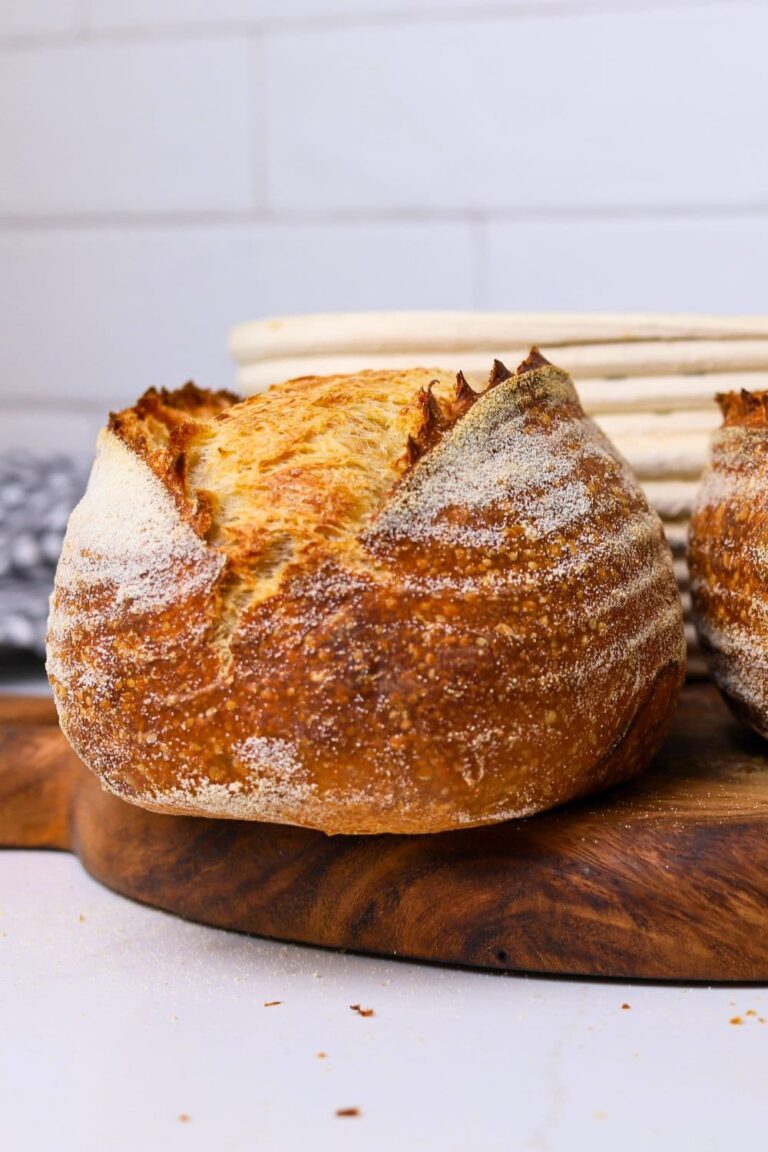
Do You Score Sourdough Sandwich Bread?
If you are baking sourdough bread in a loaf pan, you can choose to bake it as a rounded loaf, with no score or you can score it so that it forms one or even two sourdough ears. The choice is really yours.
If you prefer a domed top to your loaves, you can leave it un scored and allow it to ballon up. The only problem with this is that if your loaf is under fermented, it may naturally tear open while it bakes.
I prefer to score the loaf down the centre and allow it to form an ear. This gives the sourdough in a loaf pan a more rustic look and feel.
Frequently Asked Questions
No you don't need to cover your loaf pan sourdough bread, you can bake it uncovered in your oven at 200C/392F for 45 minutes. A spritz of water before you place it into the oven is a good idea and provides a little steam but it's not essential. You can place a loaf pan of the same size as you're using to hold your dough on the top to create a mini Dutch Oven, but it's definitely not essential.
If your sourdough bread tears at the sides of your sandwich loaf it generally indicates that your loaf is under fermented and or under proofed. Extend out the rise time and make sure that your dough is nice a puffy before you bake it.
Absolutely. Shaping your sourdough into 2 or 3 smaller balls and placing them side by side in a loaf pan makes a lovely shaped bread that can be torn or sliced into smaller loaves for freezing or sharing. Using this method of shaping with smaller balls of dough also makes the dough easier to handle than one big batch.
You could bake sourdough bread in a cake pan if you don't have a bread tin available. Cake loaf pans are generally smaller than bread pans so you will need to adjust your dough to suit this.
How To Bake Sourdough In A Loaf Pan
Equipment
- Mixing Bowl
- Digital Scales
- Loaf Tin (see notes below for size options)
Ingredients
- 500 g Bread Flour
- 350 g Water
- 100 g Sourdough Starter
- 10 g Salt
Instructions
PREMIX THE DOUGH
- Weigh out your sourdough starter and water into a large mixing bowl and mix together briefly.
- Now add your flour and salt and mix whole lot together to form a dry dough.
- Cover your bowl with cling film or a damp tea towel and let it sit for around 1 hour. This process is called the "autolyse" and allows your flour to soak in all the water and become hydrated. You can see how the dough has changed in this photo.
FORMING UP THE DOUGH
- Bring the dough together into a ball. Pull the edges of the dough into the centre until it's smoother and more formed.You'll notice that the dough is fully hydrated after soaking all the water up. It will be fairly sticky but as you bring it into a ball, it will become smoother and shinier.
- Once the dough has formed into a smooth ball, pop the cling film back on and let it rest for 30 minutes.
STRETCH & FOLD PHASE (STRENGTHENING PHASE)
- Over the next few hours you need to create some structure for your dough by "stretching and folding". Aim to do around 4-6 sets of stretches and folds. For each set, stretch the dough up and over itself 4 times. Leave around 15 minutes in between each set. Again you do not have to be exact with time, but you need to do at least 4 sets over 2 hours.
BULK FERMENTATION (RISE PHASE)
- Once you've finished your stretch and folds, place the cling film or damp tea towel back over your dough and let it rest and ferment (a plastic cover is a better option for this stage).
SHAPE THE DOUGH
- Once your dough has finished its first ferment, it's time to shape it so that it will fit into your loaf tin. Shaping your dough into a batard is the best for proofing and baking in a loaf tin.You'll need to flour your counter top with rice flour for this (we use rice flour because it has no gluten). Try to be quite sparing with the rice flour, you only need a very light dusting. Semolina is also ok for this.Use a silicone dough scraper to gently ease the dough out of the bowl. You want it to land upside down on your counter so that the smooth top of the dough is on the countertop and the sticky underside is facing up. This will make it easier to shape.Shape the dough into a batard or loaf shape (you can see instructions for this here).
PUT DOUGH INTO THE LOAF TIN
- Lightly coat the inside of your loaf tin with butter. Dust it with semolina or rice flour.Once the dough is shaped, you need to gently lift it into the loaf pan. You need to place it into the loaf tin with the seam on the bottom (opposite to how you would place it into a banneton).
PROOFING
- Now the dough is in the loaf tin, you need to let it proof. For this sourdough loaf I like to proof it a little on the counter first and then put it in the fridge until I'm ready to bake. As long as it didn't over ferment during bulk fermentation, allow the dough to puff up a bit before you put it in the fridge for cold fermentation. Don't let it go too far though or you won't have any oven spring.
PREPARE TO BAKE YOUR DOUGH
- Once you're ready to bake your sourdough, you'll need to preheat your oven to 200C/392F.
BAKE YOUR SOURDOUGH BREAD!
- Now it's time to bake!When the oven is at temperature, take your loaf of sourdough out of the fridge and score it (you don't have to score it if you don't want to). Lightly spray the top of the dough with water. Place it into the hot oven.BAKE TIME:45 Minutes at 200C/392F
LET YOUR BREAD COOL
- When your sourdough is done, remove it from the oven. Let it sit for a few minutes and then carefully remove it from the tin. Place onto a wire rack to cool.If you wish to soften the crust a little, you can brush the top of the loaf with melted butter if you wish.
Notes
- Notes on Flour: This recipe is written using strong Bread Flour. Bread flour has a higher protein content than All Purpose flour. If you choose to use All Purpose flour you may have a different result because of this. You can read more about the differences between All Purpose Flour and Bread Flour here.
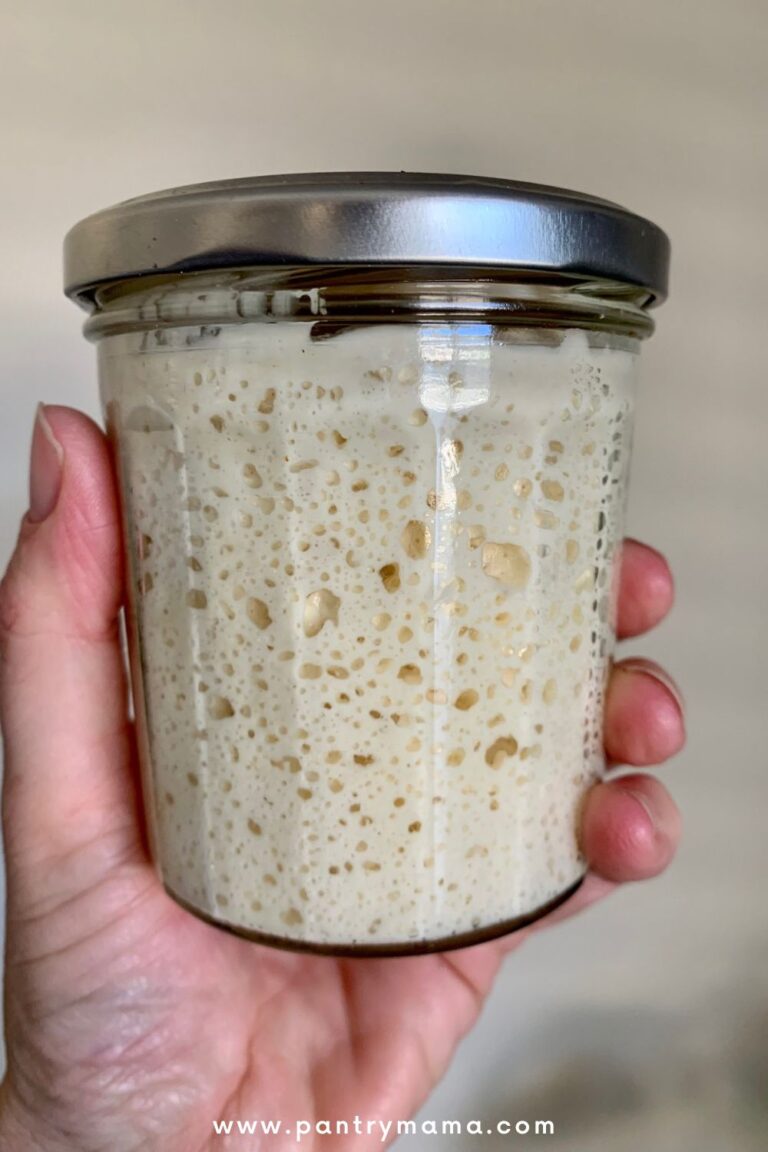
- Notes on Sourdough Starter: This recipe is based on you having an active starter that you have fed a few hours before starting your bake. For info on how to make a sourdough starter, go here.
- Notes on Stretch & Folds: If you are going to do the stretch & folds on your bench top, spray your surface with water mist rather than using flour. You can leave the dough in the bowl if you want to. Wet your hands to stop the dough sticking - although it shouldn't be too sticky. It will get less sticky as you do your stretches and folds. For more information on how to do stretch and folds, go here.
- Notes on Bulk Fermentation: If your home is warm then your dough will ferment a lot faster and could be done in as little as a few hours. If it's colder, it will take longer. You will know your dough is ready to move to the next stage when it has *just* doubled in size. It will be fairly wobbly and full of bubbles. You should be able to see large air bubbles under the surface of the dough.
You don't want to let it go any further than doubled as it will be over fermented.
You'll find more information on these topics here:
When is my bulk ferment finished? What is the difference between cold ferment and bulk ferment? Why does the amount of starter matter?
- Notes on Loaf Pan: The large loaf photographed in this recipe is a double batch of dough baked in a Farmhouse Loaf Pan measuring 24cm x 16cm x 12cm or 9.5" x 6" x 4.7". This pan was purchased here, but you can find a similar size here and here. For a single batch of dough I recommend a loaf pan measuring 22cm x 10cm x 11cm or 8.5" x 4" x 4.25"

Would you prepare the loaf pan the same way if it's a cast iron loaf pan? I use one for the dough and a second one turned upside down for a lid. I trying to get away from parchment paper.
I’ve made this recipe twice, and while it’s delicious, the bread rises up in the middle like a volcano instead of rising uniformly across. I’ve scored it each time, so I’m unsure of what’s causing this.
I have a cast iron loaf pan. Can that be used? And if so has anyone tried it and how did it come out?
Can you bake this in a silicon tin?
Thank you for this information on backing in a loaf pan .This is what I have been looking for .Now I have another question .I have organic grains both Red Fife and Rye of which I mill to make bread .I am trying a mix with white flour and my whole wheat with a sprinkle of Rye .I have not been successful to make a good descent looking and tasting loaf as of yet .But always open to suggestions.
Many thanks for your site .
What size loaf tin do you recommend?
I’m making this and my dough is very dry and tough compared to other loaves I’ve done. I did add a bit of water to my hands while stretch and fold. I hope it still bakes well
How would a whole grain sourdough loaf work in a metal loaf pan? Is there any difference in the process from how you do the sandwich loaf?
That would be fine, I'd just use the same process as outlined above. This multigrain sourdough or even rye sourdough bread both work really well when baked in a loaf pan 🙂
Can you give me ingredients in measurements rather than weights
When using a pullman loaf pan, which is best: Leave it covered, leave it uncovered, or covered for 30 minutes and uncovered for the last 15???
TYIA
Do I have to shape the dough if I bulk ferment inside the loaf Pan?
I want to use the cover on my Pullman pan will that be a problem?
I love this recipe. How long do you have to cool the bread before you slice it? Other articles claim its anywhere between 4 to 6 hours
There is a question about using a Pullman pan which I prefer is it ok for this type of recipe? Did I miss the reply to this question if so I apologize. One other question is taking a dough temp important I assume it isn’t because you don’t reference dough temps.
hi, thanks for everything. I am wondering how much to extend the baking time to allow for my cast iron loaf tin. Do you have an idea? I guess i use your times and then inspect?
Hello! I was just curious how long you let your loaf sit out after you place it in the loaf pan but before the cold ferment?
Thank you so much for your great recipes!
I am trying this for the first time and realized that the recipe calls for 100g of starter as opposed to your regular sourdough recipe which is only 50g of starter. Why is that? The other ingredients are the same in both recipes except for that one and I was curious as to why.
I used you little trick to cover bread with another bread pan on top and it worked great! I havent had to buy any tools to make bread and my husband said its perfect!
thanks
Hi! Thanks a lot for all the clear instructions. I'm now selling my loaves, so baking them in pans to better use the oven space, but I find when the oven is full of loaves they release A LOT of steam and they take forever to cook through, resulting in a super tough top crust and soggy sides. I tried removing the loaves from the pans midway, but still get bad crusts :/
This is delicious. Is the recipe you have here already a double batch? I have put it in a large loaf pan and it worked just fine. Only asking, because I’m afraid if I doubled it, it would extrude over the pan. Mine is the USA pan 10w x5d x 3h.
It is for a 1.5 pound loaf.
This is just a single loaf but you can double the recipe if you want to 🙂
Hi Kate,
Basing on this article I tried your multi grain sourdough bread. It was not baked through well. I baked it at 200degree for 45 min
Please advise how can i bake better breads in loaf pan.
Will white spelt flour work as well for this loaf pan recipe ?
You can find my spelt flour sourdough recipe here 🙂
Thank you so much for the recipe! Just successfully baked my very first sourdough loaf, I used spelt flour instead of bread flour and was a bit sceptical whether it will work just as well, but everything turned out great.
Do you let it cold ferment in the fridge overnight before baking the next morning?
Can you use a stoneware loaf pan?
Yes the clay baker is great for any weight of sourdough. Tried a half, the a three-quarter recipe in my oddly shaped clay baker (narrow at 1 end, wider at the other end). Both were good, although the smaller one was the best....soaked overnight rather than 30 minutes gave great crust. Cheers.
This is now the only way I bake my sourdough! It has never failed and the crust is only slightly crunchy. I usually slice it the day after it was baked, and wrap 3 slices up together. Then, I freeze it all in a big gallon bag. I date it, then only take out one packet at a time to eat. That way it doesn’t get old and it is usually only me eating it. I no longer even buy regular bread as this is so much healthier. Thanks for this great recipe!
Pantry Mama is my go to when looking for the answers for my sourdough problems. I have made few loaves in a pan and every time they have risen unevenly. Any suggestions?
so this recipe makes a 960g loaf? And in the picture, in the Farmhouse loaf tin, you doubled the recipe? So over 1,900g in that single loaf tin?
Yes this is correct, a double batch of dough 🙂
One daughter lives with her family, 4 hours away. Baking her a loaf or two of this bread has become a ‘thing’ every time we visit. It’s easy to do, the crust is perfect, and it’s like giving her a hug, every time.