This post contains affiliate links. Please see our disclosure policy.

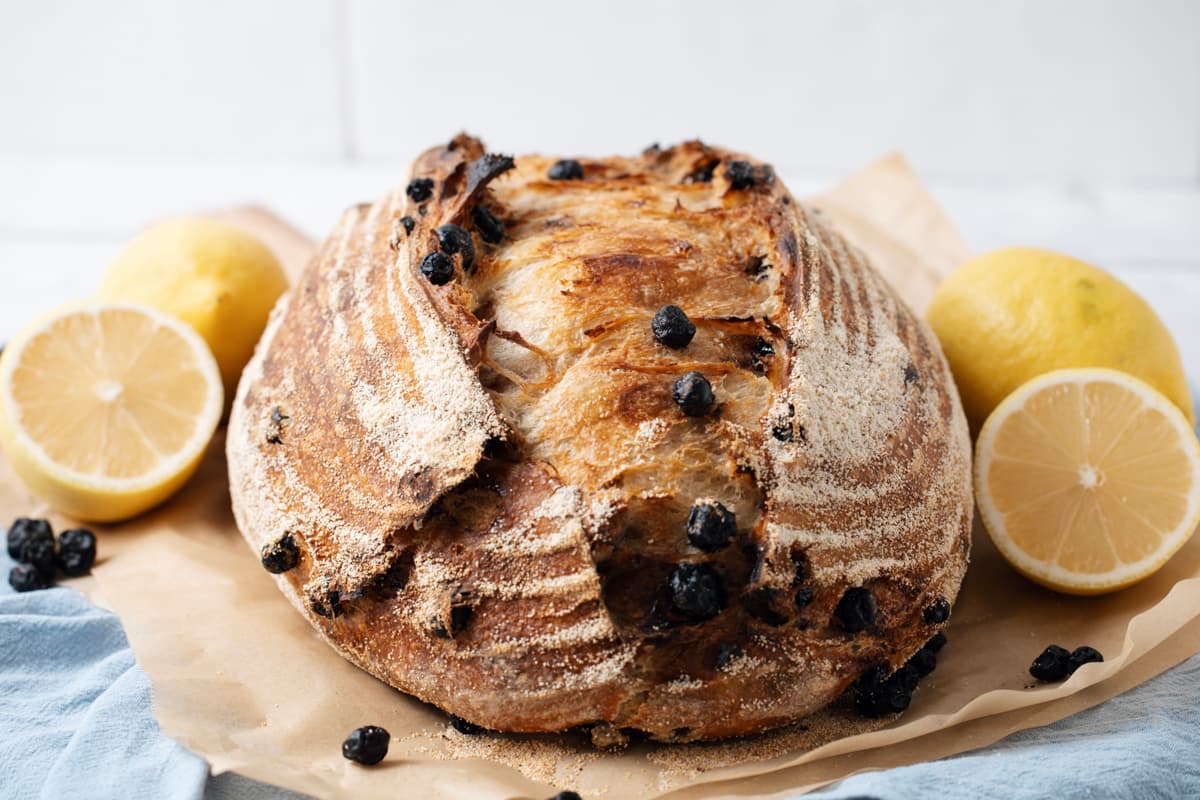
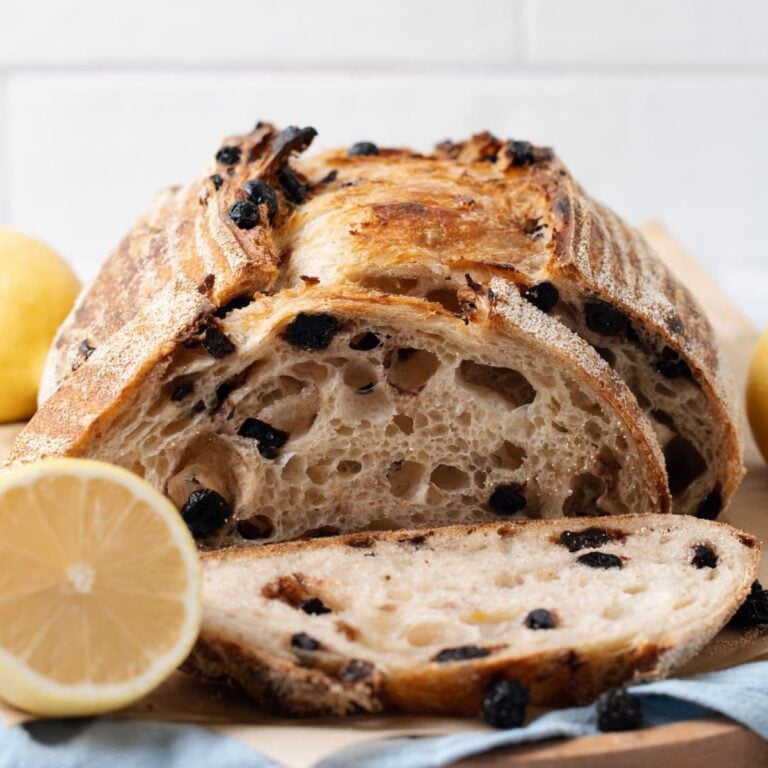
Wait til you experience the bold flavors of this delicious lemon blueberry sourdough bread. The sweet blueberries offset the tangy citrus notes of the lemon, resulting in a delightful combination that is both refreshing and flavorful – and it’s a delicious twist on my classic sourdough bread recipe. Seriously you are going to want to eat the whole loaf, trust me!
This is the perfect loaf to try if you are wanting to experiment with sourdough mix-ins!
Why You’ll Love This Recipe!
Fresh Flavors – This blueberry lemon sourdough loaf encapsulates spring and summer flavors by harnessing the popular flavor combination of lemon blueberry in a sourdough loaf. But you don’t have to wait until the summer months to make it, because this loaf uses dried blueberries which are available at any time of year.
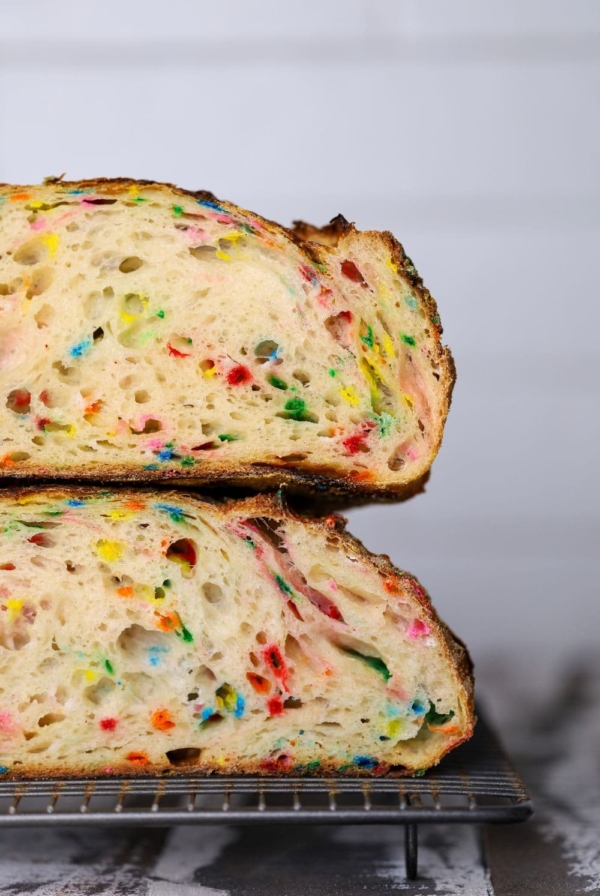
It’s Taylor Swift’s Favorite – If you’re a Swiftie, you’ll be happy to know that this is one of Taylor Swift’s fave recipes! Along with this funfetti sourdough loaf and this sourdough cinnamon swirl bread.
If you love this blueberry lemon sourdough bread, you might also enjoy these other sourdough blueberry recipes or perhaps this sourdough lemon and white chocolate loaf is your next bake?
Ingredients
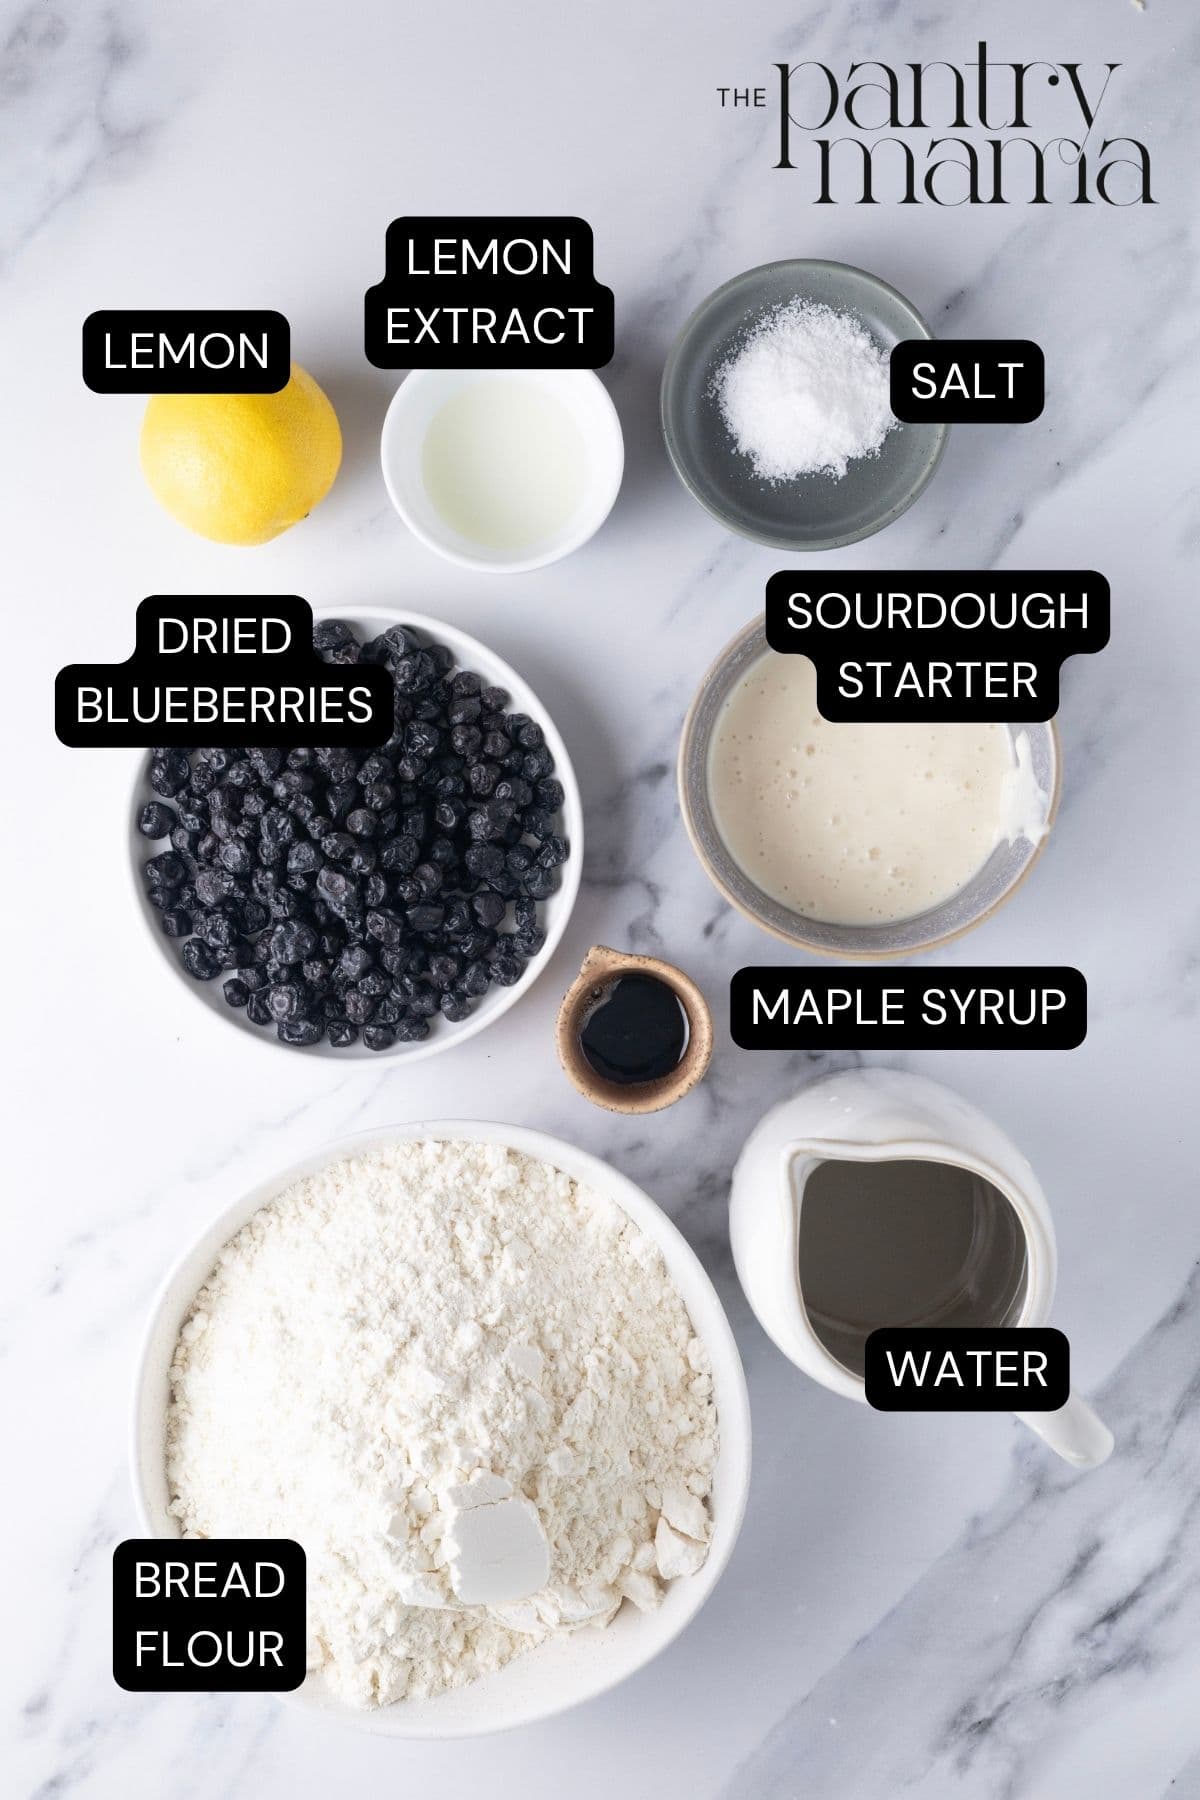
- Sourdough Starter – you’ll need active sourdough starter to create this delicious loaf. I don’t recommend using sourdough discard, as this will not have enough leavening power to rise your loaf. I have used 100 grams of sourdough starter, but you can adjust the amount of sourdough starter based on your schedule.
- Water
- Bread Flour – make sure you use bread flour rather than all purpose flour. This is incredibly important for this loaf because of the inclusions you’re adding. You could also add some vital wheat gluten to your bread flour to further increase it’s protein content.
- Salt
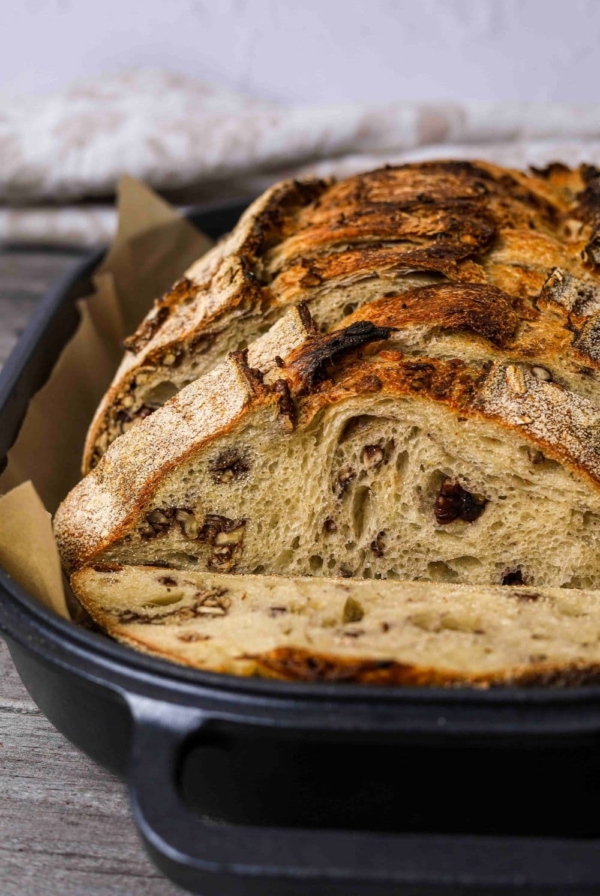
- Dried Blueberries – This flavor combination works so well together! When playing around with these flavors, I tested out a few different ways to include the blueberries and I found that the best way was to use dried blueberries. They retained their shape when baked and didn’t leach too much of their color through the bread (trust me this is super important and something I will talk more about further down the page).
- Maple Syrup – You can swap out the maple syrup for vanilla extract if you prefer. Soaking the dried blueberries in Maple Syrup makes them sweet and juicy, without being too wet. It ensures the dough retains it’s structure and beautiful color.
- Lemon Zest – I recommend using an unwaxed lemon to get the most flavor from the zest. I peel the lemon and then slice the zest to get as much as I can. Alternatively, you can use a lemon zester to do this. I highly recommend using unwaxed lemon. If you want a more intense lemon flavor you could increase the lemon zest or add a teaspoon of lemon extract along with the water. I don’t recommend adding lemon juice to this loaf.
How To Make Lemon Blueberry Sourdough Bread
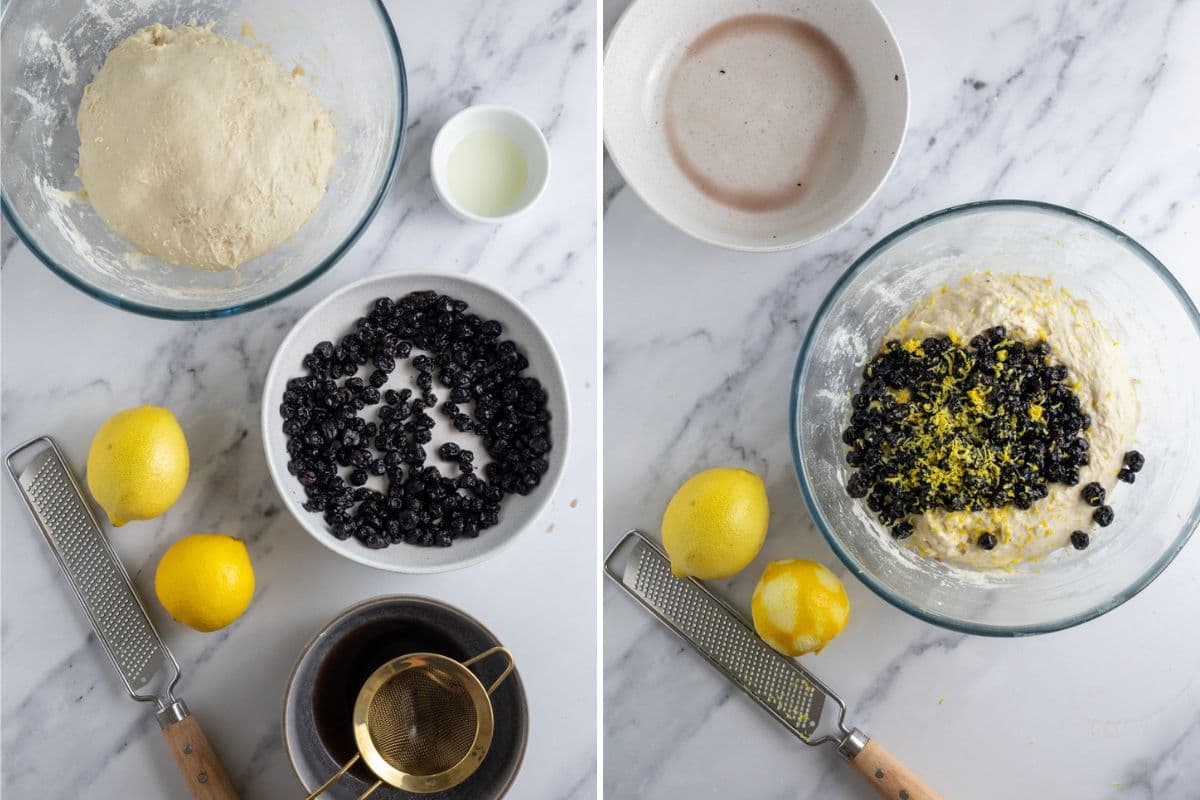
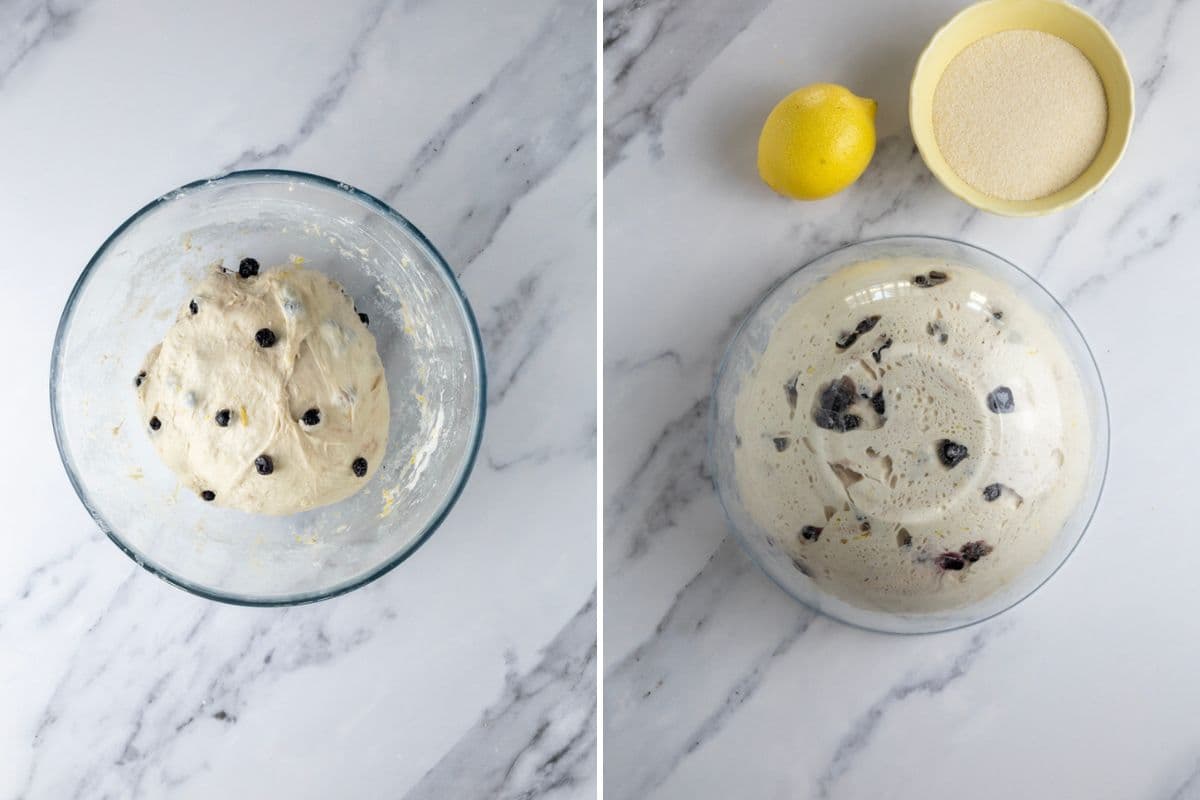
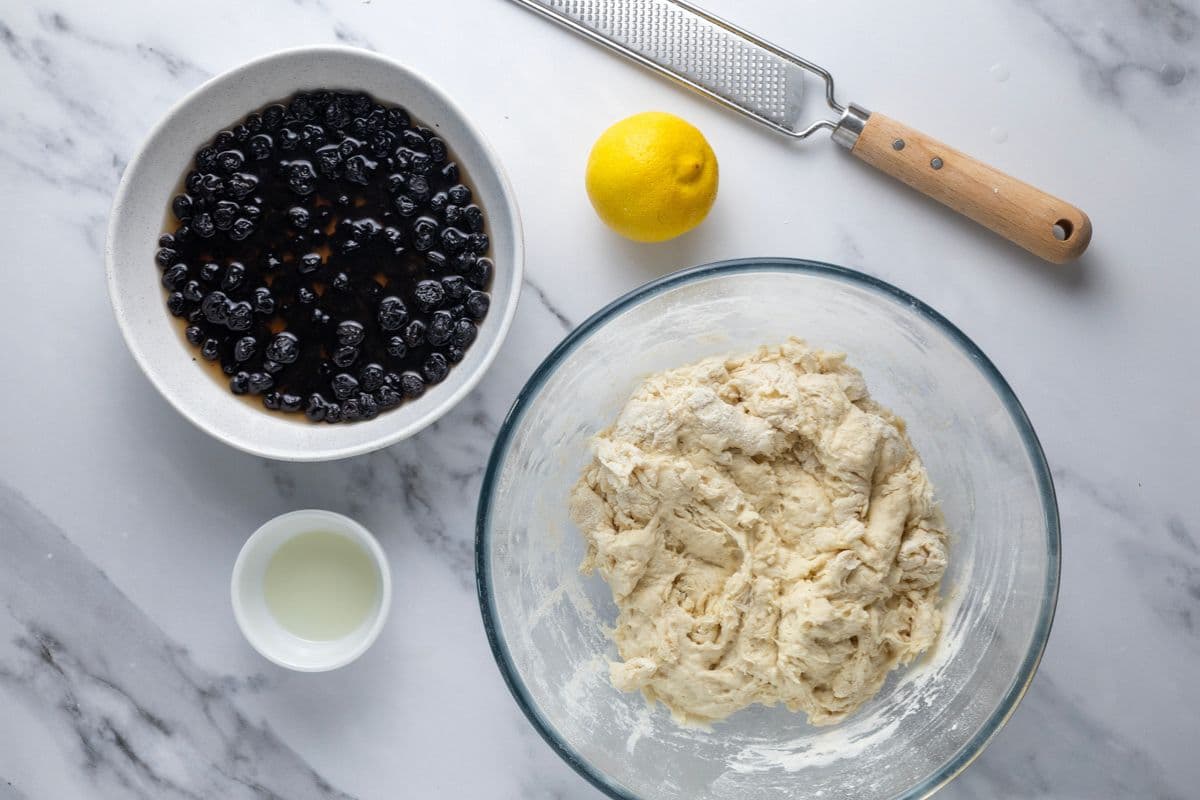
This lemon blueberry sourdough starts with a little prep that makes a big difference to the final loaf. Soaking the blueberries in maple syrup and hot water softens them and stops them from drawing moisture out of your dough later on — plus it gives you those juicy bursts of sweetness throughout the crumb. While that’s happening, bring your dough together in a large bowl using an active, bubbly starter (this is key for a nice rise).
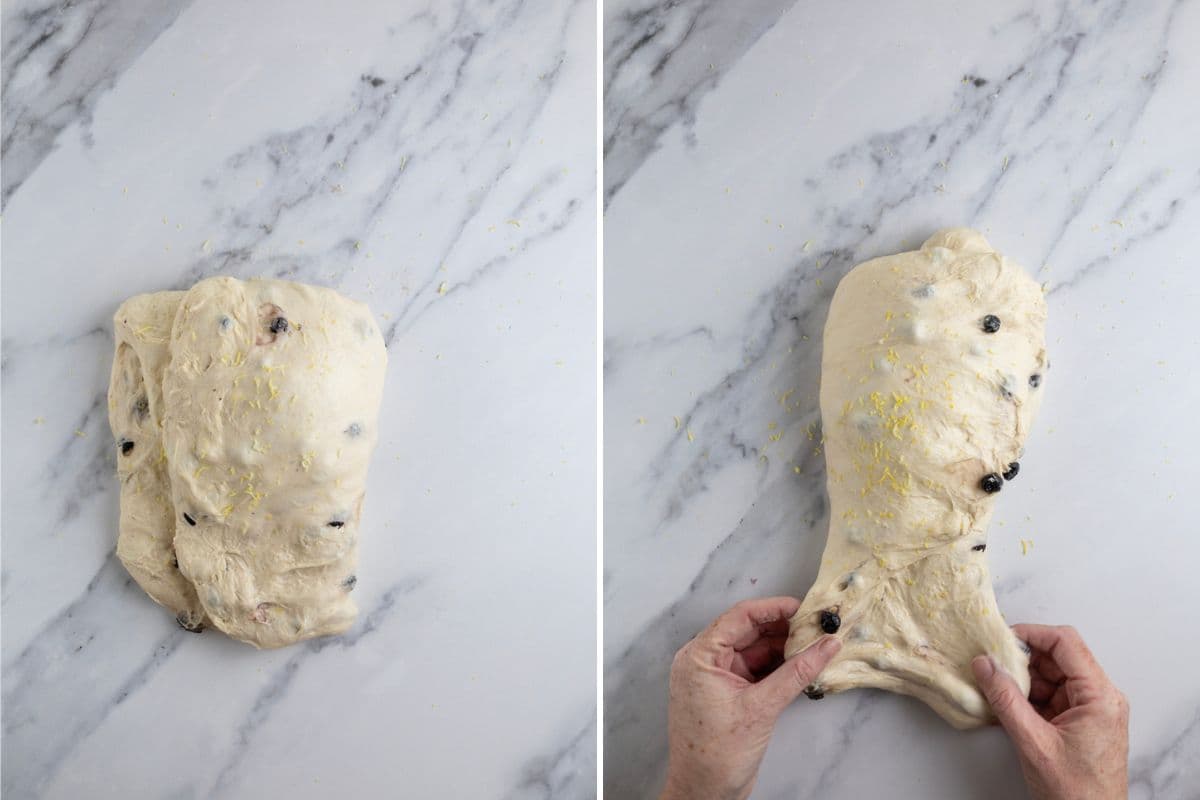
After a short rest, you’ll notice the dough transforms from rough and shaggy into something smoother and more elastic. That’s your hydration doing its thing. As you move through your stretch and folds, the dough will continue to strengthen and become easier to handle. You’ll need to add the soaked blueberries and lemon zest during your second or third set of stretch and folds. Try to do it gently and don’t stress about perfect distribution straight away — it will all come together over the remaining folds without knocking out all those lovely air bubbles you’ve worked to build.
From there, it’s all about patience. Let the dough bulk ferment on the counter until it’s noticeably risen and airy. Don’t rush this step, as it’s where the flavor and structure really develop. As always, I like to let my dough double during bulk fermentation. The top of the dough should have visible bubbles and should come away from the bowl easily, without leaving any residue.
When shaping, focus on creating surface tension to help give you that beautiful oven spring. I like to make this loaf into a batard, but you can create any shape you prefer. You could even bake this one in a loaf pan.

As always, you want to place the dough into the banneton with the seam up (this also helps you to be able to stitch the loaf together, something I find very necessary when adding a lot of inclusions like this loaf). I prefer to use semolina flour, rather than rice flour in my bannetons, but use whatever you prefer.
A cold proof in the fridge not only makes the dough easier to handle and score, but also deepens the flavor and allows the lemon and blueberry to really infuse the loaf.
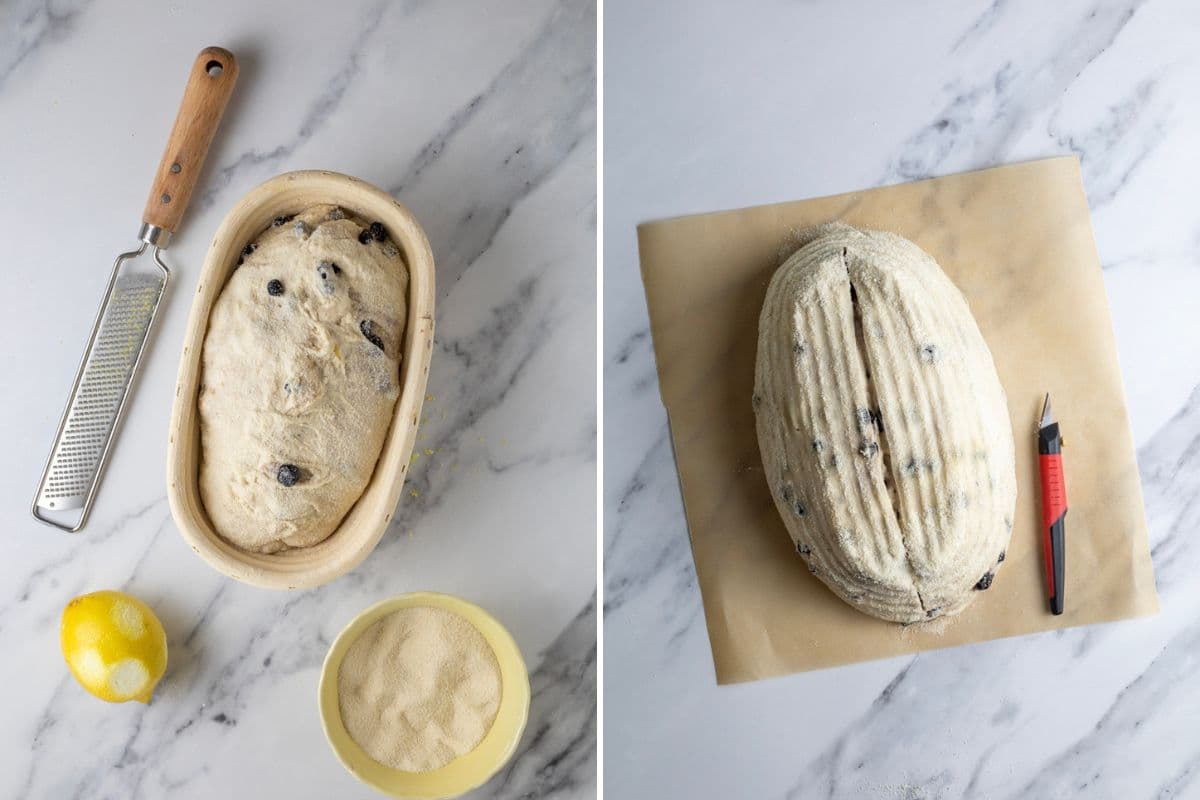
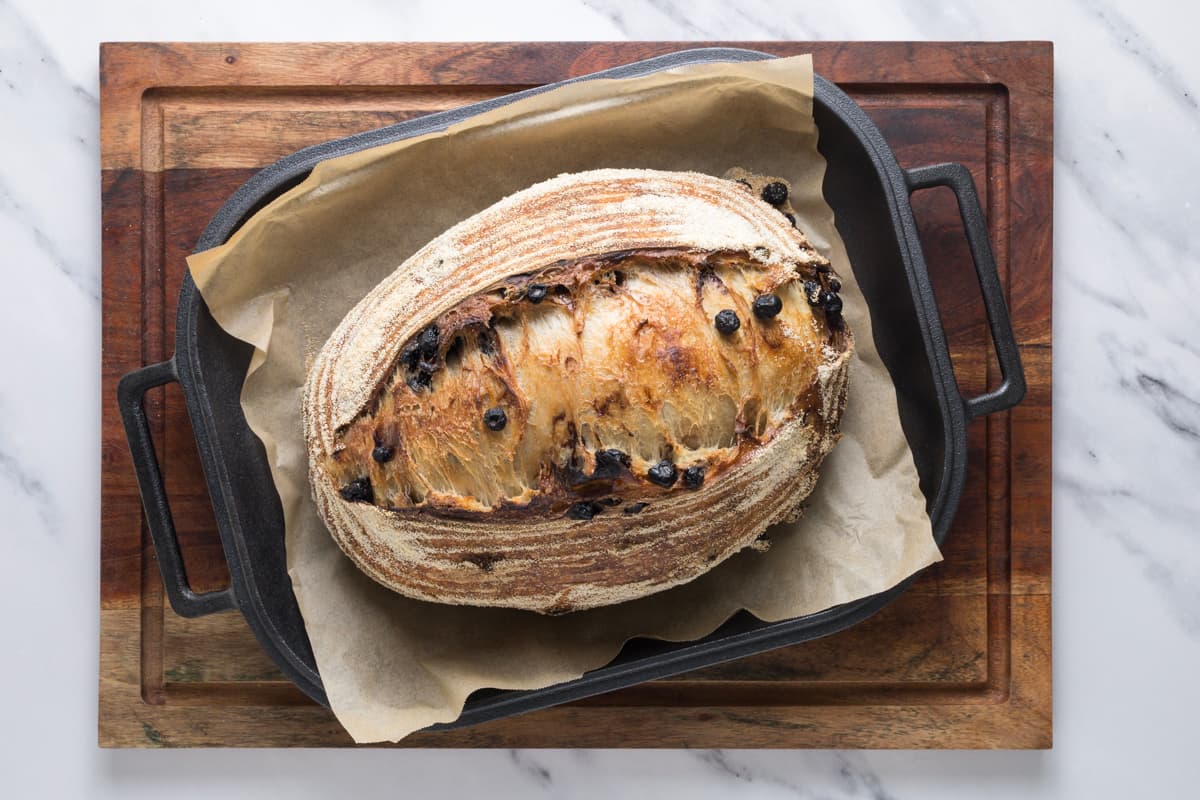
When you’re ready to bake, preheat your oven with your Dutch oven inside and turn your cold loaf out onto a piece of parchment paper and score it.
Place your loaf into a hot oven with the lid on for the first part of the bake, removing the lid and lowering the temperature for the last 10 to 15 minutes. Keep an eye on the color because the natural sugars from the fruit can cause it to brown quickly. If needed, lower the temperature even further for the final part of the bake to keep the crust from getting too dark. I recommend letting this sourdough bread cool on a cooling rack until it comes to room temperature before slicing. Don’t leave it in the Dutch oven to cool as this can result in a tougher base crust.
Kate’s Pro Tip
Increase The Lemon Flavor
If you LOVE a really strong lemon flavor, consider adding 5g of lemon extract to the water when you do your initial mix. This doesn’t hamper fermentation and imparts a very strong lemon flavor. I highly recommend it if you love a fragrant loaf! If you’ve already mixed your loaf, you can also add it with the blueberries during stretch and folds.
Baking Schedule
I love creating a sourdough timeline to help ensure my sourdough baking fits in with my schedule. This is a sample timeline that you can use. Of course you may need to tweak it to fit the time you have available.
| TIME | PROCESS |
|---|---|
| 9 am | Premix and autolyse for around an hour, forming up the dough and leaving to rest for another 30 minutes before stretch and folds. Soak the dried blueberries while the dough is in autolyse. |
| 11 am | 1st stretch and fold |
| 11.30 am | 2nd stretch and fold – add the drained blueberries and lemon zest |
| 12 pm | 3rd stretch and fold – continue to distribute the soaked blueberries and lemon zest through the dough. |
| 12.30 pm | 4th stretch and fold |
| 1 pm | Bulk fermentation at room temperature remembering that the soaked blueberries will speed up the fermentation process due to the sugars. |
| 6 pm | Shape dough into a boule or batard, place into banneton and then into fridge for cold fermentation. |
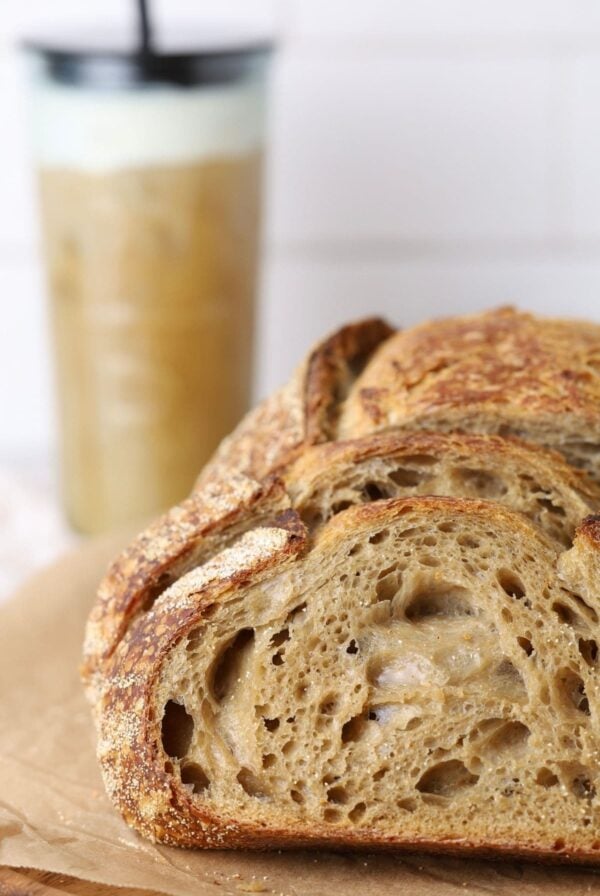
| 9 am | Wake and bake! The next morning, you can get up, make a coffee and bake your blueberry lemon sourdough loaf (I recommend some Taylor Swift to set the mood). |
Why Use Dried Blueberries?
When creating this recipe I tested so many ways of adding the blueberries in order to create the perfect loaf. Here are some of my recipe testing notes so you can understand why I chose to go with dried blueberries for this loaf.
Fresh Blueberries – I did have success adding fresh blueberries to this loaf, however, I found that there was often issues with fermentation using fresh blueberries. They alos have a tendency to pop out the side of the dough when shaping which can tear your gluten structure. Fresh blueberries are better suited to sourdough quick bread like this sourdough berry banana bread.
Frozen Blueberries – I don’t recommend using frozen blueberries when making sourdough bread. The frozen blueberries become very wet and juicy when thawed and will add too much liquid to the dough. You’ll end up with a big, sticky mess. Frozen blueberries are perfect for these sourdough blueberry muffins or these sourdough brioche blueberry cheesecake rolls.
Dried Blueberries – I tested this recipe using straight dried blueberries (without soaking them first). I much preferred the loaf where the blueberries have been soaked, but you can of course add them without soaking them first. I also found that using dried berries didn’t interfere with the hydration of the bread, which can be a big win if you are just beginning your sourdough journey and not overly confident with higher hydration sourdough laoves.
Serving Suggestions
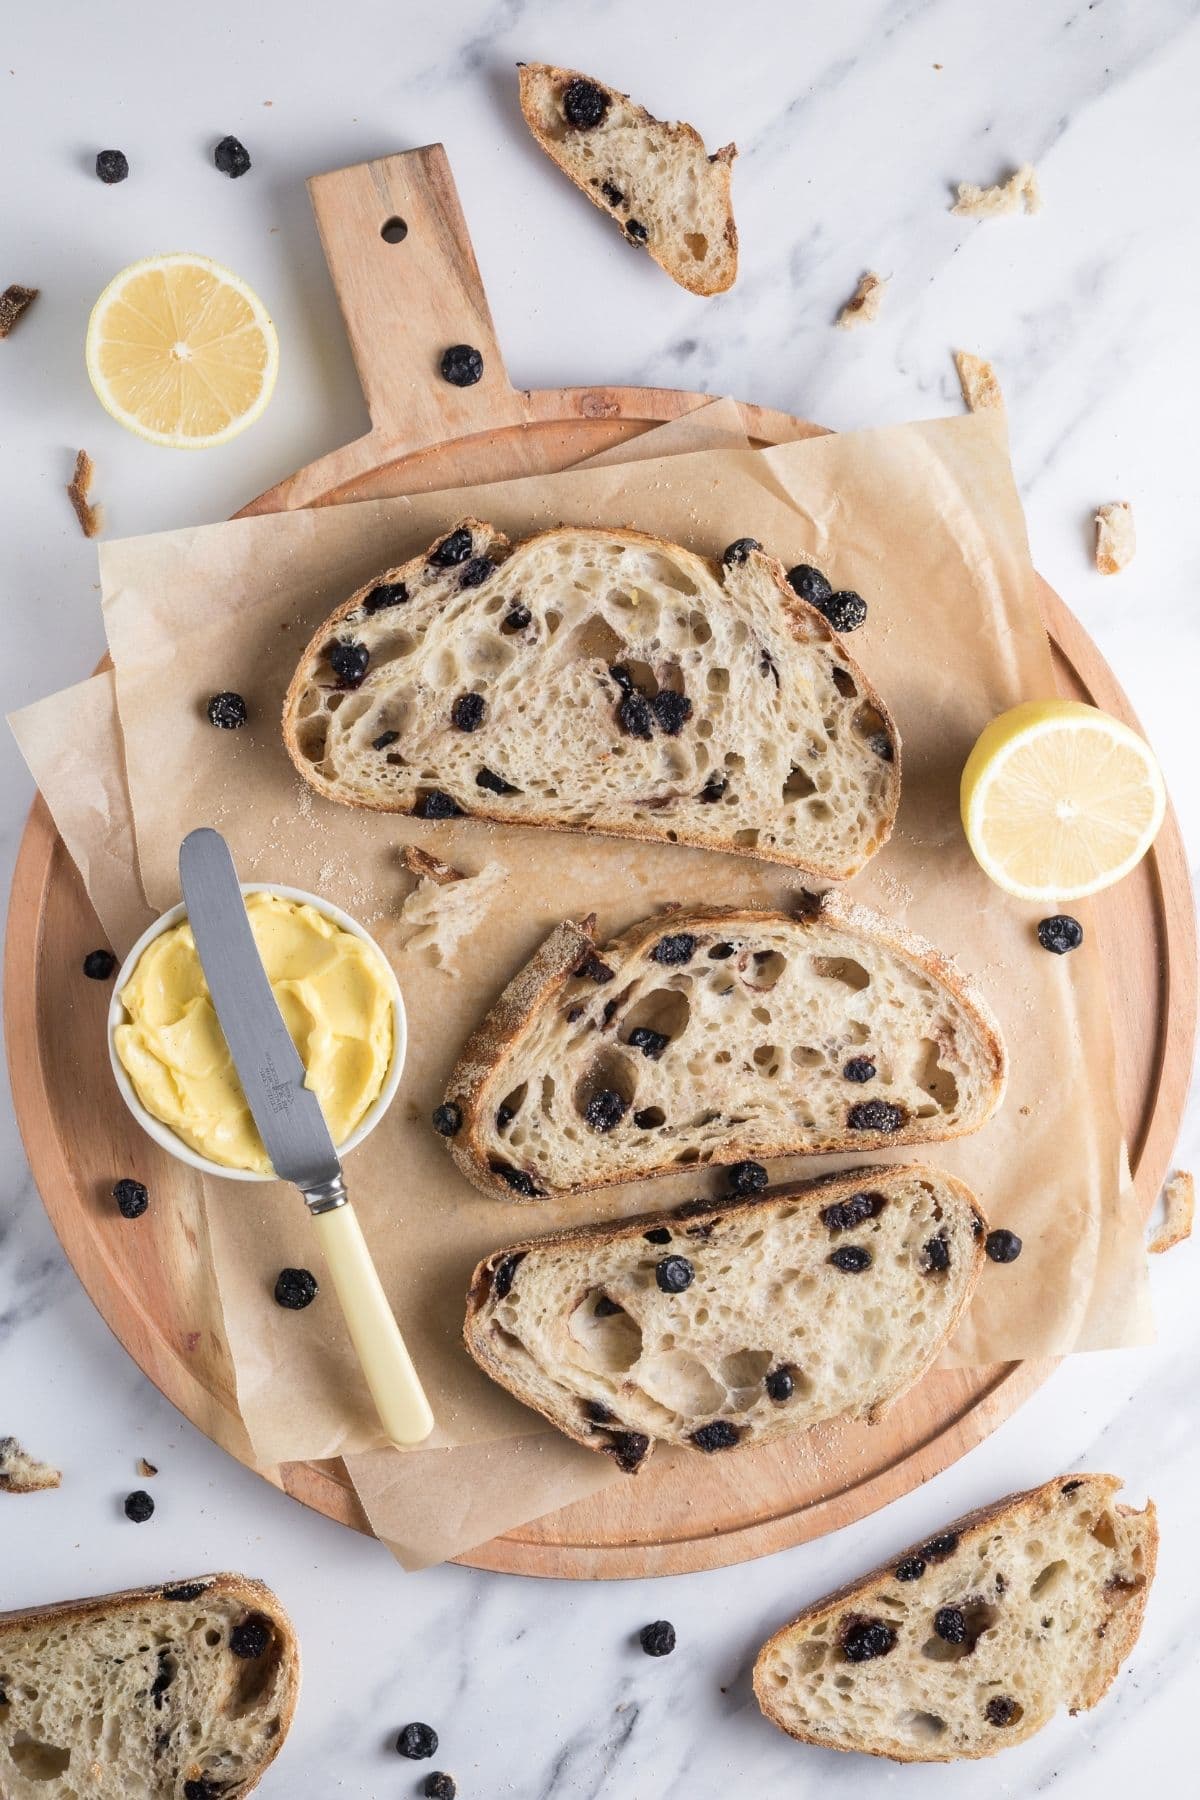
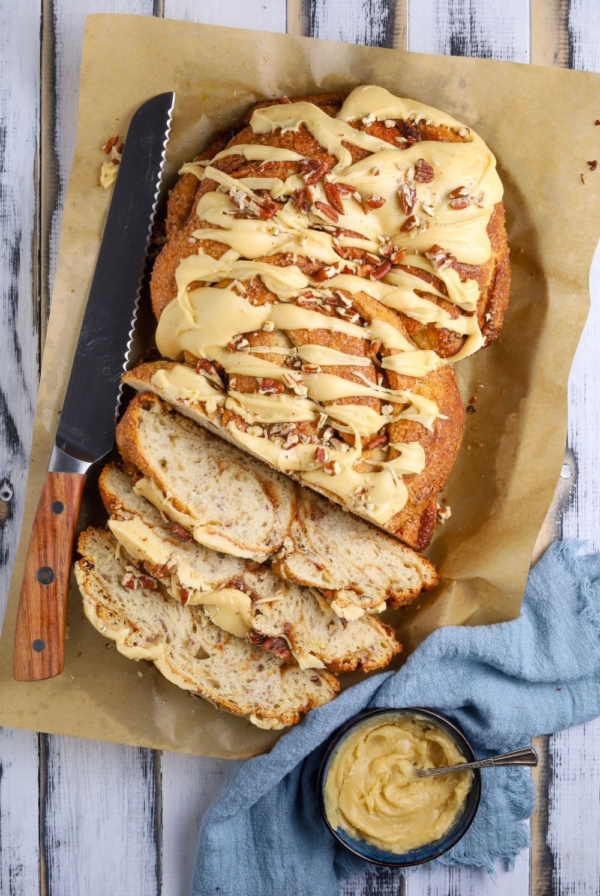
You’re going to love serving this lemon blueberry sourdough bread with homemade butter. You might also like some of these serving suggestions:
- Toast individual slices of this loaf and smear with homemade lemon curd for the perfect sweet afternoon snack.
- My personal favourite is toasting this lemony bread and topping it with homemade ricotta then dusting with a little powdered sugar and lemon juice. YUM! It’s kind of like a dessert vibe, but it’s totally acceptable at breakfast!
- You might also enjoy serving this special lemon blueberry sourdough loaf with this cinnamon honey butter or whipped maple butter.
How To Store + Freeze
Like most sourdough bread, this blueberry lemon sourdough loaf is best eaten within 24 hours of baking. Allow it to fully cool at room temperature before slicing with a good quality bread knife (you can see my favorite sourdough bread knife here).
It also freezes really well! Place the cooled loaf into a ziplock bag (much easier than plastic wrap) and then place in the freezer for up to 3 months. Thaw at room temperature in the bag to ensure you retain the moisture in the crumb.at room temperature before slicing with a good quality bread knife.
Lemon Blueberry Sourdough Loaf
Equipment
- Mixing Bowl
- Digital Scales
- Banneton
- Dutch Oven
Ingredients
- 100 g Sourdough Starter , (fed and bubbly)
- 350 g Water
- 500 g Bread Flour
- 10 g Salt
- 50 g Dried Blueberries, (you can use up to 100g)
- 10 g Maple Syrup
- Zest of a lemon
Instructions
- Before You Start – Prepare the Lemon & Blueberries:An hour before you start mixing this sourdough, you need to prepare the blueberries. You could also do this while your dough is in autolyse. Put your blueberries into a small bowl and cover them with 10g of Maple Syrup and just enough boiling water to cover them. Cover with cling wrap and put aside until you need them (these can be made the day before if you want, but as long as they sit for an hour they will be fine).
- Premix & Autolyse:Weigh out your sourdough starter and water into a large ceramic or glass bowl. This recipe is based on you having an active starter that you have fed a few hours before starting your bake.Mix the water and starter together briefly. Then add your flour and salt and mix together with the end of a wooden spoon. The dough will be fairly shaggy and only just brought together.
- Cover your bowl with cling film or a damp dish towel and let it sit for around 1 hour. It's ok if it's a little longer.
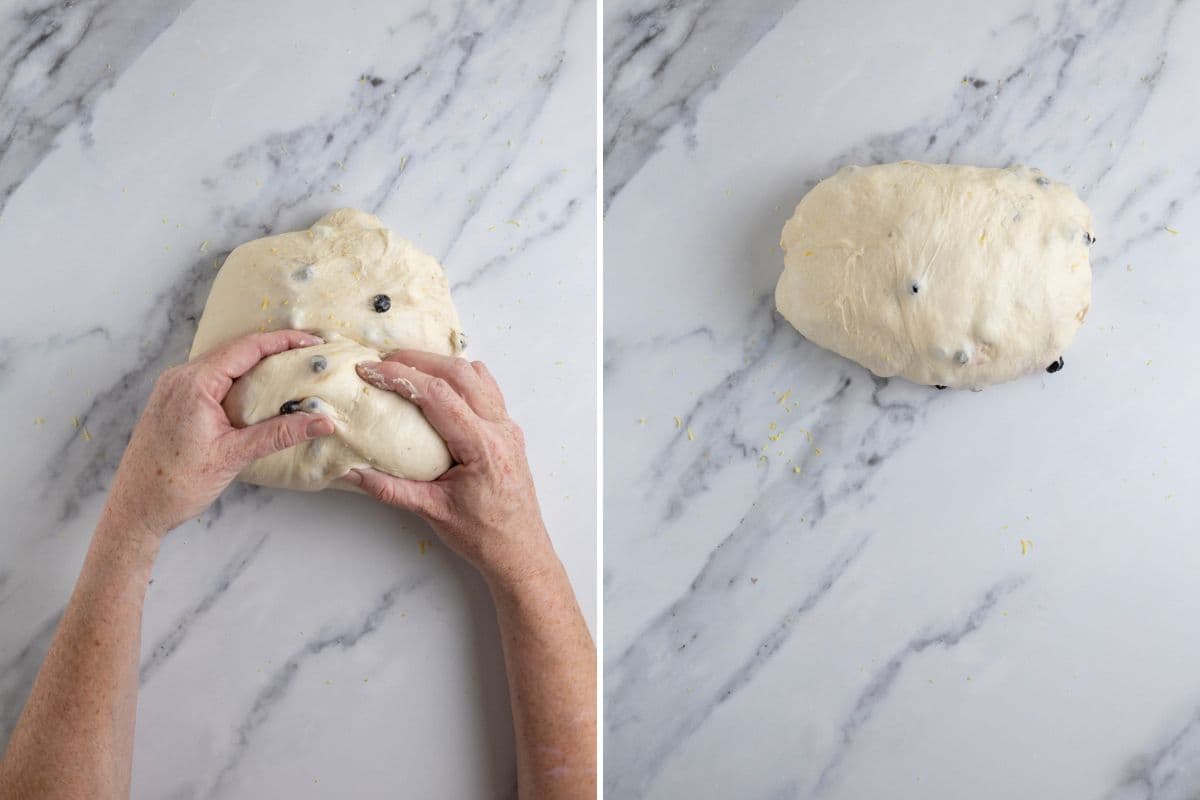
- Forming Up Your Dough:After the dough has been through autolyse, you need to bring it together into a ball. You'll notice that the dough is fully hydrated after soaking up all the liquid. It will be fairly sticky but as you bring it into a ball, it will become smoother and shinier.Work your way around the bowl, grabbing the dough from the outside and stretching it up and over itself until a smooth ball is formed. You shouldn't need more than 20-25 folds to form the ball, you might need less. You just need to let the dough tell you Once the dough has formed into a smooth ball, pop the cling film back on and let it rest for around 30 minutes.
- Stretch & Folds / Adding Flavors:Over the next few hours, you need to create some structure for you dough by stretching and folding. Aim to do around 4-6 sets of stretches and folds. For each set, stretch the dough up and over itself 4 times. You'll find it gets easier to do at each set as the gluten in your dough develops.8
- Around your second or third set of stretch and folds, add the drained blueberries and lemon zest. Try to incorporate them without disturbing all the beautiful bubbles that will be forming in your dough. I find it's easiest to actually get your dough out of the bowl and pop it on the bench top. Add the flavors on top of the dough and gently stretch and fold the dough around them. Don't worry if they aren't all through your dough on the first add – you'll have them worked through by the last set.
- Bulk Ferment:Once you've finished your stretch and folds, place the cling film or damp tea towel back over your dough and let it rest and ferment.
- Shaping Your Dough:Once your dough has finished its bulk ferment, you need to shape it. I've chosen to shape into a boule for this recipe, but you can use any shape you prefer.
- Once you're happy with the shape, place your dough into your banneton or bowl, ensuring that you've liberally floured whatever you are using.
- Cold Ferment:Now your dough is in it's shaping container, cover it loosely with a plastic bag or damp tea towel and place it into the fridge.Try to leave it for a minimum of 5 hours, up to a maximum of 36 hours. The longer you leave it, the better your bread will be.
- Preparing To Bake:Once you're ready to bake your sourdough, you'll need to preheat your oven to 230ºC/450ºF. Place your Dutch Oven into the oven when you turn it on so that it gets hot. Try to preheat for around 1 hour to ensure your oven is super hot – but you know your oven, so just adjust this time if you need to.Leave the dough in the fridge until the very last minute.
- Time To Bake!When your oven is at temperature, take your sourdough out of the fridge. Gently place it onto a piece of baking paper or parchment paper.Gently score your bread with a lame, clean razor blade or knife. A cross is sufficient, but you can get as artistic as you like.Carefully take your Dutch Oven out of the oven. Place the sourdough into the pot using the baking paper as a handle. Put the lid on and place into the hot oven. If you want you can spritz your dough with extra water before you put the lid on.
- BAKE TIME:Bake your sourdough for 30 minutes with the lid on at 230ºC/450ºF plus12-15 minutes with the lid off at around 210ºC/410ºF. Keep an eye on your bread at this stage – because it has blueberries and sugar in it, the sugar can make the top go very dark, very quickly.
- Once the time has elapsed, remove your sourdough from your Dutch Oven. Turn off your oven and place the sourdough back into the oven, directly on your oven rack. Let it cool in here with the door ajar for 1-2 hours.
Notes
- Notes on Sourdough Starter
This recipe is based on you having an active starter that you have fed a few hours before starting your bake. For information on whether your starter is ready, go here.
- Notes on Stretch & Folds
If you are going to do the stretch & folds on your bench top, spray your surface with water mist rather than using flour.
- Notes on Bulk Fermentation:
If your home is warm then your dough will ferment a lot faster and could be done in as little as a few hours. If it’s colder, it will take longer, possibly overnight. I would recommend that you try to do your first few bulk ferments during daylight hours so that you can watch your dough closely.
Once you’re more familiar with the process – and the temperature of your home – you will be able to do overnight ferments.
You will know your dough is ready to move to the next stage when it has *just* doubled in size. It will be fairly wobbly and full of bubbles. You should be able to see large air bubbles under the surface of the dough.
You don’t want to let it go any further than doubled as it will be over fermented. If you want to do an overnight ferment, but your home is warm, consider using a little less starter (ie 25g).
Less starter means your dough will take longer to ferment and you will reduce the risk of over fermenting your dough. You’ll find more information on these topics here:
When is my bulk ferment finished? What is the difference between cold ferment and bulk ferment? Why does the amount of starter matter? - Notes on Baking
If you’re worried about the base of your bread burning, place a baking sheet on shelf underneath your Dutch Oven – it works! If you’re worried about your bread not being cooked all the way through, turn the oven off and place your dough straight onto the oven rack. Leave the door ajar and let your bread rest there for a few hours. Remember not to cut into your loaf too soon – you’ll need to let it cool for at least a few hours (4-6 is best).
Nutrition
Nutrition information is automatically calculated, so should only be used as an approximation.
Like this? Rate and comment below!


Can I use fresh blueberries, and if so what adjustments would I have to make to the recipie? Thanks
No, dried are best. Fresh will break down too much during the cooking process xo
Can I make this recipe with discard? Like just adding the blueberry lemon zest to your discard sourdough boule recipe?
You could definitely add the flavorings to the discard loaf, yes 🙂
This is just the best recipe! The flavours are very subtle but go together fabulously! Love it! Easy to follow instructions as well!
Could you use a different syrup, not a maple fan. If so, what do you recomend?
Thanks much
I would like to make this recipe, blueberry lemon sourdough bread, but I would prefer to make it in a pan as I find pan shaped breads to be far easier to cut. Can I successfully use this recipe but make it in a 9X5 inch pan? If yes, what temperature and time of baking would I need for a finished loaf?
thank you,
Wayne
I feel like the sugar and blueberries became extremely wet. Is that normal for something like it? Also, I found that my blueberries stayed in one pocket while stretching and folding. I assume it’s probably my “technique”? This is my first week of sourdough and 2nd boule lol
You say drained blueberries in the recipe, So you drain them before you add them to the sourdough?
Is it possible to strain/muddle fresh blueberries and use the juice to include in part of the total hydration? And use the scrapes of blueberries in the dough as inclusions?
Hi there! Can you use fresh blueberries?
Fresh berries won’t work here because they will break down too much.
Just made this and it is delicious!
I baked this last night and got some serious oven spring! I used the full 50 grams of dried blueberries, and was glad I did. My bulk ferment was 5 hours in a warm oven before going in the fridge for 20 hours. This made such a nice breakfast with butter and blueberry jam!
Hey there, just wondering if I would be able to bake this same day?
Great recipe! Loaves were well received. I made one with dried blueberries, and one with chopped dried apricots (and no maple syrup). I had oranges, so used orange zest instead of lemon. Both came out well. I used the lamination method rather than added the fruit during stretch/fold. Rather than spread the fruit across the entire surface (as shown), I put 1/3 of the mixture in the center, folded the right side over. Then 1/3 of the mixture on the right side and folded the left side over. Then 1/3 of the mixture on top and rolled up the dough. That distributed the fruit and sugar more evenly than if I’d spread the fruit and sugar across the entire rectangle and then folded it up.
The (drained) berries/apricots and the moisture from the hydroscopic properties of the added sugar made the dough a bit more challenging to shape into loaves, since they added moisture. Also, the fruit did make it harder for me to get surface tension. The fruit tore the strands of gluten a bit. Nevertheless, I’ll happily make this recipe again!
I made this for the first time today and it turned out great! I had a little trouble with the blueberries letting off a ton of extra liquid despite straining them, but I just used a paper towel to soak the excess out of the bottom of the bowl and that did the trick. Will definitely make again!
Thank you so much for the recipe .this was my first really successful sour dough recipe ( thanks to a great starter I recently purchased … I’ve killed every starter I tried to make from scratch). I made two loaves and even though I didn’t do all the stretch and folds but it came out amazing. I did not have blueberries so I substituted with some black and golden raisins and I also added some lime rind in addition to the lemon rind. I also left the dough to bulk ferment in the fridge overnight and I can barely keep my hands off the bread it’s so delicious . Thank you so much
Hi, can I use frozen blueberries in the recipe Thankyou
Hi Colleen, I don’t think that will work as they will add too much moisture.