Extra Sour Sourdough Bread Recipe [tangy sourdough flavor]
This post may contain affiliate links.
If you are seeking an extra sour sourdough bread recipe, then look no further! This homemade sourdough bread recipe will give you the big, bold, extra sour sourdough flavor you've been looking for! And the best part is, all you need is flour, water, salt ... and your sourdough starter of course! There's no extra ingredients necessary to achieve a more sour flavor.
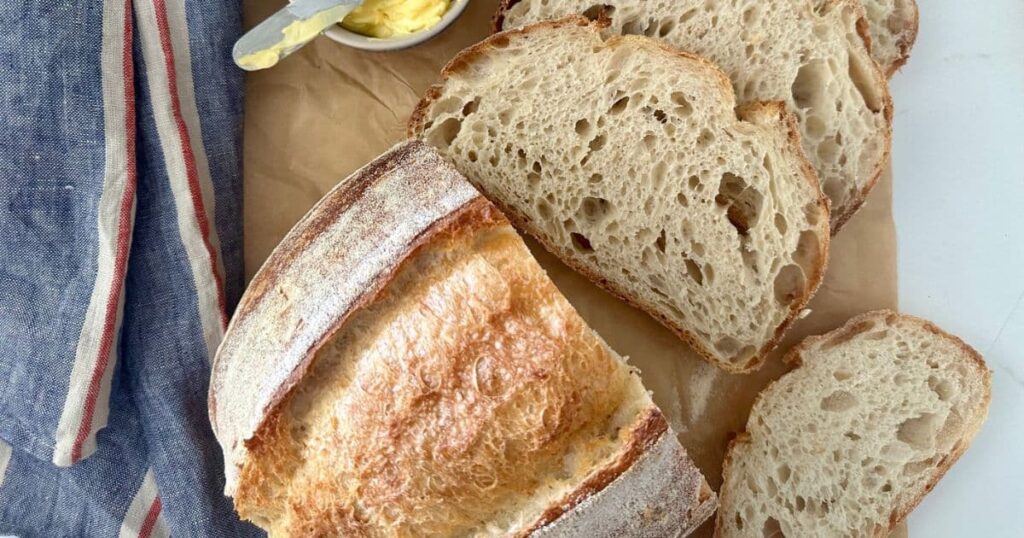
I have written the recipe for extra sour sourdough bread to go with my guide to making your sourdough bread more sour. It's full of little tips and tricks you can use to tweak your exisiting recipe (like this simple sourdough bread recipe). But if you are looking for a "done for you" recipe, then you will love this loaf with it's big, bold extra sour sourdough flavor!
If you love recipes with a big, bold sourdough flavor, make sure you check out this sourdough pumpernickel bread, long fermented sourdough bread or this sourdough rye bread.
Why You'll Love This Recipe
Big, Bold, Extra Sour Sourdough Flavor - if you're seeking a level of sour flavor that only a true sourdough lover will enjoy, then you are going to absolutely love the tangy flavor you'll achieve in this loaf!
No Citric Acid Required - many extra sour sourdough recipes require citric acid to be added to the dough to increase the tangy sourdough flavor, however this is not the case with this easy sourdough bread recipe.
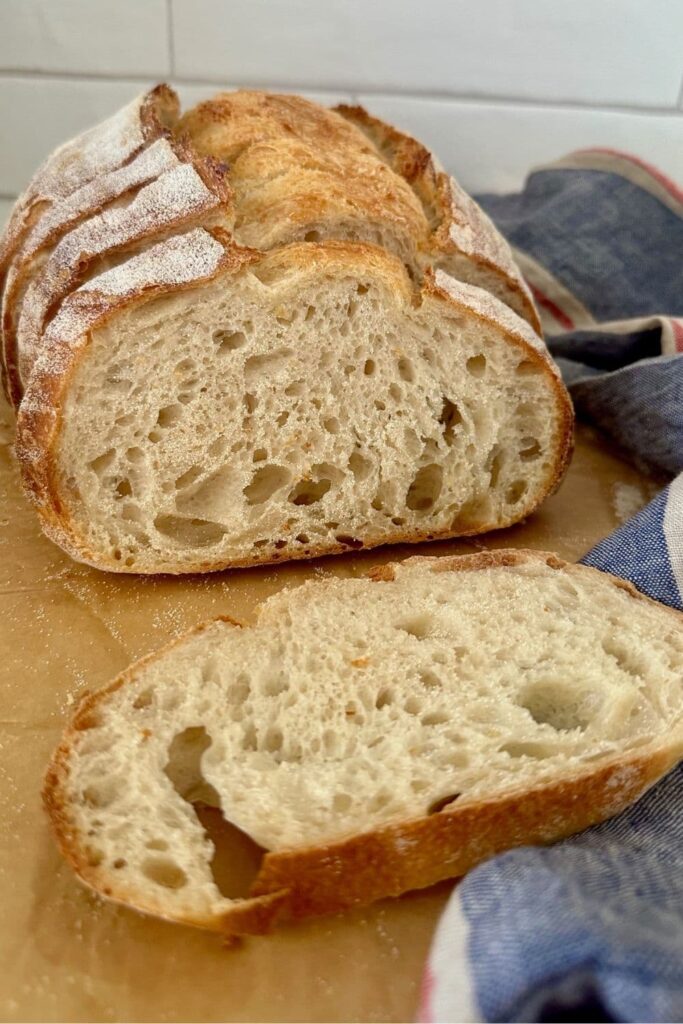
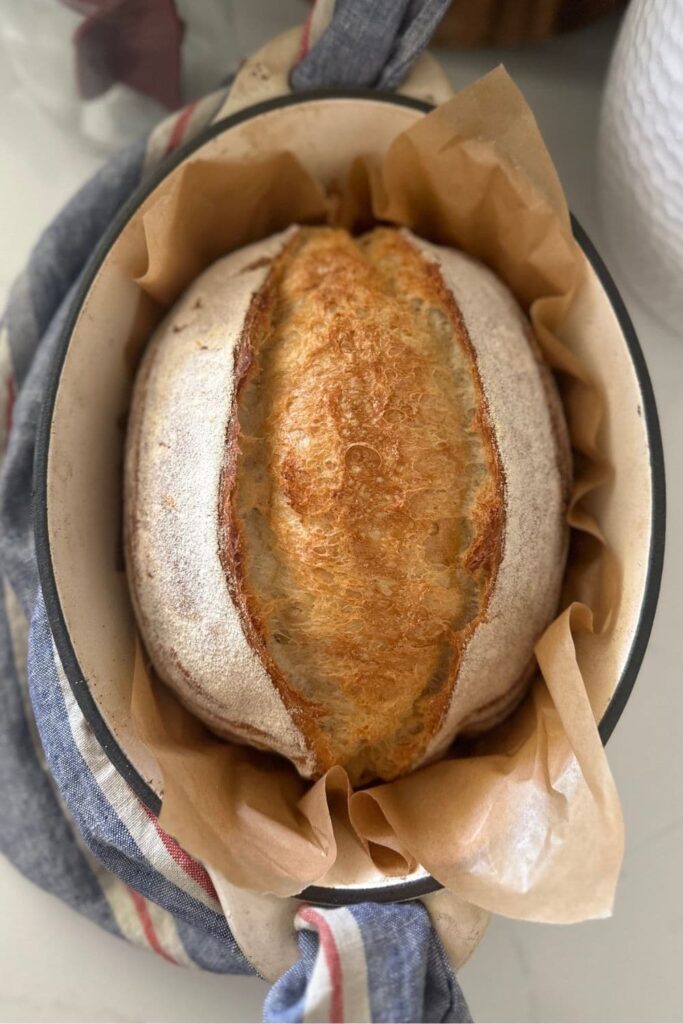
Beautiful Blistered Crust - This easy sourdough recipe will give you a nice crust, covered in the gorgeous sourdough blisters that are synonymous with a long cold fermentation. Getting the fermentation right will give you a very deep golden brown crust covered in beautiful blisters.
What Gives Sourdough Its Sour Flavor?
The distinct sour flavor of sourdough bread arises from the natural fermentation process powered by wild yeast and lactic acid bacteria. The mixture of flour and water creates an environment where wild yeast and lactic acid bacteria thrive.
These microorganisms play pivotal roles: wild yeast consumes carbohydrates, producing carbon dioxide and alcohol, contributing to the dough's rise, while lactic acid bacteria metabolize sugars to generate lactic acid, imparting the signature tanginess to the bread.
The prolonged fermentation period of sourdough, often spanning hours or days, allows the wild yeast and lactic acid bacteria to collaborate, producing a complex flavor profile. This extended process defines the bread's unique sour taste.
San Francisco sourdough is renowned for it's deep tangy sourdough flavor. People travel to San Francisco in search of this once unique flavor profile. While you may not be able to match the famous San Francisco flavor profile exactly, with these tips, you'll be able to recreate a flavor that is very close to this famous sourdough bread.
If you'd like to know more about how sourdough works, you might be interested in the science of sourdough or where the wild yeast in sourdough comes from.
What Can Affect The Sourness of Your Sourdough Bread?
- Ambient Temperature - lower temperatures lead to a more sour flavor because they allow for a very slow fermentation process.
- Small Amounts of Sourdough Starter - using less sourdough starter in your dough produces a more sour flavor because it takes much longer for the dough to rise, giving the bacteria more time to produce the natural acids that give sourdough its distinct flavor.
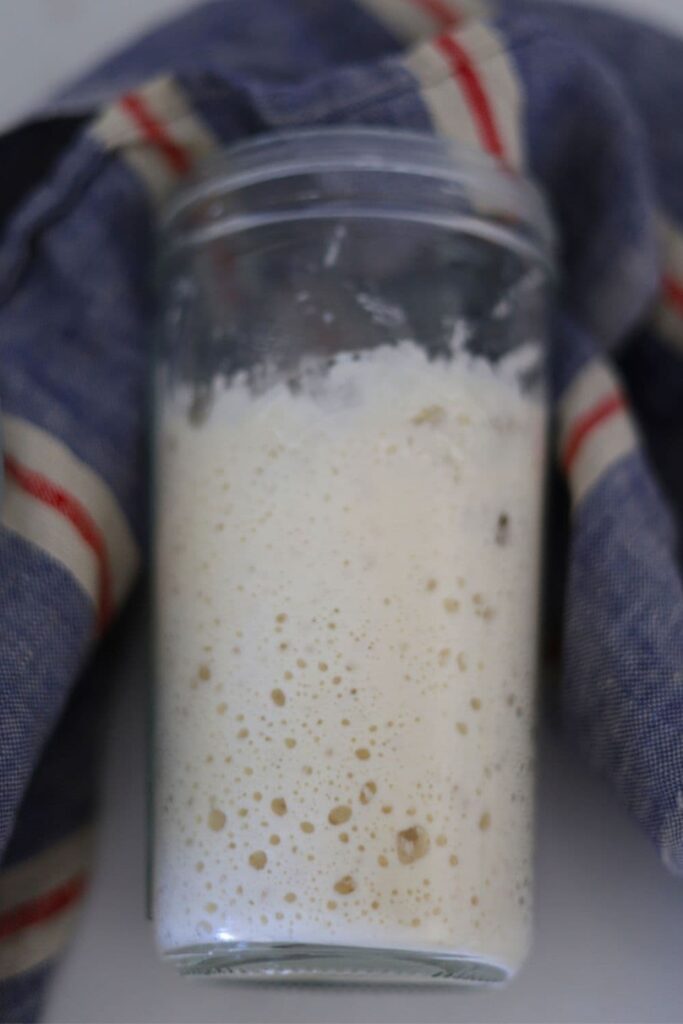
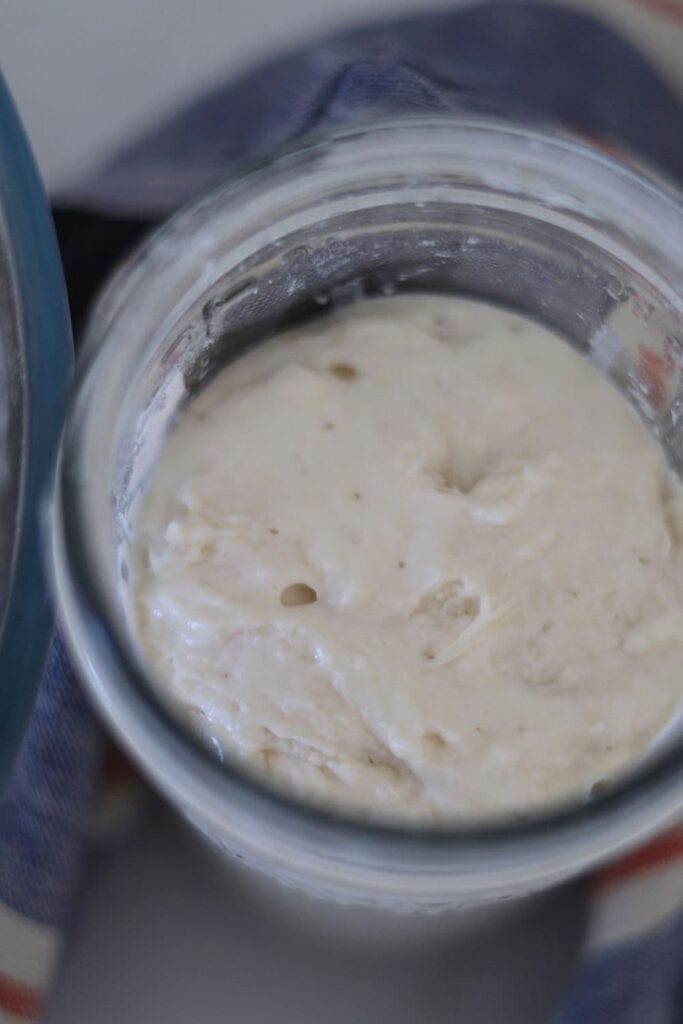
- Vigor of Your Starter - you'll need an active starter to ensure your dough ferments properly. Generally a more mature and well established starter will produce a more flavorful, sour loaf.
- Hydration of the Dough - this affects how long your dough will take to ferment. A slightly lower hydration will take longer to ferment than a higher hydration loaf, leading to a bigger depth of flavor and sourness.
Do You Need To Use Whole Grains To Get Really Sour Sourdough Flavor?
You don't necessarily need to use wholegrain flour to achieve a deeper, more sour flavor in your homemade sourdough bread. Bread flour (or strong white flour) can be used with long fermentation techniques to achieve the depth of flavor you desire.
Using a strong bread flour will mean that you can still achieve a strong gluten network and bouncy oven spring, even with longer fermentation times for more sour flavor. I don't recommend using all purpose flour for this sourdough recipe, as it's not strong enough for the long fermentation period of this bread dough.
You can of course use a blend of wholegrain flours like whole wheat flour, rye flour or even spelt to create the deeper flavor you're seeking but it's not essential. You can read more about the best flour to use for sourdough bread here.
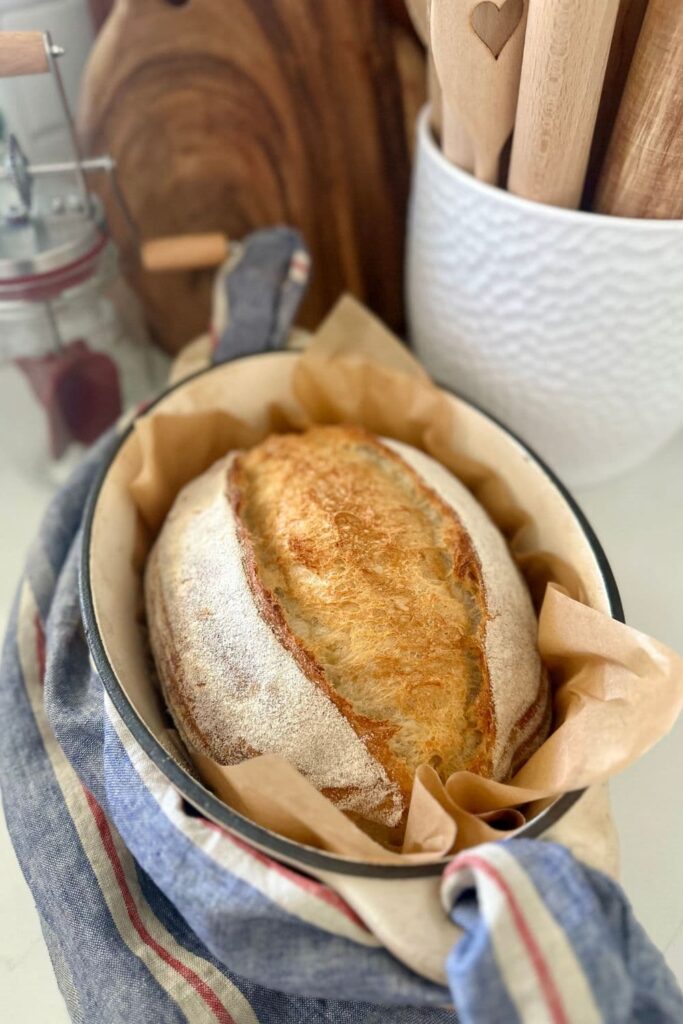
How To Make Extra Sour Sourdough Bread
This deliciously sour sourdough bread recipe is the perfect loaf to cure your cravings for tangy sourdough. So grab your kitchen scale and let's make your best sourdough bread ever!
Autolyse - Premixing The Dough
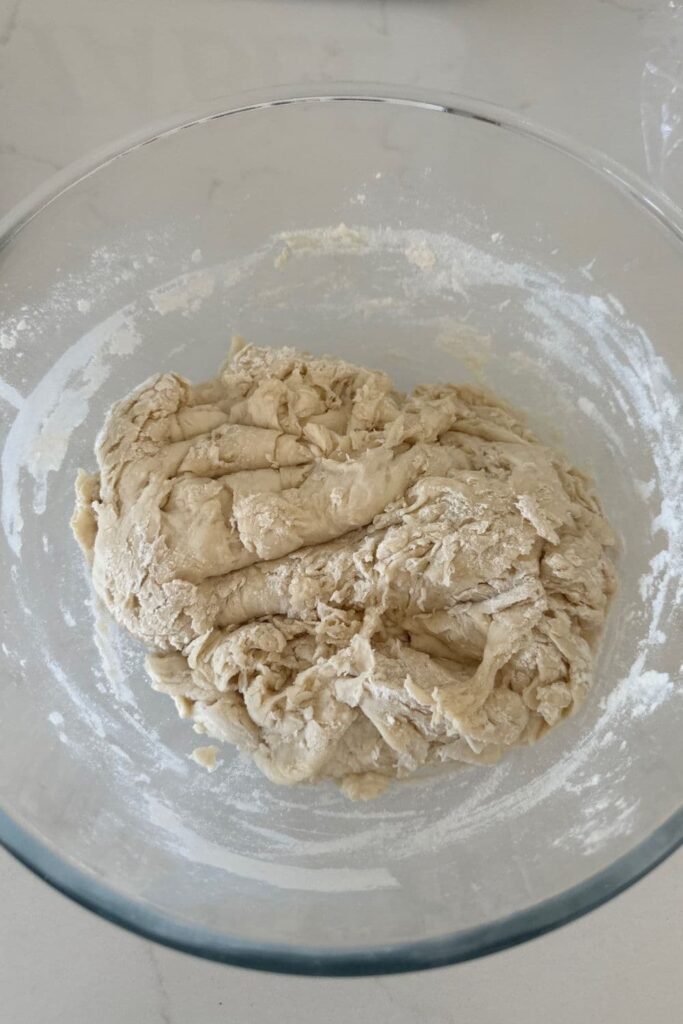
Weigh out your sourdough starter and water into a large ceramic or glass bowl. Mix the water and starter together briefly. Then add your flour and salt and mix whole lot together to form a shaggy dough.
Cover your bowl with cling film or a damp tea towel and let it sit for around 1 hour. It's ok if it's a little bit longer, it's not going to matter too much.
This process is called the "autolyse" and allows your flour to soak in all the water and become hydrated.
Forming Up The Dough
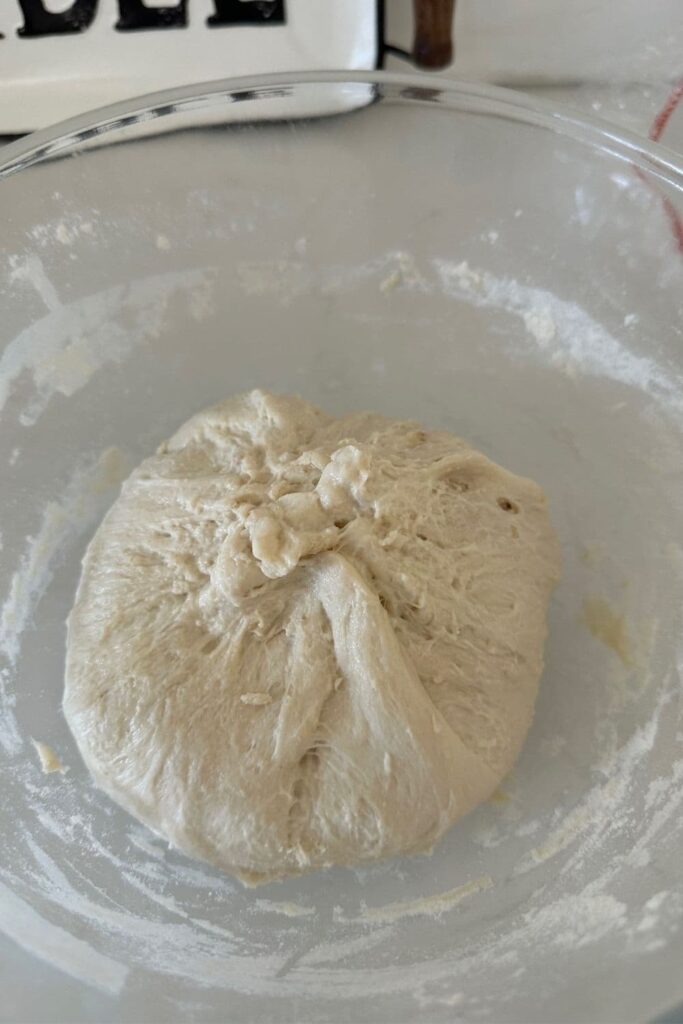
After the dough has been through autolyse you need to bring it together into a ball. Work your way around the bowl, grabbing the dough from the outside, stretching it up and over itself, into the centre, until a smooth ball is formed. You shouldn't need more than about 20-30 stretches to form the ball.
You'll notice that the dough is fully hydrated after soaking all the water up. It will be fairly sticky but as you bring it into a ball, it will become smoother and shinier.
Once the dough has formed into a smooth ball, pop the cling film back on and let it rest for 30 minutes.
Stretch & Fold - Creating Structure
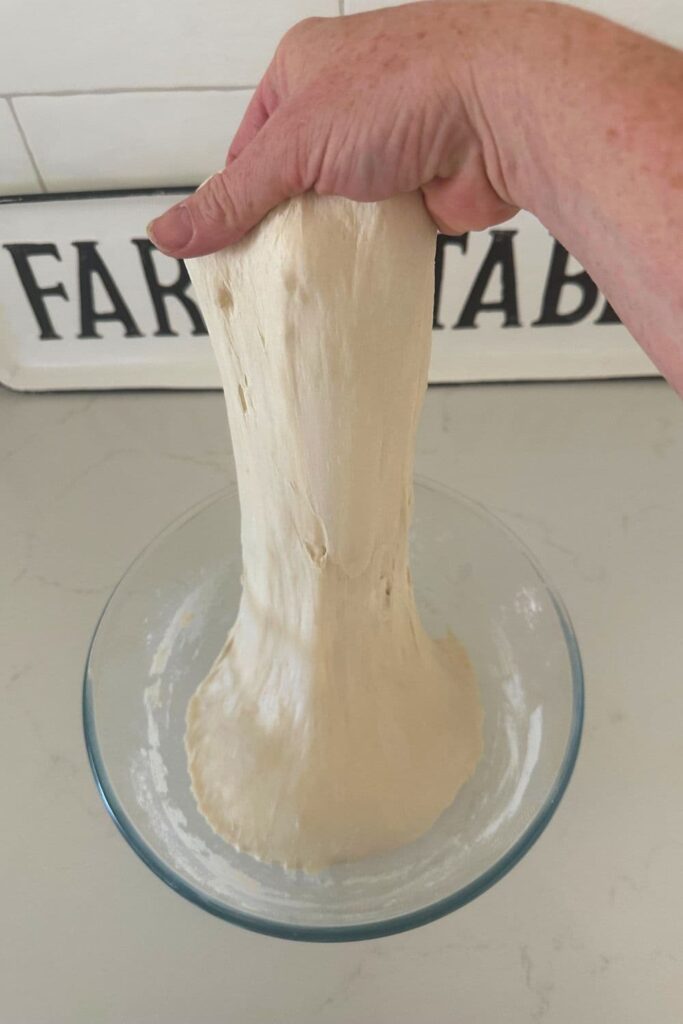
Over the next few hours you need to create some structure for your dough by "stretching and folding".
Aim to do around 4-6 sets of stretches and folds.
For each set, stretch the dough up and over itself 4 times. Leave around 15 minutes in between each set. Again you do not have to be exact with time, but you need to do at least 4 sets over 2 hours.
Bulk Fermentation
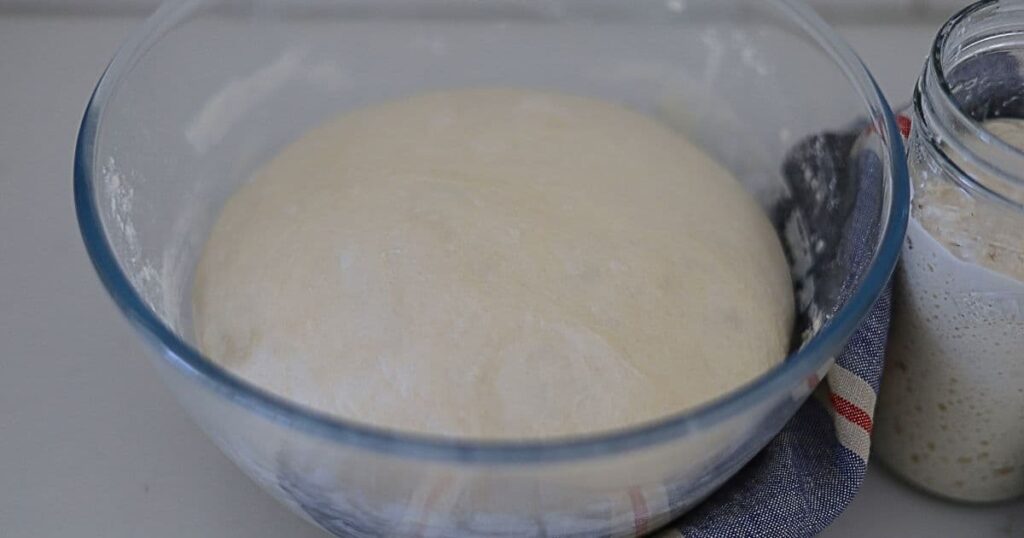
Once you've finished your stretch and folds, place the cling film or damp tea towel back over your dough and let it rest and ferment (a plastic cover is a better option for this stage). You want to allow your dough to rise until it's JUST UNDER DOUBLE.
Normally I would bulk ferment to double, but because you are going to do an extra long cold fermentation (of at least 24 hours and up to 48 hours, it's good to go just under double).
Shaping The Dough
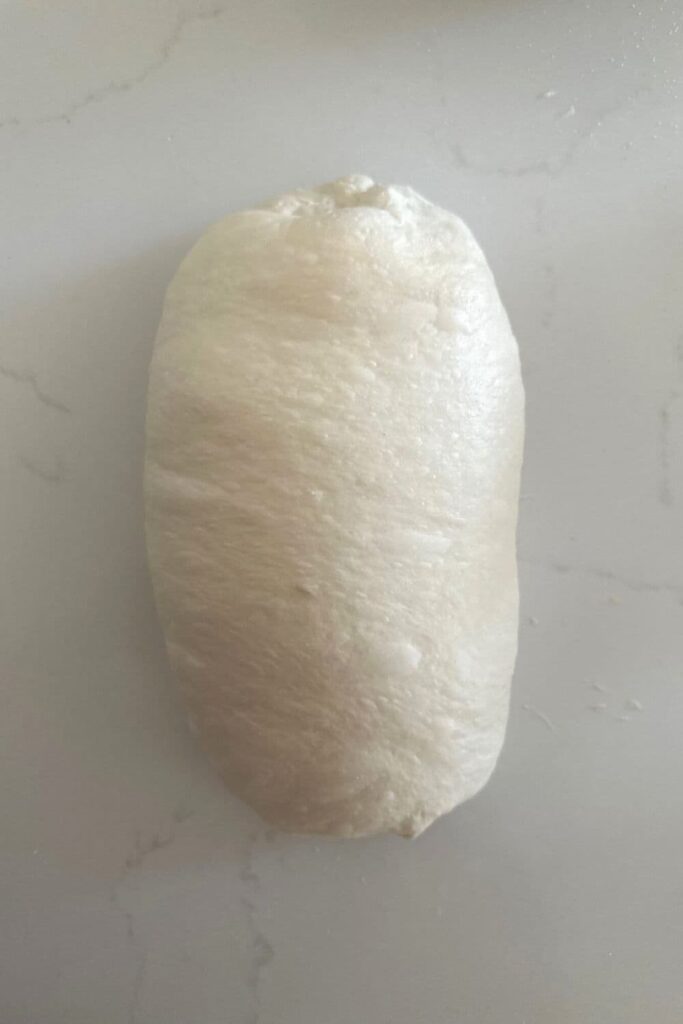
Once your dough has finished it's first ferment, it's time to shape it into either a boule or a batard.
You'll need to flour your counter top with rice flour for this (we use rice flour because it has no gluten). Try to be quite sparing with the rice flour, you only need a very light dusting. If you use too much rice flour, you won't get good surface tension.
Use a silicone dough scraper to gently ease the dough out of the bowl. You want it to land upside down on your counter so that the smooth top of the dough is on the countertop and the sticky underside is facing up. This will make it easier to shape.
You want to pull the edges of the dough into the centre and then flip it over so that the sticky side is now underneath. Using the stickiness, gently pull the dough into a tight ball or shape into a batard.
You will need a proofing basket or banneton to put your dough into. If you do not have a banneton, then a bowl or basket lined with a floured tea towel is perfectly fine. Make sure your bowl isn't too big though, you want your dough to retain some shape.
Whatever you're using needs to be liberally floured with your rice flour. If you're using a banneton - liberally sprinkle it with rice flour. If you're using a cloth or tea towel, rub the flour into it to ensure it becomes non stick.
Placing Into A Banneton
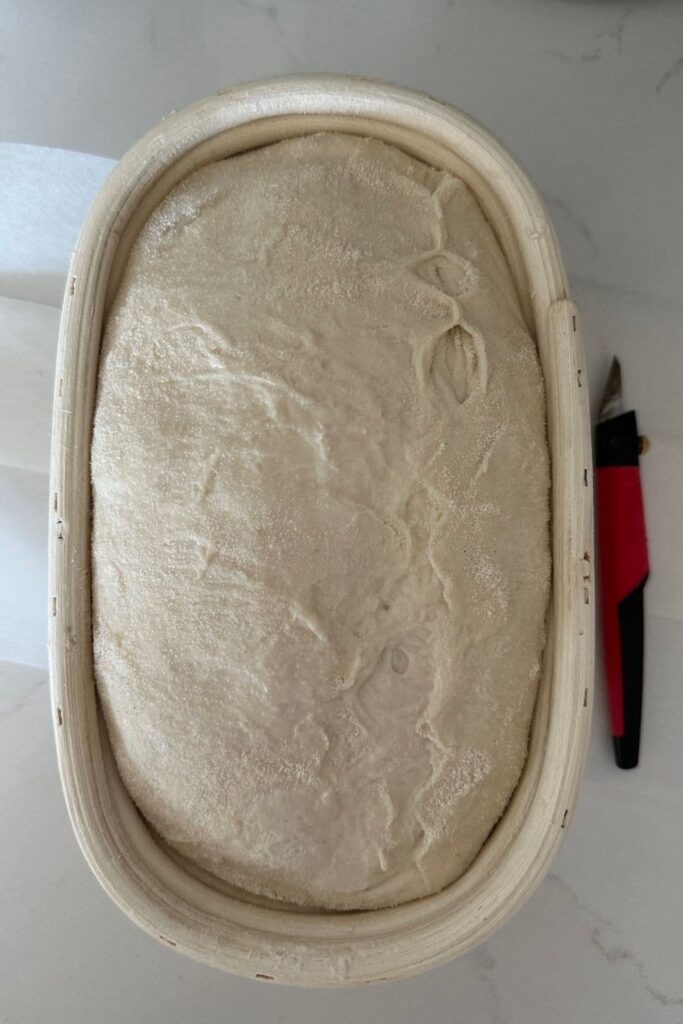
Once the dough is shaped into a tight ball, place it into your banneton smooth side down, so your seam is on the top - this way the top of your dough will get the pretty lines from the banneton.
If you're using a cloth or tea towel in a bowl it's ok to put your dough with the smooth side up. Just make sure the dough is tight.
Lift your dough around the edges to pop a little more rice flour if you feel it needs it. Just try to handle the dough as little as possible and be really gentle as you really want to preserve all the gases and air bubbles that have formed during your bulk ferment.
Cold Ferment
Now the dough is in its "shaping container" cover it loosely with a plastic bag or damp tea towel and place into the fridge. You will need to leave your shaped dough in the fridge between 24 to 48 hours (or anywhere in between). It's super important that your fridge is set to the correct temperature for this (4 degrees C/39.2 degrees F)! If it's too warm, your dough will over ferment in the fridge.
I use a large plastic bag to cover it - I just reuse it each time. This period of cold fermentation is the KEY to extra sour and tangy sourdough bread!
Preparing To Bake
Once you're ready to bake your sourdough, you'll need to preheat your oven to 230C/450F.
Place your Dutch Oven into the oven when you turn it on so it gets HOT. Try to preheat for around 1 hour to ensure your oven is super hot - but you know your oven so just adjust this time if you need to.
Leave your dough in the fridge until the very last minute - placing a cold dough into a hot oven will give you a great "spring".
Bake Time!
Now it's time to bake!
When your oven is at temperature, take your sourdough out of the fridge. Gently place it onto a piece of parchment paper.
Make sure that you make the parchment paper big enough to use the edges as a handle to lower to dough into your Dutch Oven.
Gently score your bread with a lame, clean razor blade or knife. At minimum a large cross is sufficient, but you can get as artistic as you like. You can find my full guide on how to score sourdough bread here.
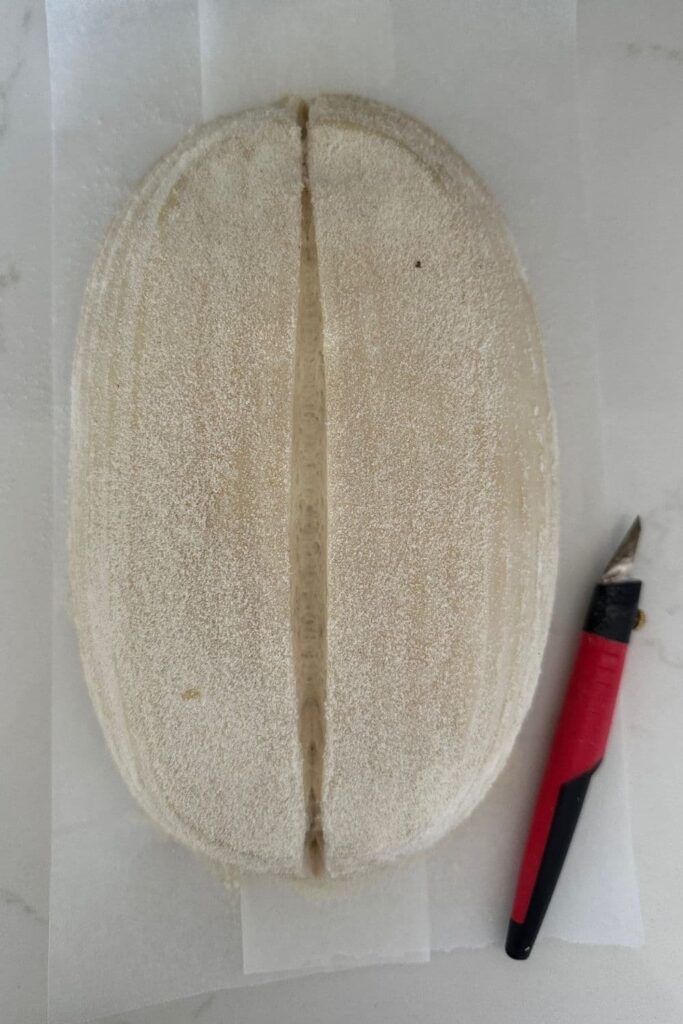
Carefully take your dutch oven out of the oven. Place the sourdough into the pot using the baking paper as a handle. Put the lid on and place into the hot oven.
If you want to you can spritz your dough with extra water before you put the lid on.
BAKE TIME:
30 Minutes with the lid on at 230C/450F plus
10-15 Minutes with the lid off at 210C/410F
Finishing The Bake
When you remove your dough from the oven, carefully remove it from the dutch oven as soon as possible and place on a wire rack to cool.


Extra Sour Sourdough Bread Recipe
Equipment
- Mixing Bowl
- Digital Scales
- Banneton
- Dutch Oven
Ingredients
- 500 g Bread Flour
- 360 g Water
- 20 g Sourdough Starter (can increase if particularly cold/winter months - see notes)
- 10 g Salt (can increase to taste)
Instructions
- Autolyse - Premixing The DoughWeigh out your sourdough starter and water into a large ceramic or glass bowl. Mix the water and starter together briefly. Then add your flour and salt and mix whole lot together to form a shaggy dough. Cover your bowl with cling film or a damp tea towel and let it sit for around 1 hour. It's ok if it's a little bit longer, it's not going to matter too much.This process is called the "autolyse" and allows your flour to soak in all the water and become hydrated.
- Forming Up The DoughAfter the dough has been through autolyse you need to bring it together into a ball. Work your way around the bowl, grabbing the dough from the outside, stretching it up and over itself, into the centre, until a smooth ball is formed. You shouldn't need more than about 20-30 stretches to form the ball. You'll notice that the dough is fully hydrated after soaking all the water up. It will be fairly sticky but as you bring it into a ball, it will become smoother and shinier.Once the dough has formed into a smooth ball, pop the cling film back on and let it rest for 30 minutes.
- Stretch & Fold - Creating StructureOver the next few hours you need to create some structure for your dough by "stretching and folding". Aim to do around 4-6 sets of stretches and folds. For each set, stretch the dough up and over itself 4 times. Leave around 15 minutes in between each set. Again you do not have to be exact with time, but you need to do at least 4 sets over 2 hours.
- Bulk FermentOnce you've finished your stretch and folds, place the cling film or damp tea towel back over your dough and let it rest and ferment (a plastic cover is a better option for this stage). You want to allow your dough to rise until it's JUST UNDER DOUBLE.See notes below for more info on this step.
- Shaping The DoughOnce your dough has finished it's first ferment, it's time to shape it into either a boule or a batard. You'll need to flour your counter top with rice flour for this (we use rice flour because it has no gluten). Try to be quite sparing with the rice flour, you only need a very light dusting.Use a silicone dough scraper to gently ease the dough out of the bowl. You want it to land upside down on your counter so that the smooth top of the dough is on the countertop and the sticky underside is facing up. This will make it easier to shape.You want to pull the edges of the dough into the centre and then flip it over so that the sticky side is now underneath. Using the stickiness, gently pull the dough into a tight ball.You will need a banneton to put your dough into. If you do not have a banneton, then a bowl or basket lined with a floured tea towel is perfectly fine. Make sure your bowl isn't too big though, you want your dough to retain some shape.Whatever you're using needs to be liberally floured with your rice flour. If you're using a banneton - liberally sprinkle it with rice flour. If you're using a cloth or tea towel, rub the flour into it to ensure it becomes non stick.
- Placing Into A BannetonOnce the dough is shaped into a tight ball, place it into your banneton smooth side down, so your seam is on the top - this way the top of your dough will get the pretty lines from the banneton. If you're using a cloth or tea towel in a bowl it's ok to put your dough with the smooth side up. Just make sure the dough is tight.Lift your dough around the edges to pop a little more rice flour if you feel it needs it. Just try to handle the dough as little as possible and be really gentle as you really want to preserve all the gases and air bubbles that have formed during your bulk ferment.
- Cold FermentNow the dough is in its "shaping container" cover it loosely with a plastic bag or damp tea towel and place into the fridge. You will need to leave your shaped dough in the fridge between 24 to 48 hours (or anywhere in between). It's super important that your fridge is set to the correct temperature for this! If it's too warm, your dough will over ferment in the fridge.I use a large plastic bag to cover it - I just reuse it each time. This period of cold fermentation is the KEY to extra sour and tangy sourdough bread!
- Preparing To BakeOnce you're ready to bake your sourdough, you'll need to preheat your oven to 230C/450F. Place your Dutch Oven into the oven when you turn it on so it gets HOT. Try to preheat for around 1 hour to ensure your oven is super hot - but you know your oven so just adjust this time if you need to.Leave your dough in the fridge until the very last minute - placing a cold dough into a hot oven will give you a great "spring".
- Bake Time!Now it's time to bake!When your oven is at temperature, take your sourdough out of the fridge. Gently place it onto a piece of baking paper. Make sure that you make the baking paper big enough to use the edges as a handle to lower to dough into your Dutch Oven.Gently score your bread with a lame, clean razor blade or knife. At minimum a large cross is sufficient, but you can get as artistic as you like. You can find my full guide on how to score sourdough bread here.Carefully take your dutch oven out of the oven. Place the sourdough into the pot using the baking paper as a handle. Put the lid on and place into the hot oven. If you want to you can spritz your dough with extra water before you put the lid on.BAKE TIME:30 Minutes with the lid on at 230C/450F plus10-15 Minutes with the lid off at 210C/410F
- Finishing The BakeWhen you remove your dough from the oven, carefully remove it from the dutch oven as soon as possible and place on a wire rack to cool.
Notes
- Notes on Flour: This recipe is written using strong Bread Flour. Bread flour has a higher protein content than All Purpose flour. You can read more about the differences between All Purpose Flour and Bread Flour here.
- Notes on Sourdough Starter: This recipe is based on you having an active starter that you have fed a few hours before starting your bake. For info on how to make a sourdough starter, go here.
- Notes on Stretch & Folds: If you are going to do the stretch & folds on your bench top, spray your surface with water mist rather than using flour. You can leave the dough in the bowl if you want to. Wet your hands to stop the dough sticking - although it shouldn't be too sticky. It will get less sticky as you do your stretches and folds. For more information on how to do stretch and folds, go here.
- Notes on Bulk Fermentation: If your home is warm then your dough will ferment a lot faster and could be done in as little as a few hours. If it's colder, it will take longer.
I would recommend that you try to do your first few bulk ferments during daylight hours so that you can watch your dough closely.
Once you're more familiar with the process - and the temperature of your home - you will be able to do overnight ferments. You will know your dough is ready to move to the next stage when it is just under double in size. It will be fairly wobbly and full of bubbles. You should be able to see large air bubbles under the surface of the dough.
You don't want to let it go any further than doubled as it will be over fermented, particularly because you are doing a long cold ferment. You'll find more information on these topics here:
When is my bulk ferment finished? What is the difference between cold ferment and bulk ferment? Why does the amount of starter matter?
- Notes on Baking: If you're worried about the base of your bread burning, place a baking sheet on shelf underneath your Dutch Oven - it works! If you're worried about your bread not being cooked all the way through, turn the oven off and place your dough straight onto the oven rack. Leave the door ajar and let your bread rest there for a few hours. Make sure you don't close the door or your sourdough will sweat and you'll get a wrinkly, soggy crust. Remember not to cut into your loaf too soon - you'll need to let it cool for at least a few hours (4-6 is best).
Nutrition


![Best Sourdough Easter Recipes [not just Hot Cross Buns]](https://www.pantrymama.com/wp-content/uploads/2024/01/BEST-SOURDOUGH-EASTER-RECIPES-11-1-768x1152.jpg)


