Sourdough Discard Rolls [soft + pull apart]

This post may contain affiliate links.

These super soft sourdough discard rolls couldn't be easier to make - and you can have them ready in just a few hours!

This sourdough discard rolls recipe is a great way to use up excess sourdough discard (although you can use fed starter too!).

If you love my recipe for Easy Sourdough Discard Sandwich Bread, then you are going to love these sourdough discard rolls!

They are super simple, soft and tender with a slight sourdough tang.
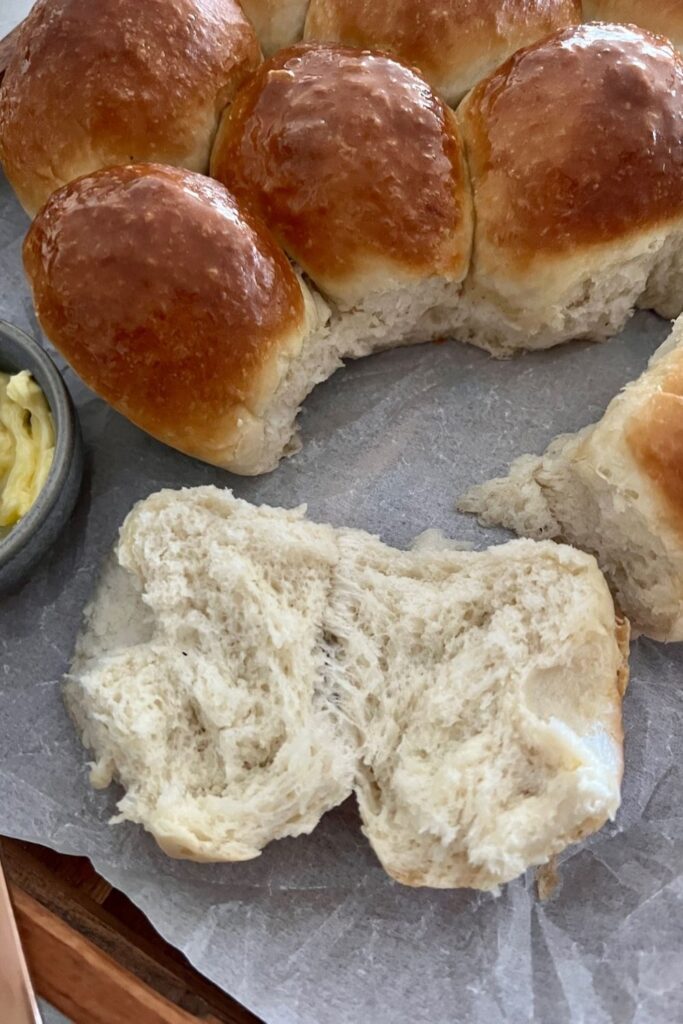
Sourdough Pull Apart Rolls

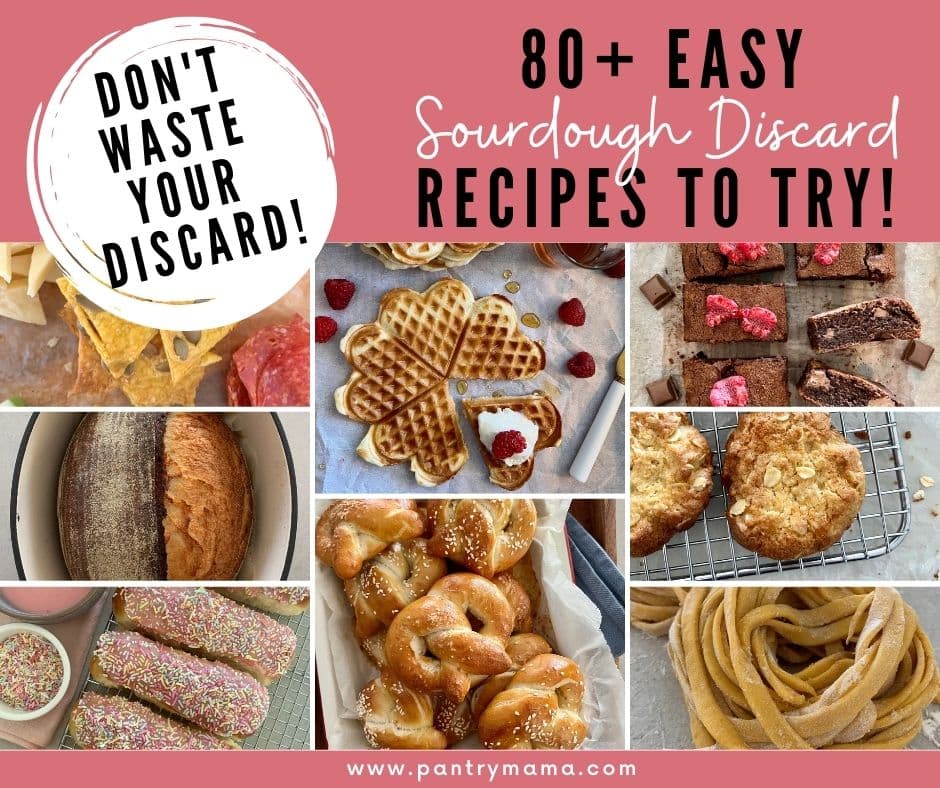
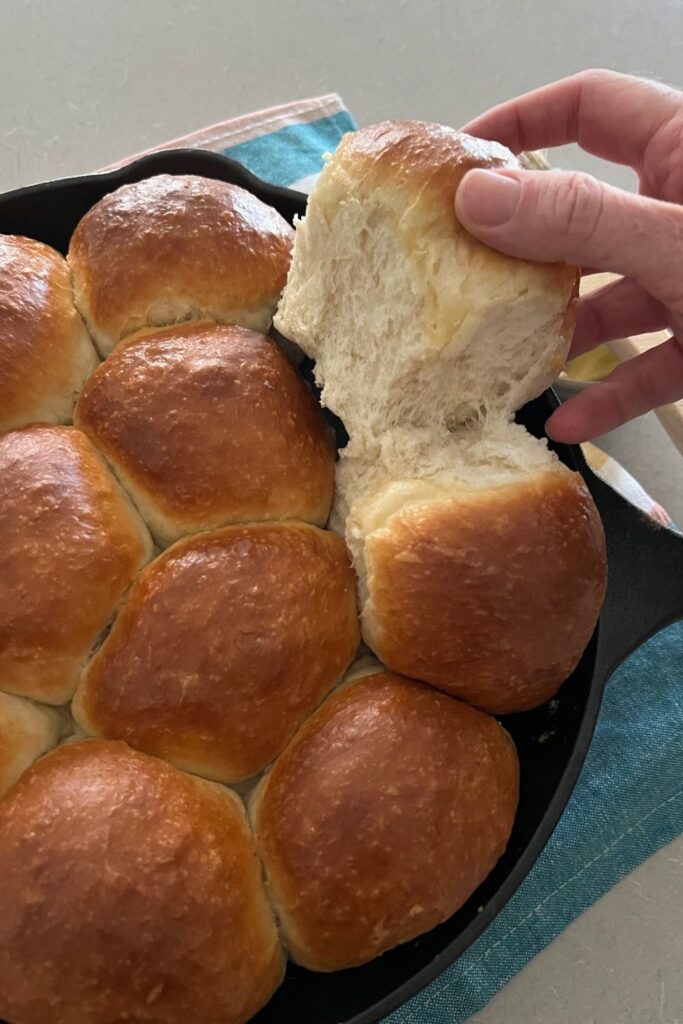
I have chosen to shape these sourdough discard rolls into "pull apart rolls". By placing them into a cast iron skillet and allowing them to rise "into each other" they form a deliciously soft pull apart rolls.

If you'd prefer individual rolls, you can place them further apart on a baking tray and allow them to rise.

The choice is entirely yours.

If you're looking for other sourdough roll recipes you might also like to check out sourdough buttered knot rolls, Sourdough Hot Dog Rolls, Sourdough Sandwich Rolls, Sourdough Discard Hamburger Rolls, sourdough Tiger rolls or Soft & Sweet Sourdough Hawaiian Rolls. Or for the ultimate sourdough garlic buns, try this Sourdough Pampushky recipe.
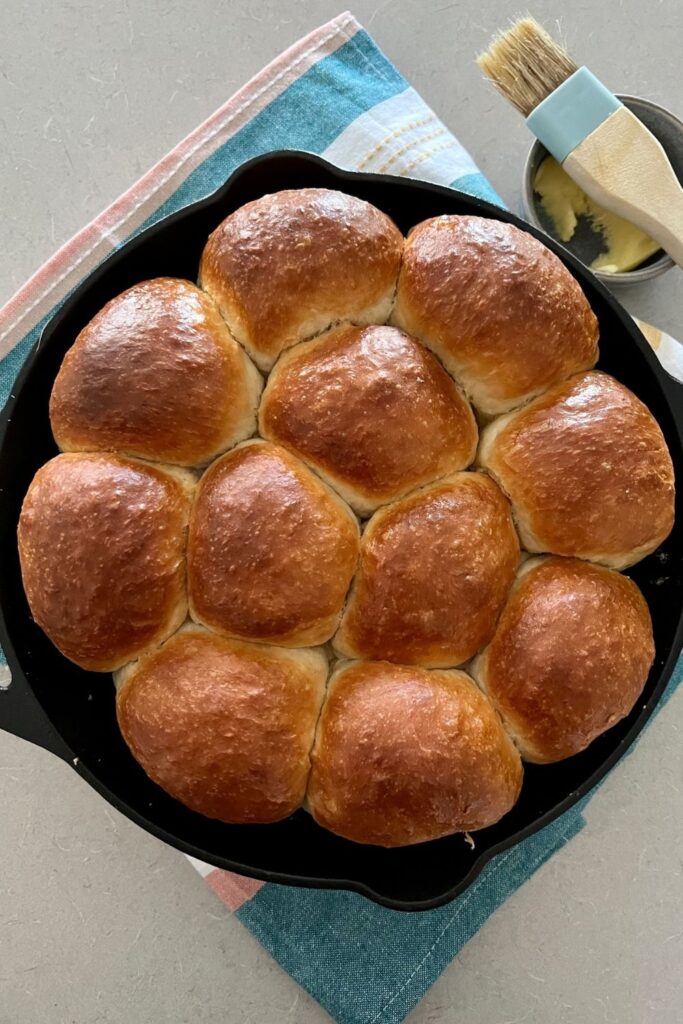
Making Sourdough Discard Rolls

These rolls are super simple to make. Using commercial yeast along with sourdough discard allows you to have these on the table in record time.

The great thing is, you'll still have some sourdough flavor by using your discard. They are a great way to use up some sourdough discard while you build your sourdough starter - but you can also use fed, active starter too!

The trick to getting the softest, squishiest rolls is allowing them to get super puffy on their second rise. If you don't allow them to rise enough, they will be dense when you bake them.
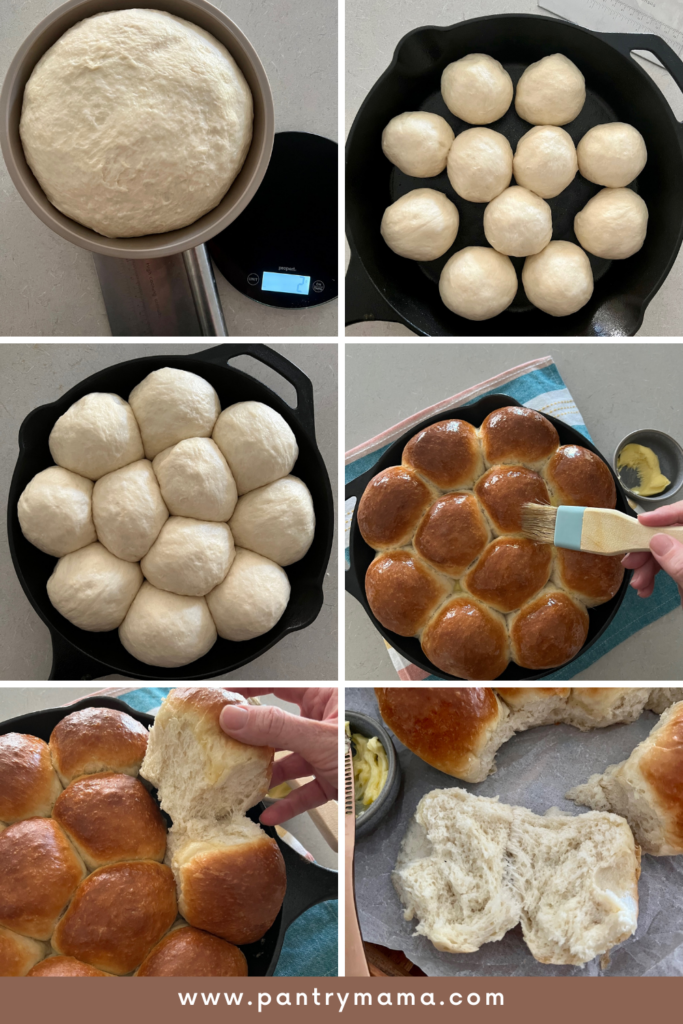
How To Make Sourdough Discard Rolls

  • Combine the sourdough discard, water, sugar and yeast into the bowl of your stand mixer or Thermomix and mix for 30 seconds until it's foamy.
  • Now, add the flour to the foamy mixture and combine until it forms a shaggy dough (around 30 seconds will do it). Leave the dough to rest for 30 minutes.
  • Now add the salt and butter to the bowl and knead the dough for around 3 to 6 minutes.You want the dough to be elastic, silky and slapping the sides of the bowl. Just keep the mixer going until you achieve this. If you are using a stand mixer you'll need to use your dough hook attachment for this step (see notes for other kneading options).
  • Now you need to let your dough rise. You are using instant yeast as the leavening agent in this recipe, rather than sourdough/wild yeast, so it will rise very quickly, particularly if your home is warm.Leave it for around an hour (it will take longer if your house is cooler). You want it to double.
  • Once the dough has doubled, tip it out onto the counter top. Divide the dough into equal pieces. You'll need to use a set of scales to get them exactly weighted - or you do it by sight if you prefer. For this recipe I did 11 rolls at 86g each. If you want 12 rolls, you'd need to make them 78g.
  • Shape each piece of dough into a ball and place the balls of dough into a cast iron skillet (see notes for options).
  • Now you need to let the rolls rise again. It's really important to make sure their soft and puffy before you bake them! This will take around an hour, depending on the temperature of your home.Make sure you cover them with a plastic food cover to stop them drying out.
  • Once the rolls have risen, you'll need to bake them.Turn your oven on and set the temperature to 180C/350F.Let it warm for around 10 minutes. Spray the top of your rolls with some water mist and place into the oven.
  • Bake your rolls at 180C/350F for around 30 minutes or until they are golden brown.
  • Remove from the oven and while they're still in the skillet, use a pastry brush to slather them in melted butter.
  • Once the butter has soaked in, remove them from the skillet and allow to cool on a wire rack.
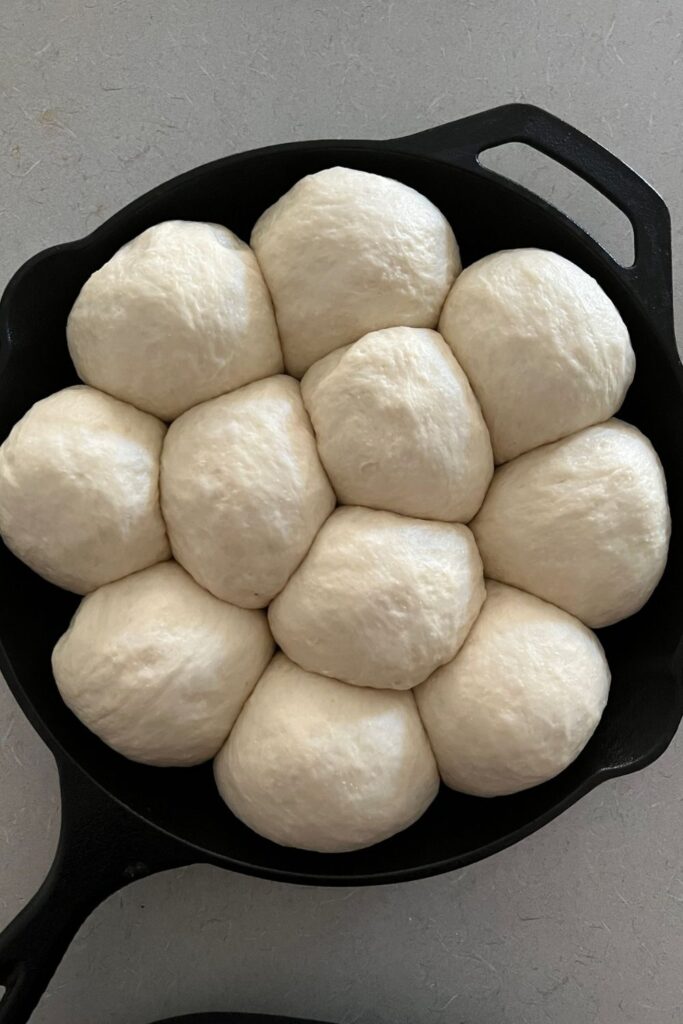
These sourdough discard rolls need to get super puffy and soft before you bake them - that's the secret to the softest, squishiest rolls!

Can You Knead These By Hand?

Yes you absolutely can make this recipe by hand. I do prefer to use a stand mixer because I find it much easier to get a silky, elastic dough. It's also easier to add the butter when the machine does it for you.

But if you don't have a stand mixer - or you just don't want to use one - you absolutely can mix by hand.Just follow the recipe as it is.

The only thing I would say you might want to change is to add the butter in small dots when you are hand kneading. If you add it all at once it can sometimes be hard to knead in thoroughly.

Flavor Additions for Sourdough Discard Rolls

While these rolls are truly delicious just as they are, there are always a few things you can do to jazz them up! Here are a few ideas:

  • Brush the baked rolls with garlic butter and sprinkle with parsley
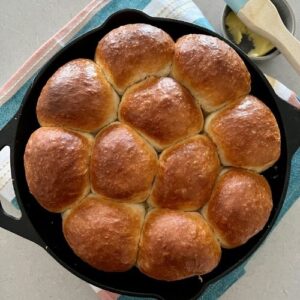
  • Add 20g of honey and 50g of oats to the mixture. Top the risen rolls with rolled oats before baking.
  • Add 40g of chopped jalapeños and 100g of grated cheddar to the dough or alternatively serve the rolls with spicy sweet jalapeño butter.
  • Add 100g of chocolate chips to the dough and brush with golden syrup or whipped honey butter once baked.
  • You might also like to use this dough to make sourdough discard monkey bread.

Freezing Instructions

These sourdough discard rolls freeze really well!

I have frozen these rolls with great success. I have frozen them as a whole "pull apart" without breaking them into individual rolls. I've also frozen a few leftover rolls on their own.

They have both frozen successfully wrapped in foil and placed into the freezer.

Allow them to come to room temperature before using. You can zap them in the microwave to make them soft again.
Frequently Asked Questions

Can I make this recipe dairy free?

Yes you can make this recipe dairy free by using vegan butter or your choice of oil. You can use the exact same weight as listed for butter in the recipe.

Can I make them without commercial yeast?

Yes you can omit the commercial yeast, but you will need to use active, fed sourdough starter instead of discard. You'll also need to allow them to rise for a lot longer to ensure they are soft and squishy when you bake them.

Can I use whole wheat in this recipe?

I would not substitute more than 250g of bread flour for whole wheat flour. Using whole wheat flour will make the rolls more dense and less fluffy than if you used all bread flour.

Can I use all purpose flour for this recipe?

Yes you can substitute the bread flour for all purpose flour in this recipe.
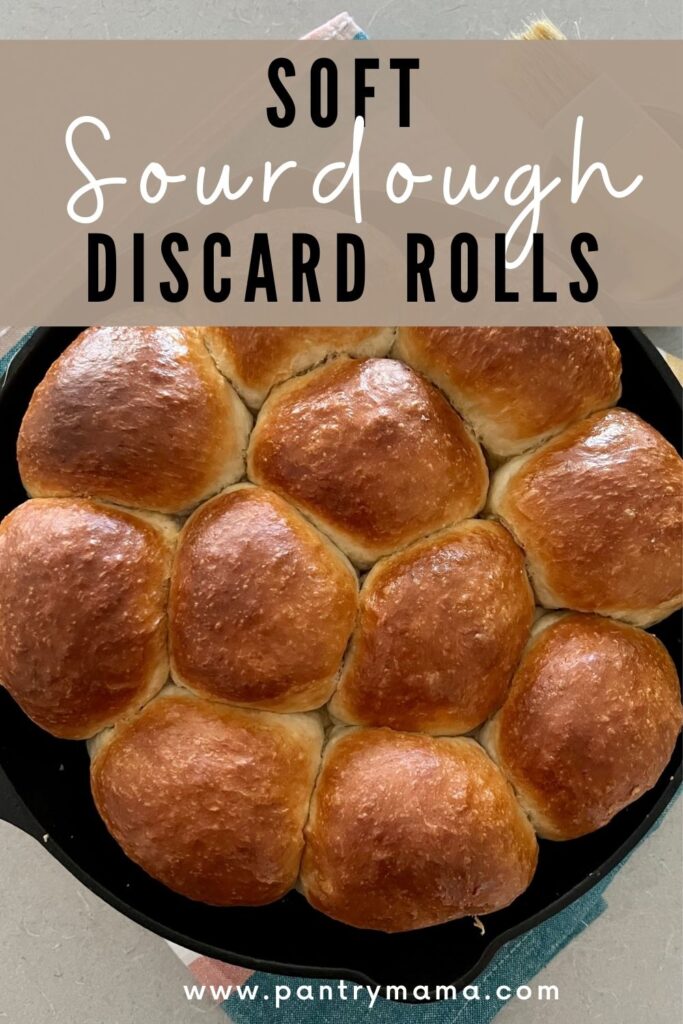
SOURDOUGH DISCARD ROLLS - PINTEREST IMAGE
SOURDOUGH DISCARD ROLLS - RECIPE IMAGE

Sourdough Discard Rolls Recipe

These quick, easy sourdough discard rolls can be made in just a few hours. They will become fast family favorites with their soft, squishy texture and delicious sourdough tang.
4.65 from 128 votes
Prep Time 40 minutes
Cook Time 40 minutes
Total Time 3 hours 20 minutes
Servings 11 Rolls
Calories 2335 kcal

Equipment

  • Stand Mixer
  • Digital Scales
  • Cast Iron Skillet or Baking Tray

Ingredients  

  • 100 g Sourdough Discard unfed sourdough starter
  • 500 g Bread Flour or All Purpose Flour
  • 250 g Water
  • 10 g Salt
  • 20 g Sugar
  • 60 g Butter room temperature
  • 7 g Instant Yeast
  • 50 g Melted Butter for brushing

Instructions 

  • Combine the sourdough discard, water, sugar and yeast into the bowl of your stand mixer or Thermomix and mix for 30 seconds until it's foamy.
  • Now, add the flour to the foamy mixture and combine until it forms a shaggy dough (around 30 seconds will do it). Leave the dough to rest for 30 minutes.
  • Now add the salt and butter to the bowl and knead the dough for around 3 to 6 minutes.
    You want the dough to be elastic, silky and slapping the sides of the bowl. Just keep the mixer going until you achieve this. If you are using a stand mixer you'll need to use your dough hook attachment for this step (see notes for other kneading options).
  • Now you need to let your dough rise. You are using instant yeast as the leavening agent in this recipe, rather than sourdough/wild yeast, so it will rise very quickly, particularly if your home is warm.
    Leave it for around an hour (it will take longer if your house is cooler). You want it to double.
  • Once the dough has doubled, tip it out onto the counter top. Divide the dough into equal pieces. You'll need to use a set of scales to get them exactly weighted - or you do it by sight if you prefer. For this recipe I did 11 rolls at 86g each. If you want 12 rolls, you'd need to make them 78g.
  • Shape each piece of dough into a ball and place the balls of dough into a cast iron skillet (see notes for options).
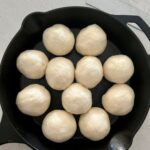
  • Now you need to let the rolls rise again. It's really important to make sure their soft and puffy before you bake them!
    This will take around an hour, depending on the temperature of your home.
    Make sure you cover them with a plastic food cover to stop them drying out.
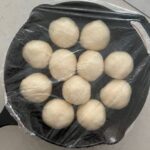
    Cover the shaped sourdough discard roll in plastic and allow to rise somewhere warm
  • Once the rolls have risen, you'll need to bake them.
    Turn your oven on and set the temperature to 180C/350F.
    Let it warm for around 10 minutes. Spray the top of your rolls with some water mist and place into the oven.
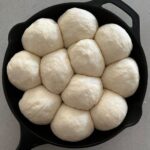
    Allow the discard rolls to get super puffy before you bake them.
  • Bake your rolls at 180C/350F for around 30 minutes or until they are golden brown.
  • Remove from the oven and while they're still in the skillet, use a pastry brush to slather them in melted butter.
    Brush the baked sourdough discard rolls with melted butter
  • Once the butter has soaked in, remove them from the skillet and allow to cool on a wire rack.

Notes

This recipe is a "sourdough discard" recipe - so it's based on using unfed sourdough starter that you accumulate when you're building a sourdough starter or when you feed it ready to bake.
Yes you absolutely can make this recipe by hand. I do prefer to use a stand mixer because I find it much easier to get a silky, elastic dough.
It's also easier to add the butter when the machine does it for you.But if you don't have a stand mixer - or you just don't want to use one - you absolutely can mix by hand.Just follow the recipe as it is.
The only thing I would say you might want to change is to add the butter in small dots when you are hand kneading. If you add it all at once it can sometimes be hard to knead in thoroughly.
I choose to bake these as "pull apart rolls" in a cast iron skillet. I do not butter the skillet - I season it after I use it each time which means it has a non stick surface. You can bake them as individual rolls on a baking tray if you want to.

Nutrition

Calories: 2335kcal Carbohydrates: 386g Protein: 63g Fat: 58g Saturated Fat: 32g Trans Fat: 2g Cholesterol: 129mg Sodium: 4331mg Potassium: 582mg Fiber: 14g Sugar: 22g Vitamin A: 1509IU Vitamin C: 1mg Calcium: 102mg Iron: 5mg
Tried this recipe?Share your creation with us @ThePantryMama or tag #thepantrymama!

Share the sourdough love!

Recommended

4.65 from 128 votes (87 ratings without comment)

Leave a Reply

Your email address will not be published. Required fields are marked *

Recipe Rating


87 Comments

  1. 5 stars
    The best rolls I have ever made. I recently decided to concer the fact that I couldn't make good rolls. So this recipe is so great and easy, it is explained very well. They are just so darn good.

    1. Hi! Can you tell me what size cast iron skillet you used? Hope to try these this weekend for Father’s Day!
      Thank you

    2. 5 stars
      All the recipes I've tried have been spot on. Very impressed. Just love trying something out with a confidence that it will be terrific. Thank you so much.

    1. 5 stars
      This is a great recipe. I just dumped all the ingredinets in my bread machine on the dough setting (no frothing etc) and at the end of the dough cycle (1.5 hrs) I shaped let rise 1 hr and baked. They rose a Lot, my starter might have still been a little Alive, but it just made it better if anything.

      1. 5 stars
        What a great idea to use the bread machine. I am pressed for time today. This will help me so much.😊

  2. 5 stars
    fantastic rolls. easy to make for dinner with few hours notice. My husband thought they were the best rolls I ever made.

  3. 5 stars
    Perfect recipe! I used your adaption for honey oat on your discard sandwich bread recipe and they were beautiful looking rolls.

  4. What diameter cast iron skillet did you use? And I'm assuming I would use the same size skillet if I'm making 12 rolls instead of 10.

  5. 5 stars
    First time making these I followed the recipe exactly and they are perfect. I thought the dough was too dry but it wasn't. It was just that I am not familiar and I have never worked with such dry dough.

  6. 5 stars
    Fantastic recipe. I needed a bit longer rise on mine as my house was a bit cool. And I foolishly decided to bake 5 minutes longer to get some browning and over baked them, still wonderful. Won’t do that tomorrow when I bake them again. The FB Sourdough discard groups is baking up a storm of these rolls the past few weeks, we love them.

  7. Have you ever doubled this recipe? Or is it best to keep it single? I want to make a large batch of them if I can.
    Thank you,
    Daisy

  8. 5 stars
    These rolls taste fantastic so thank you. Can these be prepped and refrigerated then baked the next day. If yes, should I shape and refrigerate or shape them the day I plan to bake them. Thanks

    1. 5 stars
      I made some the day of baking and shaped and stored in cooked in fridge. Came out perfectly both ways. I let the rise occur day of baking which took approximately 80 minutes

    2. 5 stars
      I made these rolls today for Thanksgiving. They came out delicious! I put my rolls in a 9×13 baking dish because my cast iron was being used for something else...I also started the dough the day before because I have to work very early.. took them out of the fridge let them get to room temperature and it worked out beautifully! Thank you for sharing!

  9. Can you make the rolls after the first rise, then freeze individually, and store in a ziplock in the freezer? I’d love to keep a batch in the freezer,pull out small amounts, and do a final rise as needed. Do you think that will work?

      1. 5 stars
        Hi! I want to make your Christmas tree pull apart bread using discard and someone mentioned this roll recipe. Do you think using this dough with the garlic cheese filling will work? Love all your recipes!

  10. I accidentally used active dry yeast in stead of instant.
    Do you think it'll still turn out if I follow the instructions elsewise?

      1. These rolls are not designed to use gluten free flour 🙂 They have only been tested with wheat based flour 🙂

        1. 5 stars
          I made these before and LOVED them!! I need to bake them tonight, but I need them to serve tommorow, how would you reccommend I store them for the freshest reslults?

          1. I'd probably pop them in the fridge after shaping and then allow them to proof right before I bake them, that way they are fresh. But if you want to bake them tonight, you'd need to wrap them in a plastic bag once cool to keep them soft.

  11. Perfect, I add a little milk powder for myself and doubled the recipe.at 70g per roll, I made 27. Thanks for the recipe.

  12. Hi! I want to make your Christmas tree pull apart bread using discard and someone mentioned this roll recipe. Do you think using this dough with the garlic cheese filling will work? Love all your recipes!

    1. Yes you can definitely fill these rolls with the cheese and garlic filling 🙂 or if you just want to follow the Christmas Tree Pull Apart, just use the discard in that recipe with 7g of yeast (and shorten rising times to account for the yeast) - TPM xx

  13. I’m excited to make these tomorrow. To double the recipe, do I double everything, including the starter? Thank you!

  14. 5 stars
    Grrrrrrrreat recipe! These rolls are pure perfection.
    I saw someone’s comment about using their bread machine so of course I did - couldn’t not have been easier, what a beautiful dough to work with. Also used your cast iron suggestion for baking. I made and shaped the rolls, refrigerated till the next day, let them rise and then baked off.
    - I am just starting the sourdough “adventure” and nice to have so many recipes for the discard. Trying your pizza dough next!
    Thanks for a perfect recipe -

  15. I am so confused. I followed to a "t" and used my skillet to cook them. They look like they have completely baked together and will not brown. They are hard on top and still whitish in color. What did I do wrong?

  16. Very delicious abd super easy to make but I'm wondering if these can go through a cold rise in the refrigerator over night instead of same day?

  17. 5 stars
    I noticed this recipe is the same, ingredients wise, as the discard sandwich bread. If I started out making the sandwich bread and following that recipe, meaning I mixed the ingredients in the order of that recipe instead of this one, could I switch and finish the recipe using the instructions for the rolls?

  18. What is the best way to store these? I need to make 200 for my sister's wedding. Her wedding is on a Saturday and I want to bake these on Thursday. Thanks so much!!

  19. 5 stars
    I rarely review recipes but I have to say, this one is perfection. I’ve made it about 10 times now and the rolls are perfect every time. The weird thing is that I live at 8600 ft elevation! We eat half with dinner while hot and use the other half for sliders the next day. GREAT recipe!

  20. 5 stars
    Oh my goodness. These rolls are so delicious and easy! I was amazed with how fluffy they were and the sourdough tang was perfect. I was so proud of myself with how they turned out. Amazing! I think I’ll bring these to thanksgiving dinner.

  21. 5 stars
    I’ve made these a couple of times now and they were fantastic. I want to make them for Christmas. Can I freeze the dough after shaping and before the second rise? I was thinking I could take them out Christmas morning and let them thaw/rise for late lunch/early dinner. Do you think that would work? Thank you!

    1. Yes you can make it with active starter, you just need to omit the yeast and allow the dough plenty of time to bulk ferment and proof. You can definitely knead by hand 🙂

  22. 5 stars
    These are now my go-to dinner rolls! They turn out perfect every time. I’ve made them plain and as cheesy garlic herb rolls (with melted butter, minced garlic, herbs/seasonings, and shredded cheese added after baking, and then put back into the oven for a couple minutes to melt the cheese). Tonight I’m using this recipe but I divided the dough into 6 large balls instead of 12 smaller ones and I’m making hamburger buns out of them. 😋

  23. 5 stars
    I made these for Thanksgiving. The best rolls I've EVER made!! They were a huge hit with everyone, carnivores and vegans alike!
    I can't stand throwing away the discard & am thankful for your wonderful discard recipes!
    How should I reheat these in the oven. Thank you!

  24. 5 stars
    This is my several time a week go to discard recipe!
    I've got a question though- could you make these as a loaf if you needed to? How would I need to change the baking temp and time?
    Thanks so much!

  25. These look amazing! Do you need to let the discard sit out of refrigerator to warm up before making? If so about how long? Thank you!

  26. 5 stars
    I will never buy any rolls again. These are so yummy and pretty easy. We used a couple for hamburgers and they made a great bun also. I have not found any receipe of yours that I don't like. Thank you!

  27. 5 stars
    I out some melted butter and garlic with parsley on top and serve it with borscht. Perfect pairing!
    Greta recipe.

  28. 5 stars
    Love these rolls! Have you tried freezing them before baking? I’m trying to make a large batch and wondering if I could just make up the balls, freeze them, and take them out when I want to bake them!?

    1. Hi Mary, You can. They can stay in the fridge for around 24 hours. Just bring back to room temperature before baking.

  29. 5 stars
    Love these rolls! I’m going to make batches to prep for the holidays. If I freeze them before the second rise, do I need to let them thaw and rise? Maybe take them out the night before and let them rise at room temp?

    1. I would definitely bake them before freezing. You risk over or under proofing if you freeze before baking 🙂 They will still taste great if baked and frozen. You can warm them up a little in the oven and they'll be just like fresh baked x

  30. 5 stars
    I love these and bake them every couple of weeks to use my discard. I make them as individual rolls and bake on a baking sheet, freeze them and use for my kids' lunch boxes. I bake them at 180°C, but never know should they be baked with or without fan please?
    Love the new website look by the way😁👏
    Jowita

    1. Thank you, Jowita! Kate generally uses a fan forced oven, but if you're not and it's working, that's great too! 🙂

    1. Hi Holly, You can! Just don't refrigerate longer than about 24 hours, and bring to room temperature before baking.

  31. 5 stars
    Love these rolls! If I’m baking these on Thanksgiving-eve, how can they be stored and reheated the following day?

  32. Is there a point that I can freeze the dough to bake later? Or how long can I leave in the fridge before I form the rolls for the final rise?

    1. I don't recommend freezing the dough as it's really hard to judge when they are thawed and proofed enough to bake. But the dough can be refrigerated for up to 24 hours before baking. Just bring to room temperature before baking.

  33. Hi there, I'm new to sourdough baking and tried this recipe last night. My teenage son said they were the best rolls I've ever made! He initially thought it was garlic bread, so we're definitely going to make these again with garlic butter, and maybe grated cheese melted on top as some other comments say.
    Awesome recipe thank you!

  34. 5 stars
    Great recipe. They look amazing in the cast iron pan, a real showstopper. I made them with Becel vegan butter since one of my guests has a dairy allergy and they still turned out excellent (just a little salty).

    My gentle feedback: Your site is quite busy with ads, banners, pop-ups and images. For my old computer it slows things down and makes it hard to quickly scroll back and forth between the detailed instructions and the actual recipe. You absolutely have a right to make money off this site, but perhaps there is a way to streamline it a little so it's a bit more functional.
    Thanks!