Easy Sourdough Discard Sandwich Bread Recipe
This post may contain affiliate links.

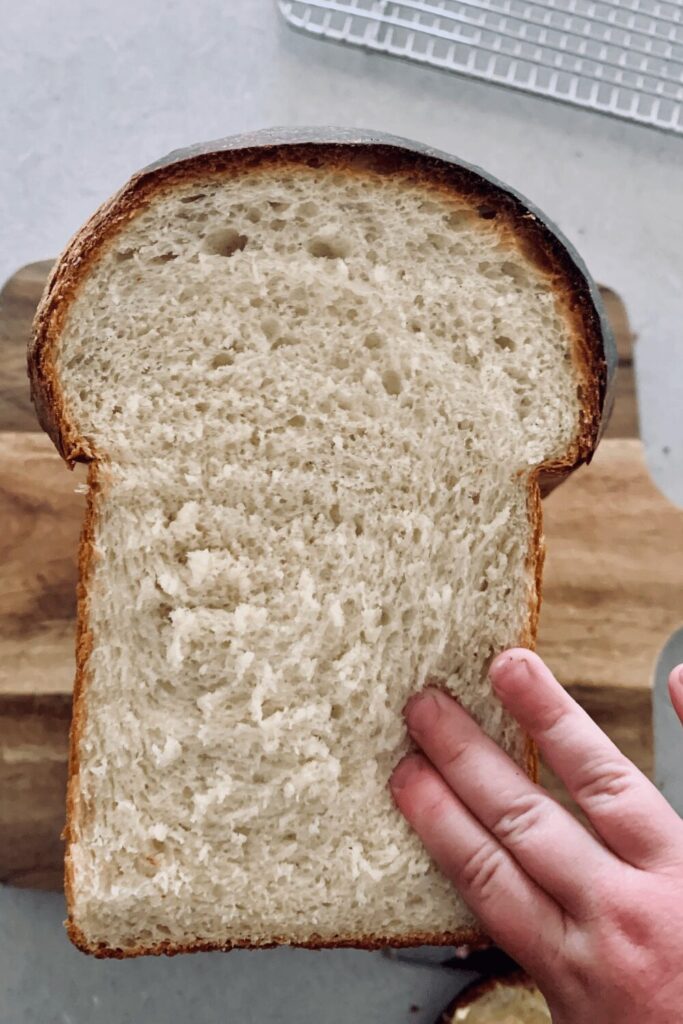
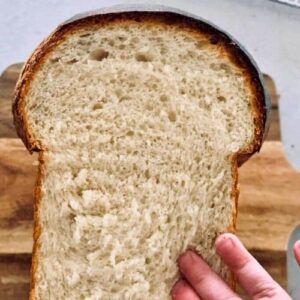
This quick and easy sourdough discard sandwich bread is a great sourdough recipe to have in your repertoire for when you need to use up some discard or you need a loaf of bread in a hurry. You'll get a super soft, light and airy crumb with a soft crust that's easy to eat.
This bread takes around 2 to 3 hours from start to finish, depending on how warm your house is. It utilises 100g of sourdough discard and is perfect with homemade butter!
If you'd like a more artisan style sourdough discard bread, you could try this recipe.
Which Loaf Pan Should You Choose?
Sandwich bread needs to be baked in a laof pan. You can use an open tin or a tin with a lid or “Pullman Bread Tin“. If you use an open tin, you’ll achieve a rounded top to your sandwich loaf. This is what I prefer to bake in.
You can however also use a Pullman Tin. This has a lid that slides on top and will yield you a square sandwich loaf, more like the bread you would buy in the supermarket.
No matter what type of tin you use, this loaf is best in a tin around 4 x 8 x 4 inches. This is the one I use (I just leave the lid off as I think it is nicer with the rounded top).
Sometimes my sourdough sandwich discard bread comes out looking like a mushroom ... it makes my kids love it even more because they think it's hilarious! Spot the squishy toddler fingers!
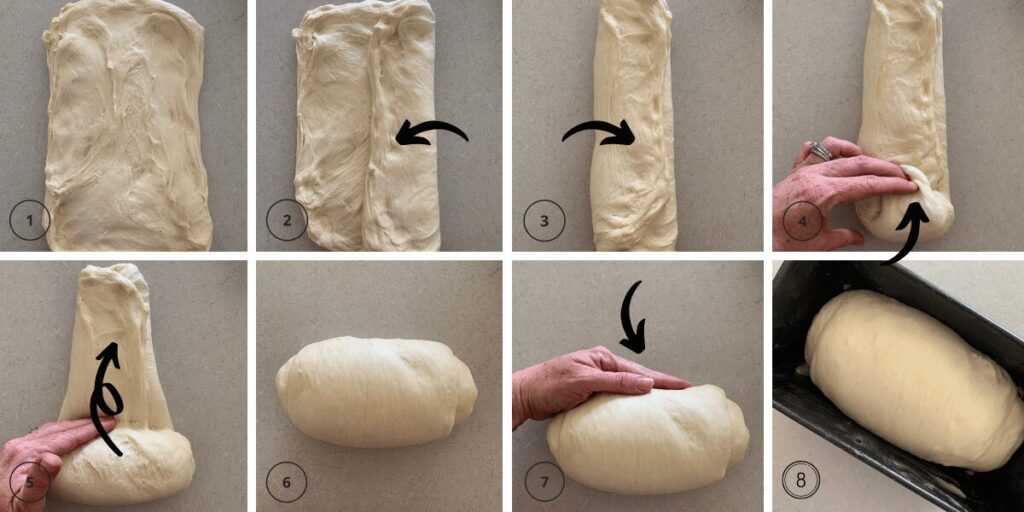
Shaping Sandwich Bread
Shaping sandwich bread is so so easy. Of course, like anything, there are a million ways to complicate it, however I like to stick to this simple method – it’s so easy my kids can do it!
Remember that this dough will feel different to traditional sourdough sandwich bread because it has been leavened with instant yeast. It may feel stickier than traditional sourdough, but if it is, you just need to flour your hands a little.
You need to pop your fermented dough out onto the kitchen counter so that the smooth side is underneath and the sticky side is on the top. Gently ease the dough out into a rough rectangle, with the short edge closest to you.

Then roll the dough up into a log and tuck the ends under. Try and create as much tension as you can on the top of the loaf. This will help it to develop a lovely shape and crust when it's baked.
Then simply plop the log into your buttered tin.
Freezing A Sourdough Discard Sandwich Loaf
You can easily double or even triple this recipe (when you look at the recipe below, you can easily click the button and it will automatically calculate the measurements for you). Doubling the recipe means you can use one loaf and freeze the other.
These plastic bread bags are perfect for freezing your sandwich bread in.
This yeasted version of sandwich bread is super handy to have in your recipe collection when you realise you have to pack school lunches ... and there's no bread!!
It also freezes really well - as a whole loaf or even sliced and made into sandwiches.
To store frozen sandwiches, you can place each sandwich in a plastic ziploc bag. This makes them easy to place in lunchboxes in the morning. You could also wrap them in parchment paper and store in an airtight plastic container in the freezer if you don’t want to use ziploc bags.

Slicing Sourdough Discard Sandwich Loaf
Slicing a sandwich loaf can be tricky, especially if you want perfect slices. However, you can purchase a bread slicing guide which makes things much easier. You could even use an electric knife or electric food slicer.
Making Sourdough Discard Sandwich Bread in the Thermomix
I use a Thermomix to make this discard bread, however you could use any stand mixer. I find that using a mixer creates a super soft crumb - and makes this a quick easy recipe to use.
I use the dough function on the Thermomix (any version will work TM31, TM5 or TM6).
As with the traditional sourdough method in your Thermomix, clean up is easy - just add some water to the jug afterwards and run at speed 10 to clean the blades.
For the all the best sourdough recipes to make in your Thermomix, check out this guide.
Sourdough Discard Sandwich Bread Variations & Substitutions
There are lots of ways to jazz up this easy sourdough discard sandwich bread. Here are a few suggestions:
- Honey & Oat Sandwich Loaf - Add 20g of honey and 50g of oats to the mixture when you add the butter, sugar and salt. If you'd like to add oats to the top you should do so when you put the dough into the tin - spray the loaf lightly with water so the oats stick to the top.
- Multigrain Sandwich Loaf - Add 50 to 100g of your favorite seeds to the mixture when you add the butter, sugar and salt. Seeds like sesame, sunflower, pumpkin and flax work really well.
- Wholemeal Sandwich Loaf - Replace half the Bread Flour with Whole Wheat or Wholemeal Flour for a more hearty country style sandwich loaf. You could top with sesame seeds when you place it into the tin.
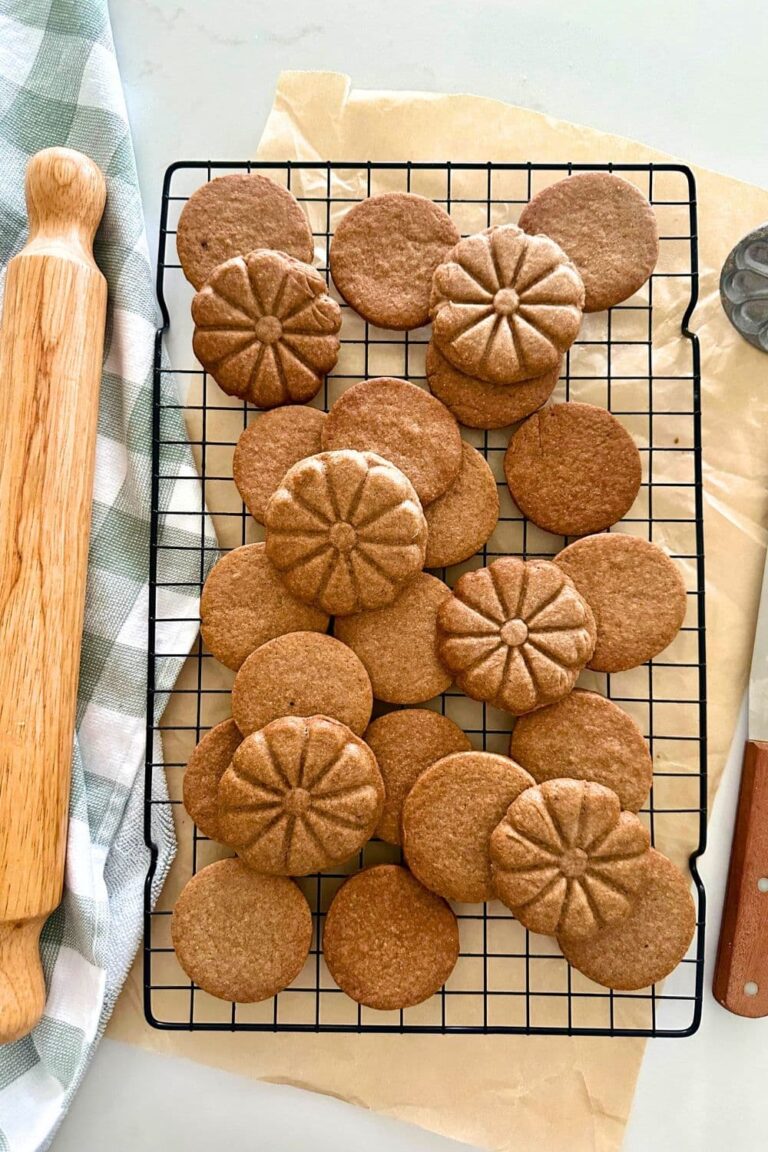
- Make this loaf into sourdough discard rolls by following these instructions.
Equipment for Making Sourdough Discard Sandwich Bread
Sandwich Loaf Pans – you’ll need a selection of sandwich loaf tins to bake your bread. Having 2 or even 4 is a great idea if you want to bake several loaves at once (and this bread freezes really well).
Plastic Bread Bags – these are a great way to store and freeze your bread and fantastic if you’re making multiple loaves at once.
Bread Slicing Guide – these are super handy if you’re wanting perfectly sliced sandwich bread.

Further Reading
If you love this recipe, you might enjoy these:
- Check out this guide to making sourdough discard sandwich bread in a bread machine.
- Prefer baking with whole wheat flour? You might prefer this whole wheat sourdough discard sandwich loaf.
- These super fast sourdough discard hamburger buns are delicious - soft, buttery and everything a burger bun should be!
- Want to make a sourdough version of pane di casa? This sourdough pane di casa is perfect (it uses discard too!).
Sourdough Discard Sandwich Loaf Recipe
Video
Equipment
- Stand Mixer
- Digital Scales
- Bread Tin
Ingredients
- 100 g Sourdough Discard (unfed sourdough starter)
- 250 g Water
- 500 g Bread Flour (or All Purpose Flour)
- 10 g Salt
- 20 g Sugar
- 60 g Butter (salted, room temperature)
- 7 g Instant Yeast
Instructions
- Combine the sourdough discard, water and flour into the bowl of your stand mixer or Thermomix and mix until it forms a shaggy dough (around 30 seconds will do it). Leave the dough to rest for 30 minutes.
- Now add the salt, sugar, butter and yeast to the bowl and knead the dough for around 3 to 6 minutes. You want the dough to be elastic, silky and slapping the sides of the bowl. Just keep the mixer going until you achieve this. If you are using a stand mixer you'll need to use your dough hook attachment for this step.
- Now you need to let your dough rise. You are using instant yeast as the leavening agent in this recipe, rather than sourdough/wild yeast, so it will rise very quickly, particularly if your home is warm. Leave it for around an hour (it will take longer if your house is cooler). You want it to double.
- While you're waiting for the dough to double, lightly butter a sandwich loaf or pullman pan so it's ready to go when the dough is shaped.
- Once the dough has doubled, tip it out onto the counter top with the smooth side underneath and the sticky side on the top. Gently ease the dough out into a rectangle. It should be quite easy to do this as the dough is very elastic.
- Now you want to shape your dough into a sandwich loaf. This is fairly easy. Make sure that the short side of the rectangle is in front of you. Fold each side of the dough into the middle, then roll the dough into a tight log with the seam underneath. Tighten the top of the dough by putting your hands at the base and pulling the dough towards you, without lifting if off the countertop.
- Once the dough is shaped, gently place it into the buttered loaf tin. Leave the dough to rise until it's just above the rim of the tin. This will take around an hour, depending on the temperature of your home.
- Once the dough has risen, you'll need to bake your loaf. Turn your oven on and set the temperature to around 180C/350F. Let it warm for around 10 minutes. Spray the top of your dough with some water mist and place into the oven. Make sure that there's plenty of room for it to grow in the oven as it will generally keep rising.
- Bake your bread at 180C/350F for around 40 to 45 minutes or until the loaf is golden brown.
- Remove from the loaf tin and allow to cool on a wire rack.
Notes
Nutrition


Hi Kate! Love this recipe and make it often. Can I replace the water with acid whey (from yogurt)? Will I need to make any changes to the recipe besides swapping water for whey?
You can definitely do this! It will bake a little quicker, so just watch the top that it doesn't start to burn due to the extra sugar from the acid whey 🙂
Can you put the dough in the fridge (after shaping) over night to cold proof?
Thank you
Not really with this recipe, it's more of a fast recipe. If you want to cold ferment the dough overnight, you should try this true sourdough recipe.
Hello:)
I have used new flour and new yeast but for some reason my dough is not rising at all?
I have a good bit of discard so I definitely want to try again!
Just wondering if you have an idea what I might be doing wrong?
It is 68 degrees in my house, so not the warmest but I don't think too cold.
Thanks for your help!
Are you using instant yeast? This is important in this recipe as you don't bloom the yeast before you add it. If you aren't using instant yeast this can cause an issue. I would also try to keep the dough a little warmer, that will definitely help xx
Ok so this recipes says 1 loaf and I doubled it, my loaves are HUGE! They more than tripled out of the loaf pan in the oven. Maybe I should have let the dough more than double on first prove. Definitely a surprise. We will see how the crumb turns out.
¯\_(ツ)_/¯
I’ve made this spread before and it’s delicious. So when I made it today, I had to go to the store. It was longer Then I thought I would be going and Rose pretty high out the pan. Do you think it’ll be still good ?
I would re-shape it and put it back in the tin. Because you're using commercial yeast, it will rise again.
The exterior is gorgeous but the inside is dense, almost doughy. If I baked it longer I'm afraid the top would be too brown. Followed recipe exactly. What happened?
This indicates under fermentation, or in this case, under proofing. You need to let the dough proof for longer before baking 🙂
Amazing! Fail proof. I love the different variations you have. This is a recipe I will keep forever. I make it weekly! Thank you so much.
Could you do an overnight or all day ferment with this? I know it uses yeast but to acquire a little more of the fermentation benefits I was wondering if anyone had ever done it.
I don't recommend this as the commercial yeast will over ferment. If you are wanting a true sourdough loaf, then check out this sourdough sandwich loaf that uses active starter 🙂
Hey, sorry if I've just not spotted this in the recipe notes but do you cover the loaf once it is shaped and into the bread tin? If so, what are you using as whatever I use gets stuck to the top of my dough...so just wondering if you have to cover it 🙈!! Thank you X p.s. amazing recipie!!
I'm so glad you love the recipe. We use an elastic food cover (it's a bit like a shower cap). I put it on the tin and then pull it up like a tent so that the dough doesn't touch it. You can also rub the top of the loaf with a little olive oil to make sure that it doesn't stick if the cover collapses.
What kind of instant yeast do you use?
Kate uses a brand called Lowan Whole Food's Instant Yeast.
How many sandwich slices do you get from one loaf using this recipe?
It really depends on the loaf pan you use and how thickly you slice them 🙂 But around 12 I would say - I've honestly never counted!
I started to knead the dough in my kitchen aide but don't think it is powerful enough so I kneaded it by hand for quite a while but I never got that smooth silky look. I am letting it rise now. Can someone tell me what I may have done wrong? I followed recipe exactly as posted. Thanks
I have been a baking Xmas bonanza! Thanks to your recipe, I have made SO much bread that actually my kids say is better than the store stuff! Thank you!
I absolutely love this recipe! A friend gave it to me, and it’s been our favorite since! I made enough for four loaves, not realizing the time. Is it ok to put the unused dough in the fridge and use it in the morning?
We love to hear that! Yes, you should be able to bake unused dough in the morning. Just bring to room temperature first. 🙂
Love this recipe! Was wondering if anyone had ever doubled the recipe and frozen the dough?
Surely adding instant yeast defeats the purpose as it’s no longer sourdough??
This is a sourdough discard recipe so adding yeast is perfectly fine. If you don't want to add yeast, you could use active starter instead 🙂
Love this recipe! Do you have a discard honey wheat recipe?
You can use this whole wheat discard recipe and sub honey for the sugar.
I just made your sourdough discard sandwich bread and it is wonderful - large loaf that JUST fits in my bread slicer and my toaster. Great flavor and great crust.
I am just starting sourdough baking in a dutch oven and working on perfecting the technique. I am a bread baker from way back (decades and decades actually) and am enjoying experimenting with this. Love your website, Donna
I made this today and it is so good! I left mine in the oven for 50 minutes and it worked perfect for me. It’s a perfect neutral-tasting sandwich bread and the first recipe I’ve tried that MIGHT just replace store bought bread!
This is my family absolute favorite sandwich bread. Make it weekly.
Recipe worked perfectly for me today!
As a relatively new sourdough baker (will I ever become proficient enough to think in anything other than a newbie!) I an grateful to you for all your wonderful instructions and tips.
I prefer not to add sugar in my cooking (honey on occasion). Can I omit the sugar in this recipe?
Yes you can omit the sugar if you prefer 🙂
My dough is still runny and not taking shape. What is wrong with it?
This is a lower hydration dough so it definitely shouldn't be runny at all. Are you sure you measured the flour and water correctly?
Thank you for your recipe
Just tasted it, my favorite. Do you have the Thermomix version, please?
So glad you love it! Would you like me to adapt the recipe for the Thermomix?
So excited about this recipe! I'm new to sourdough and bread baking. My first attempt at this recipe turned out great!
I mistakenly used active yeast instead of instant. Is the bread salvageable? It’s not rising and the yeast is visible in the dough. Thanks !
This recipe is written for instant yeast because active yeast needs to be bloomed first 🙂 You could try and leave it to see if the yeast activates 🙂
Would this recipe work in a bread machine?
You can use this sourdough discard sandwich bread recipe designed for a bread machine instead if you like 🙂
Is there a recipe somewhere for this bread with conversion amounts? I struggled😆
I only bake in grams - you can read about why this is the best way to bake here 🙂
A scale is one of the best tools in your kitchen. You can buy one for under $20 either from Walmart or Amazon. It’s actually easier to use grams rather than ounces. Not only is it easier if you wantto divide measurements but also it’s extremely precise measuring ingredients with a scale.