This post contains affiliate links. Please see our disclosure policy.

Making Thermomix sourdough allows you to use your Thermomix to knead sourdough bread.
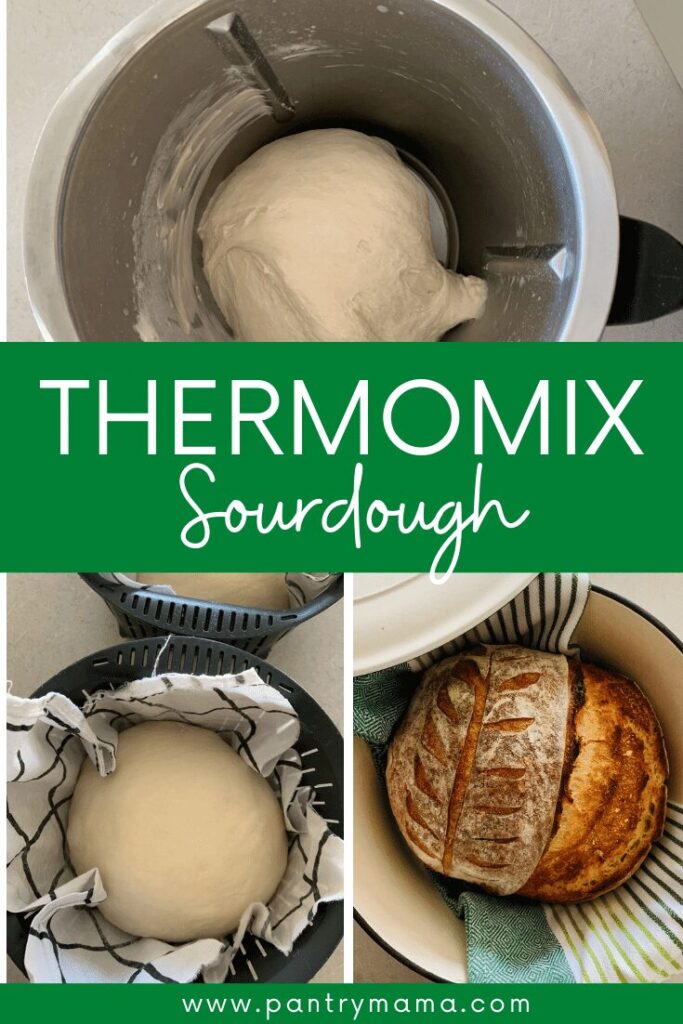
No matter which Thermomix model you own, this guide to making sourdough bread in a Thermomix will see you baking a successful loaf every single time!
This is a true sourdough recipe using a Thermomix – there is no commercial yeast added.
Thermomix sourdough uses a sourdough starter – you can find the instructions to make one here.
If you’re wanting to make sourdough in a stand mixer, this guide will be helpful.
Table of Contents
- Thermomix Sourdough Bread Recipe
- Why Use Your Thermomix to Make Sourdough Bread?
- Understand The Process of Making Sourdough Bread
- The Key to Sourdough Success
- Baking Timeline When Making Thermomix Sourdough
- Thermomix Sourdough Hydration Level
- What Equipment Will I Need To Make Thermomix Sourdough Bread?
- What Else Can I Use My Thermomix For When Making Sourdough Bread?
- Making Additions To Thermomix Sourdough Bread
- Resources for Thermomix Sourdough Bread
- Frequently Asked Questions About Thermomix Sourdough
- Further Reading
- Thermomix Sourdough Recipe
Thermomix Sourdough Bread Recipe
When I started my journey into sourdough, I always mixed it by hand – I liked to get a feel for the dough and developing my intuition with each stage. Since starting this blog and my Sourdough Facebook Group I’ve been asked multiple times how to use a Thermomix to make sourdough.
At first I resisted – seriously who wants sticky dough stuck on Thermomix blades, right? But I thought, what the hell, maybe I should try it. And so I have spent several weeks testing out different techniques. I’ve tested this recipe many, many times and it works really well. So in order to help other Thermomix owners enter the world of sourdough, I’ve decided to share this method with you.
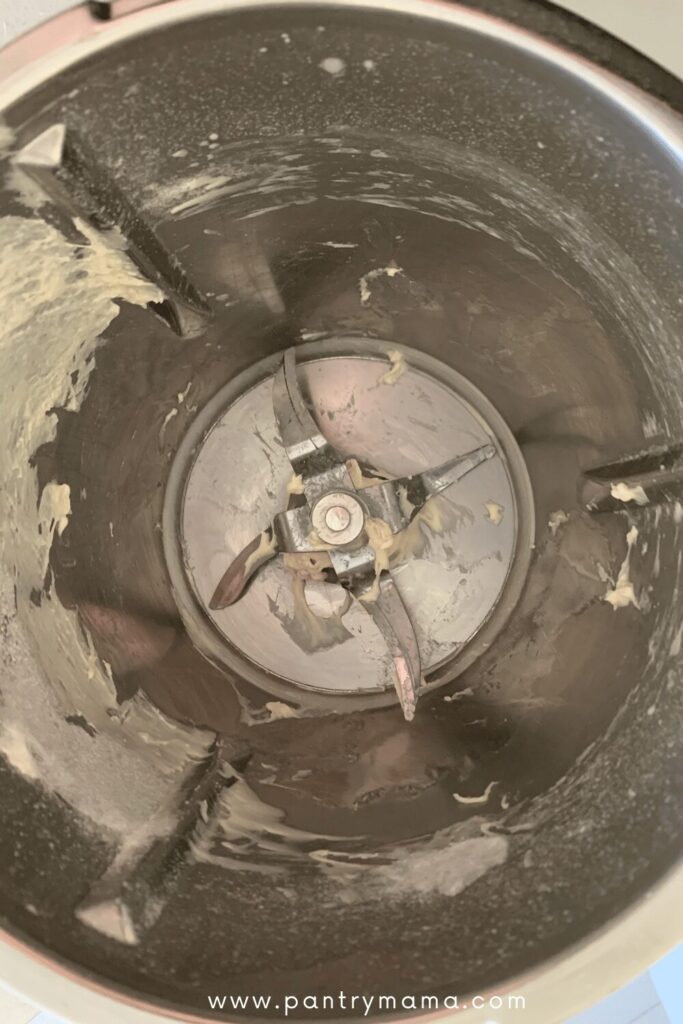
I’ve even discovered that the blades don’t get that sticky and are quite easily cleaned. Who would have thought?
Why Use Your Thermomix to Make Sourdough Bread?
Using your Thermomix means you don’t have to handle the dough really at all until the shaping stage.
This hands off approach won’t suit everyone – and to be honest – I still love to hand mix my dough – but using your Thermomix will:
- save you time at the beginning of the process;
- allow you to develop the gluten network more quickly;
- keep your hands clean;
- allow you to have a more hands off approach.
There are many people who say that there is no need to knead sourdough (haha) and you know what, they are right.
But if you have a Thermomix sitting on the bench, why not use it to your advantage? It will cut down on the time it takes you to produce a loaf of sourdough bread.
Using a Thermomix to knead sourdough bread may also be helpful for people who are unable to use their hands due to a medical condition. A bread machine is also a good option for kneading sourdough bread if you can’t do it by hand.
Understand The Process of Making Sourdough Bread
You may have already made sourdough by hand and understand the process.
If you haven’t made sourdough by hand, I highly recommend you reading this beginner’s guide to baking simple sourdough, which will take you through some of the ins and outs of the process, which are still applicable, even though you are making sourdough in your Thermomix.
Whether you use a machine – or your hands – it’s really important to understand why you are doing things and what might happen if things go wrong (and believe me things can go wrong!).
While you are building the sourdough dough in your Thermomix, you will still need to do a bulk ferment, shaping, cold retard and bake the same way as “conventional” sourdough. You’ll find a handy glossary of sourdough terminology here.
The Key to Sourdough Success
The absolute most important thing when baking sourdough is to have a super bubbly, active starter.
If you haven’t created a sourdough starter – you’ll find the simple guide to creating yours here.
If you’re having trouble getting your starter to be ready to bake with, check out our troubleshooting guide here.
Having a super active sourdough starter is the very first step in ensuring you get superior oven spring when your sourdough hits the oven. If you are wanting to make your sourdough starter extra sour, you’ll find ideas on how to do that here.
Baking Timeline When Making Thermomix Sourdough
When baking sourdough, it’s important to create your own baking timeline so that you know what needs to happen when. Planning things makes sure you don’t miss a step.
My timeline for Thermomix Sourdough looks something like this – but it’s all negotiable.
DAY 1
6.00 am – Feed sourdough starter
10.00 am – Premix and Autolyse in the Thermomix
10.30 am – Mix dough using dough mode until it forms a smooth ball
11.30 am – Place into glass bowl, cover and leave to bulk ferment
9.00 pm – Shape, lift into banneton/bowl & into the fridge for cold ferment
DAY 2
10.00 am – Bake in hot oven
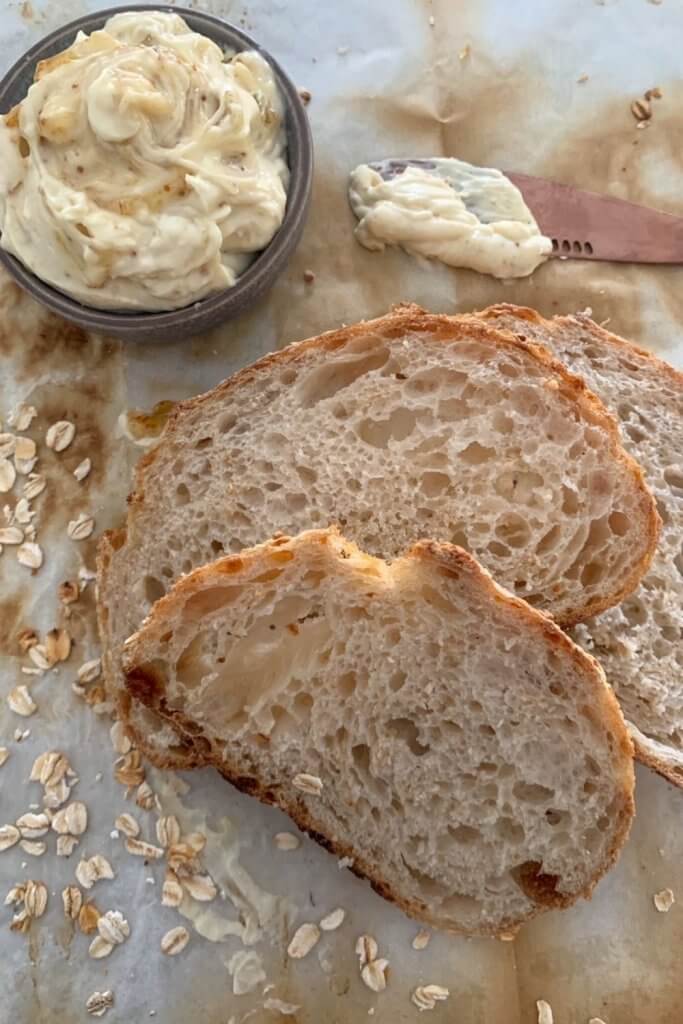
7.00pm – finally cut into delicious sourdough!
If you want more in depth information on creating a sourdough baking timeline, check out my e-book “Scheduling Sourdough“.
Thermomix Sourdough Hydration Level
I’ve made the hydration of this Thermomix Sourdough Loaf around 78%. It has 380g of water plus 100g of starter (so a total of 430g of water).
The Thermomix handles the higher hydration dough very easily. I’ve added 100g of starter because it does mean that you can ferment this dough a little faster if you need to.
This, together with the faster starter the Thermomix gives you, will allow you bake a loaf somewhat faster than using less starter.
If you prefer to use less starter to increase the sourness of your loaf, you can certainly adjust it to suit your needs.
If you have not made sourdough before – by hand – then I would definitely reduce the water in this recipe a little – so start with 350g and once you’re comfortable handling this, then move up gradually to 380g of water.
A little lower hydration will mean that your dough will be a little easier to handle.
What Equipment Will I Need To Make Thermomix Sourdough Bread?
You can make a successful loaf of sourdough with very basic equipment, as well as your Thermomix of course. However, it really does help to have some specialised equipment. Some of my favourite things to use while baking sourdough bread are:
- Glass mixing bowl so you can watch all the action unfold – while you mix it in your Thermomix, you’ll still need to ferment your dough in a separate bowl.
- Silicone dough scraper to get the dough out of the glass bowl without losing the precious bubbles.
- Stainless steel bench scraper for easy sourdough shaping.
- Banneton – a shaping basket to maintain your dough shape while cold fermenting.
- Bread Lame for perfect scoring.
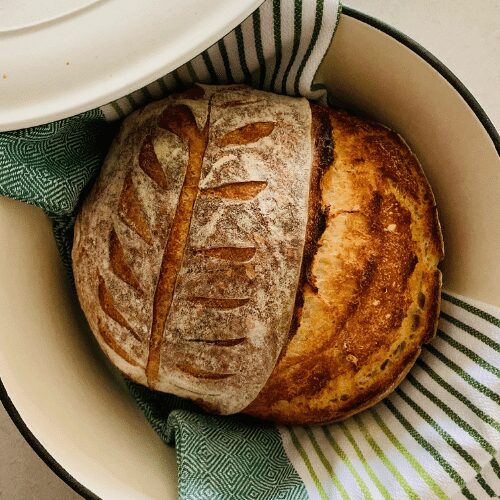
- Dutch oven to ensure you get the best possible oven spring and crust.
- Good quality bread knife to ensure easy & consistent slicing of your sourdough bread.
What Else Can I Use My Thermomix For When Making Sourdough Bread?
Your Thermomix is not only useful for mixing your dough when baking sourdough bread, it’s also very handy for the following tasks:
- Kitchen scales when feeding your sourdough starter. You can place your jar on the Thermomix lid and use it to weigh your flour and water.
- Grind up your sourdough starter in your Thermomix. Dry your sourdough starter so you have a back up. Your Thermomix will turn it into a powder which is easier to hydrate.
- Milling your own flour for baking sourdough. Milling oats, wheat berries and other whole grains is super simple – and it doesn’t get much fresher!
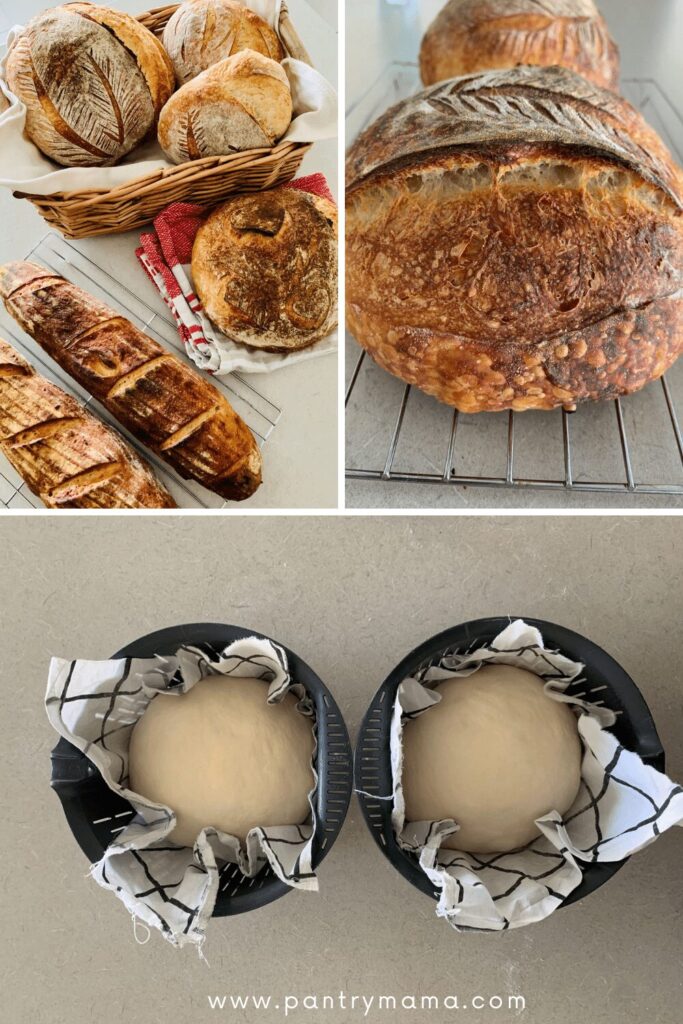
- Baskets as Bannetons – the basket of your Thermomix makes the perfect banneton for a half size loaf. If you have a few baskets you can split the dough into two pieces and shape two smaller loaves. I love to do two smaller loaves to give as gifts – or to keep a little loaf in the freezer.
- You can also make this amazing sourdough pizza dough.
- For 12 delicious sourdough recipes you can easily make in your Thermomix, check out this guide to the best Thermomix Sourdough Recipes.
Making Additions To Thermomix Sourdough Bread
You can easily make additions to Thermomix sourdough bread. You will need to add the flavors or ingredients during the second lot of kneading.
You need to be aware that the blades will chop the ingredients you add during the kneading process. This can be good for things like herbs and nuts. However, you may not want things like raisins or chocolate chips chopped up.
If you do not wish for the sourdough additions to be chopped up, you will need to add the flavors by hand once you remove the sourdough dough from the Thermomix bowl.
You can do this by stretching and folding the dough. You’ll find full instructions here.
Some of the flavored sourdough breads I love to make in my Thermomix are Jalapeño Cheese, Lemon and Blueberry and Sourdough Oatmeal Bread.
Resources for Thermomix Sourdough Bread
If you are making sourdough bread in your Thermomix, you might find these resources handy:
- Beginner’s Guide to Sourdough Bread
- Banneton Sizing Guide
- Guide to prepping, using, maintaining and storing bannetons
- Scheduling Sourdough – A Guide to Baking Sourdough on Any Schedule
Frequently Asked Questions About Thermomix Sourdough
In short – there’s no need to make the actual starter in your Thermomix (plus it will be a bit messy and add unnecessary time to the process). A sourdough starter can be made easily with just flour and water – and time. You’ll find an easy sourdough starter recipe here.
Making additions to sourdough bread is very easy. Fillings or flavorings can be added very easily during the stretch and fold stage as detailed here. When using your Thermomix, you can easily add the fillings during the second lot of kneading. Just be aware that the blades will chop the flavored ingredients. If you do not wish for this to happen, you can add them by hand when you remove the kneaded dough from the Thermomix bowl and transfer it to the bulk fermentation container.
Yes! Sourdough is most definitely better for your gut! Sourdough is low GI which means it will keep you feeling fuller longer. It’s also less likely to spike your blood sugar like regular bread. It’s much easier to digest (and better for your gut) because it has lower phytate levels thanks to the lactobacillus and wild yeast. Sourdough has more nutrients than regular bread, despite being made from just flour, water and salt.
Sourdough bread generally gets it’s sour taste from the lactic acid bacteria present in your starter. Particularly when you cold ferment the dough at cold temperatures, the sourness of your bread will increase. The cold temperatures put the yeast to sleep, but the bacteria keep working. You’ll find a range of techniques to increase the sourness of your sourdough bread here.
The word sourdough actually refers to the technique of using a sourdough starter to leaven bread. Sourdough bread doesn’t necessarily have to be sour, however it is generally more sour than regular, commercially yeasted bread because of the fermentation it requires. It can be mild in flavor – or even sweet. If your bread is too sour for your taste, you’ll find a number of ways to make it less sour here.
Sourdough bread is best consumed within 24 hours. While it has no preservatives like store bought bread, the lactobacteria present will prevent the bread from molding. The actual sourdough however will begin to stale as soon as it is removed from the oven.
You need to store the sourdough bread in a particular way to retain freshness. If a soft crumb is important – a plastic bag will be the best way to store it. If a crisp crust is important, a linen bread bag or bread box is a better option.
Further Reading
If you love this Thermomix Sourdough recipe, you might find these ideas helpful:
- Want to shape your sourdough in a batard rather than a boule? You’ll find instructions here.
- Want to add some flavors to your sourdough bread? You’ll find the ultimate guide to adding flavors to your sourdough bread here.
- Looking for the best Thermomix Sourdough Recipes? You’ll find 12 sourdough recipes you can easily make in the Thermomix here.
Thermomix Sourdough
Equipment
- Thermomix
- Banneton
- Dutch Oven
Ingredients
- 100 g Sourdough Starter , fed and bubbly
- 380 g Water, you can reduce the water to 350g if you want a lower hydration dough
- 500 g Bread Flour, Baker's Flour
- 10 g Salt
Instructions
- Add your sourdough starter and water to the TM bowl. Mix speed 3 for 15 seconds.

- Add your flour and salt to the sourdough starter and water in the TM bowl. Mix for 20 seconds on Dough mode. Leave the dough in the TM bowl for 30 minutes to 1 hour.
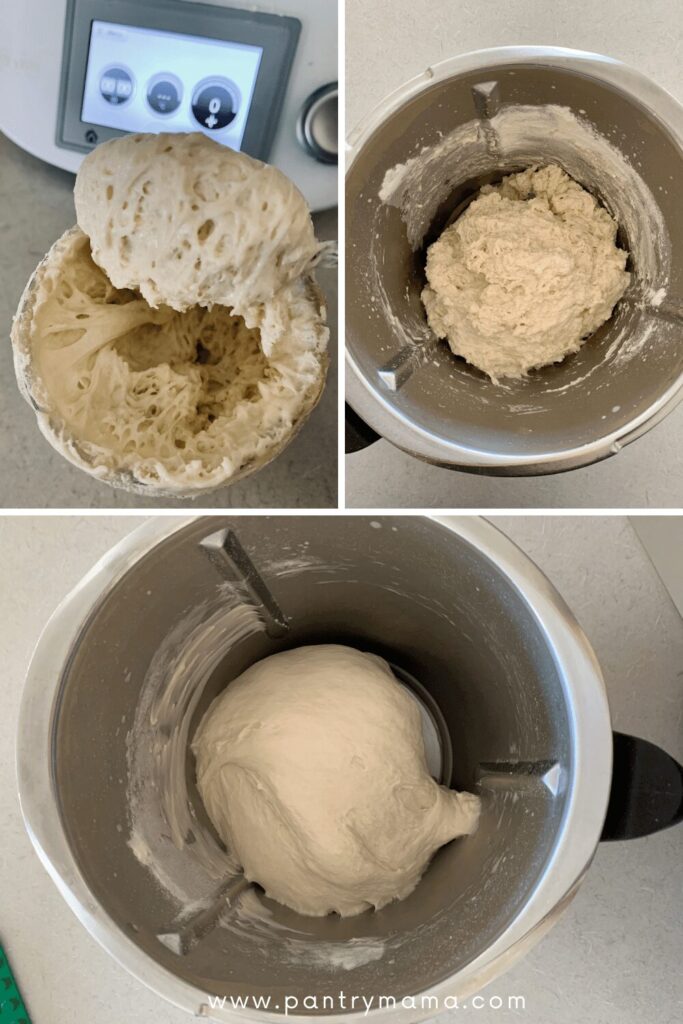
- Mix the dough for 3 minutes on Dough mode. Leave dough to rest in the bowl for at least 10 minutes (you can leave it up to around 30 minutes if you want to). You don't want the dough to get too warm from mixing.
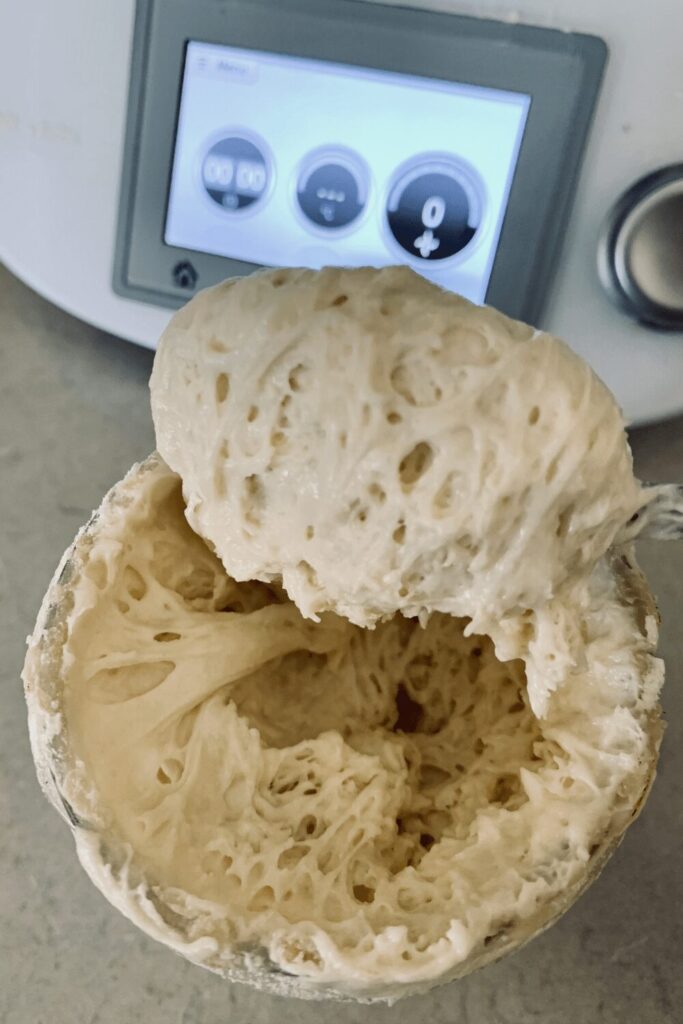
- Mix the dough for another 3 minutes on Dough mode. The gluten in your dough will be well formed by now and the dough should be slapping the sides of the bowl. When you look into the bowl, you should see that there is a gap between the dough and the side of the bowl because the dough has formed a "ball". The dough will be elastic when you pull it up and have quite a bit of stretch.
- Pour the dough into a glass bowl. It should "bounce" out in one big blob if you jiggle the TM bowl upside down. Most if it will come away from the blades in this way. You can use a silicone spatula to get the remaining dough if you need to.If there is still a little sticky dough left on the blades, just cover with water and blitz on speed 10 to easily clean the blades. The quicker you do it, the easier they are to clean. A quick zip around with a Thermo brush and you should be good to go!
- Cover the dough in your bowl with plastic wrap and leave it to bulk ferment. See Notes below for information on this step.
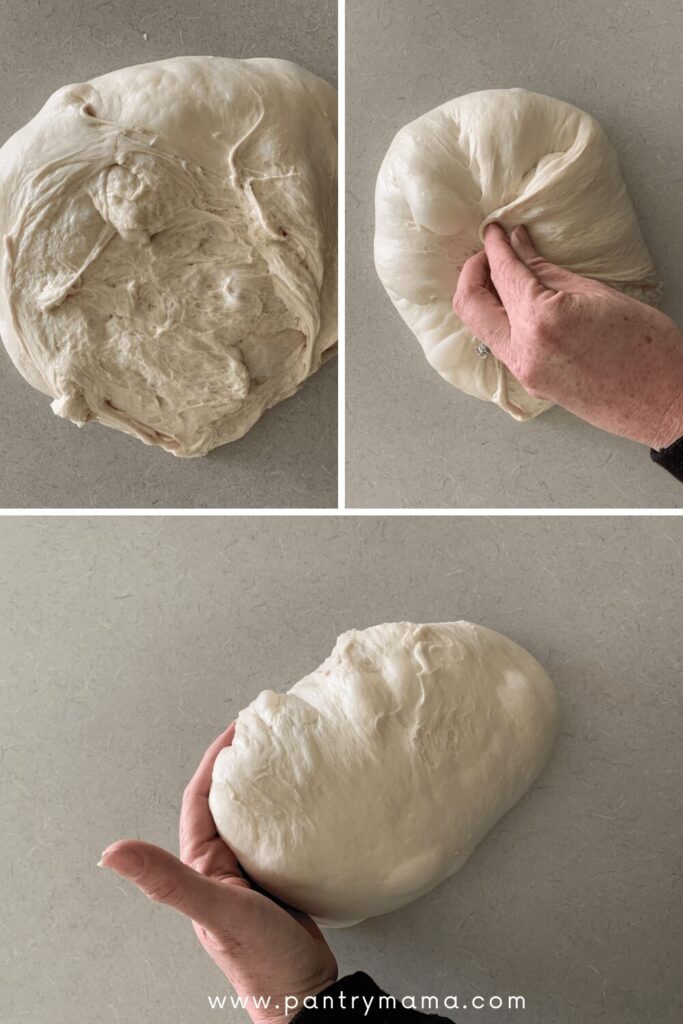
- Use a silicon spatula to gently ease the dough out of the glass bowl. You want it to land "upside down" with the smooth top of the dough at the bottom and the sticky underneath on the top. This will make it very easy to shape.Using your hands, pull the of the dough into the centre so that it starts to form a ball. Once all the edges are in the centre, turn the dough over so that the smooth dough is at the top. Using the sticky underside, gently tension the dough so that it forms a ball.
- You will need a banneton to put your dough into. If you do not have a banneton, then a bowl or basket lined with a floured tea towel is perfectly fine. Make sure your bowl isn't too big though, you want your dough to retain some shape.Whatever you're using needs to be liberally floured with your rice flour. If you're using a banneton – liberally sprinkle it with rice flour. If you're using a cloth or tea towel, rub the flour into it to ensure it becomes non stick.Once the dough is shaped into a tight ball, place it into your banneton smooth side down, so your seam is on the top – this way the top of your dough will get the pretty lines from the banneton. If you're using a cloth or tea towel in a bowl it's ok to put your dough with the smooth side up. Just make sure the dough is tight.Lift your dough around the edges to pop a little more rice flour if you feel it needs it. Just try to handle the dough as little as possible and be really gentle as you really want to preserve all the gases and air bubbles that have formed during your bulk ferment.
- Now your dough is in it's "shaping container" cover it loosely with a plastic bag or damp tea towel and place into the fridge. I use a large plastic bag to cover it – I just reuse it each time. It's not totally essential to cover it – you can place it in the fridge uncovered if you'd prefer.Try to leave it in the fridge for a minimum 5 hours up to a maximum of around 36 hours. The longer you leave it the better your bread will be! A longer cold ferment creates beautiful blisters on your crust and a deeper sourdough flavour. It will also ensure your dough forms a skin which makes it easier to score.
- Once you're ready to bake your sourdough, you'll need to preheat your oven to 230C/450F. Place your Dutch Oven into the oven when you turn it on so it gets hot. Try to preheat for around 1 hour to ensure your oven is super hot – but you know your oven so just adjust this time if you need to.Leave your dough in the fridge until the very last minute – placing a cold dough into a hot oven will give you a great "spring".
- Now it's time to bake!When your oven is at temperature. Take your sourdough out of the fridge. Gently place it onto a piece of baking paper. Make sure that you make the baking paper big enough to use the edges as a handle to lower to dough into your Dutch Oven.Gently score your bread with a lame, clean razor blade or knife. At minimum a large cross is sufficient, but you can get as artistic as you like. Try to score it fairly deep to ensure the dough opens up.
- Carefully take your dutch oven out of the oven. Place the sourdough into the pot using the baking paper as a handle. Put the lid on and place into the hot oven. If you want to you can spritz your dough with extra water before you put the lid on.If you're worried about the base of your bread burning, place a baking sheet on shelf underneath your Dutch Oven – it works!BAKE TIME:Bake your sourdough for 30 minutes with the lid on at 230C/450F plus10 minutes with the lid off at 210C/
- When you remove your dough from the oven, carefully remove it from the dutch oven as soon as possible and place on a wire rack to cool.


Notes
Nutrition
Nutrition information is automatically calculated, so should only be used as an approximation.
Like this? Rate and comment below!


Hi Pantry Mama
When you say baking sheet under Dutch oven to help stop the burning of the base of loaf, are you talking a flat metal baking sheet or could I use a silicone sheet or even the actual Thermomix silicone baking mat or will the heat of the Dutch oven be too much for the silicone?
Hi, I’d love to try this, but I’m confused that there are bulk ferment directions and then below then, instructions for an overnight ferment. Aren’t they the same thing? Do I do and overnight ferment in step 6 and then another overnight ferment after shaping? Thanks!
I think you’re getting confused between bulk ferment and cold ferment – they are both different, but can both be done overnight. So you would bulk ferment first, then shape and then cold ferment. You can see the timeline further up the page that shows how I do this. This article on bulk ferment vs cold ferment will also help to explain 🙂
Wow, wow wow amazing recipe mine came out perfect ☺️ will be making this again 🥰
Hello Kate
Thank you for publishing a thermomix recipe. It would be nice if there was a whole section for the thermomix. We just bought ours so are still learning.
My question is about autolyse. Does the time matter? When I made my last bread I autolysed the pre-dough for much longer than an hour. Can one “over” autolyse?
If you were to add things in eg. sultanas, at what stage would you add these?
Can’t wait to try out the recipe!
M in a hot, humid, tropical country with temperatures ranging from 27 to 32/33 degree celcius. Can i bulk ferment at room temperature?
Or bulk fermenting in the fridge in this case is better?
Advice needed. Thank you!
Oh no! Ive tried this recipe twice, and I get soup after Step 3.
Any ideas about what I’m doing wrong?
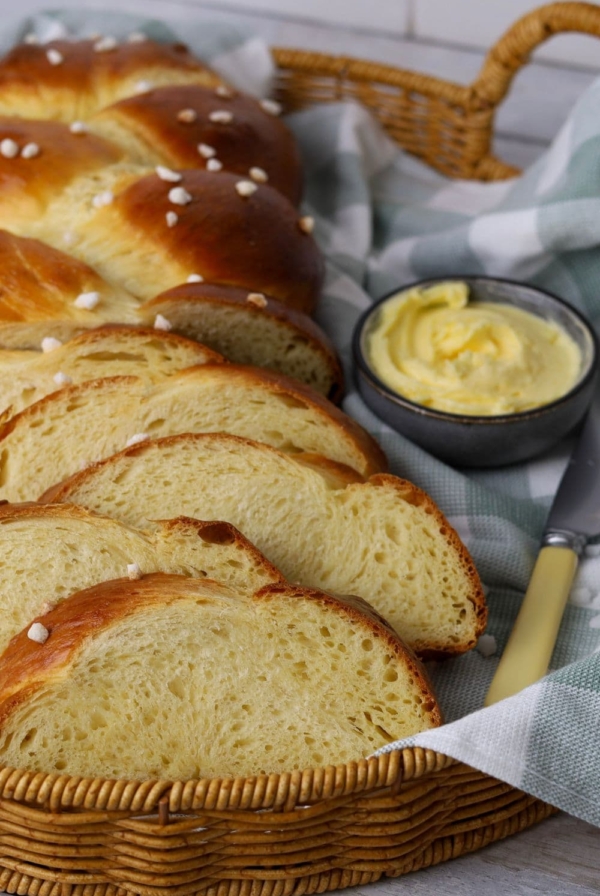
Hi, would you please publish how you use the Thermomix to knead brioche bread?
Thanks.
selena
I literally just use the knead function until it reaches window pane 🙂 It takes a bit but it does get there – the trick is, if it starts to get warm, to put the jug in the freezer for a bit to cool it down.
Hi, if i wanted to add honey & oats would this affect the amount of water needed?
HI! I am doing this as I type. It seems like a great recipe. you seem to know your stuff! I am so glad I came across your site!
I see you don’t do any stretch and folding? Just let it bulk ferment? then shape then into fridge?
So, I’m new to thermomix and re-visiting sourdough after 40 years. My question is in Bulk ferment in this recipe. Does all the dough kneading with the thermomix count as the stretch and folds? What if the dough still seems sticky at that point? Just carry on?
Thanks!
Total novice at sourdough, wasn’t even sure my starter was ready to use. Overwhelmed with all the info out there so decided to use the thermo. My timings were a bit off so decided not to do cold retard, bulk fermented till doubled, put in freezer for ten minutes so easier to score. Totally amazing…..crusty, amazing crumb, completely delicious.
Would using the Thermomix to knead sourdough cause the gluten to break ? Or overmixing it ?
As long as you don’t mix too long (see the timing in the recipe card), it shouldn’t cause any issues.