Sourdough Rye Bread Recipe [hearty + rustic]
This post may contain affiliate links.

If you long to bake sourdough rye bread, but you're worried it might be too hard, then this easy sourdough rye bread recipe was written just for you.
This delicious sourdough rye bread recipe uses a combination of rye flour and bread flour to give you a perfect balance between taste, texture, shape-ability and crumb. Seriously, it's going to be your go-to rye sourdough recipe in no time!
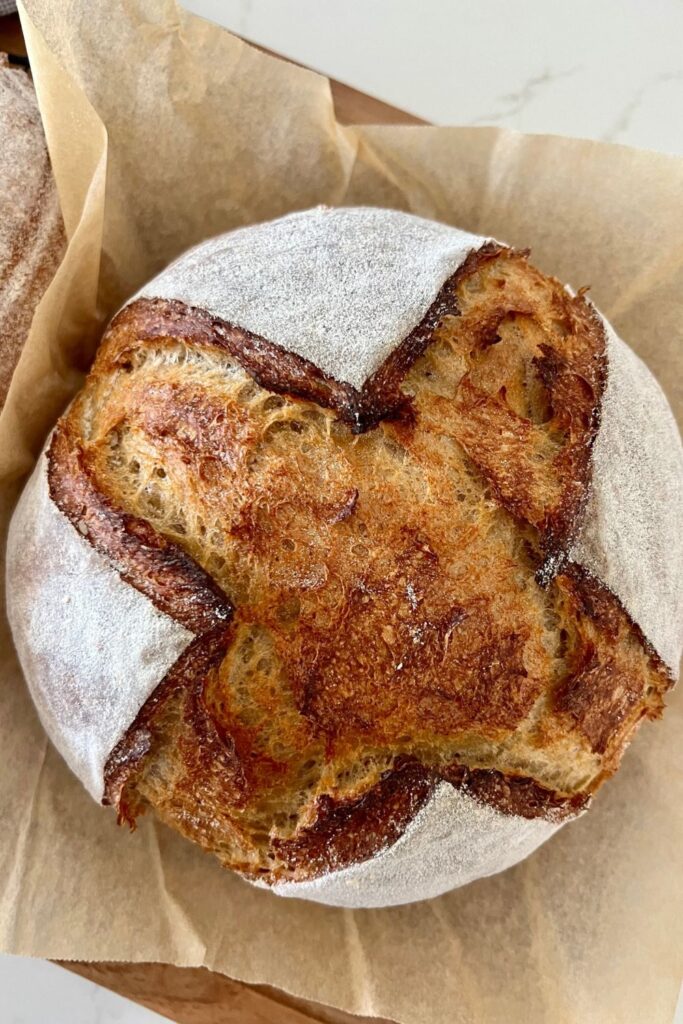
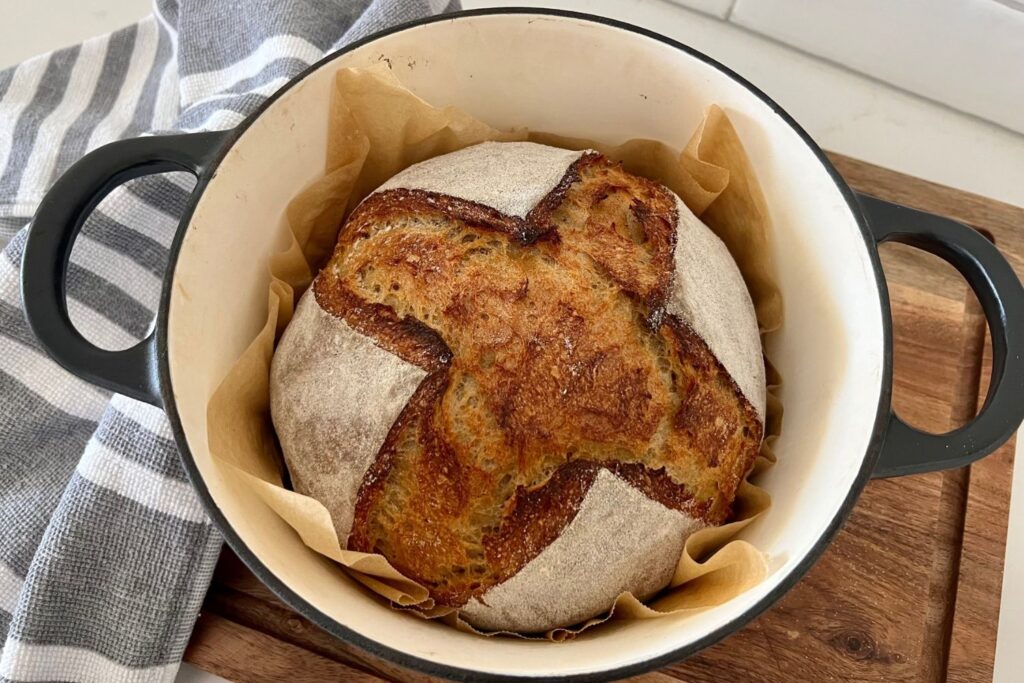
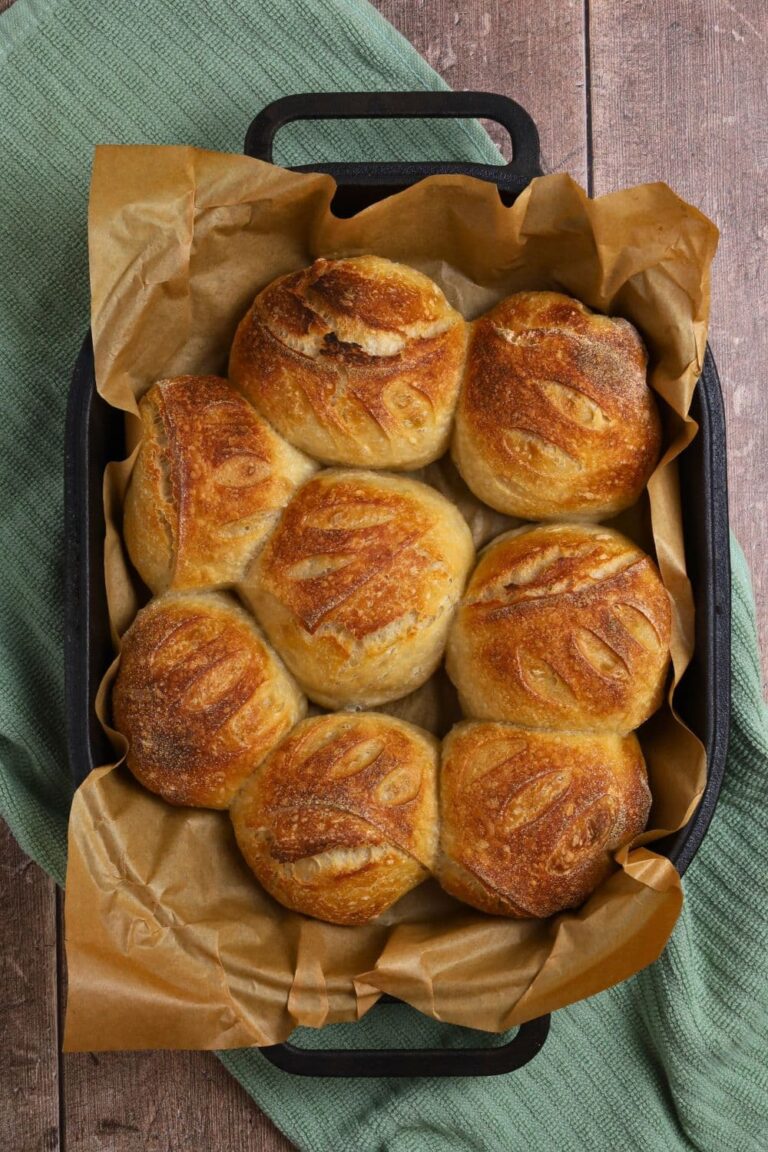
I've shaped this simple sourdough rye bread recipe into a boule, but you can shape it into an oval or batard or even bake it in a loaf pan if you'd prefer. It works really well for sandwiches and toast, so you can just choose the shape that best suits your needs.
If you're looking for more sourdough rye recipes you might enjoy these sourdough rye bagels or this sourdough rye pickle bread. Or if you're looking for a recipe that pairs whole wheat flour and rye together, try this easy whole wheat rye sourdough bread, or maybe this spelt sourdough bread is more your style.
What Is Rye?
Rye is a grass, closely related to the wheat family. Rye has an intense taste that can be overpowering if it's not complemented with other stronger flavors. This versatile grain can be used in beer, whiskey, vodka and of course bread and sourdough! You can even use cracked rye grains in salads and greens for increased flavor and texture.
There are different types of rye including a lighter rye flour and dark rye flour. The darker the rye flour the more vitamins and trace minerals present. Using rye flour in your sourdough baking (or any bread baking) is a fantastic way to give your baked goods a higher nutritional profile.
While rye flour contains less gluten, it's not considered gluten free.
What You Need To Know About Using Rye Flour
This really is a great rye bread - but the best thing is, it's much easier to work with than a sourdough made only with rye flour. Being lower in gluten, rye flour really needs to be paired with another flour of higher protein content to ensure it's not too sticky to shape. The richer, more complex flavors of rye flour really do pair well with the fermentation process which only serve to enhance their complexity.
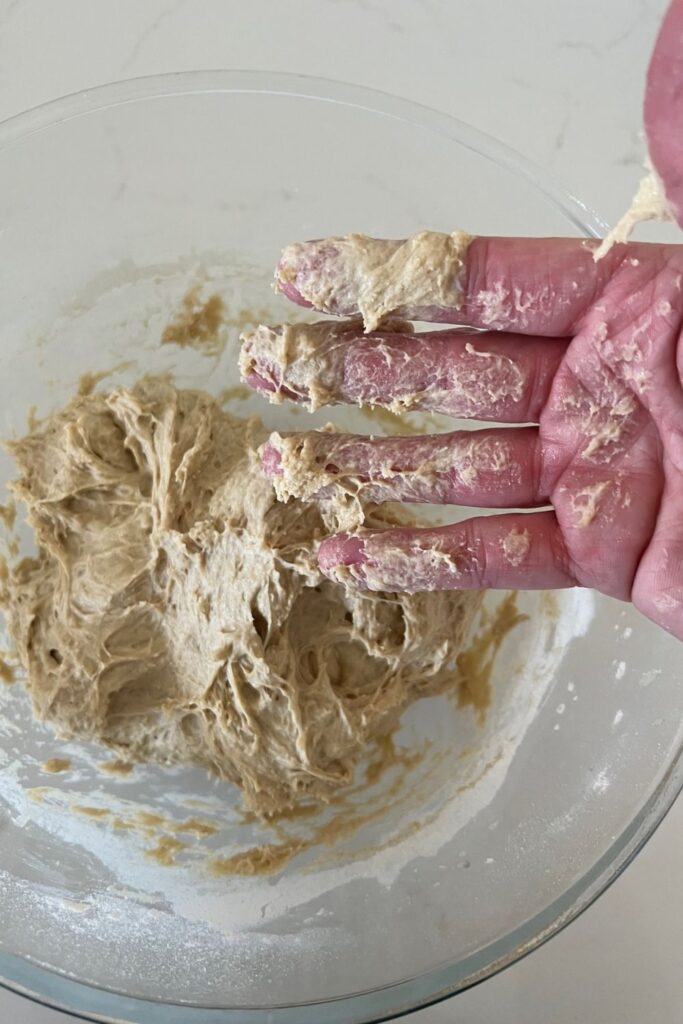
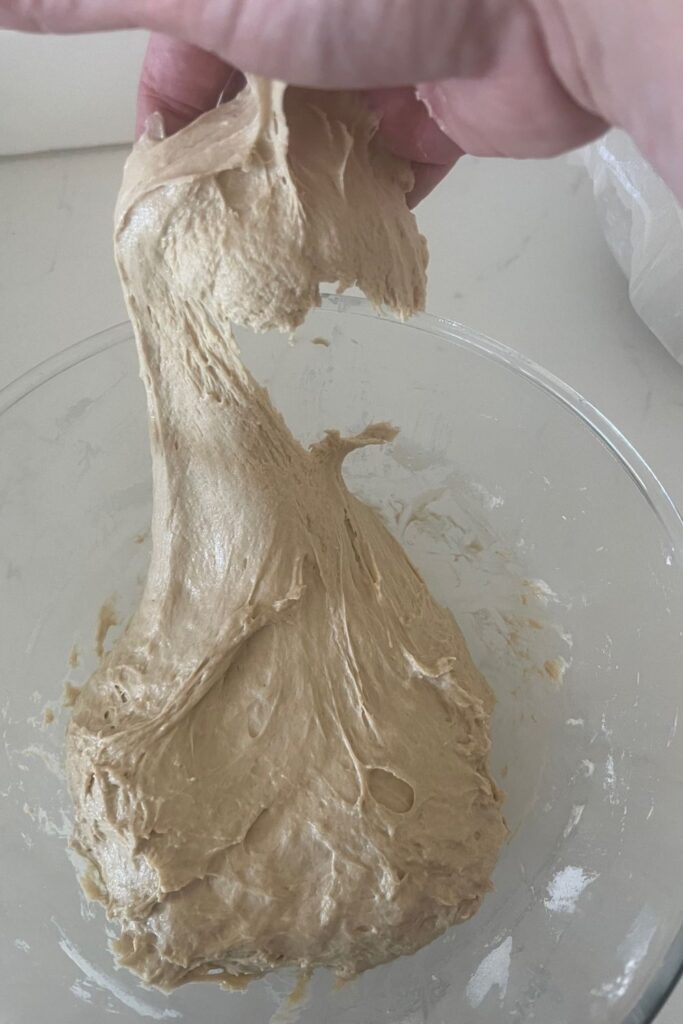
Dough made with rye flour will be wetter and stickier than you're used to. The dough can feel a bit overwhelming if you're not used to it, but rest assured the wet dough will firm up as you perform stretch and folds. As long as bulk fermentation is timed well, you'll find this dough isn't too difficult to shape (as long as you have a dough scraper and rice flour on hand).
The most important thing to remember when working with rye flour sourdough is not to panic! If the dough seems to tear, wet your hands and gently perform some stretch and folds to further agitate the gluten structure.
What is the Hydration of Sourdough Rye Bread?
This sourdough rye bread recipe is 80% hydration. It has less flour than a regular white sourdough recipe, as well as liquid molasses (which is not actually part of this calculation).
400g of water (350g of water + 50g from starter) divided by 500g of flour (450g of flour + 50g from starter) equals 80% hydration.
Rye flour absorbs more water than bread flour or all purpose flour, so you need to add more water to make the flour workable. If you feel the dough is too stiff after autolysing this dough, wetting your hands can be a good idea to gradually work extra water into the dough.
You can read more about how hydration in sourdough bread here.
Do I Need a Rye Starter?
You don't need a rye sourdough starter for this sourdough bread, but you can enhance the rye flavor by building a rye levain specifically for this loaf. You definitely do not have to though and you can use your regular active sourdough starter.
But if you do like the idea of using rye for your starter you could build a rye sourdough starter or use your existing sourdough starter to build a rye levain for this sourdough bread.
To build a rye levain, take 20g of your own sourdough starter and feed it with 50g of warm water and 50g of rye flour. Allow the levain to double before you use it in this recipe. This will give your bread an intense rye flavor and can help to build a more sour flavor profile.
How To Make Sourdough Rye Bread
Sourdough rye bread can seem a bit overwhelming because of the way rye flour dough can behave. The great thing about this bread is that it still contains a percentage of bread flour which provides structure and fantastic oven rise to the bread.
Autolyse
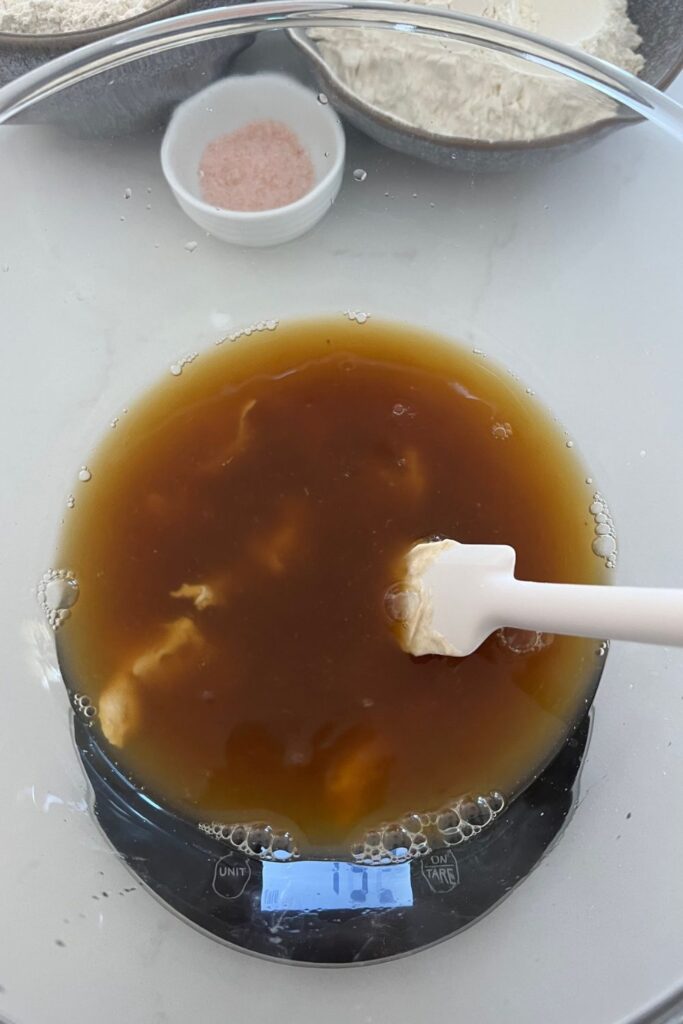
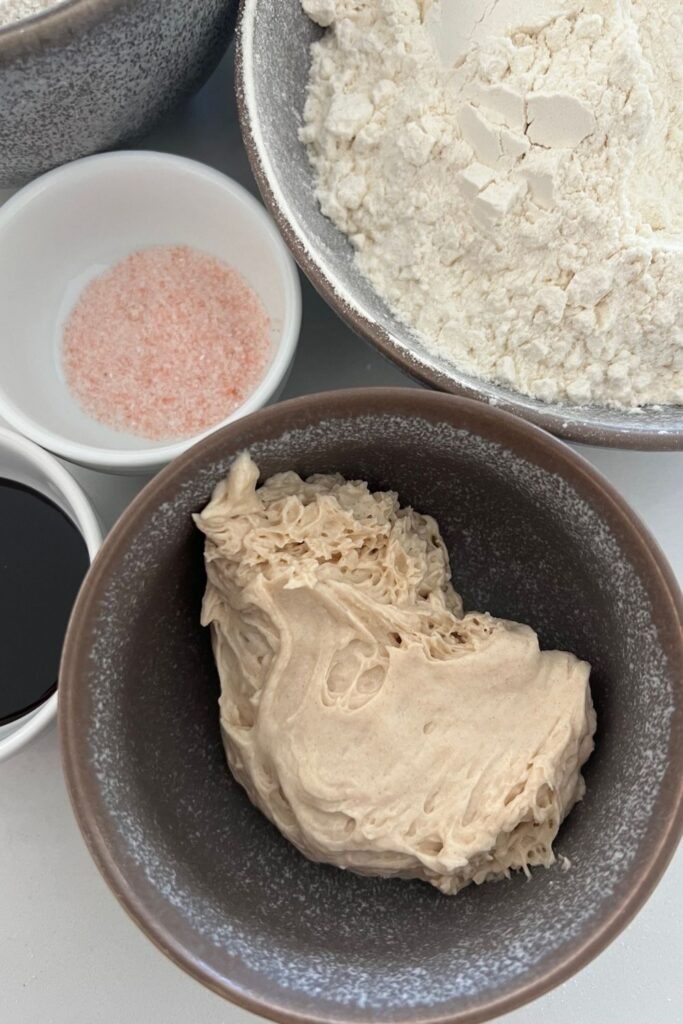
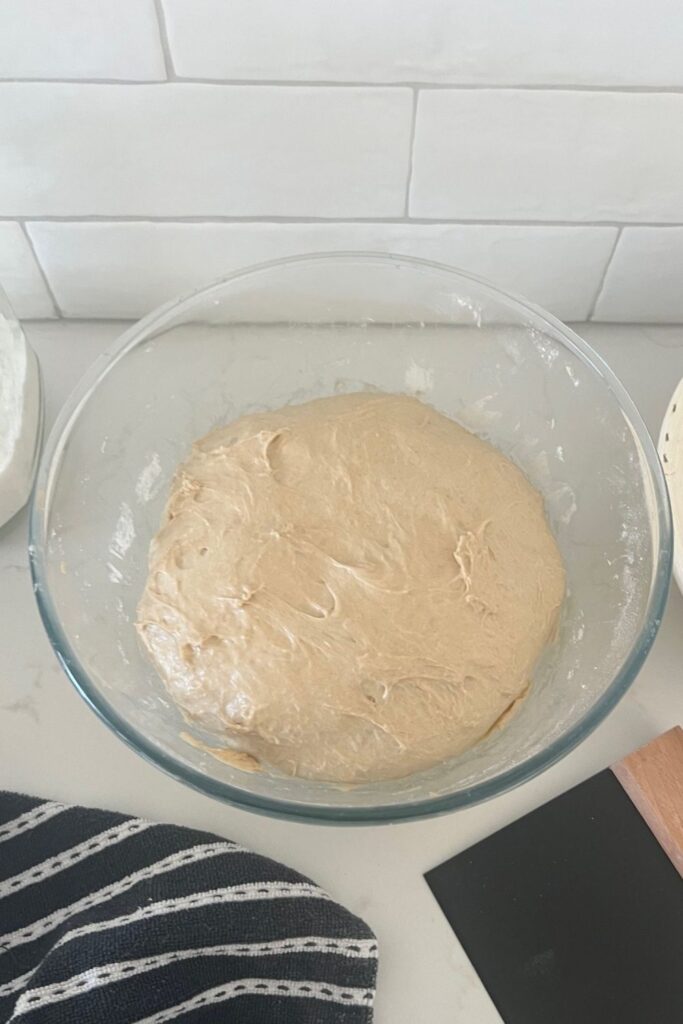
Weigh out your bubbly starter, water and molasses into a large ceramic or glass bowl. Mix them together briefly. Then add your rye flour, bread flour and salt and mix altogether with the end of a wooden spoon.
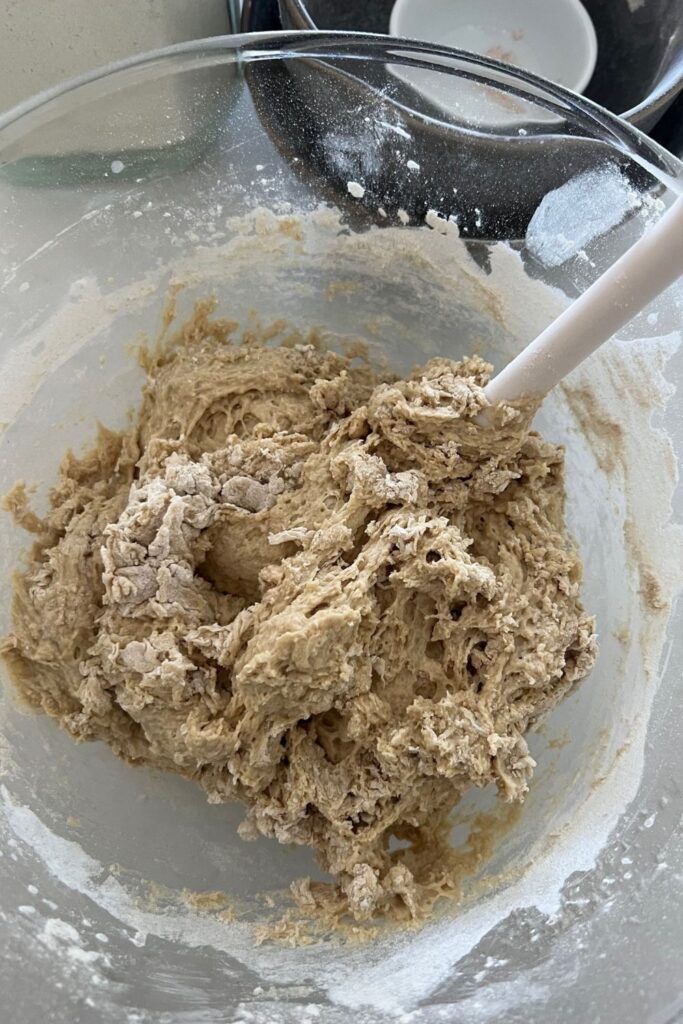
The dough will be fairly shaggy and only just brought together.
Cover your bowl with cling film or a damp tea towel and let it sit for around 1 hour. This process is called the "autolyse" and allows your flour to soak in all the water and become hydrated.
Forming Up Your Sourdough Rye Bread:
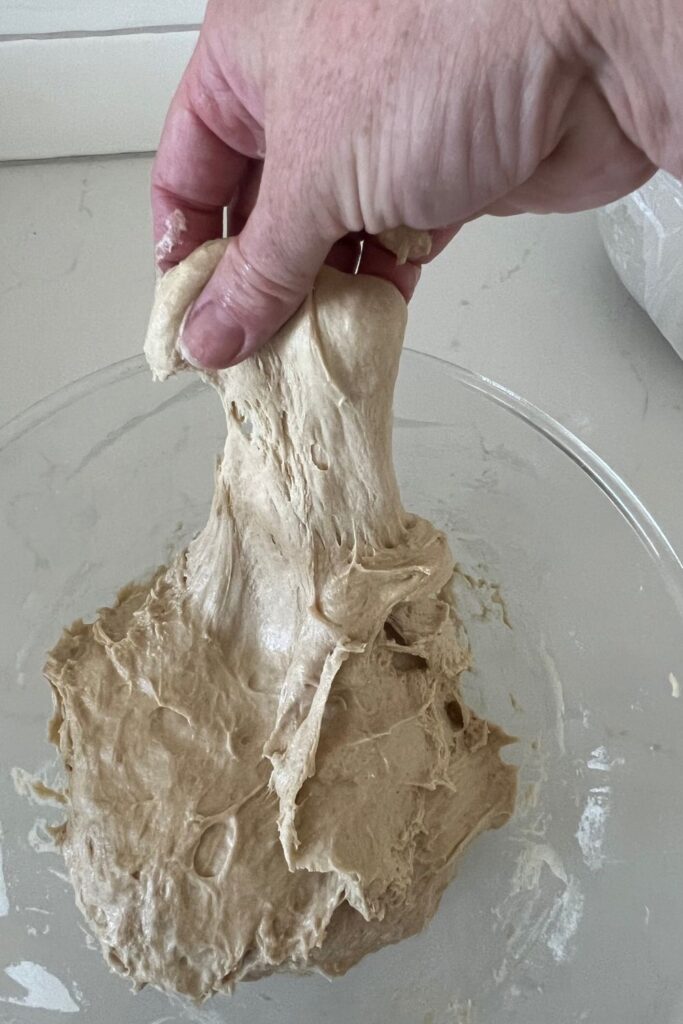
After the dough has been through autolyse you need to bring it together into a ball. You'll notice that the dough is fully hydrated after soaking all the water up.
Work your way around the bowl, grabbing the dough from the outside, stretching it up and over itself until a sticky ball is formed (remember that rye flour will make the dough stickier than you're used to).
Once the dough has formed into a rough ball, pop the plastic wrap or food cover back on and let it rest for 30 minutes.
Stretch & Folds:
Over the next few hours you need to create some structure for your dough by "stretching and folding". Aim to do around 4-6 sets of stretches and folds. For each set, stretch the dough up and over itself 4 times. Leave around 15 minutes in between each set. Again you do not have to be exact with time, but you need to do at least 4 sets over 2 hours.
You will need to really work the dough to develop the gluten - because rye flour has a lower gluten content. But do not worry if the dough seems sticky, it will be ok and it will get less sticky during the fermentation process.
*if you want to add caraway seeds, add them during the second stretch and fold*
Bulk Fermentation for Sourdough Rye
Once you've finished your stretch and folds, place the plastic wrap or damp towel back over your dough and let it rest and ferment at room temperature until the dough has grown. For this recipe you are looking for the dough to sit just under double (you don't want over fermented rye as it will be a big sticky mess).
You can find a full guide to sourdough bulk fermentation here.
Shaping Your Dough
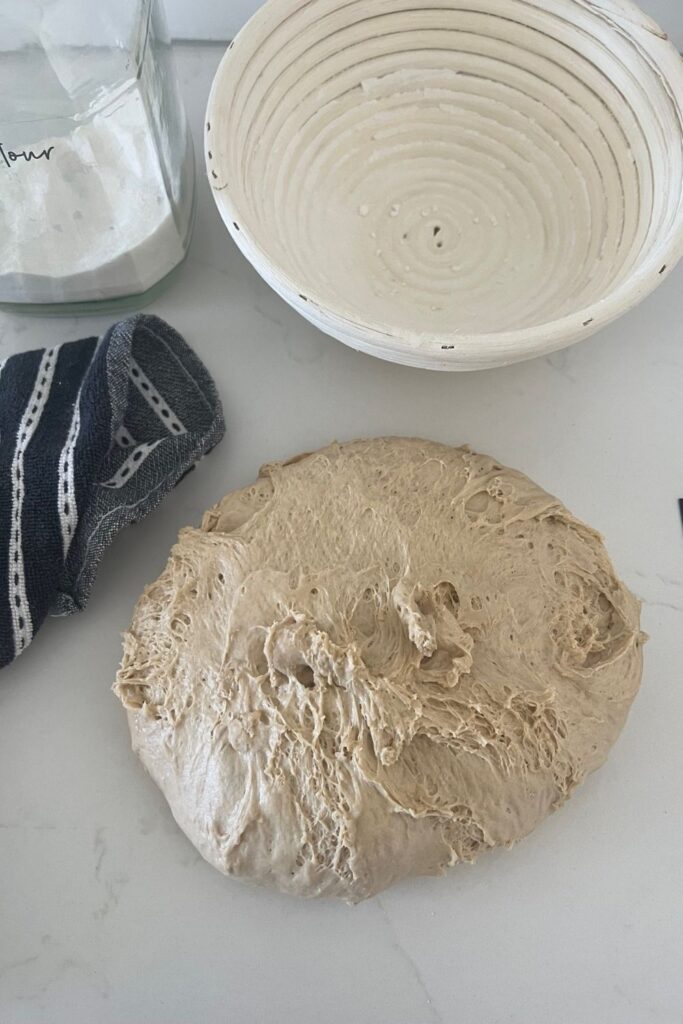
Once your dough has finished its first ferment, it's time to form it back into a ball and give it some shape and surface tension. You'll need to have a lightly floured surface to shape this rye bread. I don't normally use flour to shape however you'll need some rice flour to shape this sticky dough.
Use a silicone dough scraper to gently ease the dough out of the bowl. You want it to land upside down on your counter so that the smooth top of the dough is on the countertop and the sticky underside is facing up. This will make it easier to shape.
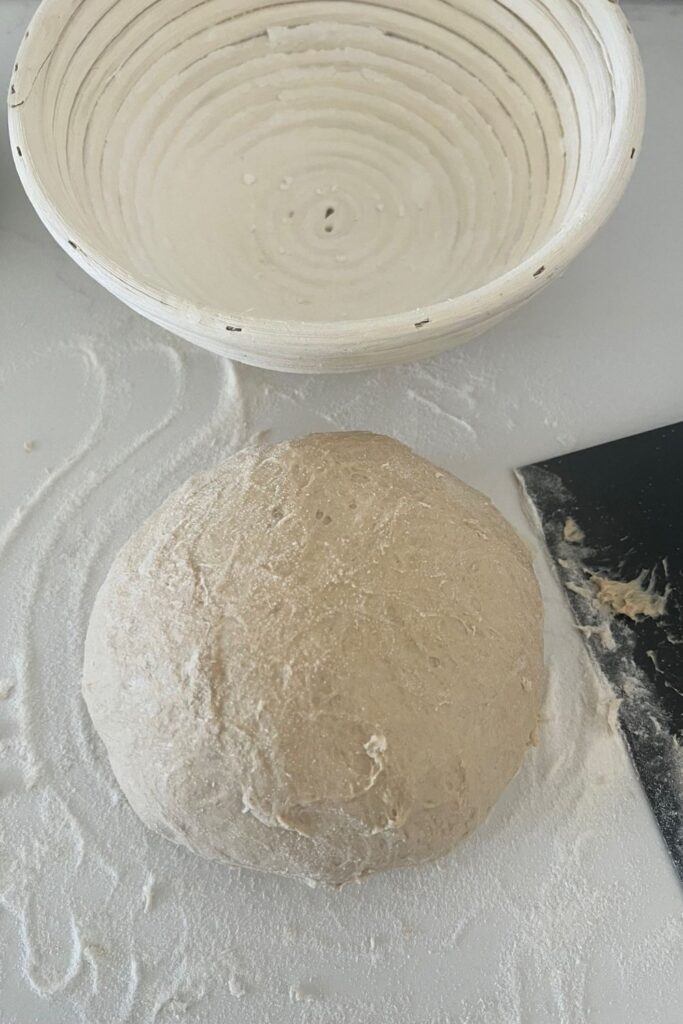
Once the dough is shaped into a tight ball, place it into your banneton smooth side down, so your seam is on the top - this way the top of your dough will get the pretty lines from the banneton. If you're using a cloth or tea towel in a bowl it's ok to put your dough with the smooth side up. Just make sure the dough is tight.
Lift your dough around the edges to pop a little more rice flour if you feel it needs it. Just try to handle the dough as little as possible and be really gentle as you really want to preserve all the gases and air bubbles that have formed during your bulk ferment.
You will need a floured banneton to put your dough into. If you do not have a banneton, then a bowl or basket lined with a floured tea towel is perfectly fine. Make sure your bowl isn't too big though, you want your dough to retain some shape.
Whatever you're using needs to be liberally floured with your rice flour. If you're using a banneton - liberally sprinkle it with rice flour. If you're using a cloth or tea towel, rub the flour into it to ensure it becomes non stick.
Cold Ferment
Now your dough is in its proofing basket cover it loosely with a plastic bag or damp tea towel and place into the fridge. I use a large plastic bag to cover it - I just reuse it each time. It's not totally essential to cover it - you can place it in the fridge uncovered if you'd prefer.
Try to leave it in the fridge for a minimum 5 hours up to a maximum of around 36 hours. The longer you leave it the better your bread will be! A longer cold ferment creates beautiful blisters on your crust and a deeper sourdough flavour. It will also ensure your dough forms a skin which makes it easier to score.
Preparing to Bake Your Sourdough Rye Bread
Once you're ready to bake your sourdough, you'll need to preheat your oven to 230C/450F.
Place your Dutch Oven into the oven when you turn it on so it gets hot. Try to preheat for around 1 hour to ensure your oven is super hot - but you know your oven so just adjust this time if you need to.
Leave your dough in the fridge until the very last minute - placing a cold dough into a hot oven will give you a great "spring".
Baking Your Sourdough
When your oven is at temperature. Take your sourdough out of the fridge.
Gently place it onto a piece of baking paper.
Make sure that you make the baking paper big enough to use the edges as a handle to lower to dough into your Dutch Oven.
Gently score your bread with a lame, clean razor blade or knife.
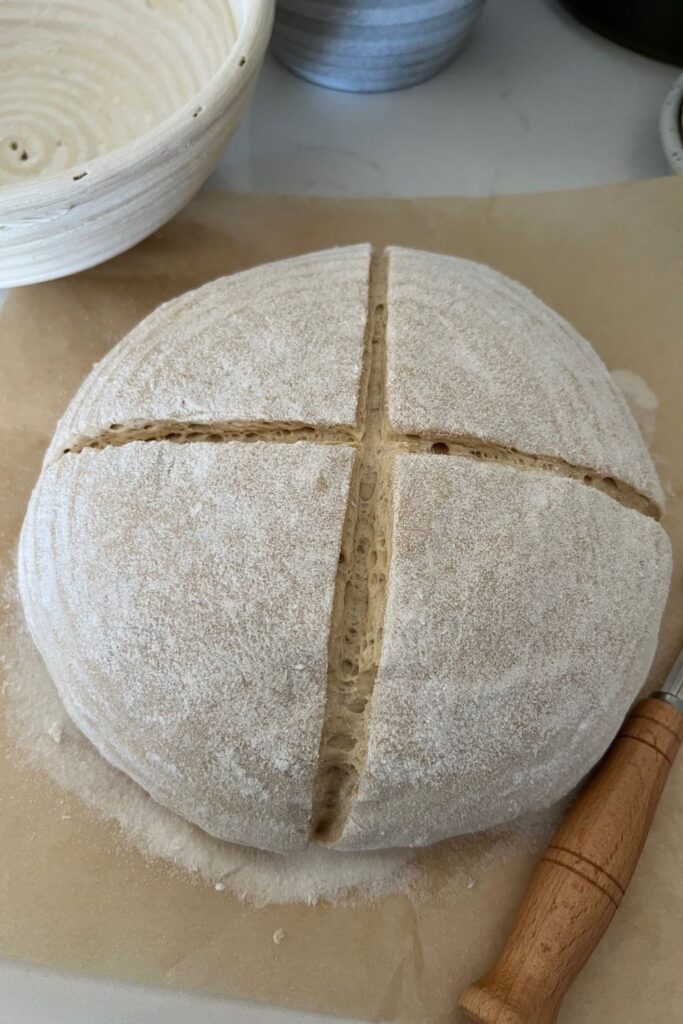
Carefully take your dutch oven out of the oven. Place the sourdough into the pot using the baking paper as a handle. Put the lid on and place into the hot oven. If you want to you can spritz your dough with extra water before you put the lid on.
BAKE TIME:
- 30 Minutes with the lid on at 230C/450F plus
- 10-15 Minutes with the lid off at 210C/410F
If you feel your sourdough rye isn't done, it's totally fine to leave it in the oven for a bit longer. Sometimes I find that taking it out of the Dutch Oven and placing it on the rack directly for an extra 5 to 10 minutes can help to give your sourdough a deeper, darker crust. This can be important due to the extra moisture content in this bread.
Finishing Your Bake
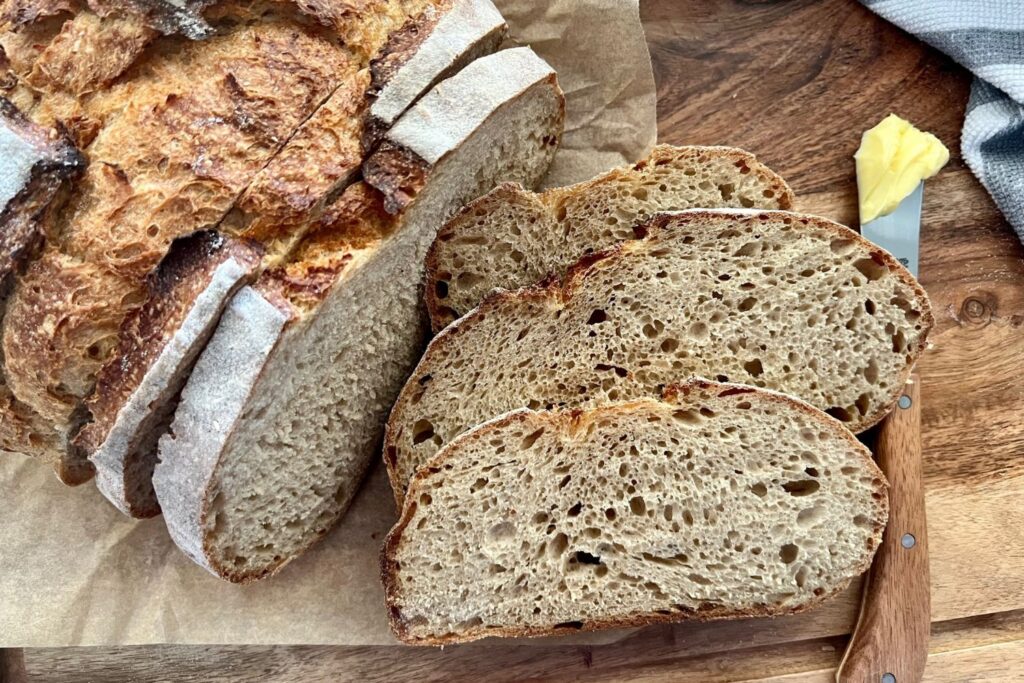
When you remove your dough from the oven, carefully remove it from the dutch oven as soon as possible and place on a wire rack to cool. Sourdough bread containing rye flour takes much longer to cool than white sourdough bread. I recommend letting your sourdough rye bread cool for at least 12 hours before you cut into it (with your Mercer Knife of course).
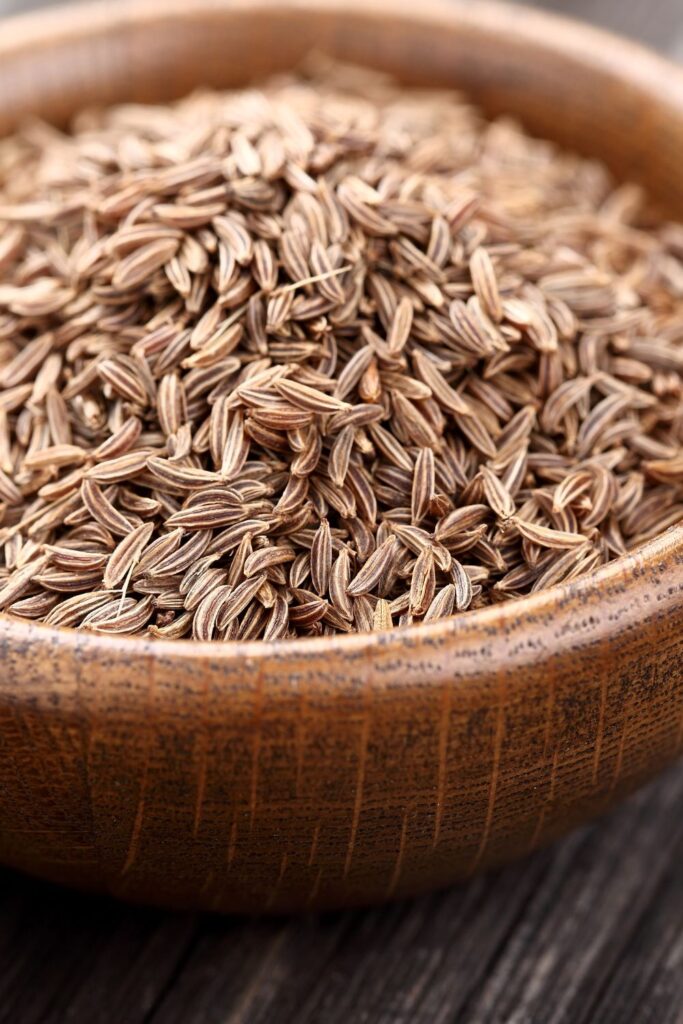
Does Rye Bread Always Have Caraway Seeds?
Caraway seeds are a very popular addition to rye bread, particularly in the United States. They are used as a spice in the rye bread and are used to boost the flavor of the bread. Caraway seeds add an aniseed flavor to the rye bread which is quite unique.
A fun fact - caraway seeds are actually the dried fruit of the plant.
You don't have to add the caraway seeds to your rye bread (and in fact I prefer it without). This is the great thing about making your own homemade sourdough bread - you get to choose what you put in it!
Should I Add Vital Wheat Gluten To Rye Bread?
Vital Wheat Gluten is an additive you can add to flour to increase the protein and thus give you a better gluten network.
It's often used with low gluten flours like rye and whole wheat. It's certainly not essential to this sourdough rye bread recipe (because it contains some high protein bread flour) however it's worth experimenting with to see if you prefer working with dough containing vital wheat gluten.
What To Serve With Sourdough Rye Bread
This delicious sourdough rye bread is just asking to be topped with your favorite things! Here are some of my favorite ways to enjoy this hearty sourdough rye bread:
- spread with homemade cultured butter
- serve with this whipped herb butter for a big flavor hit
- toasted and spread with this fig and cream cheese spread or cranberry orange jam.
- used for open sandwiches and topped with tender roast beef and whole grain mustard
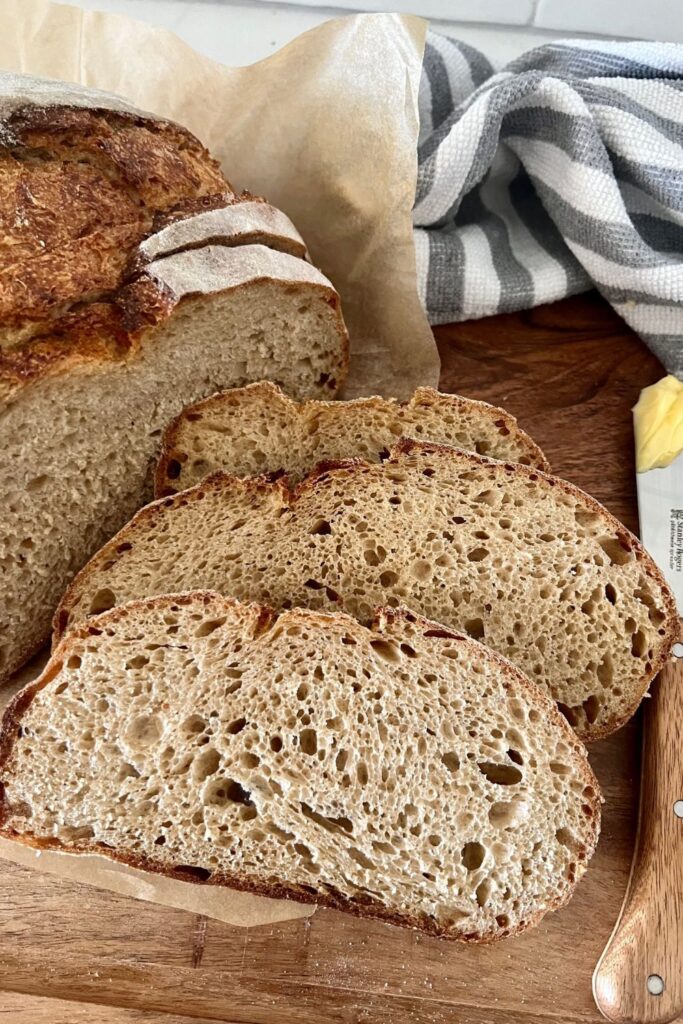
Does Sourdough Rye Last Longer Than Sourdough Bread?
Because rye flour absorbs more moisture than white flours (like bread flour), sourdough made with a higher percentage of rye flour has a more moist crumb than you might be used to. This means that it will stay fresher for a little longer than conventional white sourdough bread, which can go stale very fast. I have found that this sourdough rye stays fresh for at least a couple of days, after which it's perfect for toasting.
Because this rye bread is oh so pretty, I love to store this under a glass cloche on my kitchen counter.
You'll find more ideas on how to store sourdough bread here.
Frequently Asked Questions
Yes using rye flour can enhance the sour flavors of fermented sourdough bread. Rye flour has an intense and more sour flavor than processed white flour. This flavor is further augmented when put through a fermentation process like sourdough (or beer and whiskey making). Using a rye sourdough starter or replacing some of the white flour in your recipe with rye flour is a popular way to make sourdough more sour.
Sourdough and rye sourdough are both essentially sourdough bread, made using a sourdough starter. Conventional sourdough bread is made with high protein bread flour, whereas rye sourdough contains a percentage of rye flour, if not all rye flour for increased flavor and texture.
Using light rye or dark rye won't make all that much difference to the actual process of making sourdough rye. However, dark rye flour will give you a more intense flavor and color to your bread than light rye. Dark rye also contains increased levels of vitamins and minerals, giving bread make with dark rye a higher nutritional profile.

Sourdough Rye Bread Recipe
Equipment
- Mixing Bowl
- Digital Scales
- Banneton
- Dutch Oven
Ingredients
- 100 g Sourdough Starter (fed and bubbly) see notes for using levain
- 250 g Bread Flour
- 200 g Rye Flour (darker or light rye is fine)
- 350 g Water
- 25 g Molasses
- 10 g Salt
Optional
- 15 g Caraway Seeds (approx. 2 tablespoons)
Instructions
- Autolyse:Weigh out your sourdough starter, water and molasses into a large ceramic or glass bowl. Mix them together briefly. Then add your rye flour, bread flour and salt and mix altogether with the end of a wooden spoon.The dough will be fairly shaggy and only just brought together. Cover your bowl with cling film or a damp tea towel and let it sit for around 1 hour. It's ok if it's a little bit longer, it's not going to matter too much.This process is called the "autolyse" and allows your flour to soak in all the water and become hydrated.
- Forming Up Your Dough:After the dough has been through autolyse you need to bring it together into a ball. You'll notice that the dough is fully hydrated after soaking all the water up. Work your way around the bowl, grabbing the dough from the outside, stretching it up and over itself until a rough ball is formed. You shouldn't need more than about 20-25 folds to form the ball (and remember that rye flour will make the dough stickier than you're used to).Once the dough has formed into a rough ball, pop the plastic wrap back on and let it rest for 30 minutes.
- Stretch & Folds:Over the next few hours you need to create some structure for your dough by "stretching and folding". Aim to do around 4-6 sets of stretches and folds. For each set, stretch the dough up and over itself 4 times. Leave around 15 minutes in between each set. Again you do not have to be exact with time, but you need to do at least 4 sets over 2 hours.You will need to really work the dough to develop the gluten - because rye flour has a lower gluten content.*if you want to add caraway seeds, add them during the second stretch and fold*
- Bulk Ferment:Once you've finished your stretch and folds, place the plastic wrap or damp towel back over your dough and let it rest and ferment (see notes).
- Shaping Your Dough:Once your dough has finished it's first ferment, it's time to form it back into a ball and give it some shape and surface tension. You'll need to flour your counter top with rice flour for this (we use rice flour because it has no gluten). Try to be quite sparing with the rice flour, you only need a very light dusting.Use a silicone dough scraper to gently ease the dough out of the bowl. You want it to land upside down on your counter so that the smooth top of the dough is on the countertop and the sticky underside is facing up. This will make it easier to shape.You can shape into whatever you like. I prefer this one as a boule but it also works well as a batard or even in a loaf pan.
- Once the dough is shaped into a tight ball, place it into your banneton smooth side down, so your seam is on the top - this way the top of your dough will get the pretty lines from the banneton. If you're using a cloth or tea towel in a bowl it's ok to put your dough with the smooth side up. Just make sure the dough is tight.Lift your dough around the edges to pop a little more rice flour if you feel it needs it. Just try to handle the dough as little as possible and be really gentle as you really want to preserve all the gases and air bubbles that have formed during your bulk ferment.
- You will need a banneton to put your dough into. If you do not have a banneton, then a bowl or basket lined with a floured tea towel is perfectly fine. Make sure your bowl isn't too big though, you want your dough to retain some shape.Whatever you're using needs to be liberally floured with your rice flour. If you're using a banneton - liberally sprinkle it with rice flour. If you're using a cloth or tea towel, rub the flour into it to ensure it becomes non stick.
- Cold Ferment:Now your dough is in it's "shaping container" cover it loosely with a plastic bag or damp tea towel and place into the fridge. I use a large plastic bag to cover it - I just reuse it each time. It's not totally essential to cover it - you can place it in the fridge uncovered if you'd prefer.Try to leave it in the fridge for a minimum 5 hours up to a maximum of around 36 hours. The longer you leave it the better your bread will be! A longer cold ferment creates beautiful blisters on your crust and a deeper sourdough flavour. It will also ensure your dough forms a skin which makes it easier to score.
- Preparing to Bake Your Sourdough:Once you're ready to bake your sourdough, you'll need to preheat your oven to 230C/450F. Place your Dutch Oven into the oven when you turn it on so it gets hot. Try to preheat for around 1 hour to ensure your oven is super hot - but you know your oven so just adjust this time if you need to.Leave your dough in the fridge until the very last minute - placing a cold dough into a hot oven will give you a great "spring".
- Baking Your Sourdough:When your oven is at temperature. Take your sourdough out of the fridge. Gently place it onto a piece of baking paper. Make sure that you make the baking paper big enough to use the edges as a handle to lower to dough into your Dutch Oven.Gently score your bread with a lame, clean razor blade or knife. Carefully take your dutch oven out of the oven. Place the sourdough into the pot using the baking paper as a handle. Put the lid on and place into the hot oven. If you want to you can spritz your dough with extra water before you put the lid on.BAKE TIME:30 Minutes with the lid on at 230C/450F plus10-15 Minutes with the lid off at 210C/410F
- Finishing Your Bake:When you remove your dough from the oven, carefully remove it from the dutch oven as soon as possible and place on a wire rack to cool. You'll need to allow this bread a bit longer to cool due to its higher moisture content. It will take up to 12 hours for it to cool completely.


Hello, can I bake this in a loaf tin. Would I need to adjust the timings. Thank you
I have made this recipe three times and the bread comes out perfect and delicious however the rise isn’t quite high enough to make Rueben’s with. You mentioned it could be done in a pan. What would the process be? Put the pan in the Dutch oven? I’d like the same great results with a higher shaped loaf. Any advise would be appreciated.
Hello! I am wondering if the molasses can be omitted from the recipe? If it can’t be what can be used to substitute? Your starter recipe is the one I have been successful starting. I had tried 5 others and all have died along the way. Thank you. Christa
You can leave it out or replace with honey.
I am confused. The first ferment before the loaf is how long? It sounds like the long one 5-36 hours is after the loaf is shaped. So how long is the first ferment before loaf shaping, you only say to go to the notes which describes the ferment after the loaf is shaped?
I figured it out!! 😉
If I want to bake in a loaf pan do I use the loaf pan for the cold fermentation?
Hi there!
If you have the ability to control the temp for the bulk ferment, what do you recommend? I have the Brod and Taylor proofer...
I'd like to get the bread ready for baking first thing tomorrow morning.
Thanks!
Have just put my second attempt into the frig for cold ferment. It is similar to the consistency of honey and not possible to shape into a ball. I put it on parchment paper in a bowl so if it firms up I can lift it into the dutch oven. The flavor of the first loaf was fantastic but dough was also very wet. Should I change the measurements of ingredients if I try again?
What is your opinion of adding soaked 7grain mix to this recipe?? I see you have another recipe but I like the idea of 100g of starter......What do you think? Would it change anything? or would you limit quantity of grain mix?
I'm sure I can leave out the molasses....Right
The loaf turned out great! My family loved it! I followed the recipe and instructions with no subs to the ingredients. It is a higher hydration dough and quite sticky when you first start but it will get better as you go along with the stretches and folds. I baked the loaf using a cloche and the crust was gorgeous! Thank you, Pantry Mama, for the detailed instructions and tips!
I, too, had troubles with a sticky dough. Twice it partially adhered to the banneton while I was turning out onto parchment. Despite using a lot of rice flour on the banneton. Also, as you mentioned. less than usual oven spring. However, it tastes good.
I made this once and it has become a new favorite! I have a question about using the levain. Following your recipe, it creates an amount suitable for using 100g of starter, which follows your recipe. Later in the notes, you mention using less starter/levain, which is what I chose to do to get a more sour loaf. My questions is, how does the levain recipe change if I do that? Is it simply cut in half? (10g starter to 25g each flour and water?). Thanks, I look forward to playing with this recipe!
My first time making rye sourdough bread and it came out amazing! So delicious, way better than store bought! I created and used a rye levain and doubled the recipe to make a boule & a batard. I also added in the caraway seeds during the second set of stretch & folds, as you suggested. The dough was a bit stickier than regular sourdough, but I had no problem handling it with moistened hands. Second rise in fridge overnight, baked early this morning. Yum!
How would you adapt this recipe for a rye sandwich loaf? If more than an adaptation is required, would you please create a rye sandwich loaf recipe? TIA.
Can the molasses be left out?
This is the first sourdough bread recipe I have tried. It looked good when I brought it out of the oven. It had a nice crust and subtle tangy taste. The texture was, however, a little doughy and squashy which made it difficult to slice and toast. Could this be because I hadn't bulk fermented it for long enough? I found it hard to judge as it was a sticky dough to work with. It was bedtime and I thought it would be too much to leave it overnight so just moved on to the next phase regardless and hoped for the best! But it was delicious though and not bad for a first attempt.
I tried this once and it tasted great. I used sorghum instead of molasses. Though, the high hydration was a challenge, as I’m not used to it. Have you done this recipe with a stand mixer/dough hook before? I’m wanting to try it
can i make this recipe without molasses
Yes you can make this sourdough rye bread without the molasses x
Is it possible to mix this in an Ankarsrum mixer? Do you have any tips or advice on adapting it to the mixer?
Thanks!
Not sure what I’m doing wrong, but my dough was severely sticky all the way through the process, even after fermentation. Never gained structure after S&F. I had to put it in a loaf pan because it turned into a puddle and stuck even to the parchment paper. I believe I followed the directions, and used a scale. Is this a common problem? What am I doing wrong? Used baking molasses, light rye flour and bread flour.
Hi Jackie, There are many different reasons for sticky dough. This post on Why is my Sourdough Wet & Sticky goes through a bunch of troubleshooting that should help.
I've done this recipe a few times now. I couldn't find the liquid molasses so used molasses sugar or honey instead. Yes, it's stickier, yes, it's harder to shape and yes, it doesn't spring as much when baked, but boy does it taste good.
I've been making bread using your website for almost a year now and I've put on a few pounds, I can tell you, but I'm now addicted to sourdough and never tire of the magic involved.
Haha! Thank you, Angela! I'm so glad to hear that! 🙂
In your directions you said 50gm starter 350gm water but recipe says 100gm starter did I misunderstood ? Also deflated when I scored over proofed?
I'm trying to find where we've said 50g of starter, but I think maybe it's in the hydration section where we talk about the 50g? And there we're talking about 50g of flour and 50g of water to build a 120g levain. Anyway, you can use anywhere from 50g to 100g of starter for this recipe, I prefer 100g, however if the weather is warmer, I would definitely reduce down to 50g.
Rye is quite difficult to work with and can over ferment, so dough deflating when scored can definitely be from over fermenting 🙂
Can I use a stainless steel bowl or is it essential the bowl be ceramic or glass?
You can use stainless steel if you prefer. It's a non reactive metal so is fine for sourdough.
The dough so sticky it was almost impossible to work with. I tried adding more flour and nothing helped. There was no "stretch and fold" elasticity to the dough, just gloop. I weigh measure everything. No idea what went wrong here, but I will not try this recipe again.
Have you tried adding some vital wheat gluten to your rye flour? This can help if your dough is too wet 🙂 You can read about it here
I don’t know what I did wrong. I followed the recipe to a “T”. When I took it out of the fridge, I was so proud of how risen and beautiful the dough was. Until it immediately began to deflate. And I do mean immediately! Help?!
The best bread I’ve made ever!!!
Delicious! Mine didn’t rise as much as I would have liked, but I’m pretty new at this - I need more practice. Nonetheless, it was really good.
Is the amount of rye flour in the recipe (200g) correct? The other recipes all have a total of 500g of flour. Considering you also add 25g of molasses with 450g total of flour it is a sticky dough that I have problems shaping even after 6 strech and folds.
Yes this amount of rye flour is correct, the rest of the flour is made up of bread flour. The dough is sticky when compared to regular sourdough bread dough for sure! But it will come together eventually 🙂 If you're finding it too sticky, you can add more flour or less water 🙂
I would like to add a coarse rye meal instead of the caraway seeds, would it be the same amount of 2 TBSP i want to add a little more texture to the bread . What is your suggestion on the amount of rye meal or is there something else I need to add. We dont really like caraway seeds that much.